Cardamom Cake

I saw this recipe pop up on Instagram last week, and independently Lara heard the Food52 Genius Recipe podcast about it as well. We both thought it sounded perfect. Simple, elegant, easy. So on my day off (a cool, blustery, kind of wet spring day) I decided to give it a go, and I am very happy that I did! It is super easy, and uses just a few simple ingredients. The final product is gorgeous as well as delicious! The buttery spice from the cardamom (and cinnamon in my version, see changes below) was perfectly balanced. The crunchy topping is a game changer. Don’t skip it.

IMG_2122 2.jpeg
IMG_2120 2.jpeg

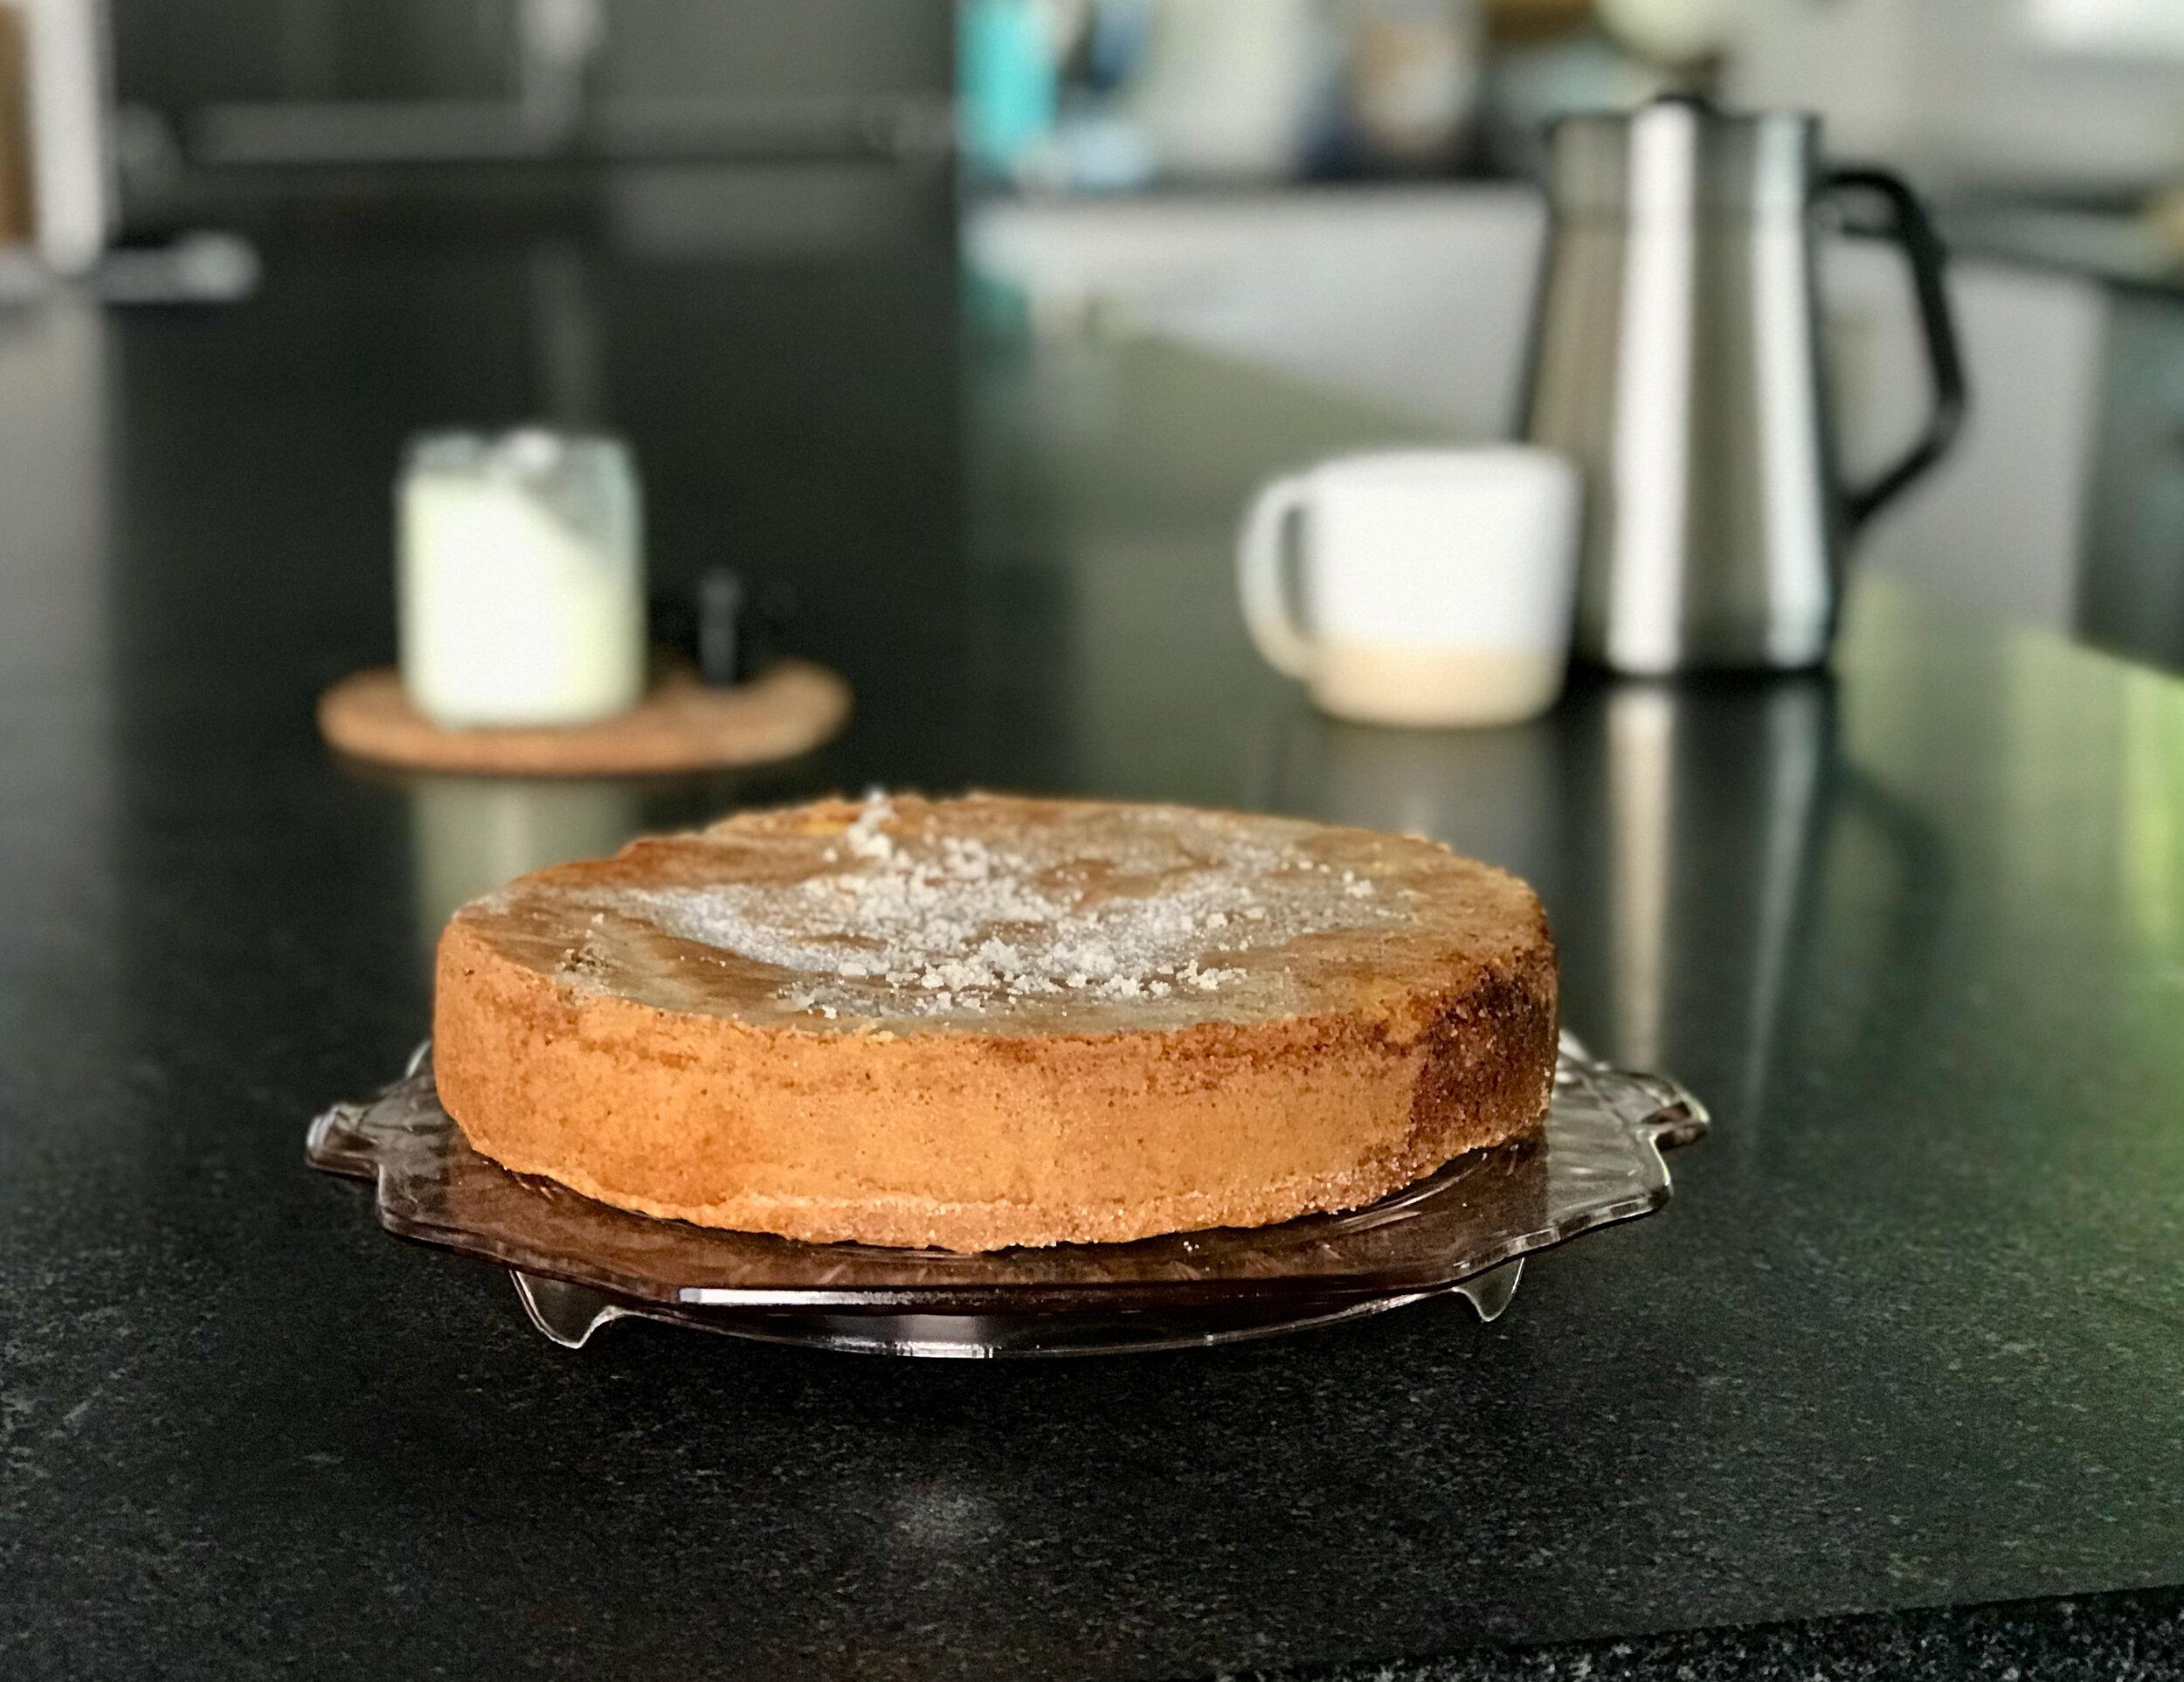
A nice recipe to keep in the repertoire when you want something elegant, but easy and fast!

IMG_2135 2.jpeg

I used a 9-inch springform pan as the recipe called for. The instant I put it in the oven the butter started dripping through onto the bottom of the oven. Ended up smelling nice and toasty, but a bit smoky and messy. So although I can’t say it would work well, next time I would probably just use a 9-inch cake pan lined with parchment (I would probably not skip the parchment if going this route. I wouldn’t skip it in the springform pan either to be honest) and see how it goes. The final cake did not stick to the sides of the pan too badly so I think a cake pan would work just fine.

IMG_2105.jpeg

My notes: I substituted 1/4 tsp ground cardamom + 1/8 tsp cinnamon for the cardamom seeds. Measured out the salt and used 1/4 tsp (wasn’t too salty). Added 1/4 tsp almond extract in with the butter because I love almond flavor. I use approximately 2.5 Tbs sugar for the pan. You could certainly do a little more or a little less. I would lean on the heavy side myself… I also used about 3-4 Tbs ground almonds in addition to the sugar to line the pan. I’m not sure how much of a difference this made, since I didn’t have anything to compare it to. Since the almond flour is so fine it may have just melted into the batter, but who knows. Without the almond flour it may have been a little less crunchy. I certainly would like to try sliced almonds next time (for texture, flavor, and for the look) but I didn’t have any. You certainly could just skip them altogether.

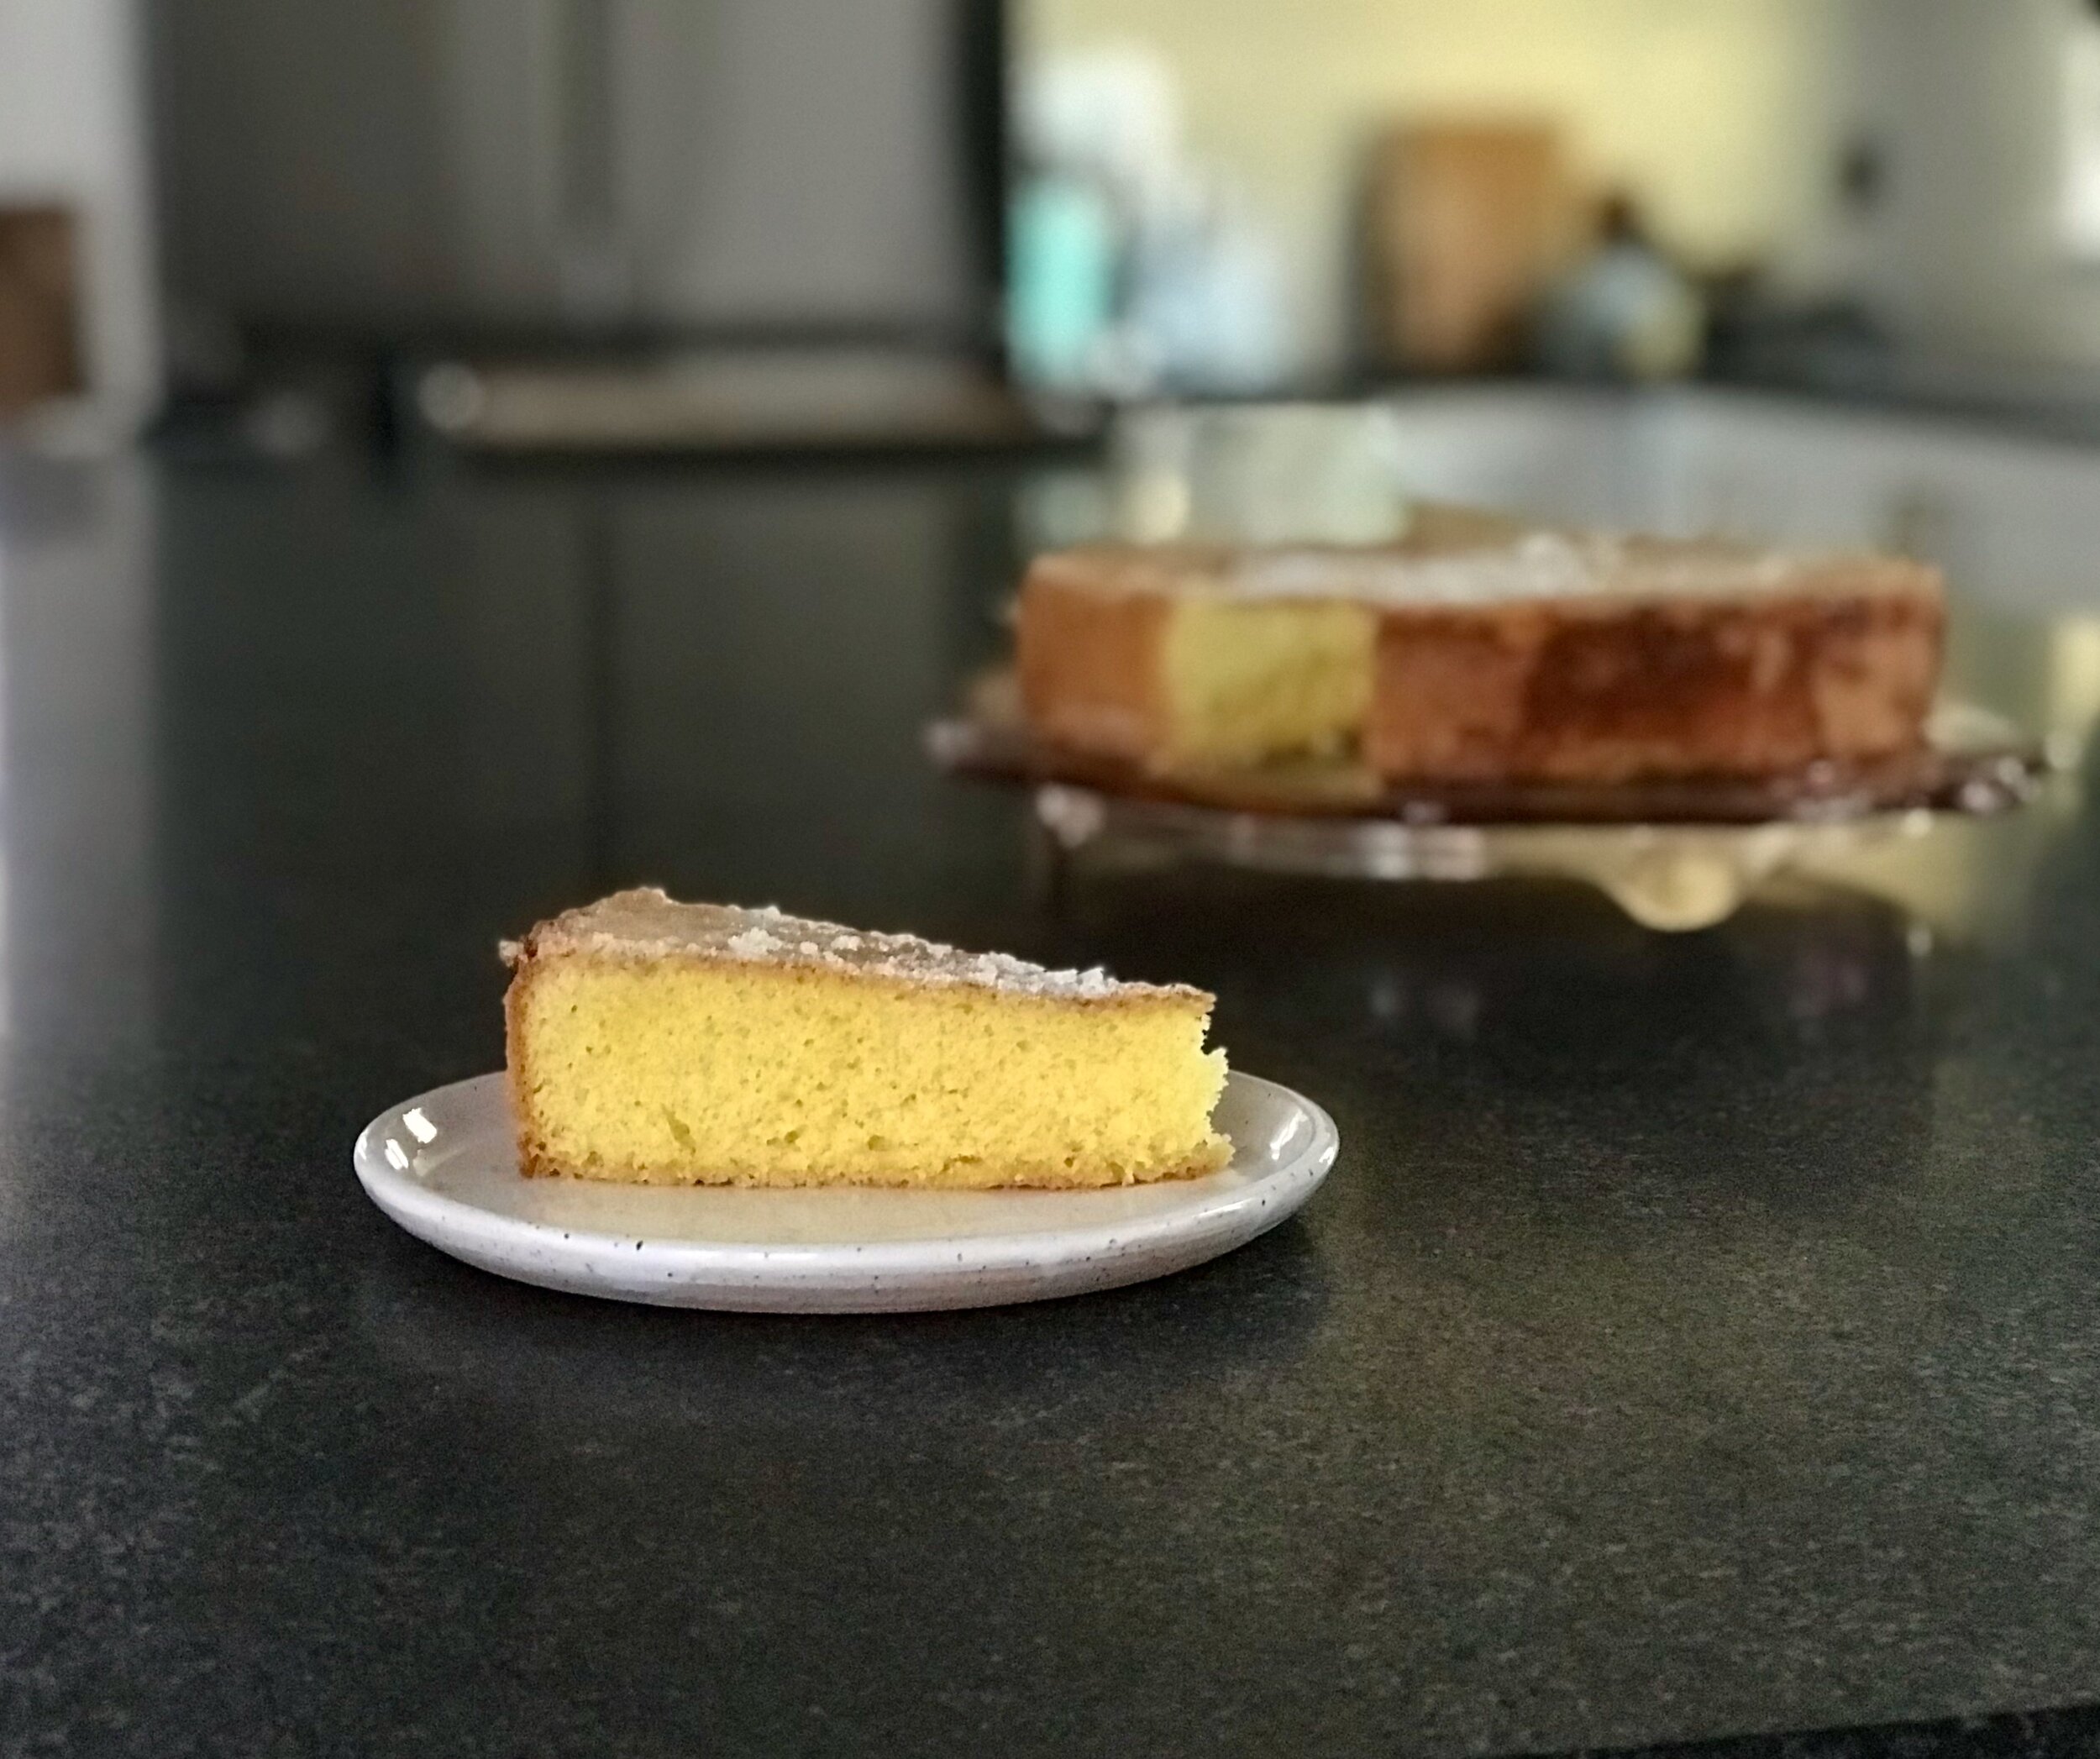
This cake has plenty of fat and sugar so it will last on the counter for several days without any issues! Enjoy!


Cardamom Cake
From Food52
Ingredients

  • 1 1/3 cups (264 grams) granulated sugar, plus more for the pan

  • 3/4 cup (65 grams) sliced unblanched almonds, for topping (optional)

  • 4 large eggs

  • 1 1/3 sticks (150 grams) unsalted butter

  • 1 tablespoon (9 grams) cardamom seeds [I didn’t have any so I used 1/4 tsp ground cardamom + 1/8 tsp cinnamon instead]

  • 1 1/3 cups (160 grams) all-purpose flour

  • 2 pinches salt [I used 1/4 tsp and it definitely wasn’t too salty]

  • [I also added in 1/4 tsp almond extract which wasn’t in the original recipe. I thought this was a lovely addition for those who really want some more almond flavor. So really nice, but not necessary.]

Directions
Heat the oven to 350°F. Prepare a 9-inch springform pan: Use parchment paper to line the bottom of the pan. Then butter the pan liberally and sprinkle in 2 to 3 tablespoons of sugar, and shake and tap the pan until the bottom and sides are coated with sugar. Don’t worry about extra sugar on the bottom. Cover the bottom with sliced almonds if you want a particularly crunchy topping—or, as an alternative you can also use ground almonds or bread crumbs. [I didn’t have sliced almonds so I used some almond flour. The almond flour may have been too fine to add a lot to the crunchy topping. I’d love to try sliced almonds next time.]

Using a stand mixer, cream the eggs and sugar until thick and pale and tripled in volume, about 5 minutes. Meanwhile, melt the butter. Bruise the cardamom seeds in a mortar. With a rubber spatula, quickly fold the flour and salt into the egg and sugar mixture, followed by the butter and the cardamom. Give the batter a thorough stir before tipping it into the prepared pan. Thump the pan on the counter to settle the batter.

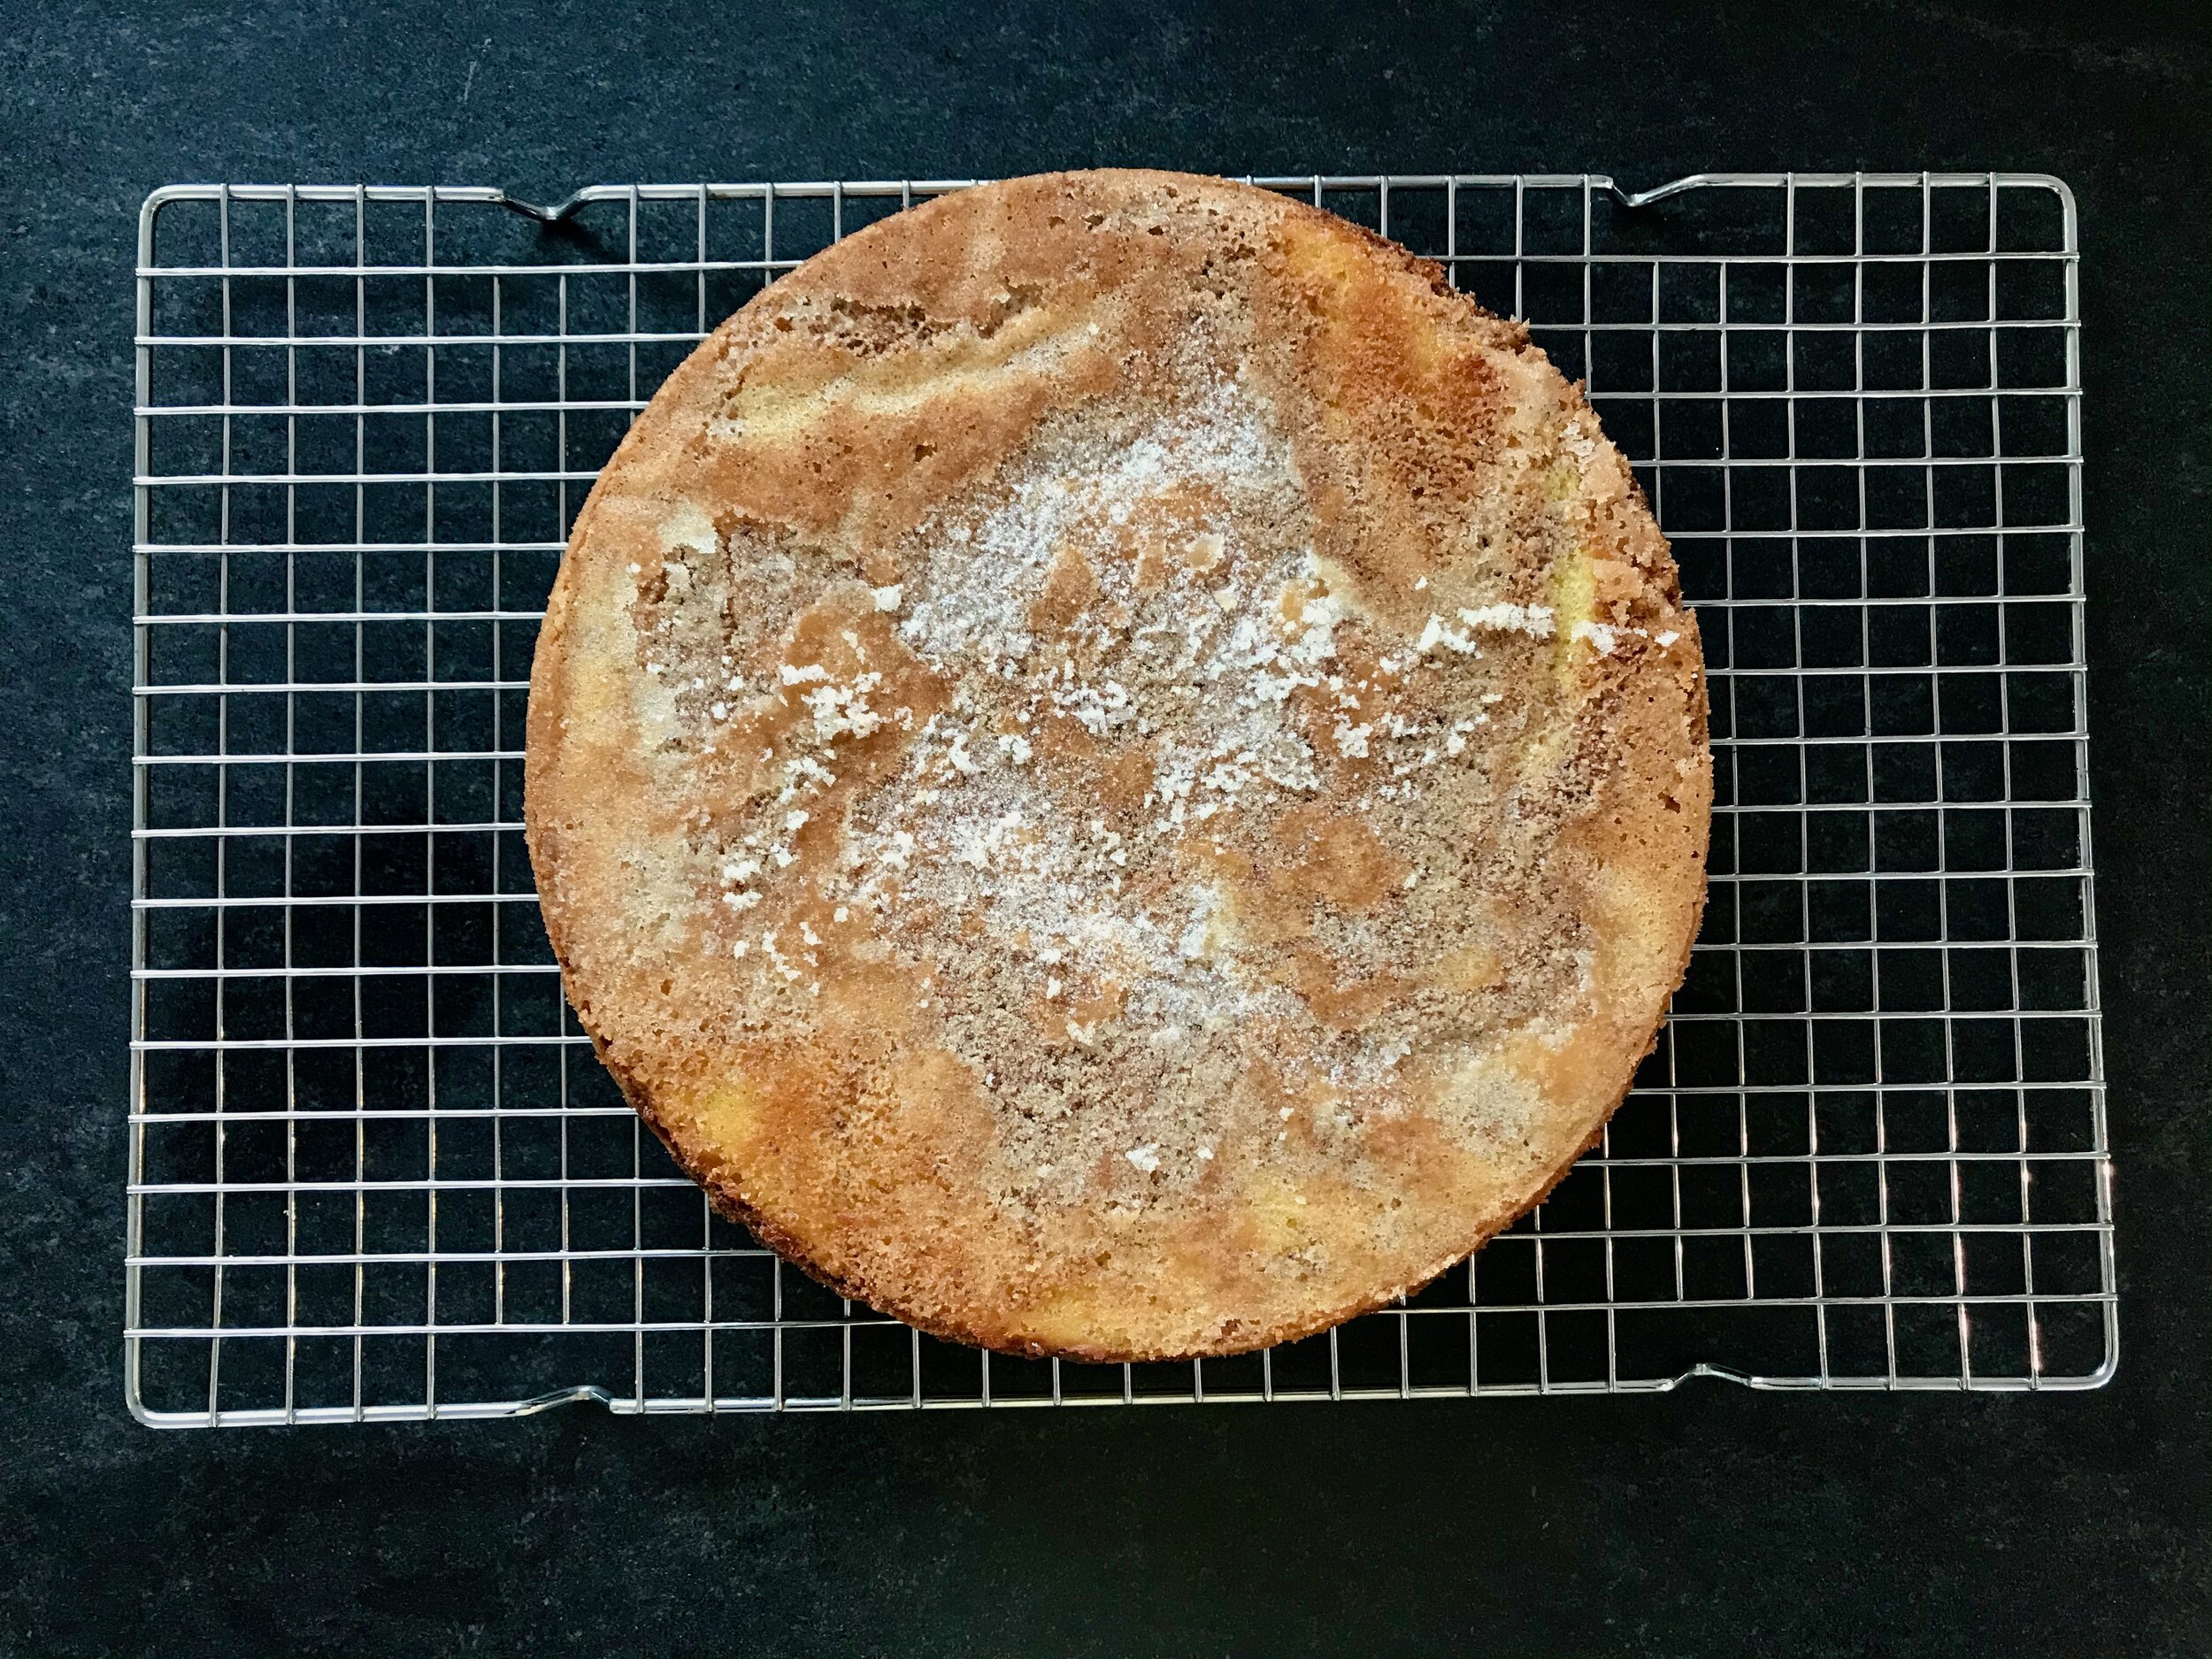
Bake the cake until the top feels dry to the touch and springs back when lightly pressed, and a skewer or knife inserted into the center comes out dry, 30 to 35 minutes [Mine took exactly 35 minutes and was perfectly cooked.]. Remove from the oven and leave in the pan for about 5 minutes. Run a knife around the sides of the pan before inverting the cake onto a rack to cool. Remove the bottom of the pan carefully while the cake is still very warm. Let cool before serving.

Coconut Cocoa Nib Bites

If you're looking for a quick and healthy snack, look no further. There are so many recipes out there for snack bites or energy balls or whatever you want to call them. These coconut cocoa nib bites are just one iteration, and a tasty one at that! I love the sweetness from the dates mixed with the bitter funk of the cocoa nibs and the chew from the coconut. Everything goes into the food processor and processed until it all comes together. Then just shape into balls and store in the fridge or freezer. Pop one out when you need a little snack. Sweet and hearty and something you can feel good about eating!

As with most recipes like this, these bites are endlessly versatile. You can use your favorite mix ins and flavorings. No almonds? Try peanuts. No dates? I think prunes would work quite well! No cocoa nibs, try some finely chopped chocolate.  Whatever sounds good to you can probably end up working out wonderfully!


Coconut Cocoa Nib Bites
Adapted from OH, Babycakes
Ingredients

  • 3 ounces coconut
  • 1/2 cup (2 1/4 ounces) raw almonds
  • Pinch salt
  • 8 medjool dates or 15-18 deglet noor dates (approximately 4 ounces)
  • 3 tablespoons water
  • 2-4 tablespoons (1/2 ounce) cocoa nibs
  • 3/4 ounce sunflower seeds

Directions
In a food processor fitted with the S blade, blend the coconut, almonds, and salt into a fine meal. Add the dates and pulse for 30-45 seconds. Add the water; pulse until combined. 

Transfer the mixture to a small mixing bowl, stir in the sunflower seeds and cacao nibs. Form the mixture into small, bite sized balls. Freeze for 30 minutes on a cookie sheet, then transfer to an air tight container or bag and store in the freezer.

Date and Almond Breakfast Bars

Quick post this week. You may or may not have noticed my love for snack bars. Usually oat based, hearty, filling and on the healthier side. Well, here's another winner! These bars are soft, but not chewy, more of a sandy texture. They are slightly sweet, just enough for me, and a little salty (which I love!). The dates add a nice natural sweetness without being an overwhelming flavor. They bars bake up pretty firm and hold together unless it's really warm out, or they sit in a hot car for a while! Whoops!! 

I cut back slightly on the honey in these bars, just by 1 tablespoon. They may have been slightly firmer with that additional tablespoon, but I didn't mind them at all the way they turned out. While the title of this recipe is "breakfast bar" I really found them to be more of a homemade granola bar. But in the end it doesn't really matter what they are called. I just know I enjoyed them!


Date and Almond Breakfast Bars
Adapted from Donuts, Dresses and Dirt
Ingredients

  • 2/3 cup (90-100 grams) chopped dates
  • 1 1/4 cup (110 grams) old fashioned oats
  • 3 tablespoons (22 grams) whole wheat flour
  • 1/3 cup (20 grams) wheat germ
  • 1/3 cup (35 grams) chopped almonds
  • 1/2 teaspoon salt
  • 1/4 teaspoon cinnamon
  • 1/2 cup (65 grams) almond butter
  • 1/4 cup (50 grams) olive oil
  • 3 tablespoons (63 grams) honey
  • 1/2 teaspoon vanilla

Directions
Preheat oven to 350. Line a 8x8 inch pan with parchment paper and spray with oil. Set aside. 

Combine the dates, oats, flour, wheat germ, almonds, salt and cinnamon in a large bowl. In a separate bowl, whisk together the almond butter, olive oil, honey, and vanilla. Pour the wet ingredients over the dry mixture, and stir together until evenly combined. Spread the batter into the prepared pan, pressing the mixture firmly onto the bottom, edges and corners.

Bake the bars for 30-35 minutes, until they are golden brown all over. Cool the bars completely in the pan on a cooling rack. When mostly cool, transfer to the fridge and let them chill for a few hours. This will make it easier to cut into neat bars.  Remove from fridge and cut into bars.

Lilac Blossom Almond Scones

I've been aware for some time now that there are quite a few different edible flowers out there; nasturtium, squash blossoms, chive blossoms, lavender, even marigolds and pansies to name just a few. Up until this point however, other than playing around with some lavender (lavender shortbread cookies!) I really haven't done much with these flowers. I decided to change that this spring when I saw the lilac bushes start bursting with their beautiful flowers, perfuming the air when I take walks. It is one of the best smells imaginable. 

It was a video I saw earlier this spring from Kitchen Vignettes that first peaked my interest in playing around with some lilacs. Then my sister showed me this recipe for lilac blossom scones from Holly and Flora and I knew I had to make them. I did a little urban foraging one morning, coming back home with a bag full of lilac blossoms. Into the scones they went, and I also made a quick lilac blossom simple syrup that I've been using to make vanilla and lilac tea lattes (yum!) all week. So although the lilacs blossoms will soon disappear for another year I will thankfully have the memory of these buttery and delicious scones to hold me through until next spring. 

The flavor of lilac blossoms is quite mild, so don't be afraid that these scones will taste like perfume or potpourri. They lend a quiet floral flavor and aroma to the scones without being overpowering. The almonds add a nice crunch and obvious nuttiness that pairs well with the blossoms. I think the addition of a little bit of white chocolate would be a wonderful third component, but I didn't have any on hand at the time so I wasn't able to try it out. Next time!

Some people might be a little intimidated by scones if they've never made them before, but they really are so easy to make. A few things I like to keep in mind: make sure your butter is very cold before starting, don't over-mix the dough once you add the liquid, and don't add too much liquid or your dough will be too soft and the scones may be a little tough. I usually don't add all the liquid right away, just to make sure I don't add too much. You can always add more as needed. You only want as much liquid as necessary to just hold everything together, and not any more. 

This is a fairly basic buttermilk scone recipe, with the addition of lilac blossoms and almonds. Wonderfully simple and delicious. I made my scones on the smaller side, halving the original recipe and cutting them half as big as what was originally called for, but if you want bigger, more coffee-shop sized scones, make 4 scones out of the recipe below (or double it and make 8 as in the original recipe). 


Lilac Blossom Almond Scones
Adapted from Holly and Flora
Ingredients

  • 1 1/2 cups (6.75 ounces) flour, all-purpose
  • 1 1/2 tablespoons (3/4 ounce) granulated sugar
  • 1 1/4 teaspoons baking powder
  • 1/4 teaspoon baking soda
  • 1/2 teaspoon salt
  • 6 tablespoons (3 ounces) unsalted butter, chilled
  • 1/4 cup (1 ounce) toasted, chopped almonds
  • 3/4-1 cup lilac flowers
  • 1/2 cup buttermilk, shaken well (I actually used a mixture of liquid whey and half-and-half because that's what I had and it work wonderfully)
  • 1/2 teaspoon vanilla extract
  • Turbinado sugar, for sprinkling on top

Directions
Pre-heat the oven to 425 degrees. In a large mixing bowl, combine the flour, sugar, baking powder, baking soda, and salt. Whisk the ingredients together. Cut the chilled butter into small cubes and toss into the dry mixture. Using a pastry blender or your fingers, work the butter into the flour mixture, until pea-sized lumps of butter are present. 

Add the almonds, lilac blossoms, vanilla and buttermilk (a little at a time) and fold together in the bowl with your hands just until the all the flour is moistened and the dough holds together. Make sure to not over-work. Lightly flour the ball of dough and flatten it out on the counter, by hand, into a 1/2 -3/4 inch thick disk. Cut the dough into triangles and place onto a parchment lined baking sheet. Lightly dust with turbinado sugar. (At this point I usually place my scones in the freezer for at least 30-60 minutes to firm up. This step is not absolutely necessary, but I find that scones bake up taller and more beautiful when they chill a little first. You can actually freeze the scones entirely, transfer them to a plastic bag and store them in the freezer. Then bake directly from the freezer when needed, adding a few more minutes to the baking time if needed. This is a great time saver on mornings when you want a fresh batch of scones, but don't want the hassle of making them that morning.) 

Bake 12 to 16 minutes, rotating the baking sheet halfway through, until turning golden brown on the edges. Serve warm, plain, or with a little butter and your favorite jam. 

Yields: 4 large or 8 small scones

Big Cluster Cinnamon Almond Granola

I was talking to my grandma a few weeks ago about making granola and how much I love doing it. It's so much better and ridiculously cheaper than buying it, and it's not at all difficult to do. Plus, you can customize it to your exact specifications! My grandma is gluten intolerant, and so granola is a good option for her to have on hand for breakfast, or a snack, or whatever. After our conversation I decided to make her a batch to show her what homemade granola can be like. 

I chose this recipe because it was very simple. Since I don't know exactly how she likes her granola I decided to keep it basic and pretty classic. Oats, almonds and brown sugar, some cinnamon and vanilla, all kept nice and crunchy with a bit of oil. It turned out a beautiful, toasty granola that formed big, crunchy clusters. Super tasty, and perfect for anything you might imagine. 

I eat a ton of granola. Yogurt and some kind of fruit, topped with granola almost every morning. I never get tired of it. I also just snack on it out of hand throughout the day. It's a great quick snack that you can eat as much or as little of as you want. There are lots of other options though; top some sweetened fruit with it and bake until bubbly, top ice cream with a little extra crunch, throw it on a salad as an alternative to croutons. Just be creative, and I'm sure you'll come up with many more options that suit your life!

Big Cluster Cinnamon Almond Granola

Adapted from

The Blue Bottle Craft of Coffee

by 

Ingredients

  • 1/2 cup (3.5 ounces) brown sugar
  • 1/4 cup (30 grams) water
  • 3 cups (250 grams) old fashioned rolled oats
  • 2 ounces almonds, coarsely chopped
  • 1/2 teaspoon cinnamon
  • 1/4 teaspoon Kosher salt
  • 2 1/2-3 tablespoons (35 grams) canola or vegetable oil
  • 1 teaspoon vanilla extract 

Directions

Preheat oven to 250 degrees. In a small saucepan, combine the brown sugar and water. Cook over medium-high heat, stirring constantly, until the sugar is completely dissolved and the mixture comes to a boil. Let cool. 

In a large bowl, combine the oats, almonds, cinnamon, and salt and mix well. 

Add the oil and vanilla extract to the brown sugar mixture and stir until thoroughly combined. Pour over the oat mixture. Mix well with a large spoon or rubber spatula until thoroughly combined and uniform in texture. 

Transfer granola to a rimmed baking sheet and pat down into a thick, even layer. 

Bake for 75 minutes. Remove oven and use a large metal spatula to flip the granola, keeping it in as large of chunks as possible. Return the granola to the oven and bake for about 60 minutes more until completely dry and no longer at all soft when you take a bite. Let cool before serving. 

Store in a tightly sealed container at room temperature. 

Chewy Trail Mix Cookies

Last week I was trying to decide what I should bake to have on hand for a quick grab and go breakfast. Breakfast cookies had been on my mind lately, so I decided to just go for it. I've been eyeing recipes for a while, and have a bunch of them pinned, but so far I hadn't got around to making any. There are so many different routes you can go with a breakfast cookie and I had been having difficulty deciding which recipe to use. I finally settled on these chewy trail mix cookies. They looked hearty and filling and were full of all sorts of good things like any trail mix should be. 

I'm glad that in the end I went with this recipe because it sure was a winner. The oats and nuts come together to form a delicious base that is filled with coconut, chocolate, seeds and dried fruit. A little brown sugar and honey for sweetness, and butter for flavor are all held together with some nut butter and an egg. They baked up thick and chewy just as I was hoping they would. An quick and easy breakfast that I can feel pretty good eating on those busy weekday mornings. 

I adapted the original recipe a little to work for me and they still turned out great. The original recipe was both vegan and gluten free, my version is neither but it would easy to go back and make the appropriate adjustment if this is something you are looking for. If you use gluten free oats they still would be gluten free, and replacing the egg with a flax egg and the butter with coconut oil as in the original recipe is a easy way to get them back into vegan territory. So as you can see, the recipe is pretty forgiving and adaptable. 

The add ins can also be adjusted to fit your tastes. Any type of seed, nut, chocolate, dried fruit, etc. could be used in this recipe. It really just depends on what you like and what you have in your pantry. As long as you aim to keep the volume of filling approximately the same as what is written I think they will turn out just fine. So play around with it, use what you like and make them your own!

Chewy Trail Mix Cookies
Adapted from Oh She Glows
Ingredients
Dry

  • 1 cup (80 grams) old fashioned rolled oats, blended into oat flour
  • 1/2 cup almond meal or almond flour (I used 2 ounces almonds ground in the food processor)
  • 1/2 cup (40 grams) old fashioned rolled oats
  • 1/2 cup (2 ounces) chopped or thinly sliced almonds
  • 1/4 cup (50 grams) brown sugar
  • 3 tablespoons (15 grams) shredded unsweetened coconut
  • 3 tablespoons (30 grams) mini dark chocolate chips (or finely chopped chocolate)
  • 2 tablespoons (20 grams) sunflower seeds
  • 3-4 tablespoon (28 grams) dried cranberries
  • 3/4 teaspoon cinnamon
  • 1/2 tsp fine grain sea salt
  • 1/2 tsp baking powder
  • 1/2 tsp baking soda

Wet

  • 1 egg, lightly beaten
  • 1/4 cup (64 grams) raw almond or peanut butter
  • 3 tablespoons butter, melted
  • 1/4 cup (80 grams) pure maple syrup
  • 1 tsp vanilla

Directions
Preheat oven to 350F and line a baking sheet with parchment paper.

In a large mixing bowl, whisk together all of the dry ingredients. In another medium sized bowl, stir together the wet ingredients until thoroughly combined. Add the wet mixture on top of the dry mixture and stir well until combined. 

Form the dough into small balls, rolling them between your palms until smooth. Place on prepared cookie sheet. (I made 12 total, they were approximately 50 grams each.) 

Bake cookies for 15-18 minutes until light golden brown on the bottom. Cool on the baking sheet for 5 minutes before transferring to a cooling rack until completely cool. 

Calories: 231 calories each for 12 cookies

Oat Bread with Dried Fruit and Almonds

Baking bread is one of my favorite things to do in the kitchen. I just love the whole process, kneading together a handful of individual ingredients and turning them into this live creature that rises and grows before your eyes. Tame it through shaping into loaves, and then into the oven for its final transformation where it becomes your desired creation. It is one of the most satisfying tasks in the kitchen.  Pulling out those final loaves, and seeing what you've been able to do with a few simple ingredients, some time and heat is simply amazing. 

These loaves are my most recent creation. I found the recipe online and for whatever reason it sounded so perfectly delicious that I had to give it a try. This whole wheat and oat sandwich loaf, slightly sweetened with honey and filled with roasted nuts and dried fruit called my name, I simply had to try it. It turned out a couple very large and beautiful loaves that have been perfect for a variety of sandwiches, a hearty snack and a healthy breakfast. 

One of my favorite quick and easy lunches in the past week has been a gourmet peanut butter sandwich with mashed banana and sliced strawberries. Add a drizzle of honey for a little extra sweetness and lunch is served, simple and delicious. It almost feels like eating dessert for lunch. I've also made a variety of other different sandwiches including an heirloom tomato BLT and a grilled vegetable and hummus sandwich with feta. So whatever type of sandwich is calling your name, this bread will get the job done. 

Oat Bread with Dried Fruit and Almonds
Adapted from A Shaggy Dough Story
Ingredients

  • 200g Dried Fruit (I used a mix of prunes and frozen cranberries instead of dried, just because I had them, and it turned out fine)

  • 161g Whole Wheat Flour

  • 130g Rolled Oats

  • 403g Water (I used the reserved water from soaking the fruit and made up the difference with fresh water)

  • 484g Bread Flour

  • 136g Milk

  • 48g Honey

  • 48g Vegetable Oil

  • 19g Salt

  • 4g Instant Yeast

  • 130g Toasted Almonds (or whatever you have, walnuts, pecans, etc)

  • Additional Rolled Oats for coating loaves

Directions
Put dried fruit in a heat-proof bowl, add enough boiling water to cover and let sit for about an hour. Drain, reserving water, and let cool.

Put whole wheat flour and rolled oats in the bowl of a mixer, add the reserved soaking liquid (adding fresh water to make up the difference) and stir to combine. Let sit for 30 minutes.

Add bread flour, milk, honey, oil, salt and yeast to the oat mixture. Using the dough hook of your mixer, blend on low speed until combined, then increase the speed to medium for about 7 minutes. Add the soaked, drained fruit and the pecans and mix on low speed until combined (it took a little bit of time to make sure they were fully incorporated).

Place the dough in a large bowl or container with oil that's been lightly coated with oil. Cover and let rest. After one hour, uncover the dough and fold, then cover and let rest for another hour.

Turn dough out onto a lightly floured surface and divide into two rounds. Cover with plastic and let rest for 15 minutes. Lightly butter or oil two 9-inch loaf pans. Uncover and lightly flour your work surface, if needed. Degas each dough round and shape into a loaf. Place loaves seam side down in the prepared pans. Lightly mist each loaf with water and them cover with oats, if desired. Cover with plastic and proof for about 90 minutes.

Place a steam pan in the bottom of your oven and preheat to 450°. At baking time, uncover the loaf pans, place in the oven and immediately add about 1 cup of ice to the pan to create steam. Bake for 15 minutes, then reduce the temperature to 400° and bake for another 30 minutes or until golden brown (cover them with foil if they start browning too soon). Remove from the oven, transfer to a cooling rack and let cool completely.

Grilled Chicken with Romescu

I love trying new things when cooking, new flavors and textures, new foods and new cuisines. This past week I experimented with a new sauce, romescu sauce. This sauce is one of the many delicious looking sauces in a great cookbook I have, The Sauce Book by Paul Gaylor. Just flipping through this book is so interesting. It is set up by region/country and I love seeing what people eat all around the world. I've been eyeing this romescu for a while now, it has pretty simple ingredients, and they're all ingredients that I love; roasted red peppers, tomatoes, paprika, almonds, garlic, what's not to love! Boy was I right, this sauce was absolutely delicious, the perfect accompaniment some summer grilled chicken.

This cookbook has a little blurb about each sauce before the ingredient list. I love this because it gives you a little idea what you can do with each sauce. Before the romescu the author writes:

One of the great Spanish sauces, dating back hundreds of years to Tarragona in the Catalonia region. Whether made with hazelnuts or almonds, it never fails to impress. I think I've served it with just about every type of grilled fish, vegetable, meat, even fried eggs - utterly versatile. 

I agree, it is utterly versatile, and super simple to make. I had it with chicken one night, on a sandwich as a great spread the next night, and a few days later as sauce on a grilled Spanish inspired pizza. And there are so many other ways it could be used. This is definitely one sauce I will be making again. It's so easy, and you don't even have to cook anything (except the pepper if you don't have any roasted red peppers on hand)

Just making this one recipe got me thinking about Spanish cuisine, and I realized how little I know about Spanish food. I can only name a few Spanish dishes off the top of my head (paella anyone?). This recipe has therefore inspired me to try out some other Spanish foods. This is my goal for the summer, learn about and how to cook Spanish food, wish me luck!

Romescu

From

The Sauce Book

 by Paul Gayler

Ingredients

  • 2/3 cup extra virgin olive oil
  • 1 slice white bread, cut into cubes
  • 3 garlic cloves, crushed
  • 1/2 cup almonds or hazelnuts, lightly toasted
  • 1 teaspoon dried red pepper flakes (or 1 dried red chile)
  • 1 teaspoon smoked Spanish paprika
  • 12 ounces roasted red peppers
  • 3 tablespoons white wine vinegar
  • 8 ounces tomatoes, blanched, peeled, seeded and chopped
  • salt and freshly cracked black pepper

Directions

Heat 2 tablespoons of the oil in a large frying pan, add the bread cubes and fry until golden. Add the garlic, almonds or hazelnuts, red pepper flakes, and paprika, and cook for another 30 seconds.

Transfer to a blender and add the roasted red peppers and vinegar. Blitz to a pulp. Using the feeder tube and with the motor running, gradually trickles in the remaining olive oil.

Add the tomatoes, blitz again, and season to taste.