Dip Duo: Za'atar-Spiced Beet Dip with Cheve, and Burnt Eggplant Dip with Tahini

IMG_8973.jpeg

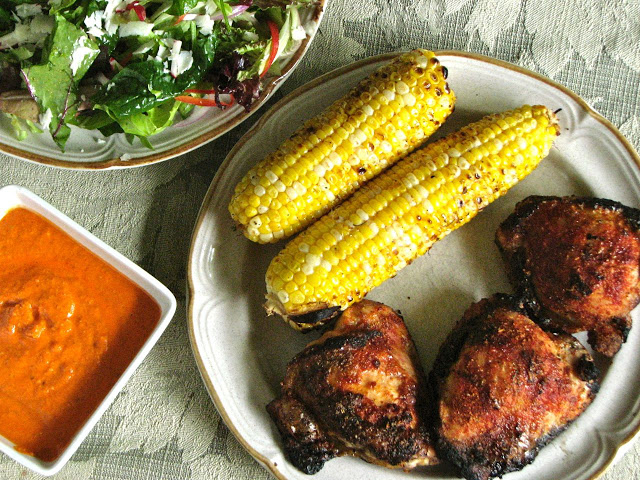
A few weeks back I got a bunch of beets, and an eggplant from my CSA. I already had a lot of other veggies I was planning to grill up for the week and didn’t feel like I needed two more to add to the mix. So instead of just grilling them with olive oil for salads, I decided to make a few dips. Something different, and something I could use up differently. I found two dips from Yotam Ottolenghi that sounded perfect. One was from his cookbook, Plenty, which I own, while the other recipe just popped up on a quick google search.

IMG_8977.jpeg

Beets: the beet dip was perfect because it used za-atar, which I have a huge bag of in the pantry, as well as a full cup of plain yogurt which I basically live on. A hot pepper for spice, and a little oil and maple syrup rounded out the flavors. He recommended topping the dip with fresh goat cheese, toasted hazelnuts and thinly sliced green onions. I didn’t have hazelnuts, so I used toasted pumpkin and sunflower seeds instead which was very nice.

I loved this dip. It definitely tastes like beets (which is a good thing in my book), but not overwhelmingly so thanks to the yogurt, oil and maple syrup. The beets and maple syrup made it quite sweet, yet it also had a pleasant spiciness thanks to the hot pepper (I had to. use a green jalapeno because it was all I could find). I thought it was perfectly balanced and delicious. While I served this with the recommended toppings several times which was great, I also served it spread on a plate of more plain yogurt as a double layer dip and thought this was also amazing. So plenty of options!

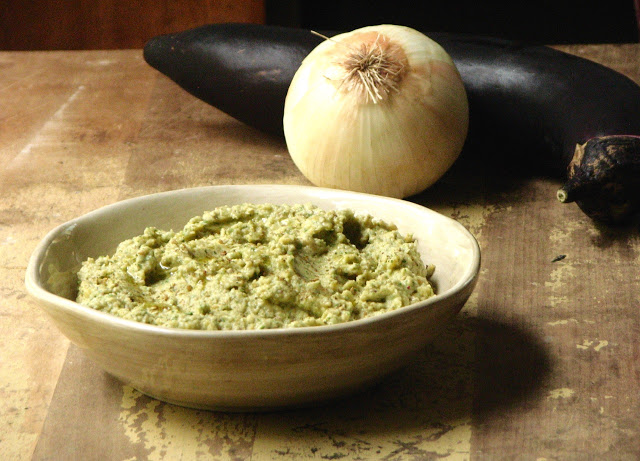
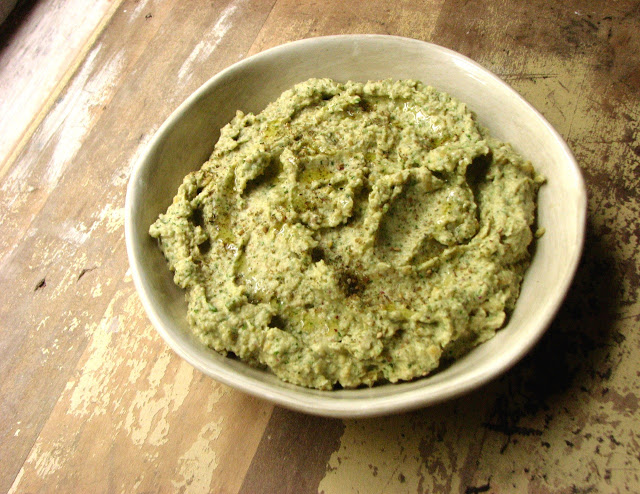
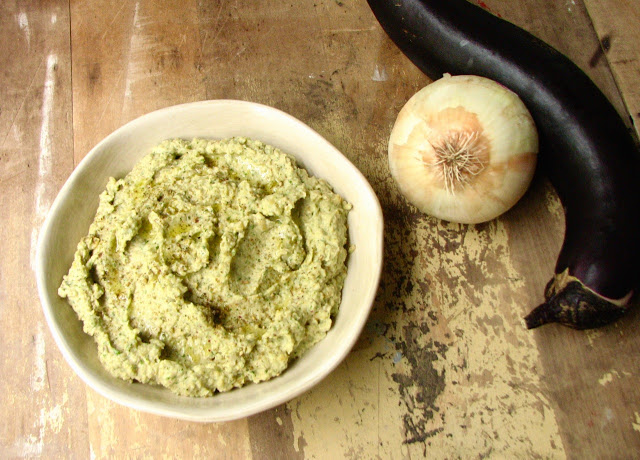
Eggplant: this burnt eggplant dip was basically baba ganoush in my opinion which I didn’t really realize until it was made. I of course had to then look up the definition of baba ganoush and found that there is a big “controversy” about the ingredients that are found in a traditional baba ganoush. I’m not going to get into it, I’m definitely not an expert, and it’s not my battle to fight. All I know is that I loved it! I have tried to make baba ganoush in the past and never had great success. I have always found it to be watery and thin, both in texture and flavor. Thankfully this dip was neither! I will definitely make this again and again!


Za'atar-Spiced Beet Dip with Cheve
From Food and Wine, by Yotam Ottolenghi
Ingredients

  • 6 medium beets (1 1/2 pounds), trimmed

  • 2 small garlic cloves, minced

  • 1 small red chile, seeded and minced

  • 1 cup plain Greek yogurt

  • 3 tablespoons extra-virgin olive oil

  • 1 1/2 tablespoons pure maple syrup

  • 1 tablespoon za’atar

  • Salt

  • 1/4 cup roasted skinned hazelnuts, chopped

  • 2 tablespoons goat cheese, crumbled

  • 2 scallions, thinly sliced

  • Warm bread, for serving

Directions
Preheat the oven to 350°. Put the beets in a small roasting pan and add 1/4 cup of water. Cover with foil and bake for about 1 hour, until tender. Let cool slightly.

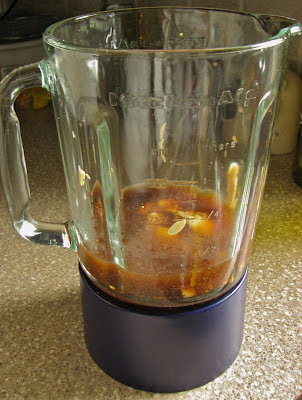
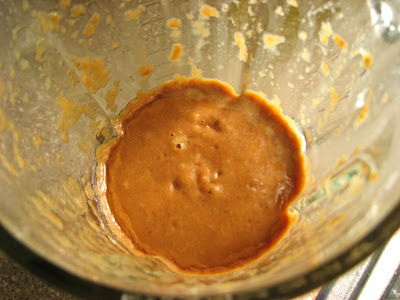
Peel the beets, cut into wedges and transfer to a food processor. Add the garlic, chile and yogurt and pulse until blended. Add the olive oil, maple syrup and za’atar and puree. Season with salt. Scrape into a wide, shallow bowl. Scatter the hazelnuts, goat cheese and scallions on top and serve with bread.


Burnt Eggplant Dip with Tahini
From Plenty by Yotam Ottolenghi
Ingredients

  • 1 large eggplant

  • 1/3 cup tahini paste

  • 1 tablespoon fresh lemon juice, plus more

  • 1 large clove garlic, grated

  • 3 tablespoons fresh parsley, chopped

  • 1/2 piece pomegranate seeds

  • 1 tablespoon olive oil, plus more

  • sea salt black pepper

Directions
First, burn the eggplant: Turn on a gas stove to a medium-low flame. Place the eggplant directly on the flame, and roast for about 12-15 minutes. Be sure to turn the eggplant frequently with tongs, and be sure it doesn't catch fire. By the end, the skin should be completely burnt, and the eggplant should be soft and "deflated." Allow to cool for a few minutes, and peel the skin off and discard. Place the eggplant in a colander to drain for 30 minutes, or wrap in foil for overnight, refrigerate, and come back to the project the next day. The eggplant will naturally drain by then.

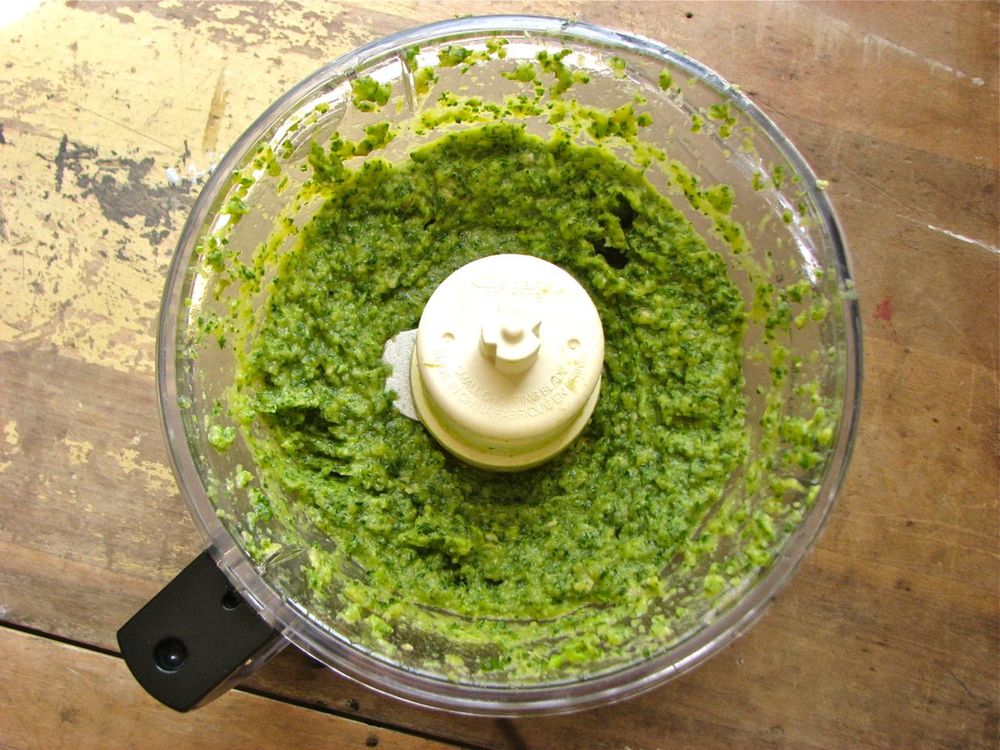
To make the dip, simply mix all of the ingredients (except half of the pomegranate seeds) together in a bowl. Adjust the seasonings to taste. You want a smoky, fresh, well-balanced flavor. To serve, garnish with the other half of the pomegranate seeds and a drizzle of olive oil and crack of fresh pepper. Serve at room temperature! Serve with pita, or vegetables.

Classic Hummus

I've been wanting to do a post on hummus for a long time now, but whenever I would make it I never ended up taking any pictures. Well, recently I decided that enough was enough, it was time for hummus pics. So here you are, my favorite, go-to hummus recipe from my favorite cookbook author and chef, Yotam Ottolenghi. To be honest, this is the only hummus recipe I've ever made, but I love it so much that I've never felt the need to search for another. It turns out super creamy, lemony hummus, full of garlic and tahini.

Homemade hummus is so incredibly good, and really quite easy. You will never want to go back to the watery, flavorless store-bought hummus again once you've tried making it yourself (even though, if in a pinch, the store-bought version makes an appearance, don't worry, I understand, sometimes convenience trumps all!). But seriously, this stuff is so good. If you've never tried making hummus before you really should give it a shot. Pull out that food processor and grab a bag of dried chickpeas and get going!

This recipe comes from Jerusalem by Yotam Ottolenghi which I've talked about before, so I won't wax poetic about this wonderful book again. The original recipe makes a massive batch of hummus, way more than I ever need for myself, so I usually halve it. You'll see the halved recipe below, so go ahead and double it if you need a big batch, just be sure you're food processor is big enough. As written below, the recipe makes approximately 2 1/4 - 2 1/2 cups of hummus in the end, so still a nice amount of hummus. 

Making hummus is really a simple process. You do have to think ahead in order to have time to soak and cook the chickpeas, but once that is done, the food processor takes care of all the hard work. And while I know you can make hummus with canned chickpeas, I highly recommend dried. They taste so much better, are not really any more work, and are cheaper, win-win! 


Classic Hummus
Adapted from Jerusalem by Yotam Ottolenghi and Sami Tamimi
Ingredients

  • 1/2 cup plus 2 tablespoons (125 grams) dried chickpeas
  • 1/2 teaspoon baking soda
  • 3 1/4 cups water
  • 1/2 cup plus 1 tablespoon (135 grams) tahini
  • 2 tablespoons freshly squeezed lemon juice (do not use bottled lemon juice)
  • 2 cloves garlic, crushed
  • 3 1/2 tablespoons ice-cold water
  • salt

Directions
The night before making the hummus, put the chickpeas in a medium-to-large saucepan and cover them with cold water at least twice their volume. Leave to soak overnight.

The next day, drain the chickpeas and return to the saucepan. Place the saucepan over high heat and add the baking soda. Cook for about 3 minutes, stirring constantly. Add the water and bring to a boil. Cook, scimming off any foam and any skins that float to the surface. The chickpeas will need to cook between 20 and 40 minutes, depending on how fresh they are, sometimes even longer. Once done, they should be very tender, breaking up easily when pressed between your thumb and finger, almost but not quite mushy. 

Drain the chickpeas. You should have roughly 1 3/4 cup (300 grams) now. Place the chickpeas in a food processor and process until you get a stiff paste. Then, with the machine still running, add the tahini, lemon juice, garlic and 3/4 teaspoon salt. Finally, slowly drizzle in the iced water and allow it to mix for about 5 minutes, until you get a very smooth and creamy paste. 

Transfer hummus (which will be quite warm at this point) to a bowl, cover the surface with plastic wrap, and let it rest for at least 30 minutes. If not using right away, refrigerate until needed. Make sure to take it out of the fridge at least 30 minutes before serving. 

Mexican Salsa Verde

I love a good sauce. Regardless of what I'm eating, it is always better with some kind of sauce or spread to liven things up a little and add some more flavor and complexity to the food. A couple of weeks ago, while I was perusing the farmer's market, a beautiful basket of tomatillos caught my eye. I had made salsa verde once before, and knew that I really enjoyed it, but I couldn't exactly remember what it was like, so I knew I had to try it again. I went to one of my favorite sauce books and, with a little adjustment for the ingredients I had, blitzed together this fresh and delicious sauce. It turned out so good; tart with just the right amount of heat, slightly warmed with a bit of cumin and packed with more flavor from the cilantro. This simple sauce is so easy to throw together, and turns out a real winner, perfect for everything from meat, to fish, to eggs, to a big bowl of chips, or simply for downing by the spoonful straight from the bowl!

The original recipe calls for 2 green serrano chiles plus 1 green jalepeno, however I only had a cayenne, and no serranos and this worked out wonderfully. I though there was just the right amount of heat. I ended up not putting very many of the seeds in, but if you like a hotter salsa go ahead and add more.

Salsa verde can be made either roasted or raw; I decided to go with the roasted because I think it adds just a bit more flavor from the bit of char that develops on the vegetables. After roasting, all it takes is a couple of blitzes in the food processor (or blender, or even mortar and pestle if you prefer) to combine everything into this fresh and tasty sauce.

Mexican Salsa Verde
Adapted from The Sauce Book by Paul Gayler
Ingredients

  • 1 green jalapeño
  • 1 green cayenne pepper
  • 8-10 fresh tomatillos, cut in half
  • 1/2 medium onion, chopped
  • 2 cloves garlic, crushed
  • a few handfuls cilantro leaves
  • salt and a good pinch of ground cumin

Directions
In a dry frying pan, toast the chiles, stirring occasionally, until aromatic and lightly charred with darkened spots. Transfer to a blender or food processor.

Add the tomatillos to the same pan and fry until charred, then add to blender or food processor along with the onion, garlic and cilantro.

Blitz until chopped to your desired sauce consistency, adding a little water if you need to. Season with salt and cumin to taste.

Chunky Mediterranean Eggplant Dip

Mediterranean food is probably my favorite thing to eat. It is so fresh and light and delicious. Now, I know that the word "Mediterranean" encompasses a huge diversity of food from many, many countries and regions, but I really do love it all. I have never been disappointed with something Mediterranean inspired. This dip caught my eye very quickly since it kind of combines two of my favorite things, hummus and baba ghanoush. 

Chickpeas and eggplant along with lemon, some spices and fresh herbs make this wonderful dip that I can easily just eat with a spoon. With a side of pita chips, or an assortment of vegetables this dip really does become the star. Nothing bland about this combination, it's perfect for pretty much anything. 

This is a pretty simple recipe, you really just throw everything in the food processor and let it do the work. The only prep work you really have to do is to broil or grill the eggplant until completely charred and black, and you can do this a day ahead if you want. I decided to cook my garlic this time, but the original recipe calls for raw garlic which is also good, so if you don't feel like getting another pan dirty you can just throw it in raw. Then just pulse away until you reach the consistency you want. It's as easy as that!

Chunky Mediterranean Eggplant Dip
Adapted from From The Land We Live On
Ingredients

  • 1 large (or two small-ish) eggplants (about 1 lb)
  • 1-2 cloves of garlic
  • 4 tablespoons finely diced onion (or a small shallot)
  • 3/4 teaspoon sea salt
  • 1/8-1/4 teaspoon cayenne pepper
  • 1 1/2 teaspoon. za’atar + more for garnish
  • 1-2 tablespoon freshly squeeze lemon juice
  • 2 tablespoons extra virgin olive oil + more for finishing
  • 2 tablespoons tahini
  • 1 teaspoon honey
  • 2 cups (or 1 can) of cooked chickpeas
  • 1/4 cup chopped flat parsley
  • 1/4 cup coarsely chopped cilantro + more for garnish
  • 2 tablespoons mint leaves

Directions
Turn on the broiler, poke some holes in the eggplant, and broil for about 20 – 30 minutes, rotating every 5 – 10 minutes, until the eggplant collapses and is charred on all sides. Remove, and let it cool. Once cool to touch, peel and roughly chop it.

Place oil in a small frying pan. Add the garlic and cook over medium-low heat until just starting to brown.

Combine the garlic, shallot, salt, pepper, za’atar, lemon juice, tahini, and honey in your food processor and pulse until well combined.

Add eggplant, chickpeas, and herbs to the food processor and pulse several times, until combined, yet still chunky. This dip is best with some texture, but pulse until it reaches your desired consistency.

Transfer the dip to a bowl, drizzle with extra olive oil, sprinkle with za’atar (I also used a little sumac), garnish with some more herbs, and serve with veggies, crackers, or pita chips.

Broccoli Kale Pesto

I know there are a lot of broccoli stem haters out there. Honestly, I'm not one of them, I've found that as long as the tough outside layer is cut off at least a little bit that they roast up quite well. However, I've come up with a new use for them, and if you are in the broccoli stem hater camp this one is for you. 

For this broccoli kale pesto I took all the stems from one bunch of broccoli, boiled them up until nice and soft, and processed them with some kale and garlic to make a vibrant, healthy, and delicious spread or sauce. I thought the broccoli flavor was quite mild so if that worries you, have no fear. The combination of the broccoli with the kale was a perfect match. The kale brightened up the color of the pesto, and the combo of the two veggies helped mellow the flavors of both resulting in a nicely balanced sauce. With the punch of the raw garlic added in as well, this sauce turned into a beautiful, healthy and delicious way to amp up a sandwich, a batch of eggs, or a bowl of pasta. It is super versatile and really can be used in just about anything you might possibly imagine. 

Like most pestos and other sauces, this recipe is very versatile. If you want to add more kale, go for it, most broccoli, why not? Not a fan of raw garlic, try roasting some up before you throw it in. I used sunflower seeds to add some nuttiness, but any other nut would work too, almonds, walnuts, whatever you might have. I didn't have much cheese when I made this but I would love to try adding some salty parmesan, a handful of feta, or my favorite - creamy and delicious goat cheese. I don't think any of these various combinations can be bad. Broccoli is definitely going on the shopping list very soon. 

Broccoli Kale Pesto

Ingredients

  • Stems from 1 head broccoli
  • 3-4 stalks Kale
  • 3-4 cloves garlic
  • Lemon juice from half a large lemon
  • Salt, to taste
  • Sunflower seeds
  • Olive oil, 2-4 tablespoons

Directions

Boil broccoli stems in salted water until very tender, 20-30, drain any leftover water.

Add broccoli to the food processor along with the kale, garlic lemon juice, some salt and the sunflower seeds. Pulse a few times to coursely chop. With the food processor running, slowly add the olive oil in a slow and steady stream until the mixture turns into a smooth sauce with your desired consistency. It's not an exact science, just do what looks and tastes good to you. Scrape down the sides of the bowl occasionally as needed. Taste, and add more salt if needed. 

Garlic Scape Pesto

Earlier this year I resolved to be more adventurous, to try new foods that I always want to try, but never know what to do with. I don't want to get stuck making the same 10 things over and over again, there is so much more out there to explore! When I saw garlic scapes for sale at the farmer's market a few weeks ago I knew I had to get them, even though I wasn't quite sure what I'd do with them. But being a lover of garlic, I knew something delicious would come to mind. When I got them home, I went straight to the computer to find some inspiration. The one thing that kept popping up over and over was garlic scape pesto. It sounded perfect to me, so I dove right in and whipped up a batch.

I can probably say that this is probably pretty close to the top of my all time favorite spread/sauce, whatever you want to call it. It was garlicky without being overwhelming, slightly chunky, with a smoothness from the oil, almonds for body and texture, and finished with salty and sharp parmesan cheese. All the ingredients complemented each other so well, it was perfect for smearing on my sandwiches, spreading on my pizza dough, and folding into pasta, utterly versatile and utterly delicious.

Garlic Scape Pesto

From

Food 52

Ingredients

  • 1 cup garlic scapes, thinly sliced crosswise
  • 1/4 cup almonds (or pine nuts, or walnuts)
  • 1/2 cup extra virgin olive oil
  • 1/4 cup Parmesan cheese, grated
  • Salt and pepper, to taste

Directions

Add the scapes and pine nuts to the bowl of a food processor and pulse until everything is broken up a bit. Then turn the processor back on, and with it running, add the oil a little at a time until it's fully incorporated.

Add cheese, pulse, then season with salt and pepper to taste.

Note: This won't brown like basil pesto will, so if you're not using immediately, just store in a container in the fridge. It will last about a week. Makes about 1 1/2 cups

Grilled Chicken with Romescu

I love trying new things when cooking, new flavors and textures, new foods and new cuisines. This past week I experimented with a new sauce, romescu sauce. This sauce is one of the many delicious looking sauces in a great cookbook I have, The Sauce Book by Paul Gaylor. Just flipping through this book is so interesting. It is set up by region/country and I love seeing what people eat all around the world. I've been eyeing this romescu for a while now, it has pretty simple ingredients, and they're all ingredients that I love; roasted red peppers, tomatoes, paprika, almonds, garlic, what's not to love! Boy was I right, this sauce was absolutely delicious, the perfect accompaniment some summer grilled chicken.

This cookbook has a little blurb about each sauce before the ingredient list. I love this because it gives you a little idea what you can do with each sauce. Before the romescu the author writes:

One of the great Spanish sauces, dating back hundreds of years to Tarragona in the Catalonia region. Whether made with hazelnuts or almonds, it never fails to impress. I think I've served it with just about every type of grilled fish, vegetable, meat, even fried eggs - utterly versatile. 

I agree, it is utterly versatile, and super simple to make. I had it with chicken one night, on a sandwich as a great spread the next night, and a few days later as sauce on a grilled Spanish inspired pizza. And there are so many other ways it could be used. This is definitely one sauce I will be making again. It's so easy, and you don't even have to cook anything (except the pepper if you don't have any roasted red peppers on hand)

Just making this one recipe got me thinking about Spanish cuisine, and I realized how little I know about Spanish food. I can only name a few Spanish dishes off the top of my head (paella anyone?). This recipe has therefore inspired me to try out some other Spanish foods. This is my goal for the summer, learn about and how to cook Spanish food, wish me luck!

Romescu

From

The Sauce Book

 by Paul Gayler

Ingredients

  • 2/3 cup extra virgin olive oil
  • 1 slice white bread, cut into cubes
  • 3 garlic cloves, crushed
  • 1/2 cup almonds or hazelnuts, lightly toasted
  • 1 teaspoon dried red pepper flakes (or 1 dried red chile)
  • 1 teaspoon smoked Spanish paprika
  • 12 ounces roasted red peppers
  • 3 tablespoons white wine vinegar
  • 8 ounces tomatoes, blanched, peeled, seeded and chopped
  • salt and freshly cracked black pepper

Directions

Heat 2 tablespoons of the oil in a large frying pan, add the bread cubes and fry until golden. Add the garlic, almonds or hazelnuts, red pepper flakes, and paprika, and cook for another 30 seconds.

Transfer to a blender and add the roasted red peppers and vinegar. Blitz to a pulp. Using the feeder tube and with the motor running, gradually trickles in the remaining olive oil.

Add the tomatoes, blitz again, and season to taste.

Grilled Steak and Homemade Steak Sauce

It's finally starting to get warm around here. Summer is right around the corner, and I am so ready for it. What says summer better then steaks on the grill? Not much in my book. My dad chose the meal last week Sunday which usually means New York strip, this week was no different. He came home from the meat market with two gorgeous strip steaks. I grilled them up on Sunday afternoon, and made a quick and easy steak sauce to go with them. The only thing else that was needed was a fresh salad and dinner was served. Sometimes simple is the best.

I love sauces on basically everything. I just like having a little something more to top things off. I have made this steak sauce recipe before. It is so easy, and uses ingredients I almost always have in the house. You can whip it together in just a couple of minutes, and it really adds some nice flavor to steaks, or even vegetables, or burgers, or anything else you can think of! The recipe starts with raisins, but don't worry, you can't tell they are in there once you are done. I don't like raisins at all, but once everything is blended together they disappear.

Plump some raisins in warm water

Let them get nice and big

Meanwhile, grab ketchup...

...Worcestershire, dijon and vinegar

Throw everything into a blender, including the raisins

Ready to mix

Blend it all up

Then it's time for the steaks; season with plenty of salt and pepper

And grill them up!

Pretty and pink, they were a little too done for me, (I'm a rare girl!) but I'll adjust the grilling time next time

Grab a salad and spoon on some sauce and you are good to go!

Classic Steak Sauce
From: The Best of America's Test Kitchen, 2011
Ingredients

  • 1/2 cup boiling water
  • 1/3 cup raisins
  • 1/4 cup ketchup
  • 3 tablespoons Worcestershire sauce
  • 2 tablespoons Dijon mustard
  • 2 tablespoons white vinegar
  • salt and pepper

Directions: 
Combine the water and raisins in a bowl and let sit, covered, until the raisins are plump, about 5 minutes. Puree the raisin mixture, ketchup, Worcestershire, mustard and vinegar in a blender until smooth. Season with salt and pepper to taste.