Classic Hummus

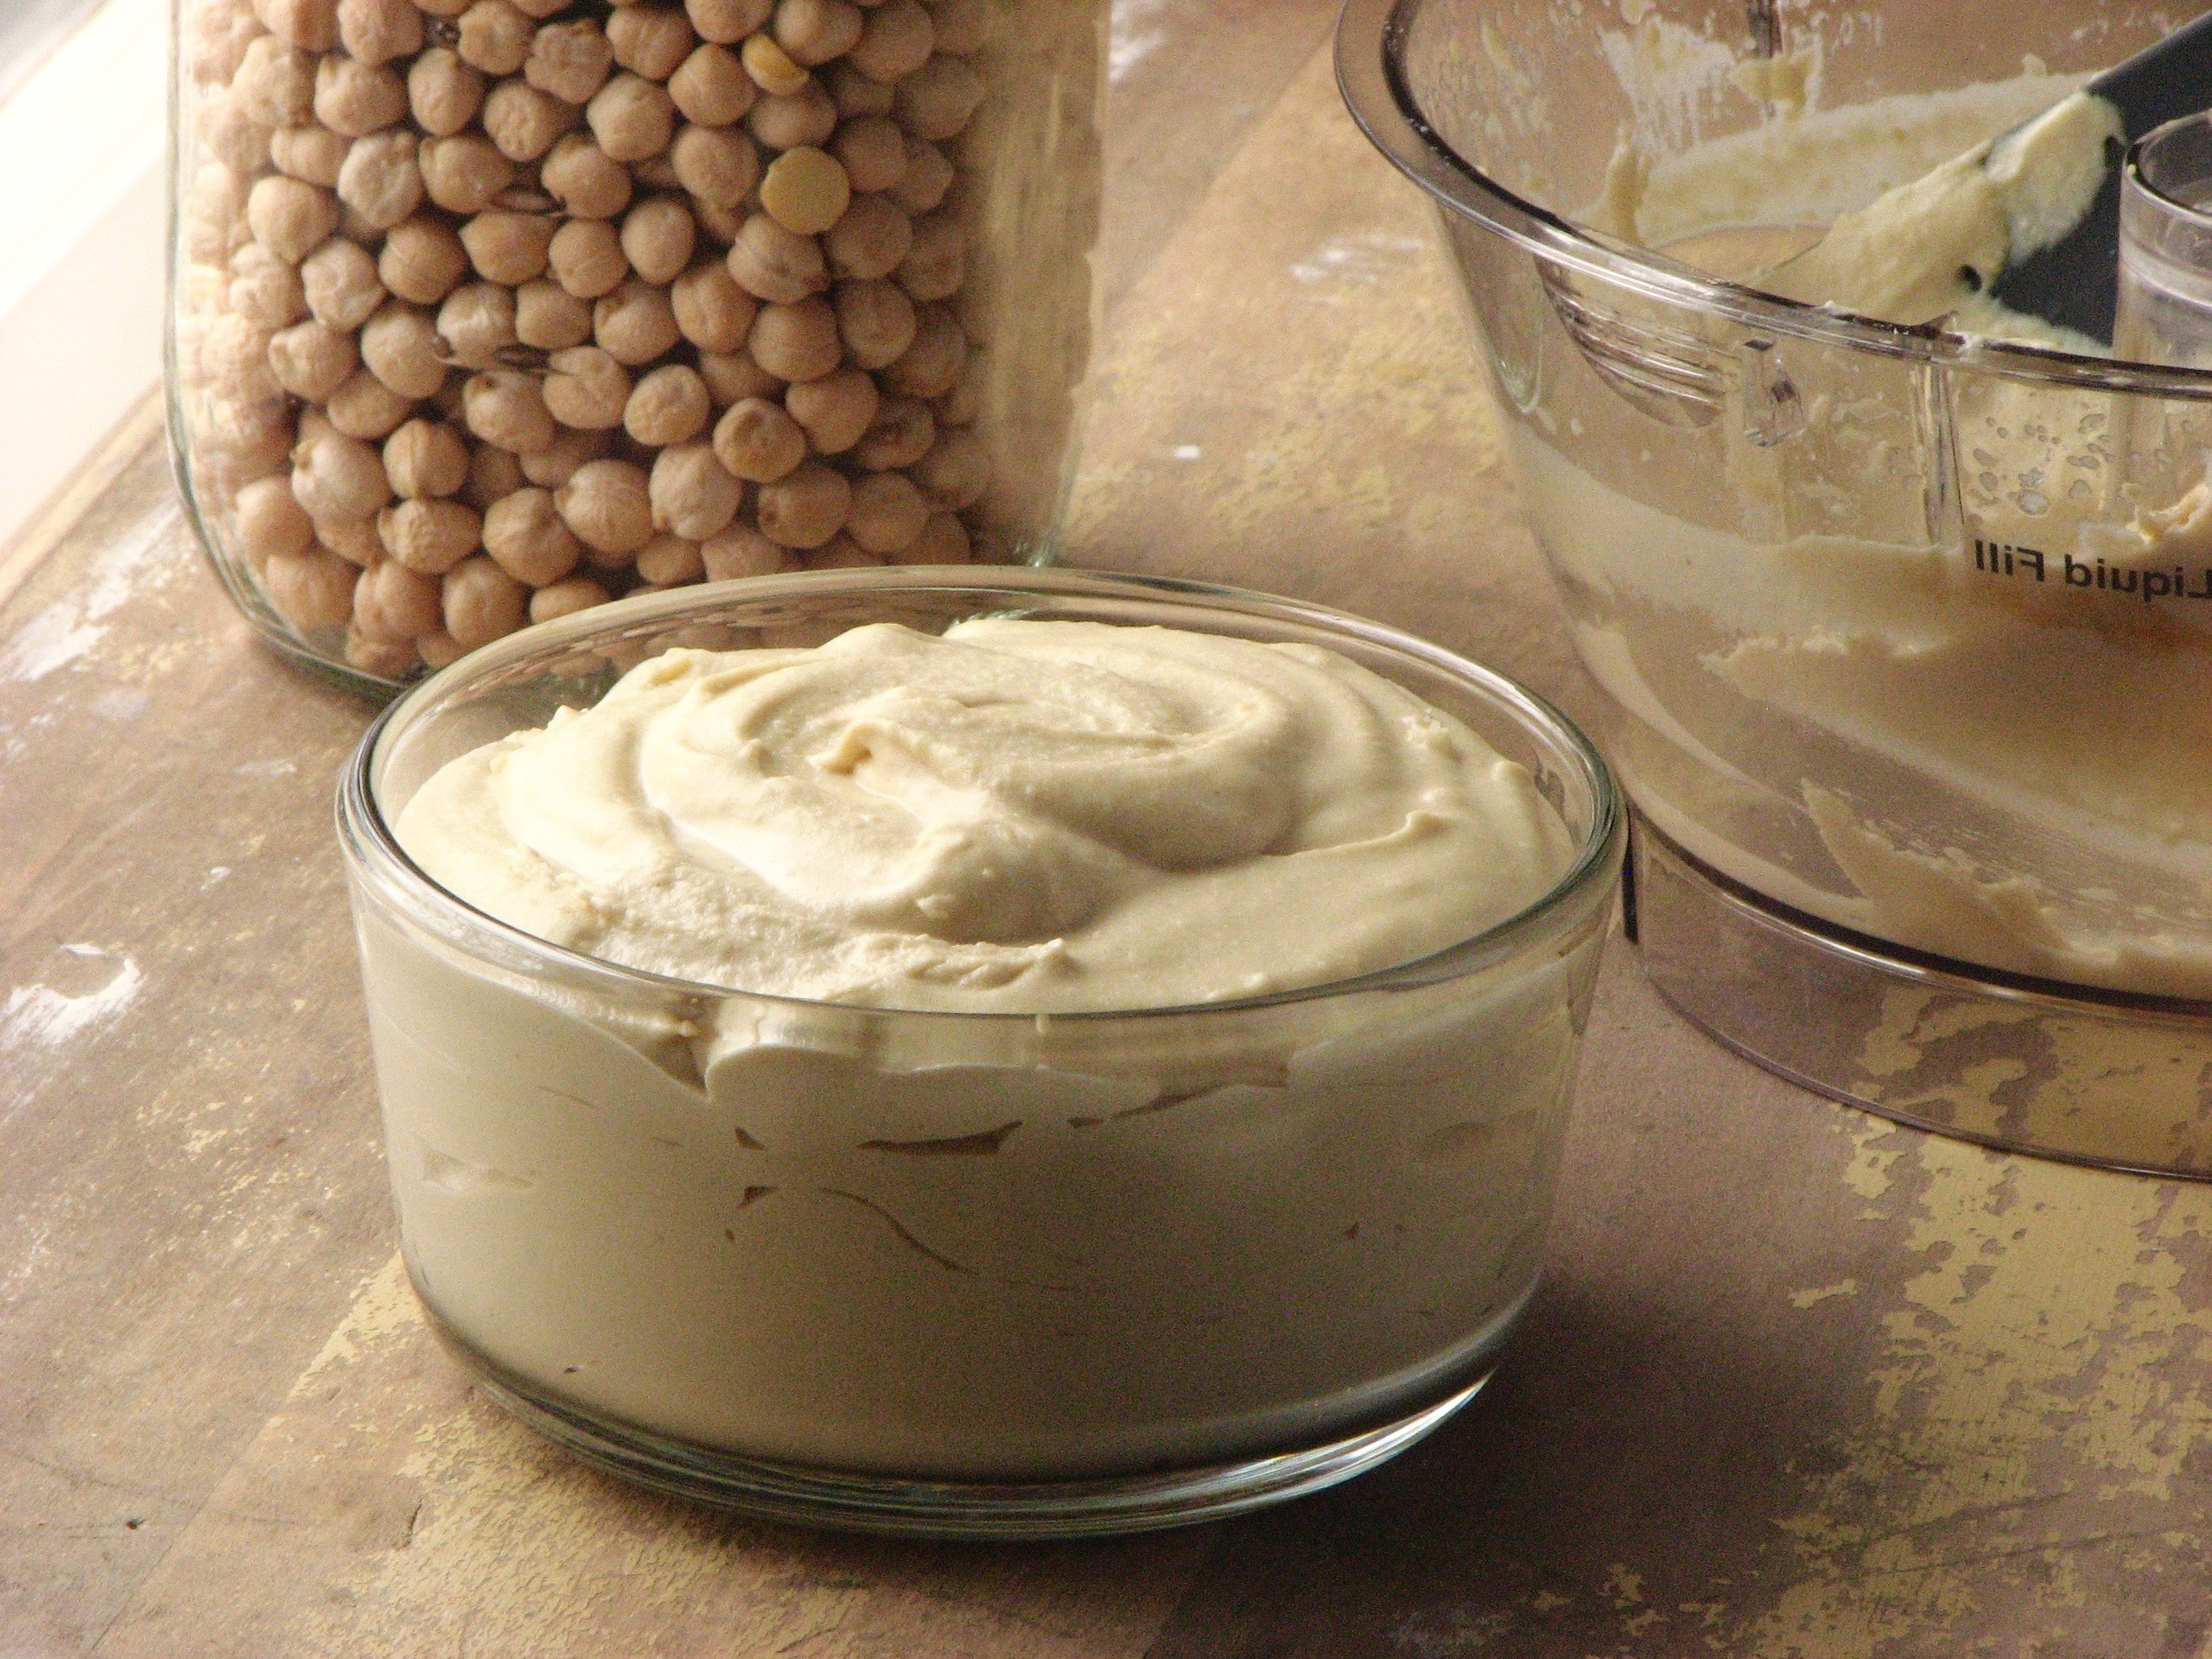
I've been wanting to do a post on hummus for a long time now, but whenever I would make it I never ended up taking any pictures. Well, recently I decided that enough was enough, it was time for hummus pics. So here you are, my favorite, go-to hummus recipe from my favorite cookbook author and chef, Yotam Ottolenghi. To be honest, this is the only hummus recipe I've ever made, but I love it so much that I've never felt the need to search for another. It turns out super creamy, lemony hummus, full of garlic and tahini.

Homemade hummus is so incredibly good, and really quite easy. You will never want to go back to the watery, flavorless store-bought hummus again once you've tried making it yourself (even though, if in a pinch, the store-bought version makes an appearance, don't worry, I understand, sometimes convenience trumps all!). But seriously, this stuff is so good. If you've never tried making hummus before you really should give it a shot. Pull out that food processor and grab a bag of dried chickpeas and get going!

This recipe comes from Jerusalem by Yotam Ottolenghi which I've talked about before, so I won't wax poetic about this wonderful book again. The original recipe makes a massive batch of hummus, way more than I ever need for myself, so I usually halve it. You'll see the halved recipe below, so go ahead and double it if you need a big batch, just be sure you're food processor is big enough. As written below, the recipe makes approximately 2 1/4 - 2 1/2 cups of hummus in the end, so still a nice amount of hummus. 

Making hummus is really a simple process. You do have to think ahead in order to have time to soak and cook the chickpeas, but once that is done, the food processor takes care of all the hard work. And while I know you can make hummus with canned chickpeas, I highly recommend dried. They taste so much better, are not really any more work, and are cheaper, win-win! 


Classic Hummus
Adapted from Jerusalem by Yotam Ottolenghi and Sami Tamimi
Ingredients

  • 1/2 cup plus 2 tablespoons (125 grams) dried chickpeas
  • 1/2 teaspoon baking soda
  • 3 1/4 cups water
  • 1/2 cup plus 1 tablespoon (135 grams) tahini
  • 2 tablespoons freshly squeezed lemon juice (do not use bottled lemon juice)
  • 2 cloves garlic, crushed
  • 3 1/2 tablespoons ice-cold water
  • salt

Directions
The night before making the hummus, put the chickpeas in a medium-to-large saucepan and cover them with cold water at least twice their volume. Leave to soak overnight.

The next day, drain the chickpeas and return to the saucepan. Place the saucepan over high heat and add the baking soda. Cook for about 3 minutes, stirring constantly. Add the water and bring to a boil. Cook, scimming off any foam and any skins that float to the surface. The chickpeas will need to cook between 20 and 40 minutes, depending on how fresh they are, sometimes even longer. Once done, they should be very tender, breaking up easily when pressed between your thumb and finger, almost but not quite mushy. 

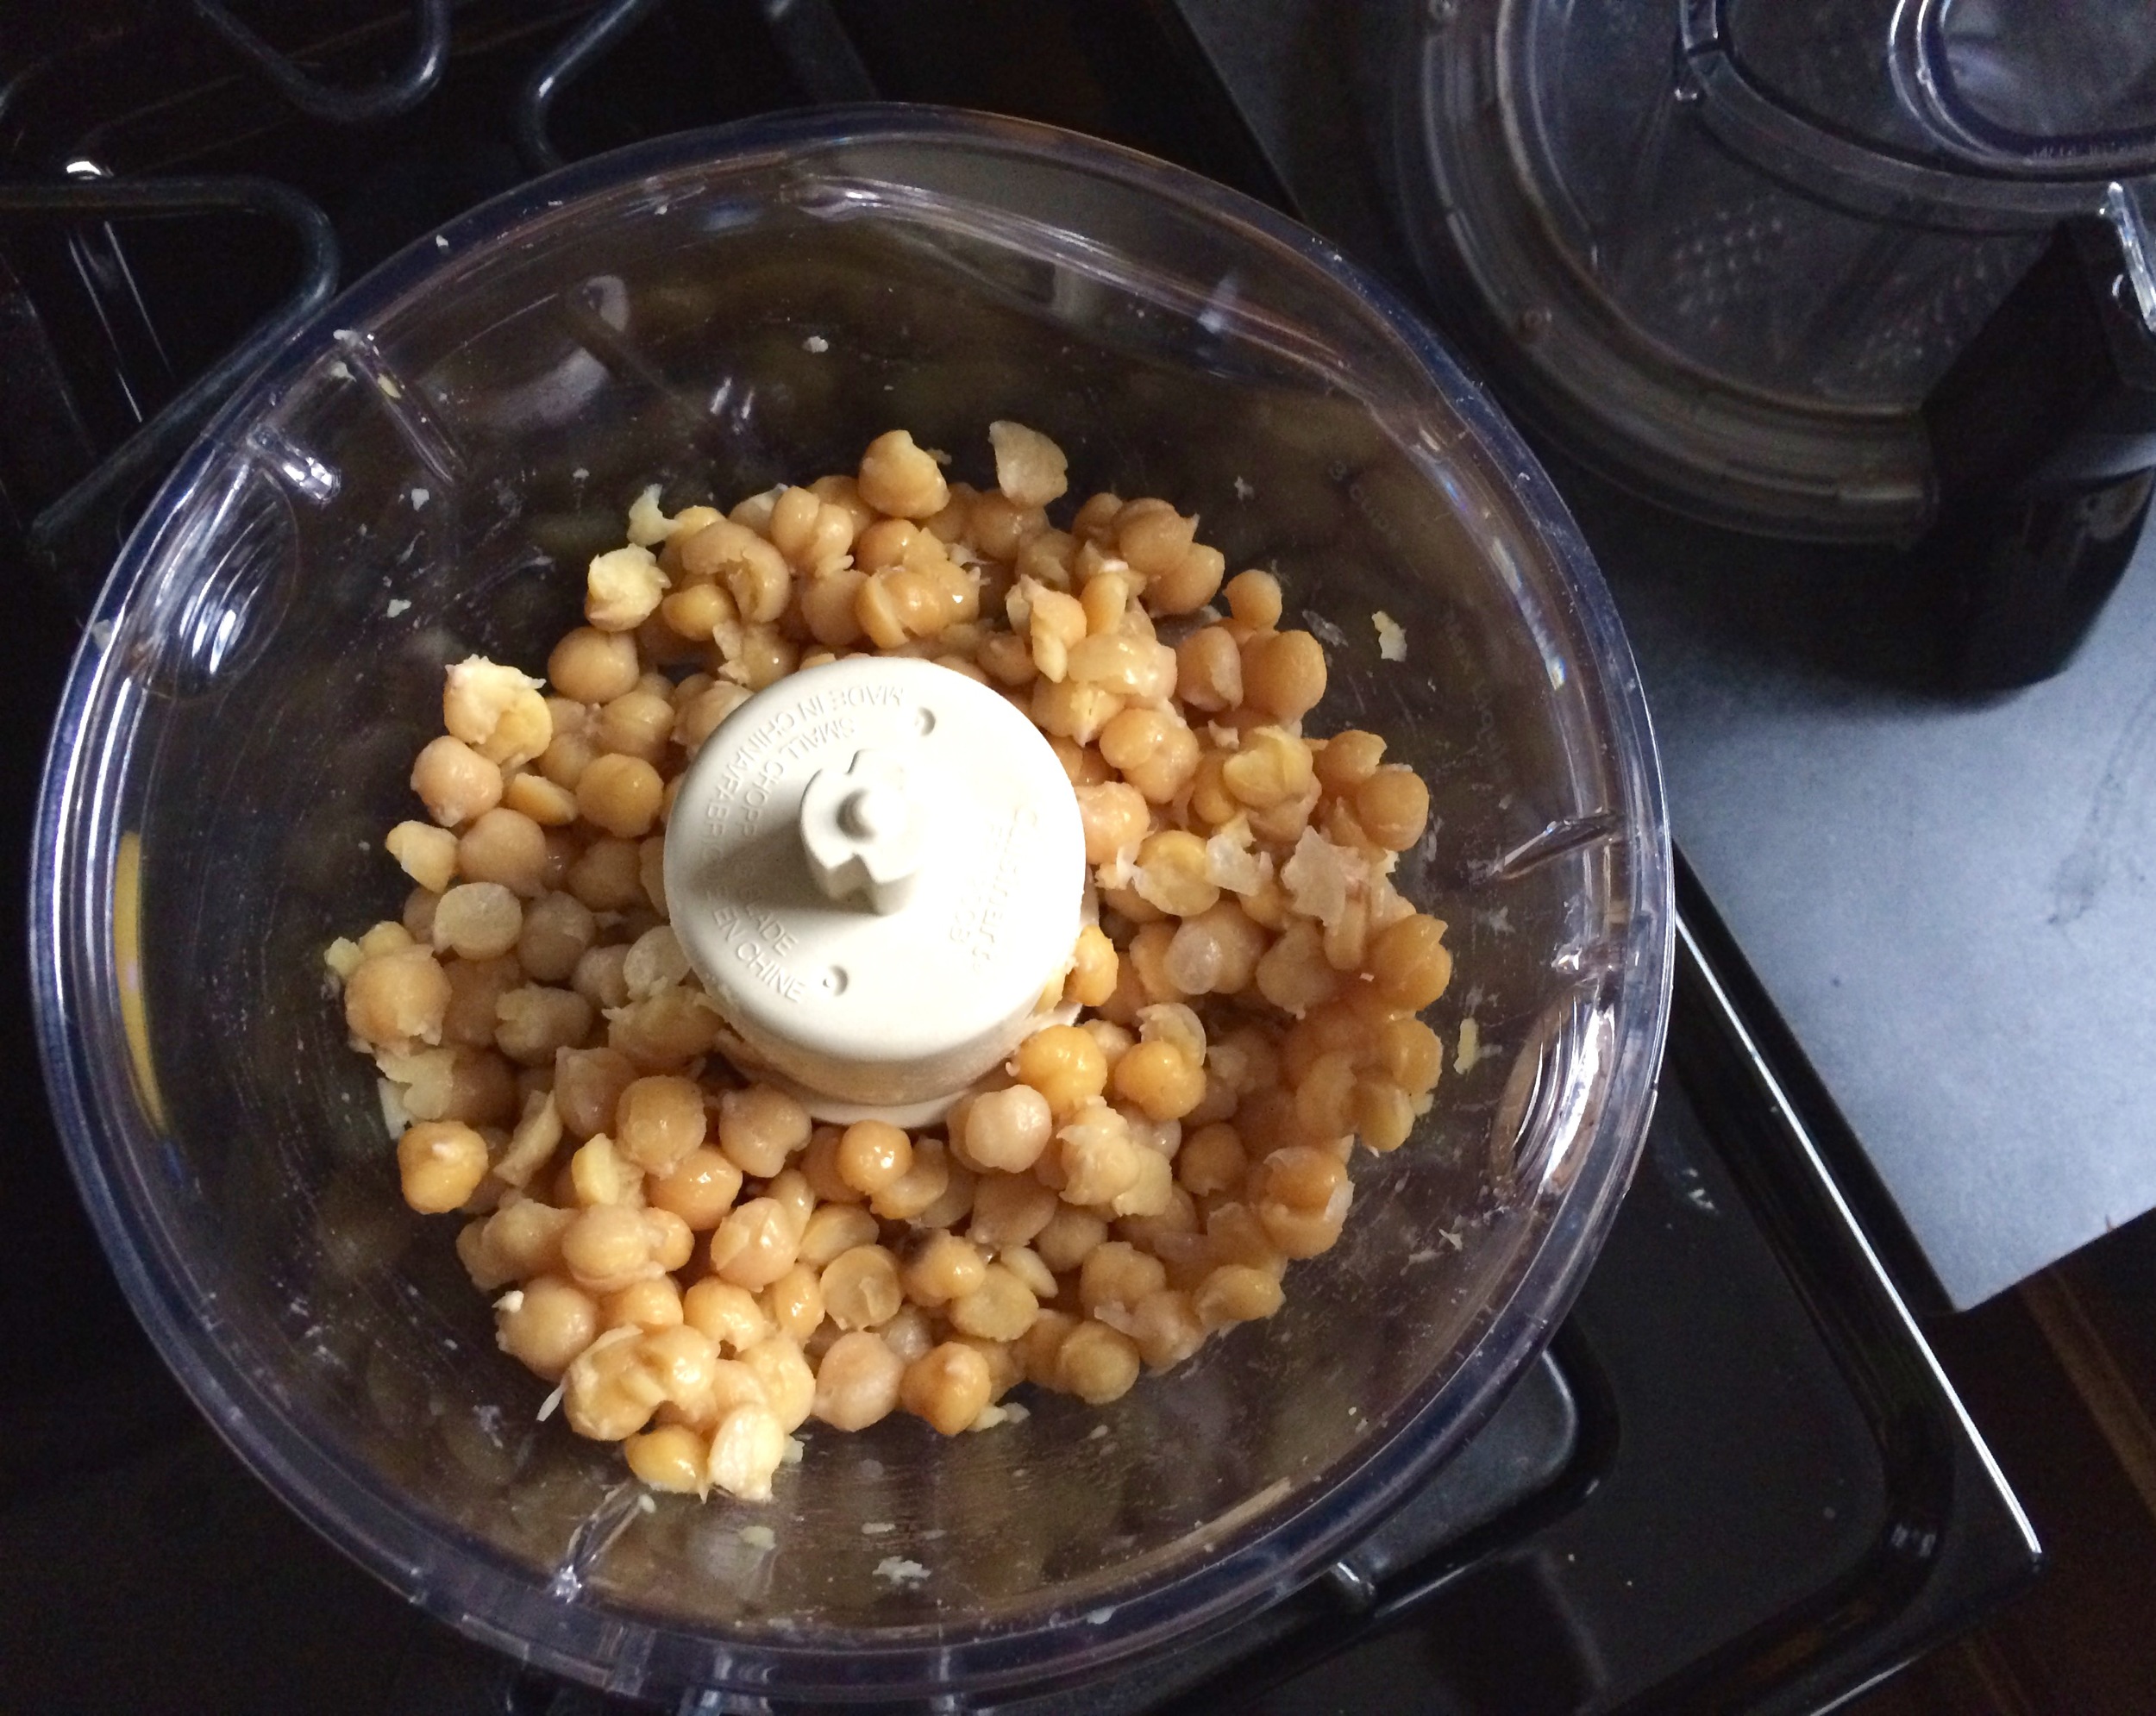
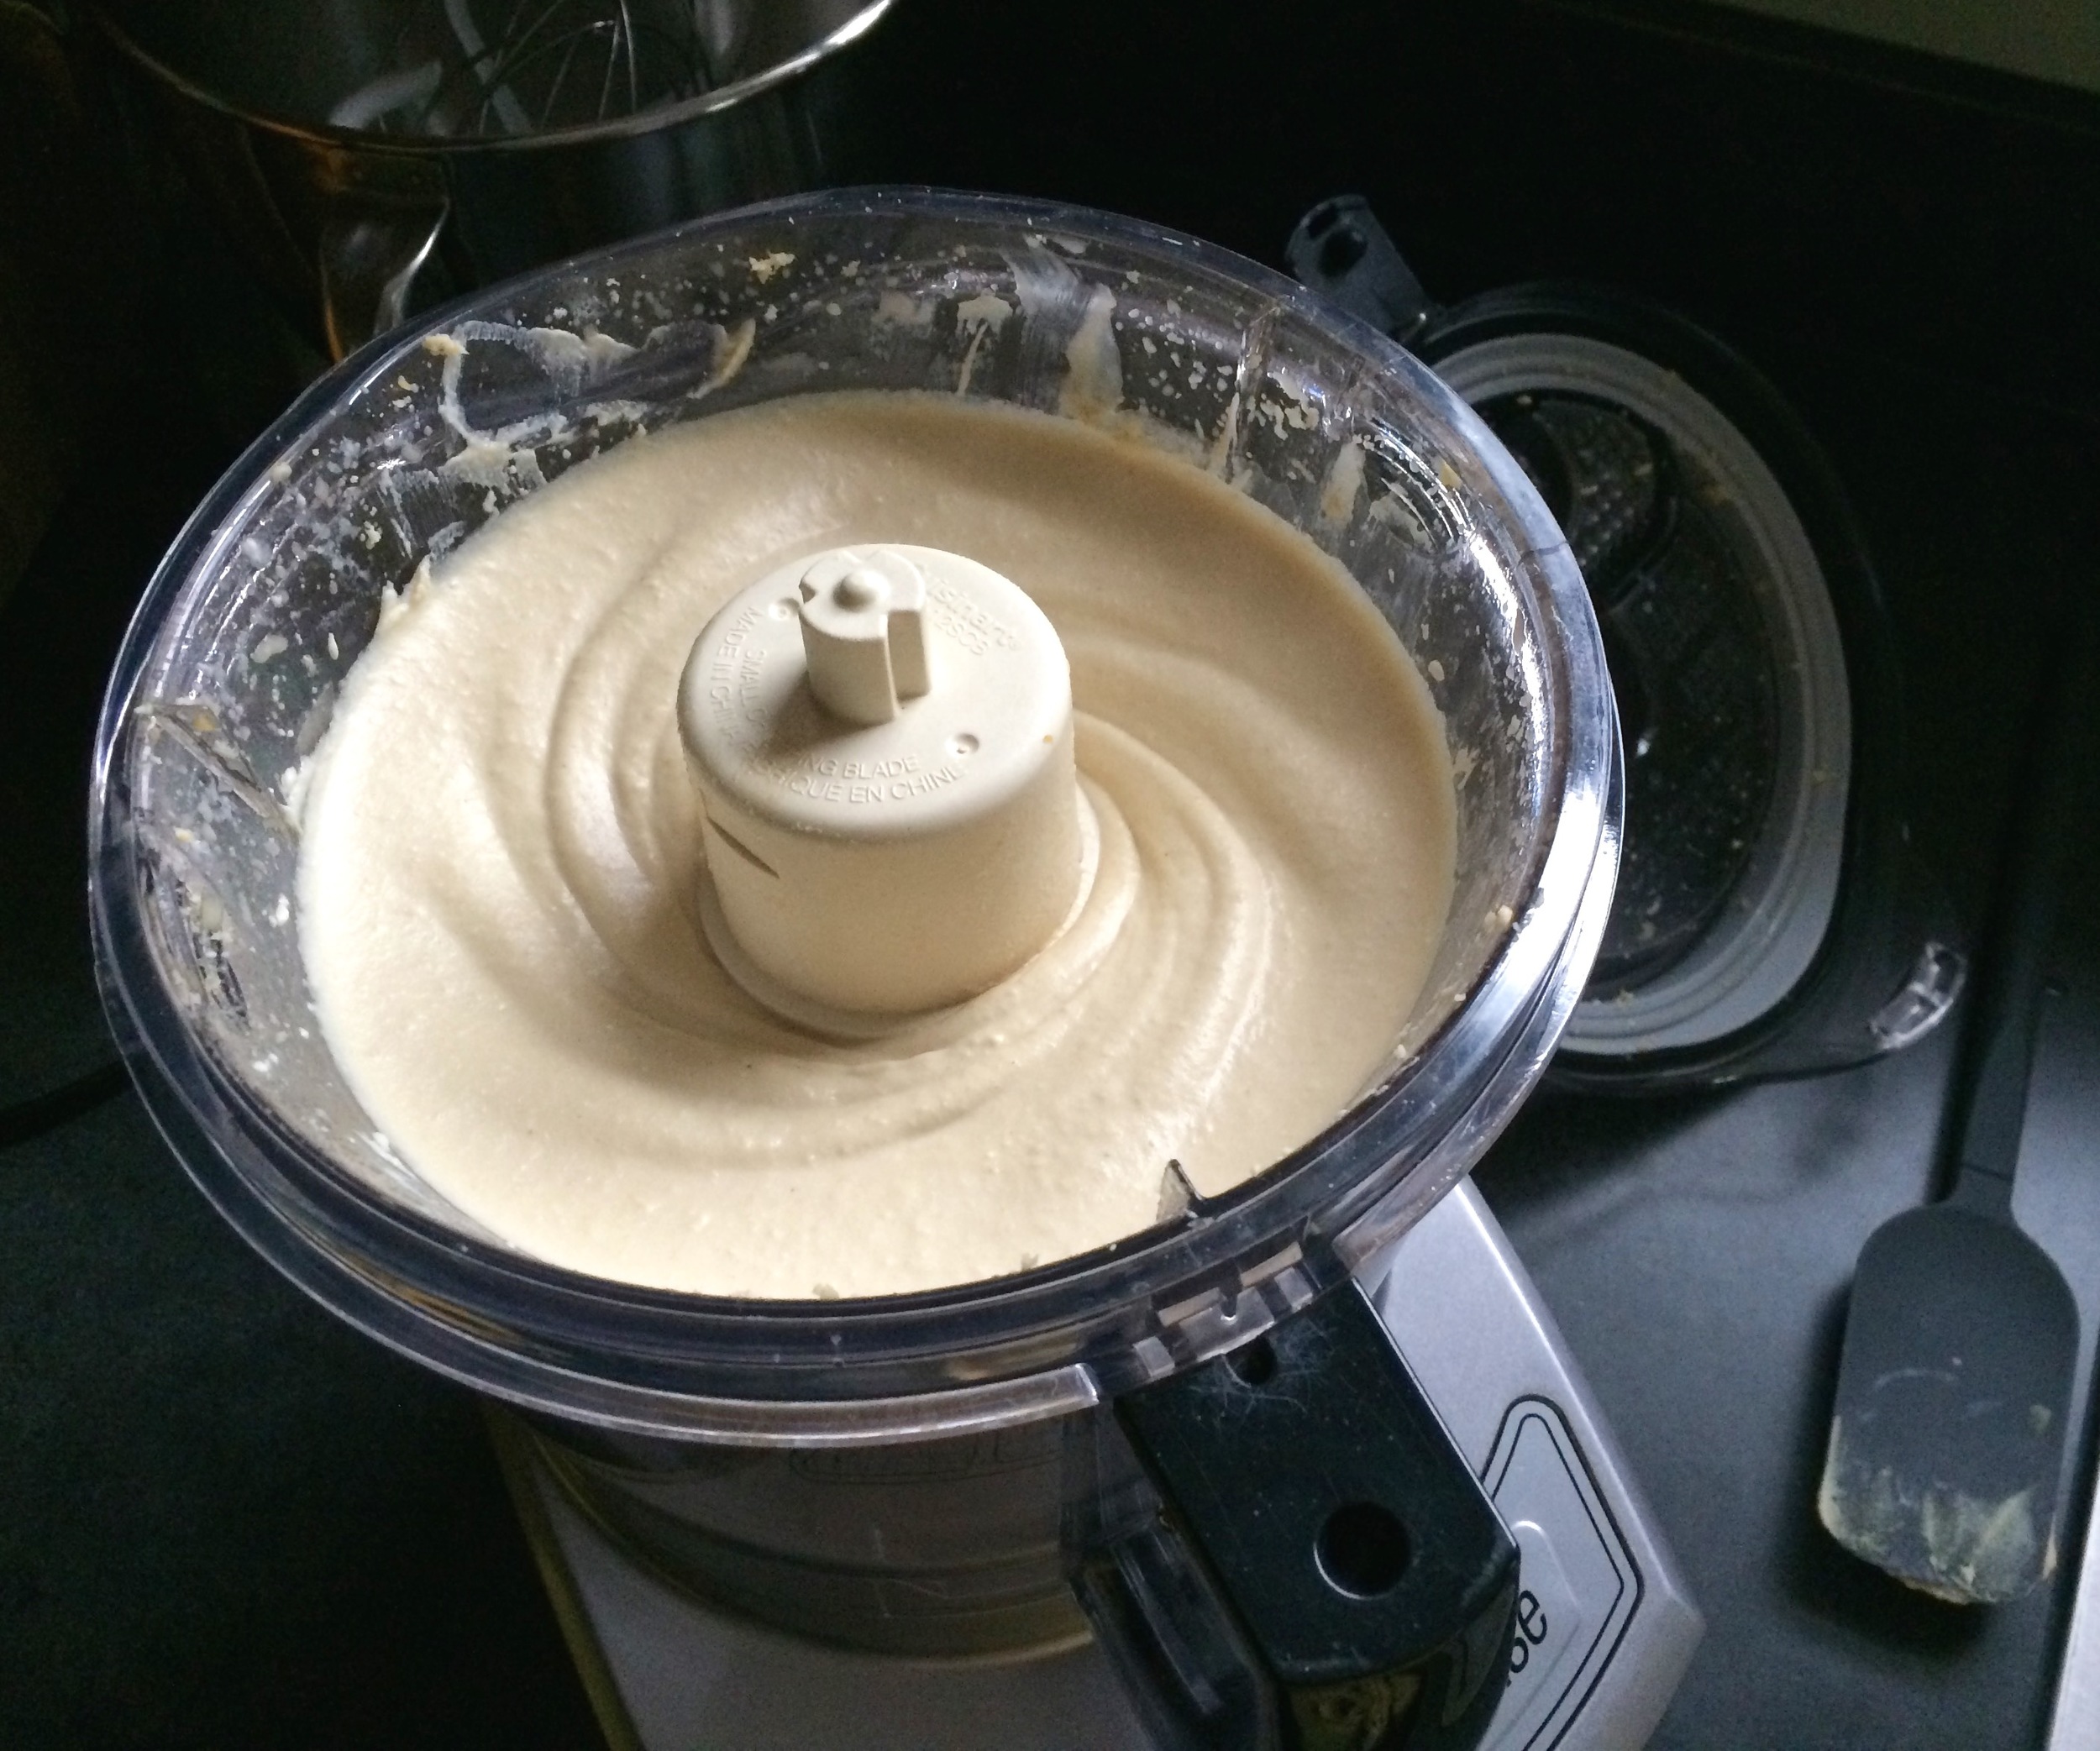
Drain the chickpeas. You should have roughly 1 3/4 cup (300 grams) now. Place the chickpeas in a food processor and process until you get a stiff paste. Then, with the machine still running, add the tahini, lemon juice, garlic and 3/4 teaspoon salt. Finally, slowly drizzle in the iced water and allow it to mix for about 5 minutes, until you get a very smooth and creamy paste. 

Transfer hummus (which will be quite warm at this point) to a bowl, cover the surface with plastic wrap, and let it rest for at least 30 minutes. If not using right away, refrigerate until needed. Make sure to take it out of the fridge at least 30 minutes before serving. 

Pita Bread

I found this recipe for pita bread back at Easter when my sister and I made an Israeli inspired meal to celebrate the holiday. There was no way I was going to make all of those Middle Eastern dishes and not serve fresh pita, it was just too perfect. I had made pita once before and I didn't love how it turned out, but it had been a long time. It was time to give it another try, and boy am I glad that I did. This time around the pita turned out perfectly! It was soft, delicious and just wonderful. 

There are so many options for what to do with pita. At Easter I just cut it up into wedges and served it along with homemade hummus. It was also perfect for soaking up all of the extra juices from the chicken I served. It also makes for a fantastic wrap, the perfect vehicle to stuff with your favorite ingredients. If you have some leftover, brush with some oil and salt and pop it in the oven for a little while until it dries out and you've got homemade pita chips. So many options, give it a try and find your favorite!

This recipe is pretty simple. I really like how the dough can be stored in the fridge for up to 5 days, so you can have fresh pita all week! It's so much fun to watch the pita poof up in the oven, almost like magic. It makes me happy every time. Beware, once you make homemade pita, you will be ruined for life. You'll never want to buy that hard, stale, flavorless pita from the grocery store ever again. 

Pita Bread
From The Food Network
Ingredients

  • 1 teaspoon dry yeast
  • 2 1/2 cups warm water 
  • 2 cups whole wheat flour
  • About 4 cups unbleached all-purpose or bread flour
  • 1 tablespoon salt
  • 1 to 2 tablespoons olive oil

Directions
Sprinkle the yeast over the warm water in a large bread bowl. Stir to dissolve. Add whole wheat flour, one cup at a time, then 1 cup white flour. Stir 100 times (one minute) in the same direction to activate the gluten in the flour. Let this sponge rest for at least 10 minutes or as long as 2 hours.

Sprinkle salt over the sponge and stir in the olive oil. Mix well. Add white flour, one cup at a time. When the dough is too stiff to stir, turn it out onto a lightly floured bread board and knead for 8 to 10 minutes, until dough is smooth and elastic. Return the dough to a lightly oiled bread bowl and cover with plastic wrap. Let rise until at least double in size, approximately 1 1/2 hours. Gently punch down. Dough can be made ahead to this point and then stored, covered, in the refrigerator for 5 days or less.

If at this time you want to save the dough in the refrigerator for baking later, simply wrap it in a plastic bag that is at least three times the size of the dough, pull the bag together, and secure it just at the opening of the bag. This will give the dough a chance to expand when it is in the refrigerator (which it will do). From day to day, simply cut off the amount of dough you need and keep the rest in the refrigerator, for up to one week. The dough will smell slightly fermented after a few days, but this simply improves the taste of the bread. Dough should be brought to room temperature before baking.

This amount of dough will make approximately 16 pitas if rolled out into circles approximately 8 to 9 inches in diameter and less than 1/4-inch thick. You can also of course make smaller breads. Size and shape all depend on you, but for breads of this dimension the following baking tips apply:

Place large baking stone or two baking sheets, on a rack in the bottom third of your oven, leaving a one inch gap all around to allow air to circulate. Preheat oven to 450 degrees. Divide dough in half, then set half aside, covered, while you work with the rest. Divide dough into eight equal pieces and flatten each piece with lightly floured hands. Roll out each piece to a circle 8 to 9 inches in diameter. You may wish to roll out all eight before starting to bake. Cover rolled out breads, but do not stack.

Bake 2 at a time (or more if your oven is larger) directly on baking stone or baking sheets. Bake each bread for 3 or 4 minutes, until the bread has gone into a full "balloon" or until it is starting to turn lightly golden, whichever happens first. If there are seams or dry bits of dough - or for a variety of other reasons - your bread may not go into a full "balloon". Don't worry, it will still taste great. The more you bake pitas the more you will become familiar with all the little tricks and pitfalls, and your breads will more consistently "balloon." But even then, if you're like us, it won't always "balloon" fully and you won't mind because the taste will still be wonderful. When baked, remove, place on a rack for about five minutes to let cool slightly, then wrap breads in a large kitchen towel (this will keep the breads soft). When first half of the dough has been rolled out and baked, repeat for rest of dough, or store in refrigerator for later use, as described above. You can also divide the dough into more, smaller pieces if you wish, to give you smaller breads.

Baklawa

I'm officially back! After hundreds of hours of studying and thousands of practice questions over the course of the past 5 weeks I finally took my boards this past Wednesday. It is such a relief to be finished. This test has been in the back of my mind since last September and it is so wonderful to finally be free of that constant worry. 

So let's celebrate! How about some baklava? I've always liked baklawa, but I really learned to love it when I lived in Dearborn, MI for two years. In case you didn't know, Dearborn has a huge Middle Eastern population which, happily for me, meant some absolutely wonderful Middle Eastern bakeries. I was spoiled with some of the best baklawa you'll ever find. But trust me, this homemade version is pretty close to being just as good. It's flakey, buttery and sweet. If you've ever wanted to try making baklawa I highly recommend it. It's totally worth it!

I always thought that baklawa would be complicated to make, and although the recipe looks fairly long with a couple of different steps, it was surprisingly not as difficult as I thought it would be. The original recipe called for clarified butter, but I really didn't feel like dealing with that so I just used plain melted butter and it seemed to turn out just fine. I happened to have some mini cupcake liners and they turned out to be the perfect thing for the individual pieces of baklawa. It is really quite sticky, so having the liners to separate each piece was very helpful, but I would guess some wax paper would work well too, even if it wouldn't be quite as cute.

The recipe makes quite a lot of baklawa, it's so rich that you don't need a big piece. I think it would be great to take to a party, definitely something different and plenty to go around!

Baklawa

Adapted from 

Rose Water & Orange Blossoms

Ingredients

  • 1 lb. box phyllo dough, room temperature
  • 6 oz. (¾ cup) butter, melted 
  • 1 ½ cups sugar
  • ¾ cup water
  • 1 T lemon juice
  • 3 cups walnuts, toasted
  • 1/3 cup sugar

Directions

Thaw the phyllo:

Refrigerate the frozen phyllo overnight, then bring to room temperature. Do not cut open the packages of phyllo until just before you are ready to assemble the baklawa.

Make the simple syrup: 

In a small saucepan, combine sugar, water and lemon juice and bring to a boil over medium high heat. Reduce heat to low and simmer for 10 minutes. Pour into a heatproof container and cool completely. It is essential that the syrup be at room temperature when you pour it over the hot pastry after it comes out of the oven.

Make the sugared nuts:

The nuts can be coarsely chopped in the food processor using pulses, but be careful not to go too far. Some nut-dust is unavoidable, but it is better to have a few nuts that need to be broken by hand than to process too much, which will produce nuts that are too finely chopped. Combine the toasted chopped walnuts and sugar stirring until all of the nuts are coated and appear damp.

Assemble the baklawa:

Preheat the oven to 325 degrees.

Open the phyllo and unroll it on top of the plastic it is packaged in. Keep the phyllo covered with a towel.

The size of the pan you use does not matter, but the pan should be metal (ideally not dark). For a 9”x13”x2” pan, trim the phyllo to fit. If you have the smaller box of phyllo, the two packages inside will need one inch trimmed off of the long side. If you have the larger box of phyllo, the one package of phyllo will need to be cut in half and trimmed to fit the pan. It’s better to leave the phyllo a little larger than the pan because it will shrink when it bakes.

Brush the bottom of the pan with melted butter. Lay one stack of 20 phyllo leaves in the pan. Spread the nuts over the phyllo in one even layer. Lay the second stack of 20 leaves over the nuts, taking care that the top layer is a sheet that is not torn. Take a layer from the center of the leaves for the top layer if necessary.

Brush the top layer with melted butter. Using the tip of a very sharp chef’s knife, cut the baklawa into diamonds by cutting six rows (5 cuts) lengthwise and ten rows (9 cuts) crosswise on the diagonal. Lightly score the top with your knife so you can see where the cuts will be.

Use your dominant hand to cut and the other hand to hold the top layers of phyllo down while cutting, and be sure to cut all the way through to the bottom of the pan. This is essential so that the butter will seep through all layers. The knife is held almost perpendicular to the pastry, cutting straight down into the phyllo and nuts. The top layer will lift and and fold, but just lay the phyllo back down where it belongs and move on. The sharper your knife, the easier the cutting will be.

Pour the melted butter over the baklawa evenly. Allow the butter to settle in, about 5 minutes. Bake on the oven shelf second from the top until deep golden brown, 50-60 minutes. Rotate the baklawa halfway through baking.

Remove from the oven and immediately pour the 1 cup of the cooled syrup evenly over the baklawa. Let the rest sit, uncovered, for several hours or overnight to allow the syrup to absorb. Cut and serve from the pan as needed, keeping the baklawa lightly, not tightly, covered with plastic wrap or waxed paper. The baklawa will keep, in the pan, for two weeks.