Christmas 2017

Merry Christmas! I hope everyone had a blessed day yesterday. It was s a beautiful white Christmas here in Michigan, we couldn't have asked for better. It truly felt like the story book Christmas. While I unfortunately had to work all day at the hospital yesterday, I am thankful that I am working at the hospital, and not admitted to the hospital myself. With Christmas music playing in the workroom, and the snow falling gently outside, it really wasn't too bad! I made the rest of the team breakfast for Christmas morning. Broccoli cheddar quiche, and coffee break muffins. Lara brought in a baked oatmeal and we all enjoyed a festive and delicious breakfast before getting to work!

IMG_1917.jpg

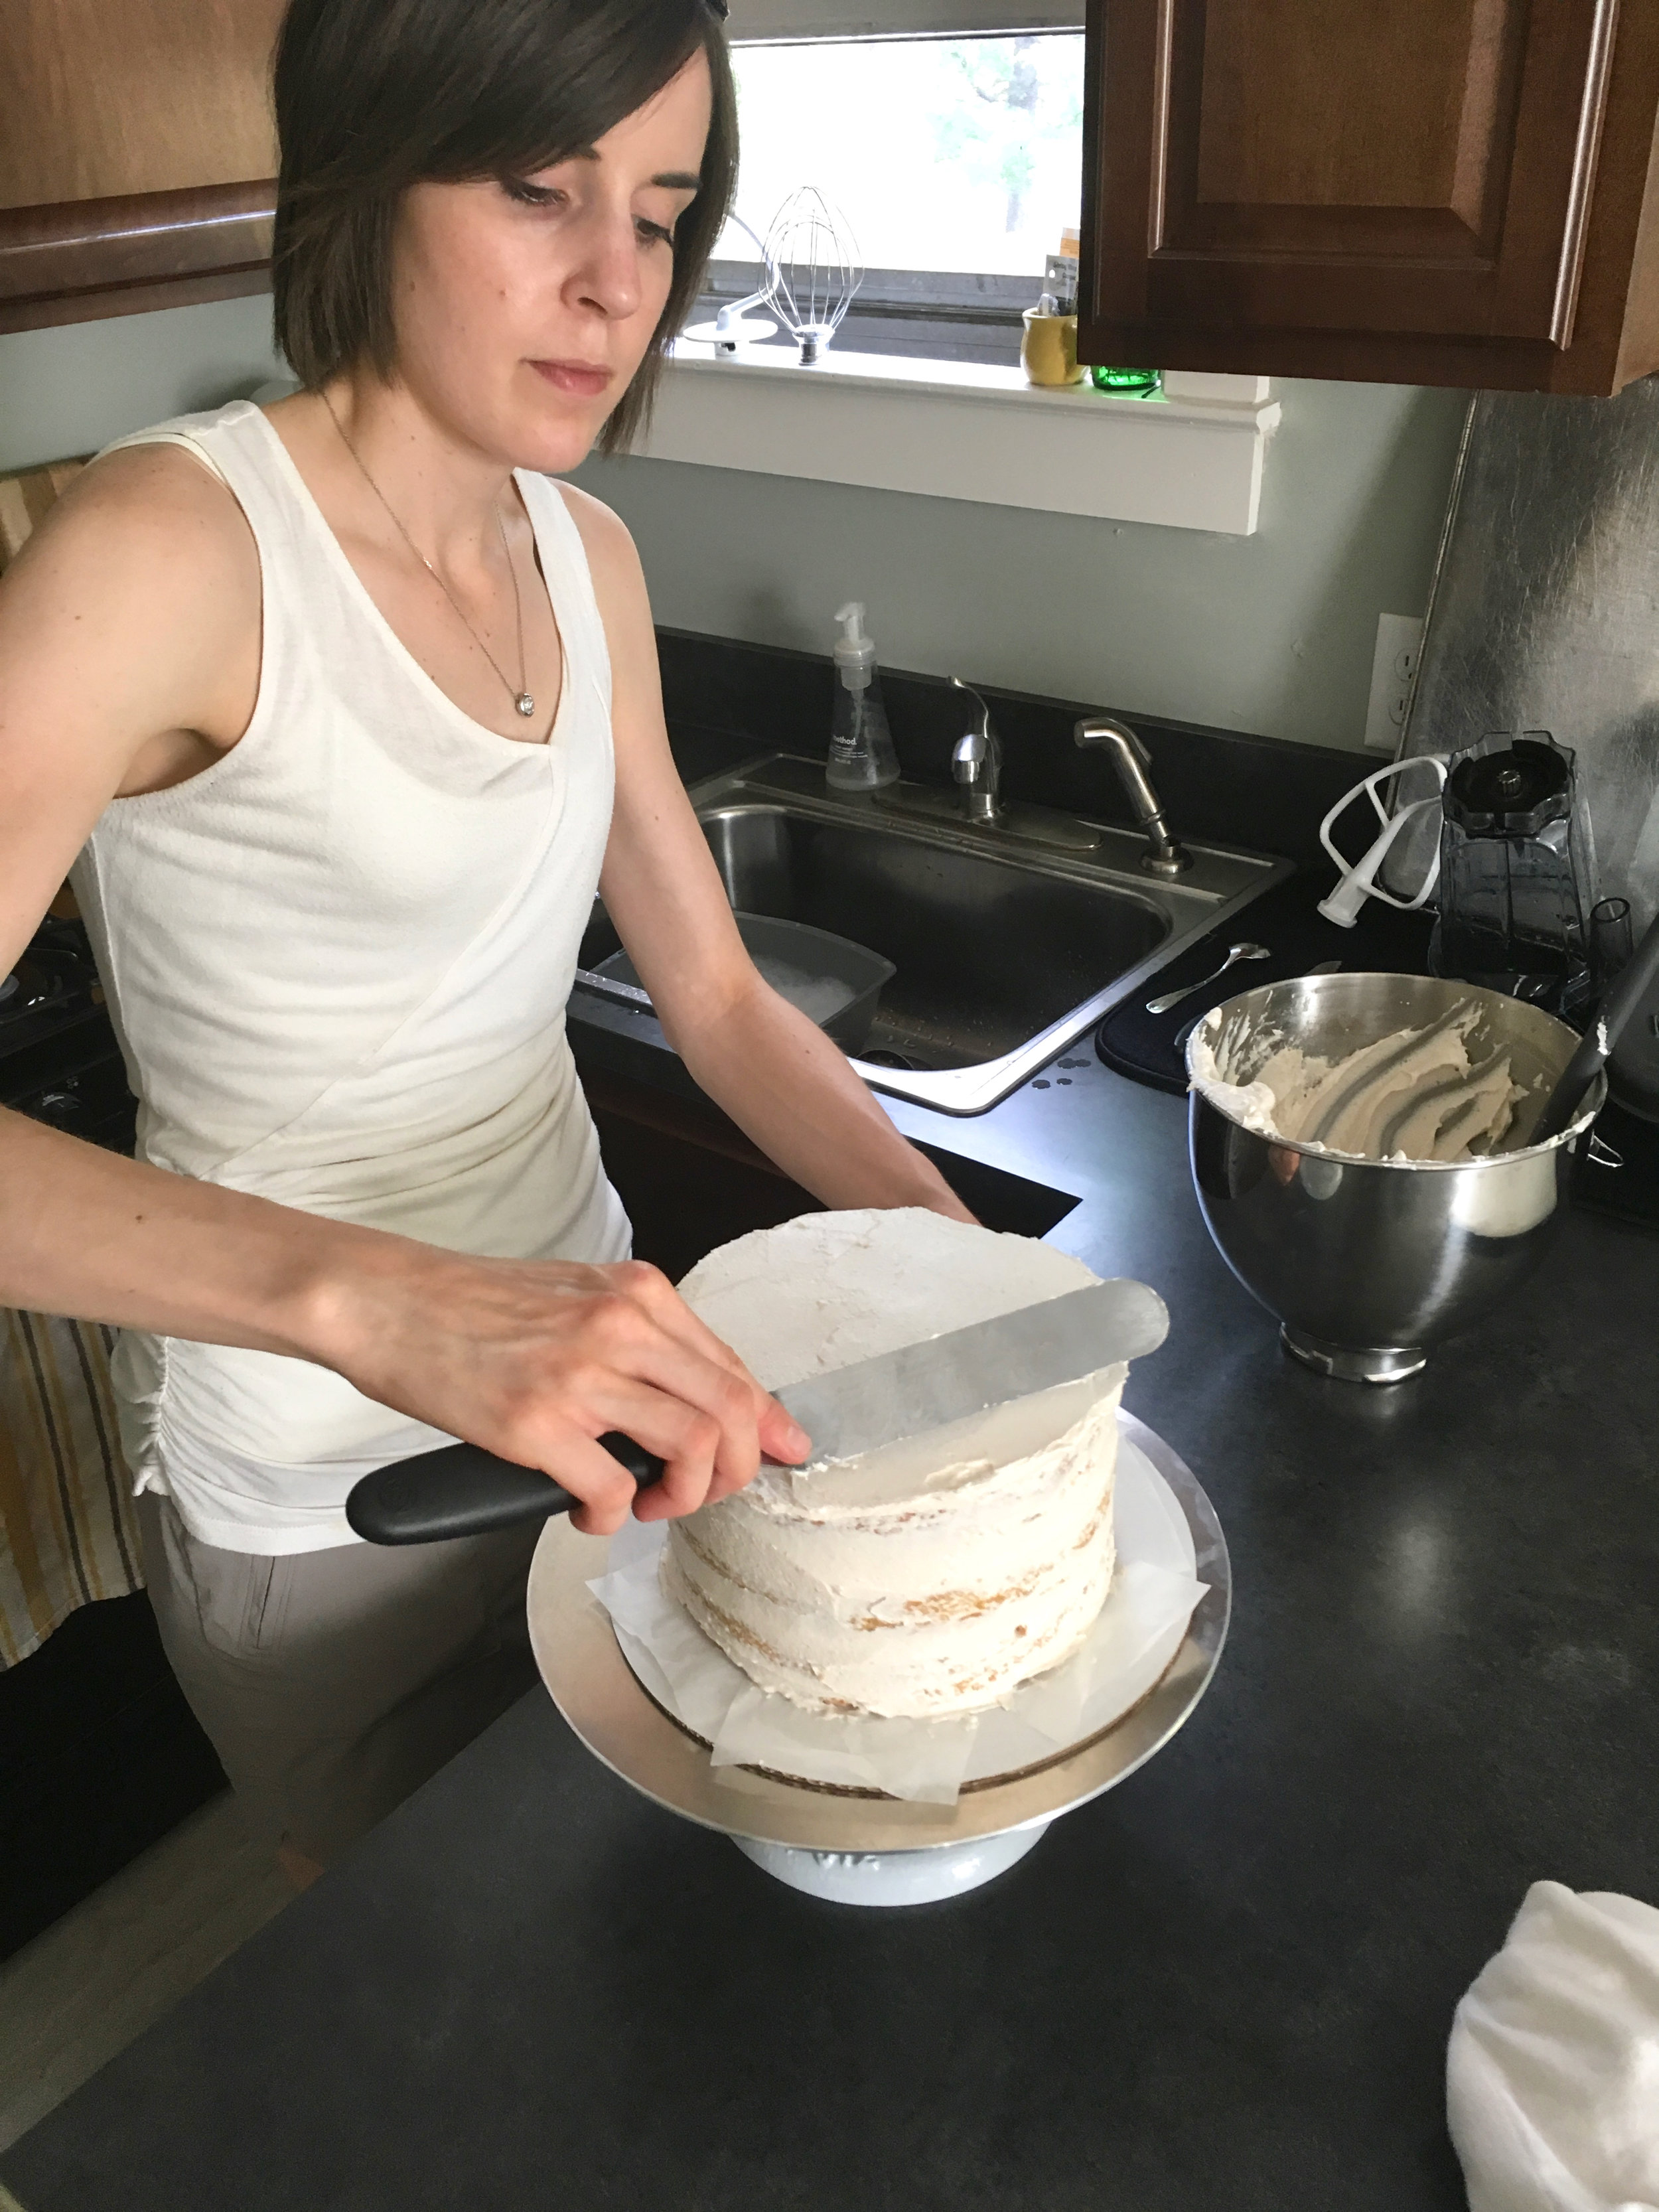
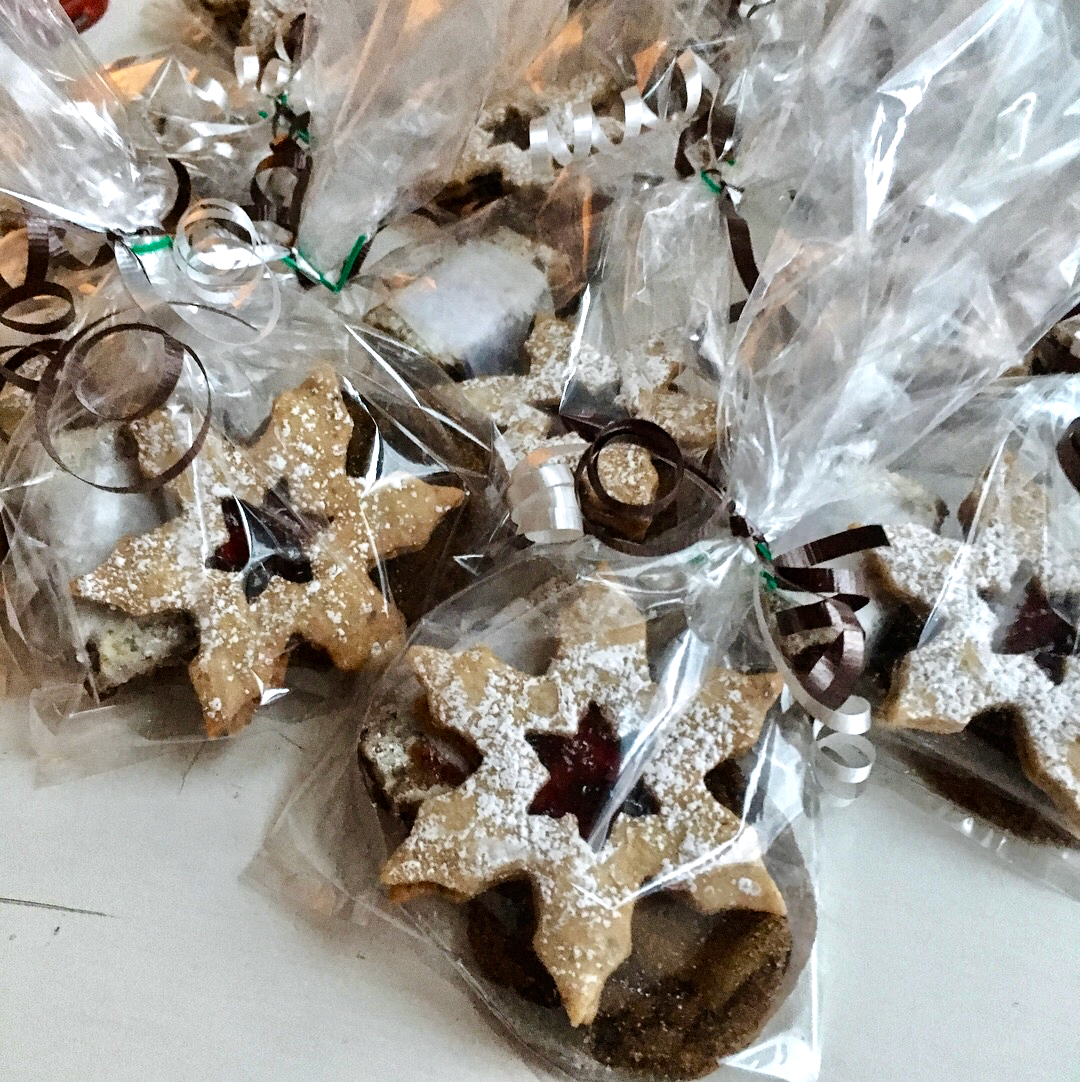
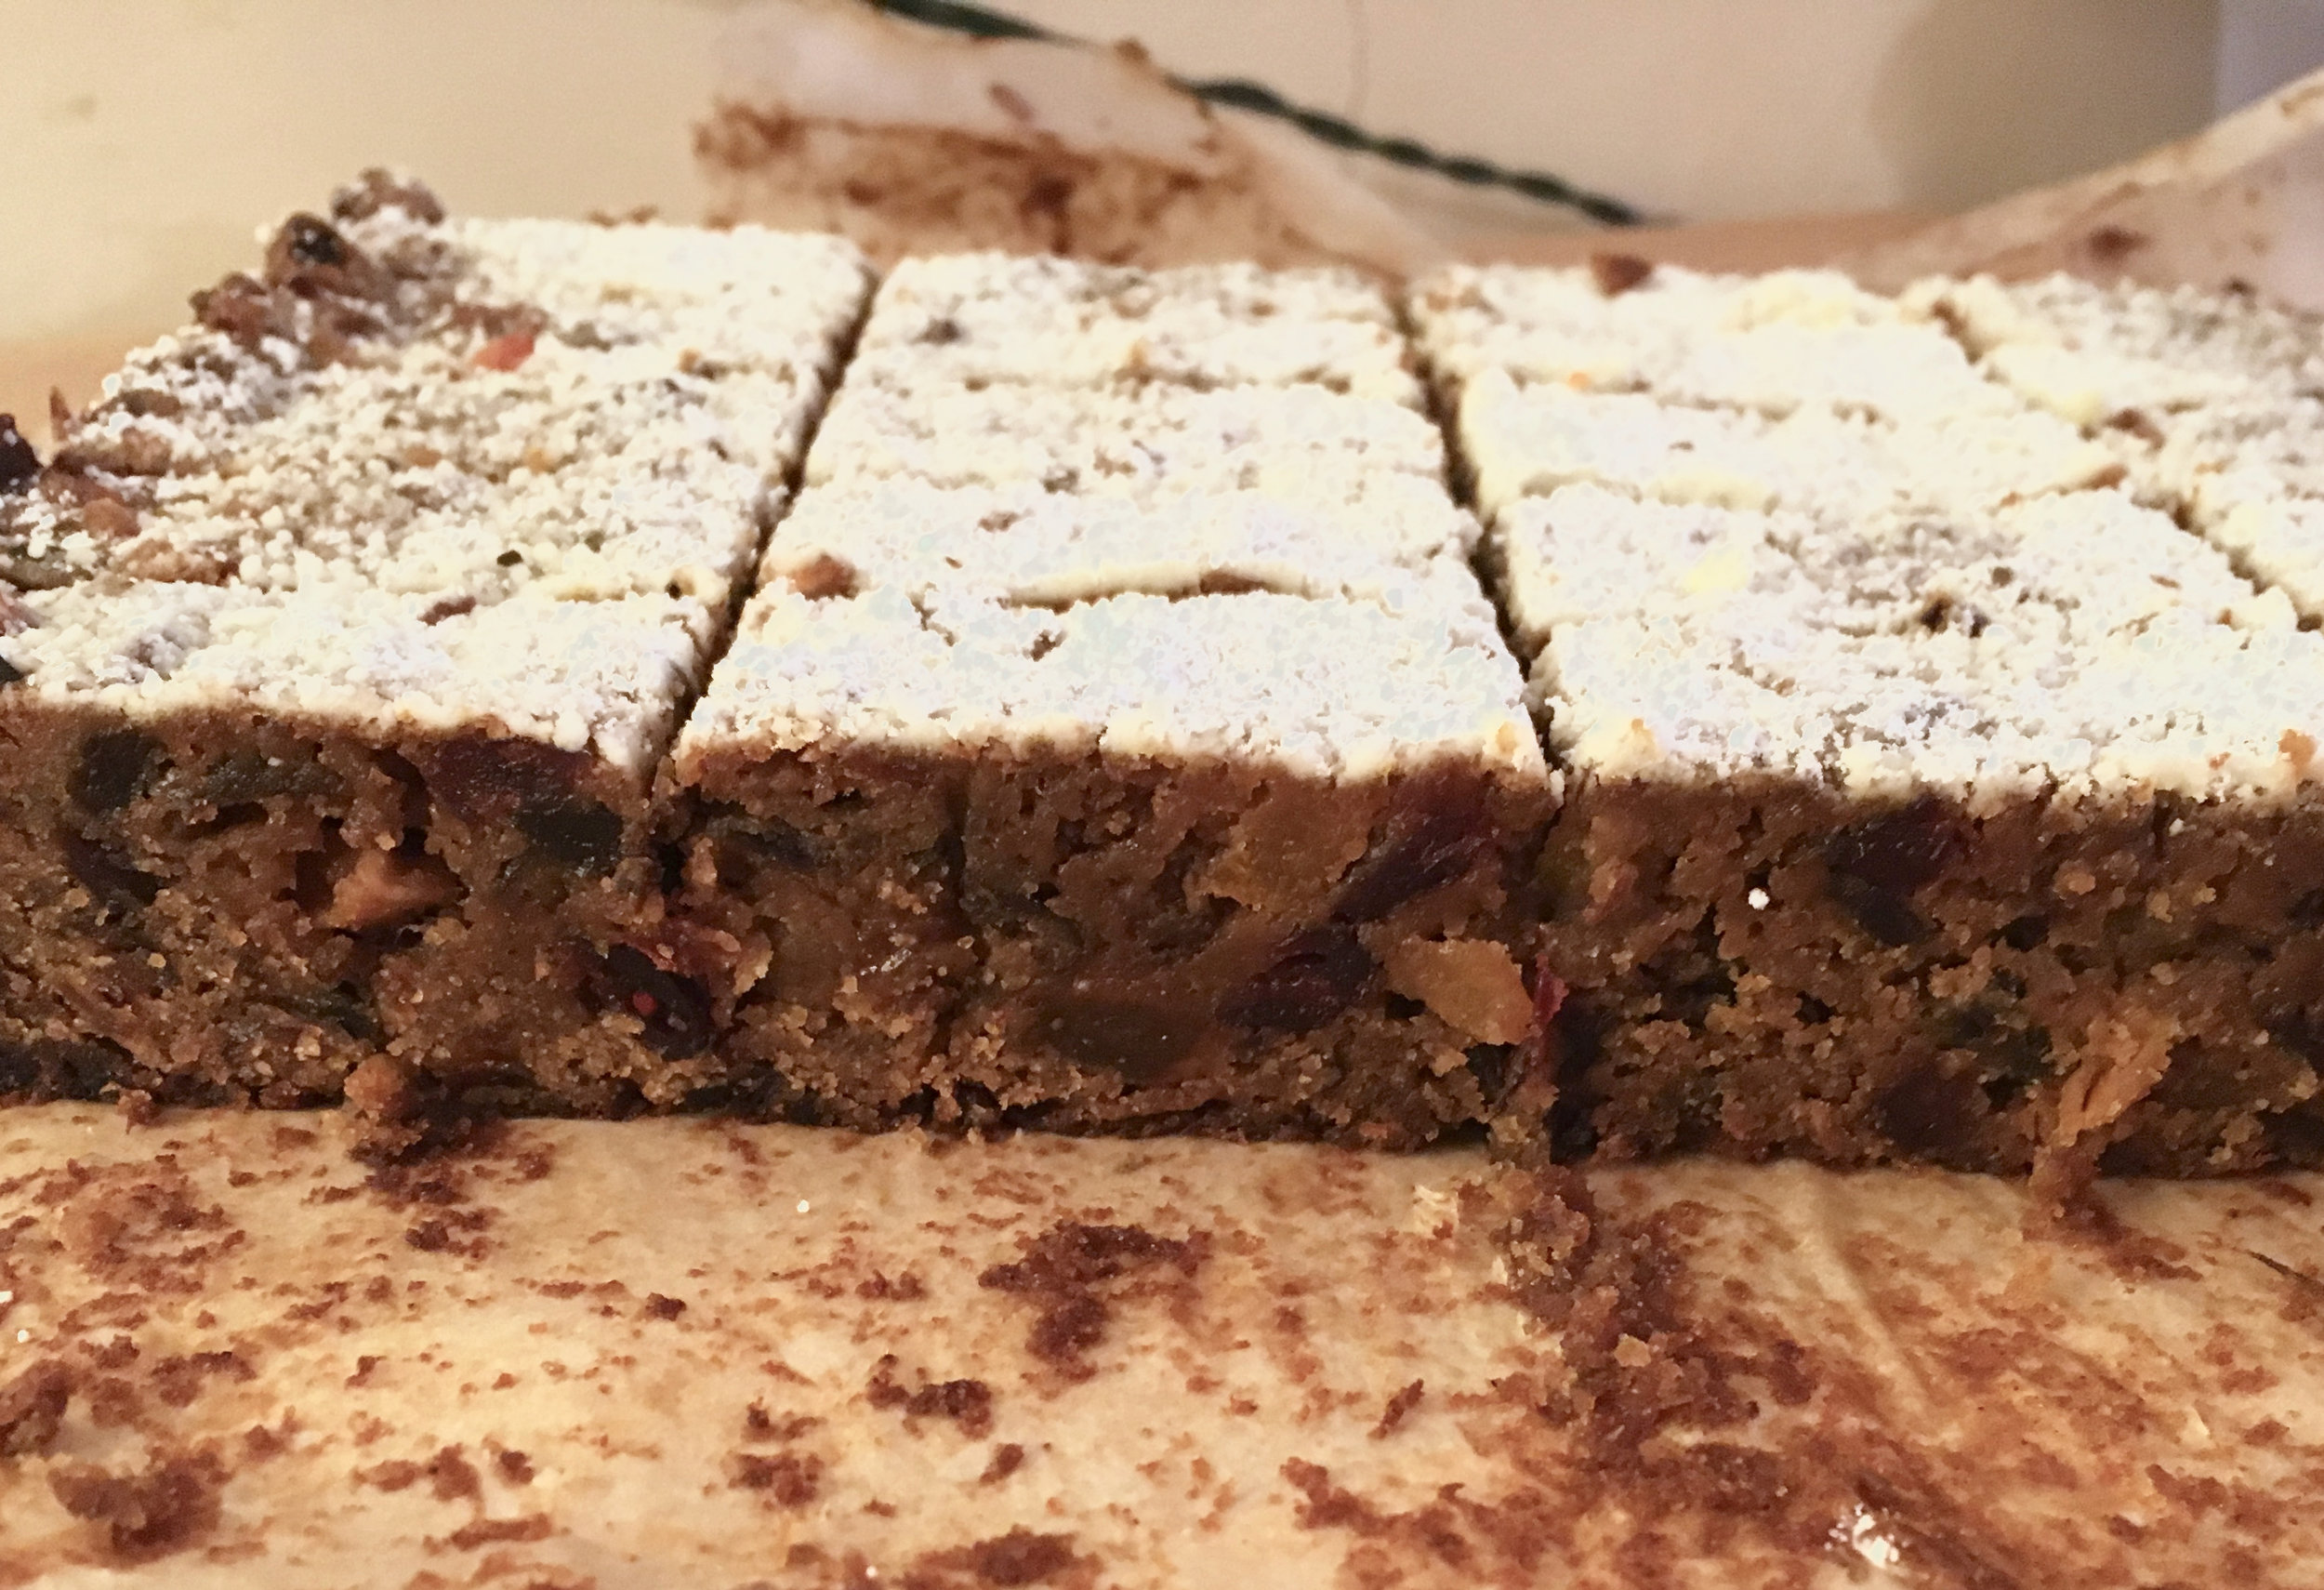
Thankfully, I was able to do a lot of baking and cooking for the holidays this year. First, Lara and I made Christmas cookies to give away to friends and co-workers. We decided on a trio of delicate snowflake Linzer cookies, thick and fruity stollen bars, and our yearly extra chewy molasses cookies (<-- these things are amazing! They may not look super exciting, but they are the best molasses cookies I have ever had!). We bagged those up a few weeks ago to get into the holiday spirit.

IMG_1854.jpg
IMG_1860.jpg
IMG_1871.jpg
 
IMG_1863.jpg
IMG_1858.jpg
IMG_1864.jpg

Next, the annual decorated sugar cookies. We decided on cute little owls, snowy Christmas trees, and simple holiday words. They turned out super cute! Lara did most of the actual decorating as usual, and of course did a wonderful job! These were snacked on all weekend long by family, friends and coworkers. 

IMG_1918.jpg
IMG_1920.jpg
IMG_1921.jpg

We celebrated Christmas with the whole extended family in Holland on the water this year on the 23rd. It was a great turn out. Most of the family could make it from all areas of the country! We had a wonderful time eating and talking and just enjoying the day all together. 

25550334_10214412110837591_2987767959520134947_n.jpg

Grandpa and grandma got into the Christmas spirit! Looking good!

25660051_10214412110797590_4219519452398896167_n.jpg
IMG_1908.jpg

And finally - Christmas day, at the hospital. Merry Christmas from the whole family medicine team!

If I had to work the holiday, at least it was with this great group of people!

IMG_1909.jpg

Peppermint Cheesecake

I can't believe that I have been blogging for so long and have not yet posted one cheesecake!! I do have a red velvet cheesecake cake, but no true cheesecake. Well considered this problem officially fixed today! Here is my first official cheesecake post, and it is a great one. My work had a work Christmas party a few weeks ago which included ugly sweaters, white elephant gifts, all that fun stuff. Obviously my first question is - what's to eat? It was potluck time, it was requested that everyone bring an appetizer or a dessert. This year it was time; Cheesecake time. 

I had stumbled across a cheesecake a few weeks earlier that for whatever reason had just caught my eye. On a whim I decided to just go for it. I went to the store and picked up cream cheese, ricotta, Oreos and candy canes and I am so glad I did. This cheesecake was so simple and turned out delicious. Creamy and light and silky smooth. A winner all around. 

IMG_1847 (1).jpg

The original recipe included a graham cracker crust and was topped with fresh strawberries. Since it's December that wasn't quite right. I wasn't sure what I was going to do, but as I was walking through the aisles at the grocery store my eyes caught on a package of peppermint Oreos and I knew what I was going to create - an Oreo peppermint cheesecake. I swapped out the graham crackers for peppermint Oreos, and added a hint of peppermint extract to the filling and voila! The perfect Christmas cheesecake was born! 

 
IMG_1844.jpg
IMG_1852 (1).jpg
 

Peppermint Cheesecake
Cheesecake Adapted from Lil cookie
Crust adapted from Crazy for Crust
Ingredients
For the crust:

  • 25 mint creme Oreos
  • 5 tablespoons (2 1/2 ounces) butter, melted

For the filling:

  • 2 8-ounce packages (450 grams) cream cheese
  • 1 16-ounce (450 grams) whole milk ricotta cheese
  • 1 cup (200 grams) sugar
  • 3/4 teaspoon peppermint extract
  • 1 tsp. vanilla extract
  • 3/4 teaspoon kosher salt
  • 1/4 cup (35 grams) all-purpose flour
  • 5 large eggs

For coating:

  • 1 8-ounce container sour cream
  • 1 tablespoon sugar
  • 1/2 tsp. vanilla extract

Directions
For the crust: preheat oven to 350 degrees. Line a 9 inch springform pan with aluminum foil (alternatively, you can use a 9 inch, tall sided cake pan with removable bottom). 
In a food processor with a steel blade, process the Oreos until crushed into small bits. Add melted butter and process until combined and the mixture is damp and cohesive. 

Press the moist crumbs to the bottom and the sides of the pan and bake for about 10 minutes. (I found it easiest to do this with a metal measuring cup.) Cool for a few minutes at room temperature. Turn the oven temperature down to 325 degrees. 

Meanwhile, make the cheese filling: Wipe the bowl of the food processor clean. Add the cream cheese, ricotta, sugar, peppermint extract, vanilla and salt and process until well combined. Add the eggs one by one, processing between additions until well incorporated. Add the flour and pulse a few times until the flour is incorporated into the filling.

Pour the cheese filling into the baked crust. Place cheesecake in the now 325 degree oven and bake for 60-70 minutes or until the cake is golden, a bit swollen and slightly vibrating in the center. Remove from the oven, turn the oven off, and let the cheesecake cool for about 10 minutes at room temperature.

While the cheesecake is baking prepare the coating: in a small bowl, mix sour cream, sugar and vanilla to a uniform mixture. Once the cheesecake has cooled about 10 minutes, pour the sour cream coating on top of the cake and return to the still-hot (but turned off) oven for 5-6 minutes.
Remove from oven and cool completely at room temperature before refrigerating it for at least 7-8 hours (preferably overnight).

Banana Rye Muffins

Is there such thing as too many banana bread recipes? Not in my book! Here it is - a perfectly simple and wholesome banana muffin recipe. Not fancy, but oh so good. Perfect with my morning coffee. I decided to switch things up a bit by mixing whole wheat and rye flours, as well as some whole oats for chew. Of course I had to add a little chocolate for a few pockets of sweetness. They baked up beautifully, and I have been enjoying them all week, I'm sure you will too!

IMG_1826.jpg
IMG_1827.jpg
IMG_1829.jpg

Banana Rye Muffins
Adapted from Broma Bakery
Ingredients

  • 2 extra ripe bananas (approximately 200 grams, or 1-1.25 cups)
  • 2 large eggs, room temperature
  • 1/4 cup (50 grams) brown sugar
  • 2 tablespoons (25 grams) butter
  • 2 tablespoons (25 grams) olive oil
  • 2 tablespoons (25 grams) plain Greek yogurt
  • 1 teaspoon vanilla extract
  • 1 cup (120 grams) whole wheat flour
  • 1/2 (60 grams) rye flour
  • 1/2 cup (40 grams) old fashioned oats
  • 1 1/2 teaspoons baking powder
  • 1/2 teaspoon baking soda
  • 1/2 teaspoon salt
  • 1/4 teaspoon cinnamon
  • 1/4-1/2 cup chocolate chunks

Directions
Preheat oven to 425°F. Line 10 muffin tins with muffin liners, spray with non-stick baking spray, and set aside. In a large mixing bowl, whisk mashed banana, eggs, brown sugar, butter, oil, yogurt and vanilla extract until well combined.

Use a spatula to fold in both flours, oats, baking powder, baking soda, salt, and cinnamon, mixing until combined. Fold chocolate in during the last few strokes of mixing.

Scoop batter into prepared muffin tins, they will be about 3/4 full. Bake for 5 minutes at 425°F, then turn oven down to 375°F and bake for an additional 10-12 minutes, until muffins are golden brown and a toothpick inserted in the middle has a few moist crumbs clinging to it, don't overbake as the end result will be dry. Remove from oven and allow to cool. 

Thanksgiving 2017

I love Thanksgiving. The food, getting together with family, cooking and baking, eating and talking, even the football watching. It's all so festive and lovely. My favorite part is probably the weeks leading up to the big Thursday, thinking of a menu, trying to come up with the right blend of tradition and innovation. My family and I don't see eye to eye on this so it can be challenging to come up with food to please everyone, but I do feel like this year was a pretty decent success. 
 

IMG_1724.jpg

Here's the menu: 

Balsamic Glazed and Lacquered Turkey
(adapted from Bon Appetit, year 3 for this baby and still a winner! This time
replaced the sherry vinegar with balsamic and [accidentally] doubled
the sugar, a happy mistake!)

Pan roasted brussel sprouts with cracked wheat berries and tahini dressing
(adapted from Plenty More by Yotam Ottolehghi - replaced the green
beans for something more seasonal)

Spicy greens salad with roasted golden cauliflower, fresh mozzarella and candied lemon peel
(also adapted from Plenty More, this time replaced the artichoke
hearts with the cauliflower)

Marbled pumpkin and chocolate bundt cake with chocolate glaze and hazelnuts
(From The Pastry Affair)

Fresh cranberry sauce with orange zest
 

There were a few additional dishes from other family members (Thanks everyone) to round out the meal. These included sourdough and brown sugar stuffed pumpkins, jello salad, and great grandma's fudge. All in all a fantastic meal!

IMG_1736.jpg
IMG_1729.jpg
IMG_1766.jpg
IMG_1739.jpg
IMG_1757.jpg
IMG_1758.jpg
IMG_1749.jpg

Leftovers! Such a wonderful thing! Fresh salads with Turkey and miso noodle soup garnished with fresh cilantro. 

IMG_1774.jpg

On the final day of the Thanksgiving weekend, Lara and I drove up north to Cedar Springs where I finally got to cut down my very own Christmas tree - something I've always wanted to do! Lara had met a new couple through church friends a few weeks earlier, and they started talking about her parent's Christmas Tree Farm so of course we had to go check it out. Red Flannel Tree Farm is the cutest, most picturesque place to cut down a Christmas tree that you can imagine. They have horse drawn wagons (or sleighs [!] if it's snowing, I was jealous!) to take you out to the trees. They had a wonderful variety of pines and firs of all sizes and shapes. They then have a barn full of old farm paraphernalia, some of which is for sale, and free hot chocolate to warm up with after cutting down your tree. They also have tree stands and some wreaths and other decor for sale. I had an absolute blast and want to go back and do it all over again! They're only open 3 weekends and said the trees were going extra fast this year so I'm glad I headed up to finally get the experience I've been wanting for a long time. 

IMG_1779.jpg
IMG_1783.jpg

With a tiny apartment, you only need a tiny tree!!

IMG_1784.jpg

Start sawing...

IMG_1786.jpg

...keep going...

IMG_1795.jpg

The perfect tree for me, a concolor fir

IMG_1787.jpg

Success!!

IMG_1797.jpg

Lara got one too!

IMG_1801.jpg

New friends, Chevy and Ford

 
IMG_1804.jpg

MERRY CHRISTMAS!! 


French Apple Tart

I had the opportunity to celebrate my very first friendsgiving this weekend and I had such a good time! Any excuse to get together with friends and celebrate is a good idea in my book. I got together at my friend Lindsay's condo to eat good food, have great conversation, and just enjoy being together before the busyness of the holiday season really picks up steam. We had a lovely meal, the main event being one of my all-time favorites, roasted chicken with clementines and fennel. Of course I had to make a dessert, and I decided to try my hand at a simple and elegant French Apple Tart. seasonal and beautiful in an understated way. It was the perfect way to end such a wonderful meal. 

IMG_1720.jpg

Of course I had to use local Jonagold apples from my favorite stand at the farmers market and they were perfect. The whole thing came together quite easily, and was fun to arrange. I made a frangipane to place under the apples which I think was a nice touch, but you can certainly make this without. Whatever you decide, apples, butter and sugar are always going to be a winning combination. 

 
IMG_1707.jpg
 
 
friendsgiving.jpg
 

French Apple Tart
Adapted from Alexandra Cooks
Ingredients
Pate Brisee

  • 1 1/4 cups flour
  • 1 tablespoon sugar (optional)
  • 8 tbsp. unsalted butter, cubed and chilled, divided
  • 1/2 tsp. table salt
  • 3-4 tablespoons ice water

Tart

  • 5 to 7 apples, peeled, cored, and halved (I used jonagold, but really any apple will do)
  • 2-4 tablespoons sugar
  • 4 tablespoons butter

Frangipane

  • 3/4 cup almonds
  • 2 tablespoons sugar
  • pinch salt
  • 2 tablespoons butter at room temperature
  • 1 small egg
  • 2 teaspoons vanilla, rum, brandy or bourbon

For finishing:

  • Whipped cream or vanilla ice cream, for serving

Instructions
Making the pastry: Combine flour, sugar, 8 tbsp. butter, sugar and salt in a food processor and pulse until pea­-size crumbles form, about 10 pulses. Drizzle in 3 tbsp. ice­-cold water and pulse until dough is moistened, about 3 to 4 pulses. (Do not pulse so much that the dough forms a mass — It will clump together when you form it into a disk.) Add more water if needed, but use as little as possible, just until the dough is just coming together. If you add too much water it will be tough and will shrink when baking. Transfer dough to a work surface and form into a flat disk; wrap it in plastic and refrigerate at least 1 hour, and up to three days. When ready to use, transfer dough to a lightly floured work surface. Using a rolling pin, flatten dough into a 13″ circle and then transfer to a tart pan with a removable bottom; trim edges; chill for at least 1 hour.

Meanwhile make frangipane: add all ingredients to a food processor and process until comes together into a smooth mass. This may take a little time and require some scraping down the sides of the food processor from time to time. Be patient and it will eventually come together. 

When ready to bake; heat oven to 375º. Spread a thin layer (about 2 tablespoons) of frangipane across the bottom surface of your tart shell. Working with one apple half at a time, thinly slice into sections, keeping slices together. Press sliced apple half gently to fan it out; repeat with remaining apple halves. Place 1 fanned apple half on outer edge of the tart dough, pointing inward; repeat with 7 more apple halves (or as many as you are able to fit — with a smaller tart pan, you won't be able to fit as many). Separate remaining apple slices. Starting where the apple halves touch and working your way in, layer apples to create a tight rose pattern. Fill in any gaps with remaining apple.

Sprinkle with sugar and dot with remaining 4 tablespoons butter. Place in the oven (I recommend placing a baking sheet lined with aluminum foil underneath the tart to catch any dripping butter that may otherwise fall to the bottom of the oven and burn) and bake until golden brown, about 70 minutes. Let cool completely before removing from pan and carefully transferring to serving platter. 

Happy 30th Birthday

A few weeks back, Lara and I celebrated a milestone birthday, we turned 30. That still sounds a little strange, but I'm getting used to it. The whole weekend I kept thinking about the moving 13 Going on 30, and reminding myself - 30, flirty and thriving! :) 

To celebrate, we both took a few days off work and headed up north to have a little fun! We stayed at the cutest little Airbnb in downtown Traverse City that was just steps away from the main drag downtown, and walking distance to the beach. It was absolutely perfect. The weather was unbelievable and contributed to our short but wonderful celebratory vacation. 

IMG_1429.jpg
IMG_1334.jpg
IMG_1335.jpg
IMG_1336.jpg

The cheese cellar at Leelanau Cheese

IMG_1337.jpg
IMG_1338.jpg

Beautiful drive up to Black Star Farms

IMG_1341.jpg

Taste Taste Taste

IMG_1396.jpg
IMG_1342.jpg
 
 
IMG_1397.jpg
 
 
IMG_1355.jpg

Stopped for a fantastic MadCap latte at Blue Bottle Coffee Co

The setting was perfection! And the food spot on!


Fish Town! The smoked trout was killer!

IMG_1364.jpg
IMG_1366.jpg
IMG_1375.jpg
IMG_1363.jpg

Our perfect Airbnb. Our host even left us a birthday bottle of wine!

IMG_1404.jpg
IMG_1380.jpg

Dinner was one of the best pizzas I've had. The setting didn't hurt either. Pleasanton Bakery had just a few options for pizzas. About 3 or 4 topping options, and only one size - 18 inches! We went with the Margherita and it was perfect.
Dinner by the bay, watching the sunset over the trees. 

IMG_1381.jpg
IMG_1386.jpg
IMG_1469.jpg
IMG_1406.jpg

Morning coffee on our little porch after a morning run. Then it was off to Sleeping Bear Dunes for a fabulous hike!

IMG_1418.jpg
IMG_1441.jpg
IMG_1417.jpg
IMG_1434.jpg

The highlight of the trip was probably lunch at 9 Bean Rows in Suttons Bay. It was abdolutely amazing. Got the soup special which was wild mushroom with sweet corn. On the side was a half sandwich for each of us - housemade pastrami with housemade sourkraut on housemade bread. Wow. I would drive the 2.5 hours simply to eat this again. One thing's for sure - I'll be back!

Baby Peppers Stuffed with Sausage and Herbs

The first official week of fall was SO HOT this year! We had record highs 5 or 6 days in a row, it was the hottest week of the whole summer, and it wasn't even summer. Kind of ridiculous. It's usually in the low to mid 70s, and we got up to 95 degrees! I'm not complaining. I know it will be cold before I know it, so I tried to enjoy the heat while I could. I decided to enjoy these unseasonable days with a summery stuffed pepper dish full of delicious sausage, in season veggies, and lots of herbs. Enjoyed on the front porch with a glass of Prosecco, it was spot on. And I ended the night with ice cream, obviously!

IMG_1520.jpg

A recipe in one of the cookbooks I recently checked out of the library inspired this dish. I didn't follow the recipe all that closely, but used it as a guide. The original recipe called for chorizo, but my butcher was out, so I went with their verde sausage which is one of my favorites. I don't know exactly what's in it, but it has herbs and a little heat, and is absolutely delicious. It worked out perfectly and these little stuffed peppers were perfect. I will definitely make these little guys again. And really, and sausage would be delicious, chorizo, verde, Italian, choose your own adventure. 

 
IMG_1522.jpg
IMG_1524.jpg
 

Baby Peppers Stuffed with Sausage and Herbs
Adapted from Les Marchés Francais: Four Seasons of French Dishes from the Paris Markets by Brian DeFehr and Pauline Boldt
Ingredients

  • 10-12 mini bell peppers
  • 1/2 medium onion, diced
  • 1/2 jalapeno, diced (optional)
  • 1 clove garlic, minced
  • 4 oil packed anchovies, or about 2 teaspoons anchovy paste
  • 1 small or 1/2 large zucchini, diced
  • 2 Plum tomatoes, chopped
  • Shredded kale (optional)
  • 2 verde sausages (alternatively Italian sausage or Chorizo are good options)
  • Salt
  • 1/2 cup minced fresh parsley

Directions
Preheat oven to 400 degrees. Oil a medium baking dish. Cut the tops off the sweet peppers. With a small knife, dig out the seeds and place the now prepped peppers in the baking dish (slice off a thin slice on the bottom of any of the peppers that want to fall over to create a flat surface). 

Preheat a large skillet over medium heat. Once warm, add a couple of tablespoons olive oil and the add the onions along with a little salt. Cook for 8-10 minutes until softened and starting to brown. Add the jalapeno (if using) and garlic and let cook for 1-2 minutes until the garlic is fragrant. Add the anchovies or anchovy paste,  zucchini, chopped tomatoes and kale (if using; I had a little hanging out in my garden and so just threw it in, but it's not needed). If the skillet is looking too dry, add a little bit of water. Let cook for a couple of minutes until everything is getting nice and wilty. Add more salt to taste. 

Remove the casing from the sausages and crumble into the pan with the onion and zucchini mixture. Cook until the sausage is just about cooked through. Remove from heat and add the minced parsley and stir everything together. (At this point you can add a little bit of shreded of diced cheese; I had a small piece of Manchego floating around the fridge that was perfect for this, but you can just skip it too). 

Use a teaspoon to stuff the mixture into the prepared sweet peppers. Place in preheated oven and bake for 25-30 minutes, until the peppers are fully softened. Remove from oven and top with shredded parmesan cheese if desired. Let cool. Serve warm or at room temperature. 
 

Pistachio Cake with Roasted Plum Buttercream

Last week was big. It was a milestone. It felt a little weird. It was my 30th birthday. I am no longer a 20 year old. I have told myself that I am never going to start dreading my birthday. I'm going to enjoy it, use it as an excuse to go out for dinner, celebrate, and most importantly - eat cake. (And go on vacation! Took a few days off to head up north for some fun, more in a later post!) When I was younger I wasn't always a huge fan of sharing my birthday every single year. However, now I think it's pretty much the best thing ever. I always have someone to celebrate with, someone who is just as excited as me, and someone to help bake a cake with! 

For our 30th birthday we wanted to do something we hadn't tried before, flavor wise. Lara had recently seen a recipe for a pistachio with roasted plum frosting and when she mentioned it to me I thought it sounded wonderful. Not only is it a unique combination, it is also plum season, and I happened to have picked up a pint of black plums at the farmers market the week before and had a few left. It was meant to be!

It was the absolute right decision. The cake turned out amazingly! It was so delicious and fun to share with family and friends. Last year we came up with the idea of decorating our birthday cake with real flowers instead of spending a lot of time trying to decorate with frosting and then not liking the results. Since our birthday coincides with dahlia season, I have a feeling that dahlias are going to be making a fairly regular appearance on our birthday. They are absolutely gorgeous and come in every size and color. Why waste your time decorating a cake when God has already perfected these beautiful flowers. Win-win!

IMG_1513.jpg

For this cake I had to make a special purchase of pistachio paste. Something I have never actually seen. I found a source online (thankfully I had been looking at birthday cakes the week before my birthday, so I had time to have them ship it to me). In the original recipe, the author gives a recipe for homemade pistachio paste, but I just didn't have any desire to do that, so I "splurged" and bought it online. I was expecting it to be a lot like almond paste which I have used quite a bit and is thick and solid, you can cut it into "slices" if desired. The pistachio paste was very runny, very much like natural almond butter than you might have. It really seemed more like pistachio butter than pistachio paste, but it was sweetened. 

Other than that one ingredient, the cake was a pretty standard butter cake with a little citrus zest (I went with orange) for brightness, and yogurt for moisture. I'm sure you could do sour cream instead if desired. The original recipe called for an Italian Meringue buttercream, but I didn't feel like doing that this year so I just went with a standard American buttercream which is also very delicious. My frosting did not get as purple, or "plum" colored, as the original. Perhaps due to the change in frosting, or maybe because I peeled my plums, which was a little disappointing. I liked the pale purple of the original. But in the end it still turned out wonderful and delicious. 

I decided to try a "naked" cake look this year. Wasn't sure how I would like it, but actually found it really easy. It was nice to not have to worry about crumbs on the side of the cake, and to not have to be a perfectionist trying to get the edges perfectly smooth. A great technique for the lazy cake froster! A few flowers on top and some crushed pistachios and I was done! Another year, another successful birthday cake!

IMG_1551.jpg
IMG_1548.jpg
IMG_1546.jpg
IMG_1542.jpg

Being goofy!

IMG_1540.jpg
 
IMG_1507.jpg

Went out for dinner the night before our birthday and got to watch the sunset over the lake on an absolutely gorgeous night, followed by ice cream obviously!

IMG_1511.jpg

Birthday brunch at our favorite place! Croissants and lattes - what more could one want!

IMG_1537.jpg

So excited to finally dig in!

IMG_1534.jpg

A beautiful triple layer cake, with a subtle tinge of green. It was dense and buttery and moist and absolutely delicious, just how I like it!


Pistachio Cake with Roasted Plum Buttercream
Adapted from A Cozy Kitchen
Ingredients
Pistachio Cake:

  • 2 1/2 cups cake flour, sifted
  • 1 tablespoon baking powder
  • 1 teaspoon salt
  • 1 cup unsalted butter, room temperature
  • 1 1/2 cups white granulated sugar
  • 1/2 teaspoon lemon or orange zest (from about 1/2 orange)
  • 4 large eggs
  • 1 1/2 teaspoons pure vanilla extract
  • 1 cup plain Greek yogurt
  • 1/2 cup pistachio paste (I used this product)

Pistachio Buttercream

  • 2 black plums
  • 1/4 cup white granulated sugar
  • 1 teaspoon balsamic vinegar
  • 3 tablespoons water
  • Pinch of salt
  • 3 sticks butter
  • 5-6 cups powdered sugar (575-690grams)
  • 1 tablespoon vanilla extract

Directions
To roast the plums: Preheat your oven to 400 degrees. In a small baking dish, toss together the sliced plums, sugar, balsamic vinegar, salt and water. Roast for 15 minutes, or until the plums are super juicy and a syrup has formed. Set aside to cool slightly, about 5 minutes. Add the plums and its juices to a blender and pulse until completely pureed. Pour through a strainer, into a small bowl. You should end up with about 1/3 of a cup puree. Set aside to cool completely, ideally in the fridge. If it is warm at all when added to the frosting it may melt the butter. 

To make the frosting: In the bowl of a stand-up mixer with the paddle attachment, add the butter Beat for 30-60 seconds, until nice and creamy. Add the powdered sugar and beat for 2-3 minutes until well combined. Add the cooled plum puree and vanilla and beat until well combined. 

To bake the cake: Preheat oven to 350 degrees F. Butter and flour three 8x2-inch cake pans. Line the bottoms with a round of parchment. Set aside.

In a medium bowl, whisk together the flour, baking powder and salt. In the bowl of a stand-up mixer add the butter and sugar; cream together until light and fluffy, about 2 minutes. Add the zest and then crack in one egg at a time, adding the next egg only when the one before it has combined. Almost lastly, add in the vanilla extract. Turn the mixer down to low speed and add the yogurt and flour mixture in a few batches, alternating between the two. Lastly, add the pistachio paste and mix until properly combined.

Divide the cake batter amongst pans, smoothing out the top with a spatula (the batter will be a little thick so it'll need some help smoothing out). Transfer to the oven and bake for 30 to 35 minutes, or until a a skewer inserted into the center comes out clean. Cool the cakes in their pan for 10 minutes before removing them to cool completely on a wire rack.

To assemble: place the first layer of cake on a cake board or a cake stand. Add about 1/4 cup of frosting the top of the cake layer and smooth it out, pushing it out to the sides. Add the second layer on top and then add a second 1/4 cup to the top of that. Smooth out the top and add a nice thin layer all the way around the sides of the cake. Transfer to the freezer to chill for about 5 to 7 minutes. This is the crumb coat. Add a second even layer on the outside. Transfer to the cake to a baking sheet and decorate however you would like! Slice and serve!