Pflaumenkuchen

Every year there seem to be "new" discoveries to make at the farmers market. Some fruit or vegetable that I just never really noticed before seems to jump out at me and I start seeing it everywhere, and see recipes all over the internet that I probably would have just skipped over before. This year I "discovered" Italian Prune Plums. They are a small, egg shaped, dark purple/almost black plum that is nice enough raw, really shines when baked. Hence this recipe. I bought a small basket a few weeks ago and ate them raw in yogurt with granola. Nice, but certainly not something to write home about. But then I saw the recipe for this yeasted breakfast cake. The description of the plums baking up into a "sweet-tart, floral, rich, and grapey" when cooked left my mouth watering. I was hooked. 

IMG_1312.jpg

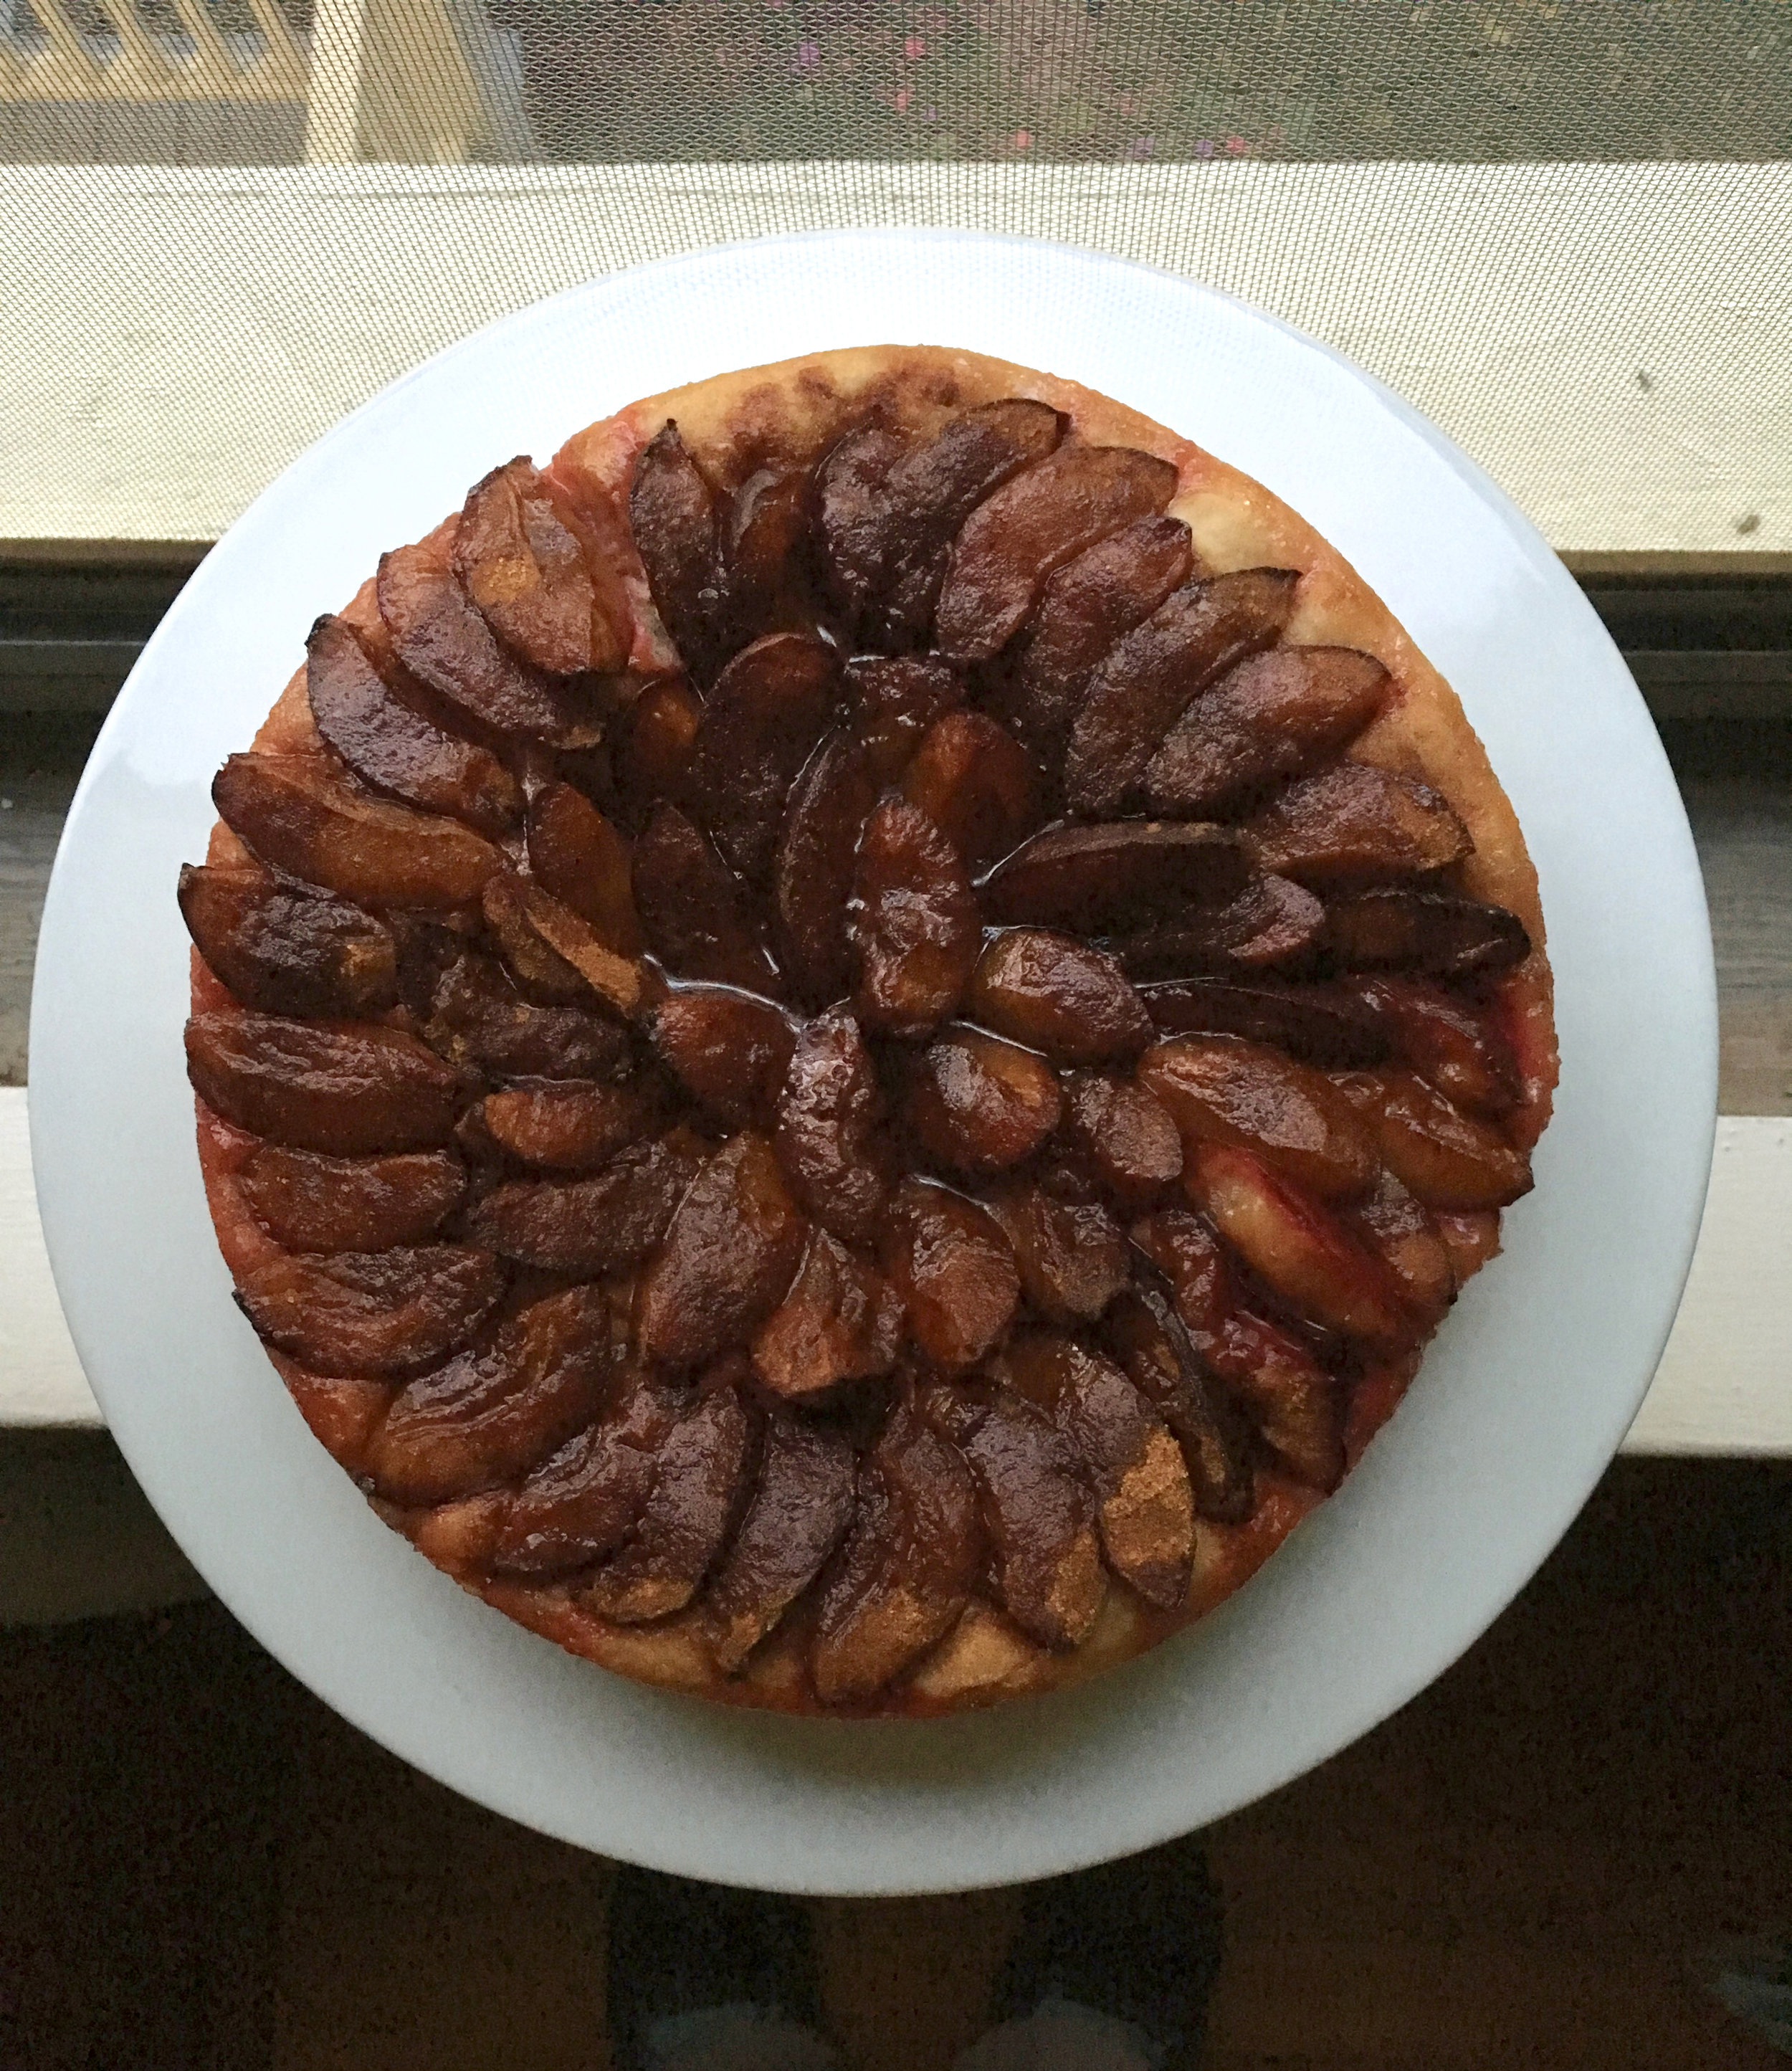
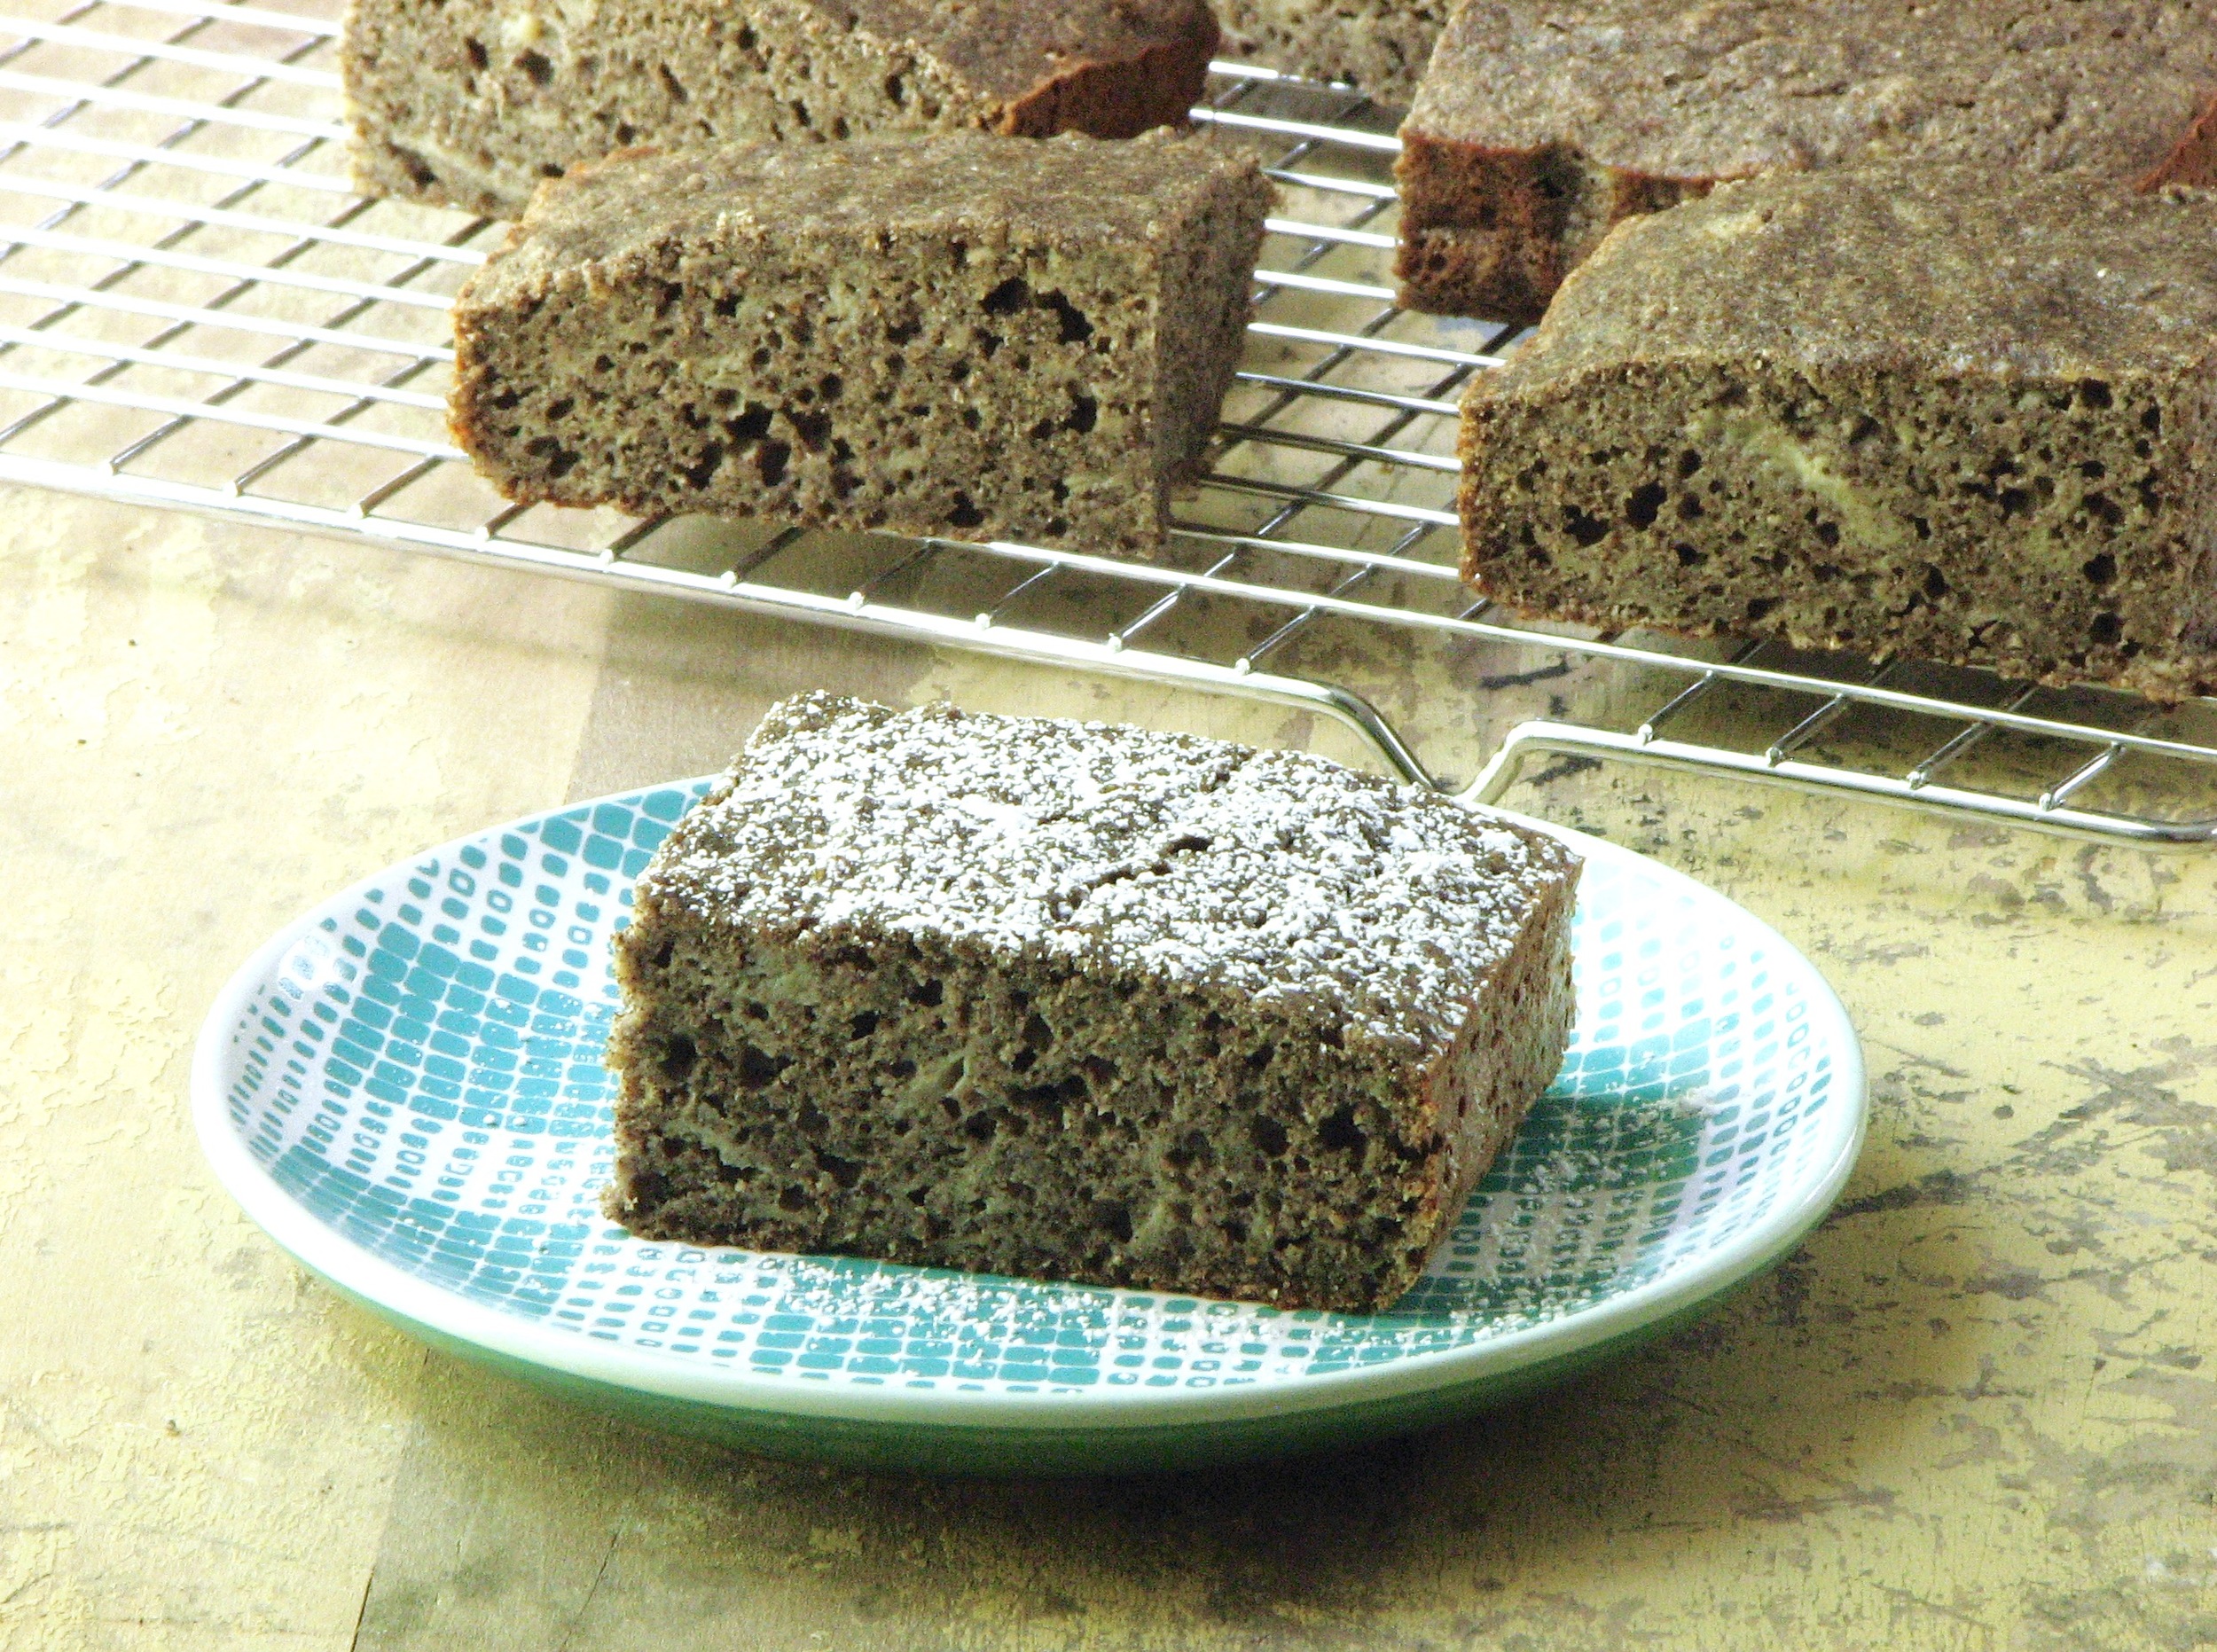
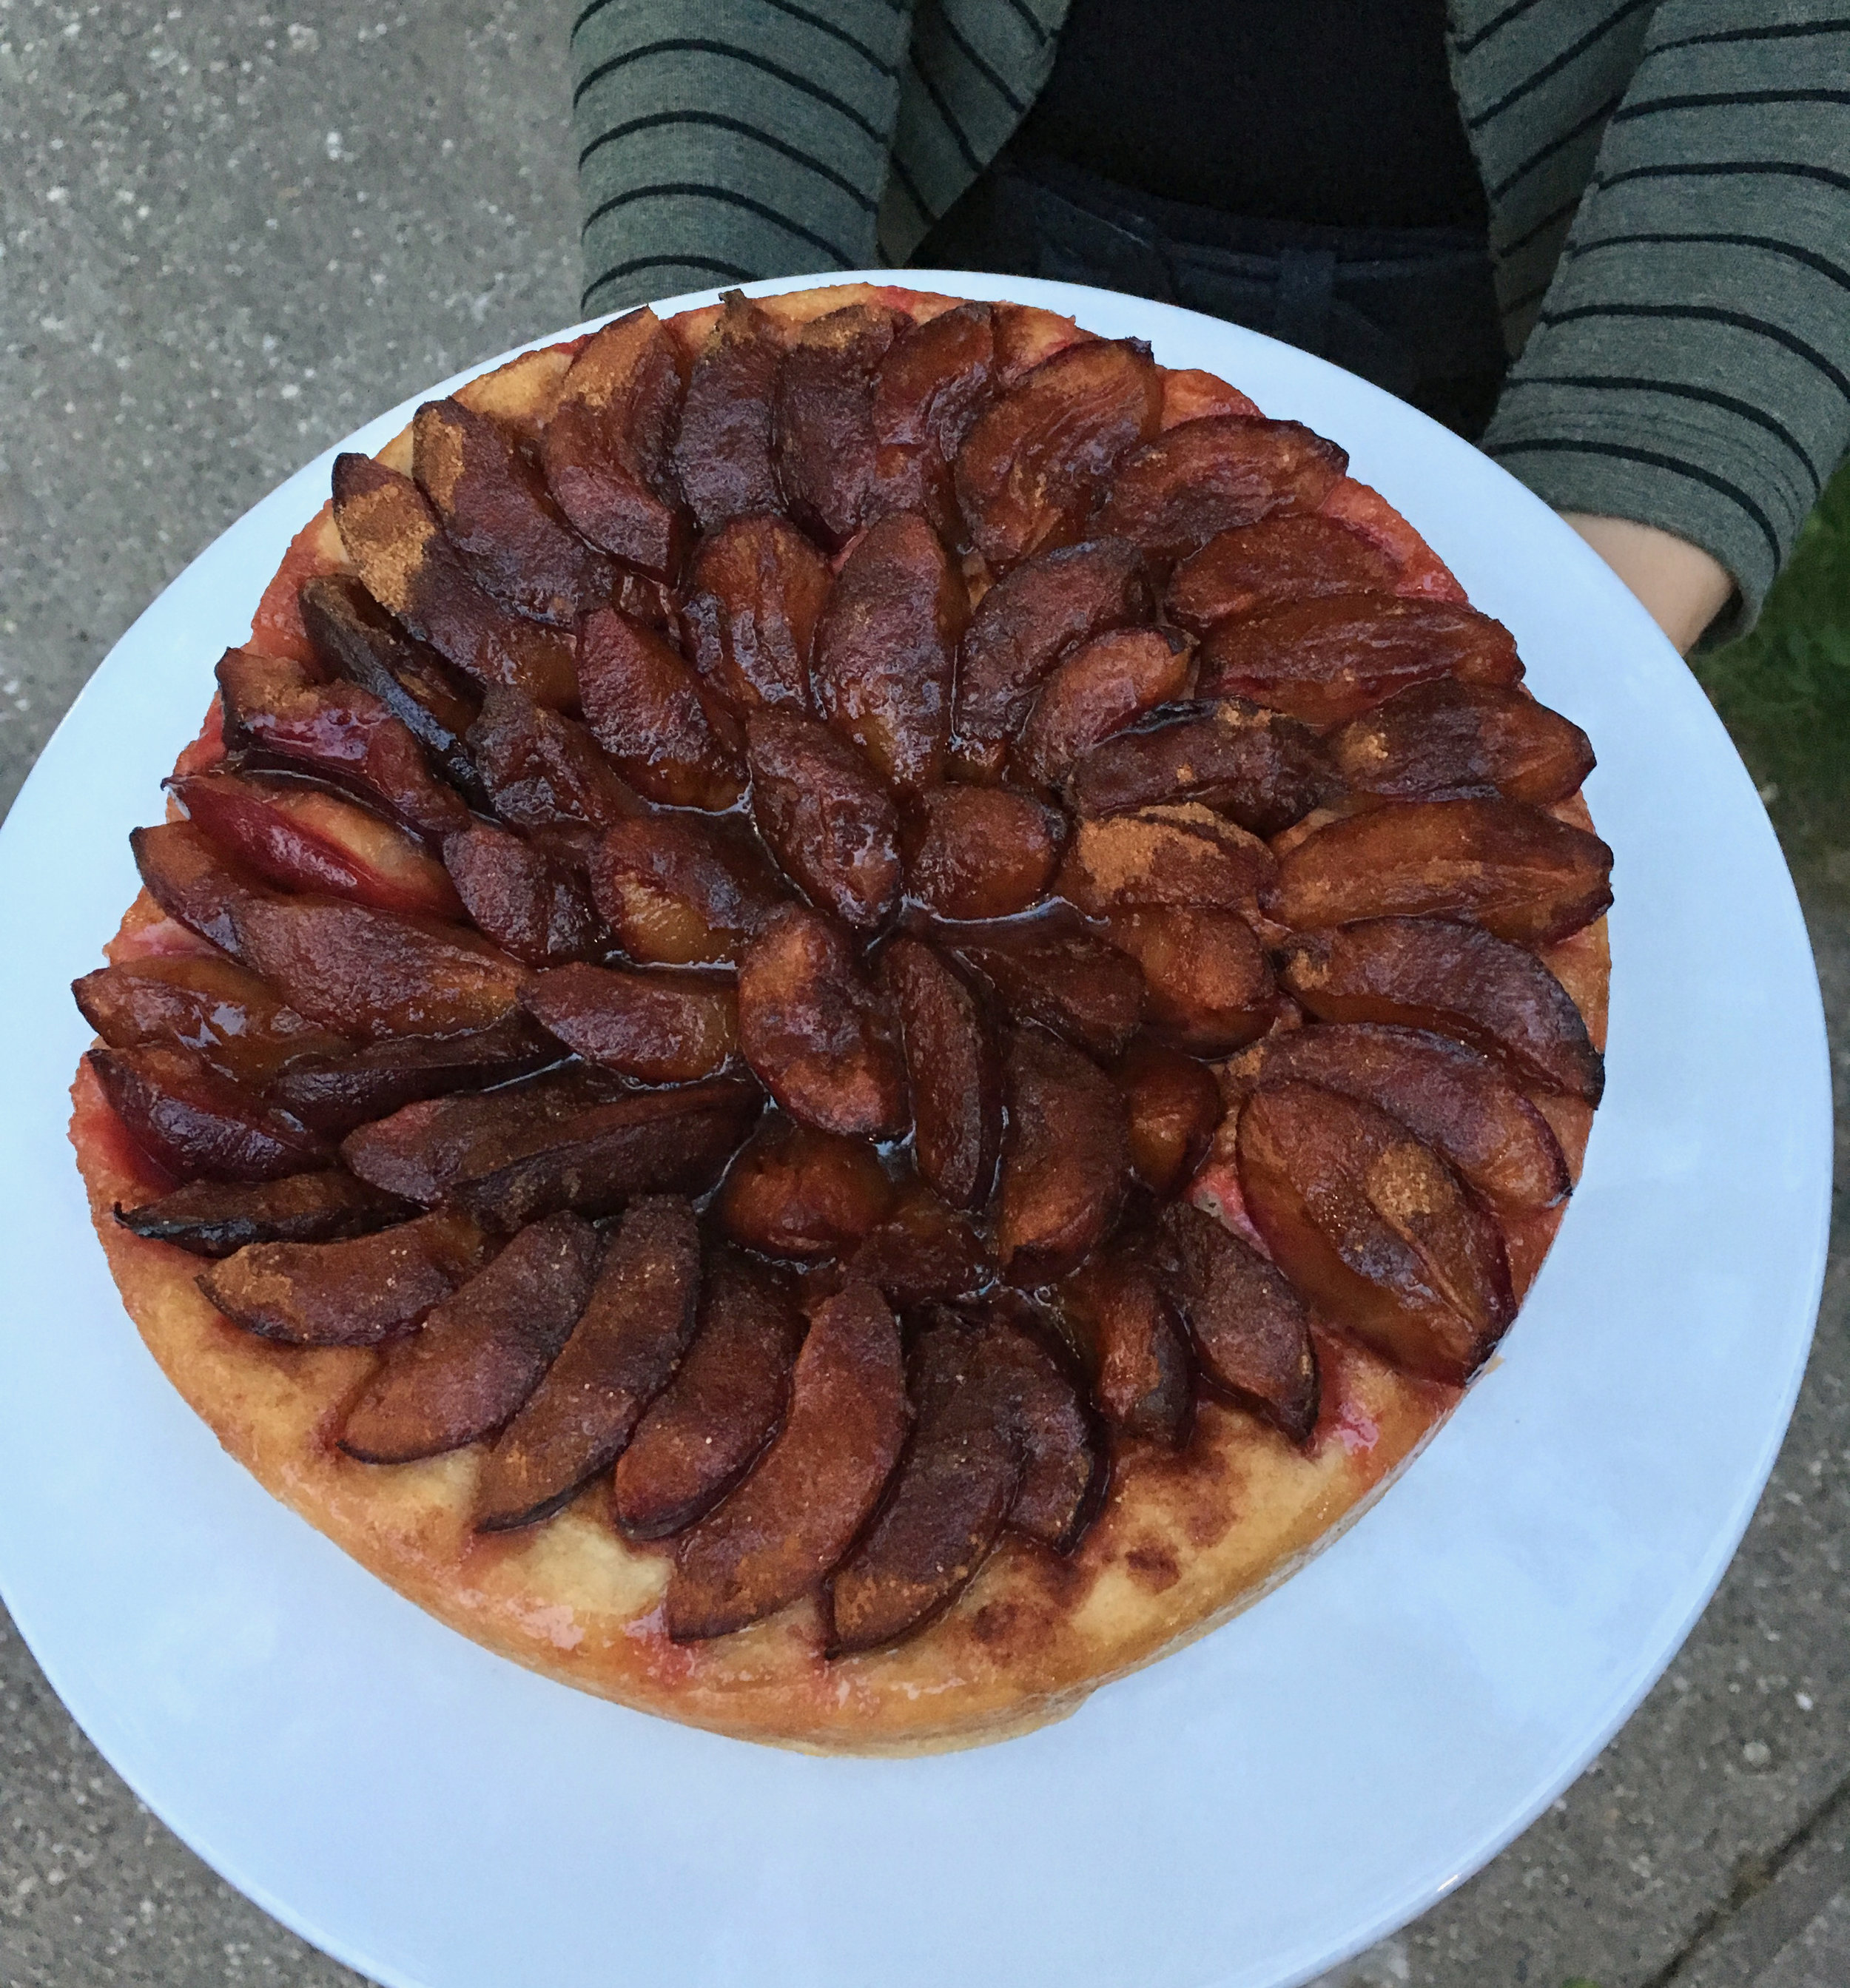
This cake was a simple yeasted dough that was mildly sweet with just a little richness from butter and an egg. The perfect compliment to the juicey and tart plums that really did bake up into a deliciously jammy topping. Covered in a good handful of cinnamon sugar it really was the perfect late summer breakfast treat. Paired with a steaming cup of coffee you will not go wrong. 

 
IMG_1307.jpg
IMG_1320.jpg
IMG_1327.jpg
IMG_1315.jpg
IMG_1331.jpg
 

Pflaumenkuchen (Yeasted Plum Cake) 
Adapted from Sweet Amandine, originally from My Berlin Kitchen, by Luisa Weiss
Ingredients
For the dough:

  • 1 1/2 cups plus 2 tablespoons (195 grams) all-purpose flour
  • 2 tablespoons (25 grams) sugar
  • 1 1/2 teaspoons instant yeast
  • Grated zest of half a lemon (optional, I didn't have one but I know it would be great)
  • 1 teaspoon vanilla extract
  • 1/4 teaspoon salt
  • 6-8 tablespoons (3-4 ounces) whole milk
  • 3 tablespoons (1 1/2 ounces) unsalted butter
  • 1 egg 

For the fruit and topping:

  • 1¼ pounds Italian prune plums
  • 3 tablespoons sugar
  • 2 teaspoons cinnamon
  • 2 tablespoons unsalted butter, melted and cooled

Directions
Butter the bottom and sides of a 9-inch springform pan or cake pan.   

Make the dough:  
Put the milk and the 3 tablespoons butter into a small saucepan and heat over the lowest possible flame, swirling occasionally, until the butter has just melted.  Add the vanilla extract. Set aside to cool until lukewarm.  Meanwhile, blend the dry ingredients - the flour, 2 tablespoons sugar, yeast, lemon zest, and salt - in the bowl of a stand mixer fitted with the dough hook. 

In a medium bowl, whisk together the egg with the lukewarm milk and butter.  Pour the mixture into the dry ingredients, and stir with a wooden spoon until you have a loose dough.  Knead on medium speed for about 4 minutes, or until a smooth dough forms.  If your dough is sticky, add a tablespoon or two of flour, only as much as you need to keep it manageable.  Form the dough into a ball, place it in the buttered pan, cover with a towel, and let it rise until it's doubled in bulk, anywhere from one to two and a half hours, depending on the temperature of your kitchen.

Prepare the fruit and topping:
While the dough rises, heat the oven to 350 degrees, and pit and quarter the prune plums.  Stir together the remaining 3 tablespoons of sugar and the cinnamon in a small bowl and set aside.  Melt the remaining 2 tablespoons of butter and leave to cool.         

When the dough is ready, deflate it with your fingertips.  Push it down evenly along the bottom of the pan and about 1-inch up the sides.  Gently press the quartered plums into the dough at a 45-degree angle, making concentric circles.  (Start at the edge and work your way toward the middle.)  If you have extra plums on your cutting board once you've arranged your circles, squeeze them in somewhere.  The more plums, the better.  Sprinkle with the cinnamon-sugar mixture, spoon the melted butter over top, and set aside, uncovered, for 20 minutes.

Bake for 40-45 minutes (the original recipe called for 30-40 minutes, but mine was definitely not done at 30 minutes, and was questionable at 40; I'd start checking at 30 just in case your oven runs a little hotter than mine, but it may take 45 + minutes so use your best judgement), until the crust is brown and the plums are bubbling.  Cool until the fruit is no longer hot.  

Buckwheat Applesauce Breakfast Cake

Cake for breakfast? Always a good idea in my book. While this recipe is not a cake in the traditional sense, light, airy and super rich, it kind of has an indulgent feel when topped with a yummy yogurt almond frosting. It's not a very sweet cake - dense and hearty in texture, yet still super moist thanks to the applesauce. The buckwheat flour really adds a unique dimension in both flavor and texture. There is a lovely bitterness to this cake from this flour which I love, but might take a little getting used to. And because buckwheat is not "wheat", it behaves differently in baking. It results in a cake that is almost a little sandy in texture, and more dense than a traditional baked good. 

I adapted the recipe (because I just can't help myself!). The original used almond flour in addition to the buckwheat, and coconut oil. I replace these with whole wheat flour and butter instead. This likely altered the texture somewhat but in the end I loved the results, so it doesn't really matter! I also used some liquid whey (leftover from homemade yogurt) instead of almond milk, but I'm sure buttermilk would also work Finally, I adjusted the spices somewhat based on my preferences, and the time of year and replaced the molasses with maple syrup along the same vein. Overall, this dense, somewhat bitter but very interesting "cake", topped with a healthy yogurt and almond butter frosting ticks all the right buttons for me. The most important thing being that it's delicious. In the end that's all that really matters!

Buckwheat Applesauce Breakfast Cake
Adapted from Edible Perspective
Ingredients

  • 1 1/4 c buckwheat flour (150 grams)
  • 1/2 cup (60 grams) whole wheat flour
  • 2 tablespoons (25 grams) brown sugar
  • 1/2 teaspoon cinnamon
  • 1/4 teaspoon cardamom
  • 1 teaspoon baking powder
  • 1/2 teaspoon salt
  • 2 eggs
  • 1 cup buttermilk or liquid whey
  • 2/3 cup (170 grams) unsweetened applesauce, I used homemade (alternatively, can use several cups of grated apple, somewhere around 250 grams, the recipe is very forgiving)
  • 2 teaspoons vanilla
  • 3 tablespoons (42 grams) butter, melted
  • 3 tablespoons (60 grams) maple syrup (or honey)

Directions
Preheat your oven to 350* F and line a 9x9 pan with parchment, or grease thoroughly.  Stir the buckwheat flour, whole wheat flour, sugar, cinnamon, cardamom, baking powder, and salt in a large bowl until well mixed.  In another bowl whisk the eggs together.  Then whisk in the milk, applesauce, vanilla, butter and maple syrup until fully combined.  Pour the wet ingredients into the dry ingredients and stir until just combined.

Pour the batter into your pan and spread evenly.  Bake for 38-40 minutes, testing with a toothpick for doneness.  You want the toothpick to be slightly sticky, not gooey or dry.  Allow to cool for 10-15 minutes before slicing. Serve with a dusting of powdered sugar, or with almond butter frosting (recipe below). 

Almond Butter Frosting
From Delectably Mine
Ingredients

  • 1 tablespoon almond butter
  • 2 tablespoons Greek yogurt
  • 1/2 teaspoon maple syrup (optional)
  • couple shakes of cinnamon
  • Pinch of salt (optional)

Directions
Mix together the almond butter and Greek yogurt until well combined and smooth. Add in the maple syrup, cinnamon and salt and stir to combine. Taste and adjust flavorings if desired, adding a little more almond butter if it is too tangy, a little more yogurt if it is too thick, or a little extra maple syrup if you want it a little sweeter. Spoon frosting onto each slice of cake, or spread in an even layer over the top of each piece. 

Zucchini Cardamom Bread

Every year when I see the mounds of zucchini at the farmers market I have good intentions about using it in plenty of baked goods over the weeks. I've found in the past however, I end up just roasting it all up and eating it before it makes its way into anything sweet. This year I told myself that I had to do some baking. And then when I was at the zucchini stall I picked up how much zucchini I thought I would want for the week, and then I bought twice as much! No going back, no choice but to bake!

One of the first things I set out to make was a nice zucchini bread. When I saw a recipe for cardamom zucchini bread (with chocolate!) it sounded like a delightful twist on a traditional bread so I went for it. The cardamom adds a lovely floral note to the bread. The 1 teaspoon called for in this recipe is definitely a hefty amount of cardamom, so if you're not a huge cardamom fan, or you're not sure if you like cardamom, you can always add half the amount to start and see how it goes. But I recommend giving it a try. The cardamom mixed with the dark chocolate chunks is a wonderful combination!

This recipe has a good 1.5-2 cups zucchini (doesn't have to be exact), and is sweetened with a touch of honey. I'm always looking to cut back on the amount of sugar in my diet, so I halved the amount of honey in this recipe and thought it turned out just fine. I didn't find it compromised the quality of the finished product, but if you're not sure if the 1/4 cup of honey will be enough, go ahead and use 1/2 cup honey.

I also swapped out 1/2 cup of the flour for 1/2 cup oat flour because I love oats in my bread, and love how healthy they are. If you don't have any oat flour you can use all wheat flour. Finally, I replaced some of the oil in the original recipe with Greek yogurt. I always have Greek yogurt on hand, and I love baking with it. You can use sour cream instead, or you can just use the full 1/2 cup of oil instead and skip the yogurt. I made all these little changes for myself based on what I like, but you can certainly make it your own based on what you like. It may change the final product slightly, but in the end I'm sure whatever you come up with will be perfectly edible! 


Zucchini Cardamom Bread
Adapted from Dishing up the Dirt
Ingredients

  • 1/4 cup (50 grams) olive oil
  • 1/4 cup plain Greek yogurt
  • 1/4 cup (85 grams) honey
  • 2 eggs, lightly beaten
  • 1 teaspoon pure vanilla extract
  • 1 1/2 cups coarsely grated zucchini (about 1 medium-sized zucchini, or 1/2 of a large zucchini)
  • 1/2 cup (60 grams) all purpose flour
  • 1/2 cup (60 grams) whole wheat flour
  • 1/2 cup (60 grams) oat flour
  • 1/2 teaspoon baking powder
  • 1/2 teaspoon baking soda
  • 1 teaspoon ground cardamom
  • 1/2 teaspoon fine sea salt
  • 1/4-1/2 cup dark chocolate (I used 40 grams)
  • A few hefty pinches of turbinado sugar for topping

Directions
Place an oven rack in the middle position of your oven and pre-heat the oven to 350 degrees.
In a large bowl, whisk together the oil, yogurt, honey eggs and vanilla, Stir in the zucchini. Mix until well combined.

In a separate bowl, whisk together the flours, baking powder, baking soda, cardamom, and salt. Stir the dry ingredients into the wet ingredients (being careful to not over-mix) adding in the chocolate partway through the mixing. 

Pour the batter into a lightly greased 8 1/2-by-4 1/2-inch loaf pan. Sprinkle the top of the loaf with the turbinado sugar. Bake until a toothpick inserted in the center of the bread comes out clean, 40-45 minutes. Cool the zucchini bread in the pan for about 15 minutes, then transfer it to a wire rack to cool completely.

Yields: 1 loaf

Rosemary Olive Oil Crackers

I really needed to use some sourdough this weekend, but I've been enjoying some absolutely delicious naturally fermented local bread (Field and Fire Bakery anyone? If you're in GR you must check it out) and didn't have any need to make bread. Crackers it was! I have a beautiful rosemary bush outside that is doing great and decided a little rosemary, a little garlic, and a little olive oil baked into a simple cracker was a quick, easy and delicious was to use up a little starter to get me through until I'm ready to bake bread again.  

I halved the recipe for these crackers and it was perfect. Just the right amount of dough for one baking sheet. I actually used my pasta roller to roll out the dough to an even thickness. I went to setting 3 on my Atlas pasta roller and thought it was the perfect thickness. But a rolling pin and a little arm strength work just as well. Just keep an eye on the crackers while they are baking to ensure you don't burn some of the thinner crackers. 


Rosemary Olive Oil Crackers
Adapted from King Arthur Flour
Ingredients

  • 1/2 cup (60 grams) whole wheat flour
  • 1/4-1/2 teaspoon salt
  • 1/2 cup (125 grams) unfed sourdough starter
  • 2 tablespoons (25 grams) olive oil
  • 1 tablespoons fresh rosemary, chopped finely
  • 1/2-1 whole garlic clove, finely minced
  • oil for brushing
  • coarse salt for sprinkling on top

Directions
Mix together the flour, salt, sourdough starter, olive oil rosemary and garlic to make a smooth(not sticky), cohesive dough. If dough is too wet add a few extra tablespoons of flour. Divide the dough in half, and shape each half into a small rectangular slab. Cover with plastic wrap, and refrigerate for 30 minutes, or up to a couple of hours, until the dough is firm.

Preheat the oven to 400°F. Very lightly flour a piece of parchment, your rolling pin, and the top of the dough. Working with one piece at a time, roll the dough to about 1/16" thick. 

Transfer the dough and parchment together onto a baking sheet. Lightly brush with oil and then sprinkle the salt over the top of the crackers.

Cut the dough into 1 1/4" squares; a rolling pizza wheel works well here. Prick each square with the tines of a fork. Bake the crackers for about 20 minutes, until the squares are starting to brown around the edges. When fully browned, remove the crackers from the oven, and transfer them to a cooling rack. Store airtight at room temperature for up to a week; freeze for longer storage.

Vacation at Lake Macatawa

Intern year is over! In some ways it went super fast, and in other aspects it was incredible slow. Regardless, I can hardly believe it's over. I'm ready to start year 2. It's crazy to think that by the end of this next year I'll be 2/3 done with residency, with only 1 year to go. To celebrate, Lara and I were able to get a few days off and we decided to spend these rare days off at the lake. My aunt and uncle generously allowed us to stay at their lake house in Holland, MI. Although the weather wasn't the most ideal for a lakeside vacation, some a little rain, a lot of clouds, it was still about as relaxing as possible, the perfect way to end out the year. Enjoy the pics!


Our first day included a trip to the local farmer's market after which our kitchen was overflowing with produce. Subsequently we ate very, very well! 


Lavender Honey Buckwheat Cookies

Once again it's one of my favorite seasons; lavender season! I love lavender so much, the sight of the elegant little purple flowers, the fragrance that heralds early summer, and of course, the delicate floral notes that add a little extra something special to baking when lavender buds are part of the mix. Of course, you don't want to go overboard and add too much lavender which can make you feel like you're eating a mouthful of potpourri, but in just the right amount in the right thing, lavender can really make your baking a little extra special; especially when using your own home-grown or home-foraged lavender. Last year I made some fantastic lavender cupcakes. This year one of my projects was these yummy little buckwheat cookies. A perfect couple of bites of sweetness balanced with the bitterness of the buckwheat and the floral lavender, a perfect combination. 

If going gluten or wheat free is something you're into, these cookies are a great option. In case you're wondering, buckwheat is actually not wheat, they're not even related. Buckwheat is the seed of a flowering plant that is related to rhubarb and sorrel. It has an unique flavor, somewhat bitter, but in a good way. I personally have no problem with wheat in any shape or form, but I still love these cookies. They use oat and buckwheat flours, softened butter, a little sugar and an egg. And of course, lavender. Because, tis the season!!


Lavender Honey Buckwheat Cookies
Adapted from Dishing Up The Dirt
Ingredients

  • 1/2 cup (60 grams) oat flour
  • 1/3 cup (2 1/2 ounces) butter, softened
  • 2 1/2 tablespoons sugar
  • 1 teaspoon dried lavender leaves
  • 2 Tablespoons (42 grams) honey
  • 1 egg
  • 3/4 cup (90 grams) buckwheat flour
  • pinch of kosher salt

Directions
Preheat the oven to 325 degrees. Line a baking sheet with parchment paper, set aside. 

Beat the butter and sugar together for a couple of minutes, until creamy and light. Add the lavender and honey and beat until well combined. Add the egg and mix well.

Add the oats, flour, and salt to the butter mixture. Mix until it forms a cohesive mixture. Divide the dough into 10-12 equal size balls. Place on baking sheet and press down gently with your fingers, or the bottom of a glass. (The cookies will not spread a lot when you bake them, so flattened them to the thickness you would like the finished product to be.)

Bake the cookies for 15-20 minutes. Rotate the pan halfway through baking. Transfer to a wire rack to cool.

Yields 12-14 small cookies, depending on how big you make them

Chocolate Coconut Crunch

ALERT: Highly Addictive Recipe!!! Be forewarned, you may end up eating the whole batch at once! If you're looking for something new and delicious to snack on, this is the recipe for you. Puffed kamut or rice (or other puffed grains) combined with coconut, cocoa and chocolate along with a little butter (mmmm!!) and maple syrup for sweetness and then baked turn out this addictive and delicious snack that you may not be able to stop eating! Don't say I didn't warn you!

This recipe has just the right amount of coconut to add richness and a hint of coconut flavoring without overwhelming the whole batch. Next time I make this I plan sprinkle some flake salt over the whole thing right before it goes in the oven for that wonderful salty/sweet combo. I used butter instead of coconut oil which is what the original recipe called for, and cut back just a little on the amount. I also decreased the maple syrup from 1/2 to 1/3 cup maple syrup and thought it was still plenty sweet. With the chocolate in there too I don't feel the need for as much maple syrup, but to eat their own! 1/4 cup? 1/2 cup? It really doesn't matter. What matters is how do you like it? I guess you'll have to try it and find out!


Chocolate Coconut Crunch
Adapted from Alexandra Cooks
Ingredients

  • 1 1/2 cup (120 grams) oats
  • 2 cups (30 grams) puffed kamut, alternatively you can use brown rice cereal or Rice Krispies
  • 1/2 cup (35 grams) shredded coconut
  • 3 tablespoons (15 grams) cocoa powder
  • 1/2 teaspoon salt
  • 3 tablespoons (42 grams) butter or coconut oil
  • 1 1/2 ounces chocolate
  • 1/3 cup (110 grams) maple syrup

Direction
Preheat oven to 275ºF. In a large bowl, combine oats, puffed kamut or rice cereal, coconut, cocoa powder, and salt. Toss to combine.

Place the butter or coconut oil and dark chocolate together in a small bowl and microwave until completely melted. Stir to blend; then add to dry ingredients along with the maple syrup. Stir until well combined.

Turn mixture out onto a parchment-lined baking sheet. Spread into an even layer. Cook 35-40 minutes, rotating baking sheet halfway through. To maintain large chunks, do not stir the mixture. Remove from oven and let cool. Break into shards or into small pieces.

Butcher Dinner on the farm: A Southern Style Barbecue Picnic

Last weekend I was lucky enough to be part of an absolutely amazing dining experience. My favorite local butcher held a farm dinner on one of the farms that they source their meet from. Lara and I took a little drive out to Coopersville and arrived at Hehlden Farm last Sunday night, where we experienced real farm to table eating. The whole meal was styled after a southern BBQ picnic, and it all centered around an entire smoked pig that was raised right there on the farm. Words cannot describe how delicious this meal was. We ate right there in one of the barns, enjoyed appetizers on hay bales, and got to walk out into the fields and meet the chickens. The food was amazing, the atmosphere could not have been better, and the entire experience was one to remember. Anyone who lives in Grand Rapids, or is driving through, should check out Louise Earl Butcher on Wealthy St to get a little taste of the amazing work they do. Until you do that, enjoy some shots of the wonderful night!

IMG_0723.jpg

Apps! House made charcuterie, local bread, and a lovely selection of wine and beer. 


<-- Checking out the chicken coops


The Menu:

Pig Roast, mopped with a Carolina BBQ sauce, mac & cheese, collards with tasso ham, red beans & rice, fried gizzards, and cornbread with cultured butter and honey. 


So excited to eat!! Bring on the pig!!

A big thank you to Matt and Cindy and the rest of the gang from Louise Earl Butcher for putting on such a wonderful event, and Matt and Amy from Hehlden farms for hosting! It really was a special night!