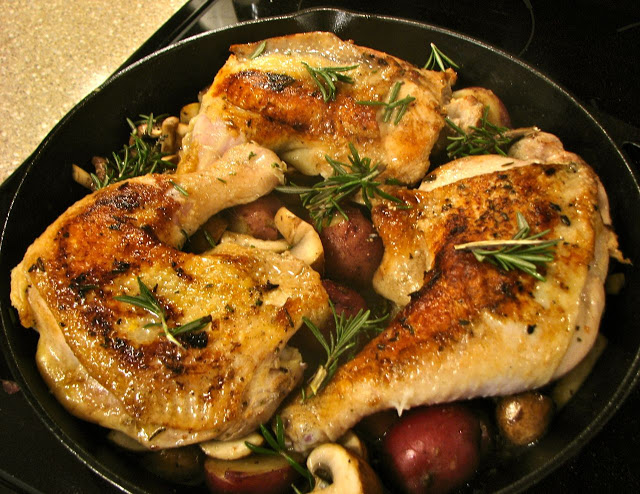
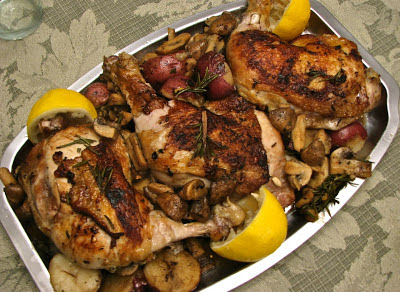
Skillet Rosemary Chicken
If you are looking for a simple and elegant meal that is healthy and delicious, I have the recipe for you. This skillet dish is quick and easy but still super flavorful and impressive looking. It also includes some of my favorite things; rosemary, red skin potatoes, and mushrooms. Trust me, it's a winning combination! I think rosemary is my favorite herb, it is just so yummy! I love it with potatoes, and I love it with chicken, so this dish combines all of that into one pan for a complete meal that everyone will love.
I've made this dish several times now and have found that I really love the mushrooms so I always add extra. If you like mushrooms too, I encourage you to add a few more than the 10 ounces called for. A few extra potatoes never hurt either, if you have room in your pan that is. One word of caution, the original recipe called for the juice of two lemons which I found a bit overpowering. I love lemon, but the juice of two lemons was just too much. I suggest using just one lemon (or not juicing the two lemons too vigorously), but you can adjust to your taste however works best. I also found that adding a splash of white wine was an excellent choice, I think adding wine is always delicious!
Skillet Rosemary Chicken
Adapted from:
Ingredients
- 3/4 pound -1 pound small red-skinned potatoes, halved, or quartered if large
- Kosher salt
- 2 sprigs fresh rosemary, plus 1 1/2 tablespoons leaves
- 3 cloves garlic, smashed
- Pinch of red pepper flakes
- Juice of 1 lemons (squeezed halves reserved)
- 2 tablespoons extra-virgin olive oil
- 4-6 skin-on, bone-in chicken thighs or 3 chicken leg quarters
- 10 ounces cremini mushrooms, halved (or more if you like mushrooms)
- splash of white wine
Directions
Preheat the oven to 450. Cover the potatoes with cold water in a saucepan and salt the water. Bring to a boil over medium-high heat and cook until tender, about 8 minutes; drain and set aside.
Pile the rosemary leaves, garlic, 2 teaspoons salt and the red pepper flakes on a cutting board, then mince and mash into a paste using a large knife. Transfer the paste to a bowl. Stir in the juice of 1 lemon and the olive oil. Add the chicken and turn to coat.
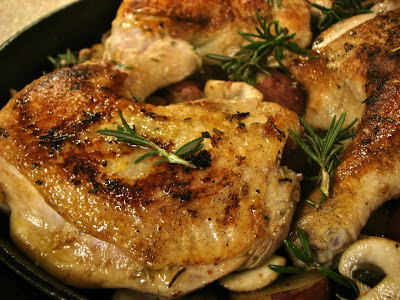
Heat a large cast-iron skillet over medium-high heat. Add the chicken, skin-side down, cover and cook until the skin browns, about 5 minutes. Remove chicken from pan; add the mushrooms and potatoes to the skillet followed by a splash of white wine. Place chicken over mushrooms and potatoes and drizzle with any marinade remaining in the bowl.
Add the rosemary sprigs and the squeezed lemon halves to the skillet; transfer to the oven and roast, uncovered, until the chicken is cooked through and the skin is crisp, 20 to 25 minutes.