Christmas Cookies 2012

Tis the season for decorating Christmas cookies! I'll admit, I had very little to do with these cookies. My sister Lara has become the cookie decorator. I am just around for moral support, suggestions, and a little help here and there, otherwise it is all her. Every year she gets a little better, and a little fancier with the cookies. This year she got some ideas out of a magazine I got in the mail, and then adapted them to work for her. I think she did a fantastic job, they turned out so beautifully! Our kitchen was taken over by cookie decorating for a few days, but that's okay, I think it was worth it.

Lara used the same recipes that we have both been using for the last couple of years, both for the cookies and for the royal icing. We love them both, and haven't had any problems with either. You can find the recipes

here

.

The whole platter full

 Poinsettias!

Good job Lara, they look great! Check out this post for the recipes!

Twisted Sugar Cookies

I finished my first semester of med school on Thursday. It was a great semester, but I am so glad that I now have three weeks off to do whatever I want! Of course, Christmas baking is at the top of that list. I've already spent many hours in the kitchen, and plan to log plenty more there before the break is over. Because I have so many things I want to bake, it is difficult to decide how to prioritize and what to bake first. This year I started with these twisted sugar cookies. I had seen the recipe last year and printed it off with the hopes of making them this Christmas. I thought that they were so beautiful and wanted to try them for myself. They were a lot of fun to make, and quite tasty to eat too. Although they didn't turn out exactly like the pictures I was looking at (she's had a lot more practice than me!), they still turned out beautifully, making me happy at the beginning of this Christmas baking season!

The dough for this recipe has yeast and sour cream, both of which are a little different. You just throw it all together, cutting cold butter in, and then chill overnight. The next day you laminate the dough while covering it in flavored sugar, and then cut into strips and twist. As the cookies bake they kind of unfold a little revealing the layers created while rolling and folding. I just love all the different layers of dough you can see. The sugar crystallizes on the bottom of the cookies, turning into a kind of carmel, yummy!

For the first half of the dough I did what the recipe said and used vanilla sugar to roll them out in, but for the second half I decided to mix it up a little and added a little almond extract as well. They are both good but I absolutely love almond flavored things, especially at Christmas, and so the almond flavored cookies were my favorite. What a fun cookie to start out the Christmas baking season with!

Lots of rolling out

Cut them up

Twisted and ready to bake

Delicious sugary bottoms!

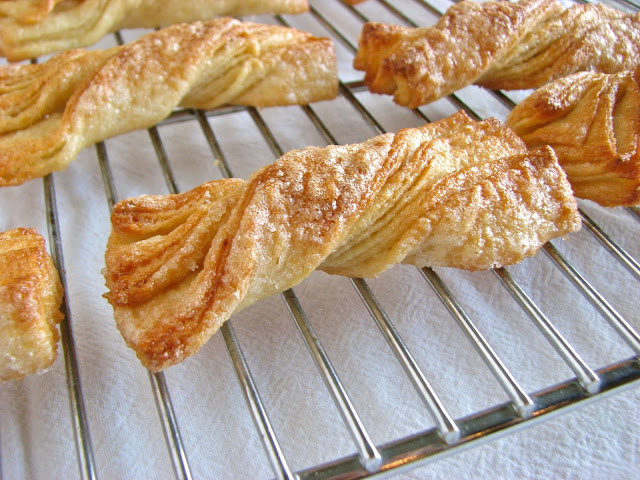
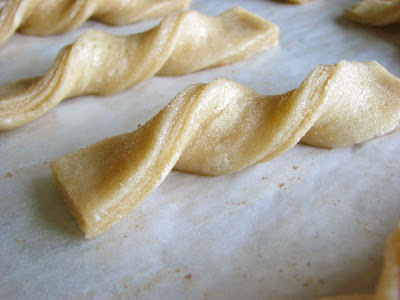
So pretty and twisty

Twisted Sugar Cookies
From Cook and Be Merry
Ingredients

  • 2 ¼ teaspoons Active Dry Yeast (1 pkg) (NOT Rapid Rise, Pizza Crust or Bread Machine)
  • ¼ cup warm water (100 – 110 degrees F)
  • ½ teaspoon sugar
  • 3 ½ cups all-purpose flour
  • 1 ¼ teaspoon kosher salt
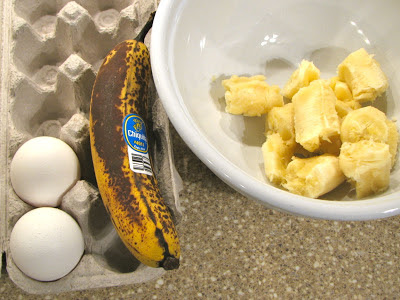
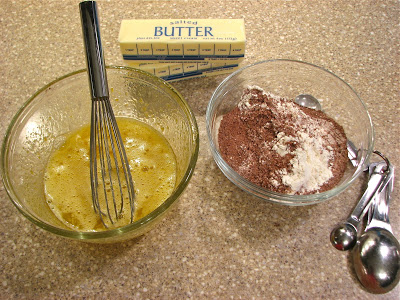
  • 1 cup salted butter (2 sticks), chilled, cut into tablespoon-size pieces
  • 2 large eggs
  • ½ cup sour cream
  • 1 teaspoon vanilla

For sugary topping

  • 1 ½ cups sugar
  • 2 teaspoons vanilla extract
  • 1 teaspoon almond extract (optional)

Directions
Preheat the oven to 375 degrees F. Line 1 cookie sheet with foil. Double pan to bake.

In a warm medium bowl, combine water, yeast and sugar. Proof until frothy, about 10 minutes.

In a separate large bowl, mix together the flour and salt. Cut butter into flour until rice-size with two knives or pastry cutter.

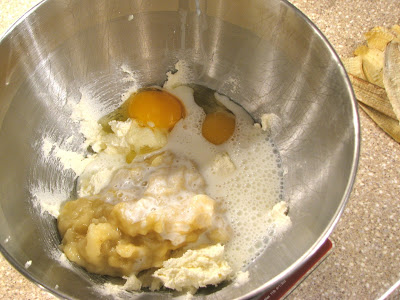
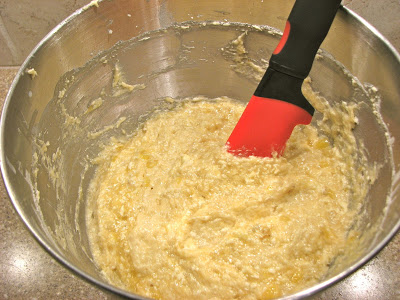
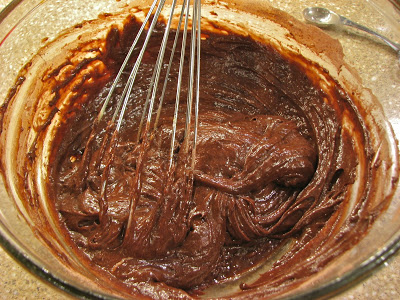
In the medium bowl, mix eggs, sour cream and vanilla into the yeast mixture. Pour the egg mixture into the large bowl with the flour. Stir thoroughly with a fork to make a dough.

Divide the dough into 2 patties, wrap each in plastic, and refrigerate a minimum of 4 hours or overnight. Place patties side by side, not stacked to assure even cooling. My patties were 18.5 oz each.

In a medium bowl, thoroughly mix together the sugar and vanilla until evenly distributed. Cover the bowl with a plate or plastic wrap so the sugar doesn’t dry out.

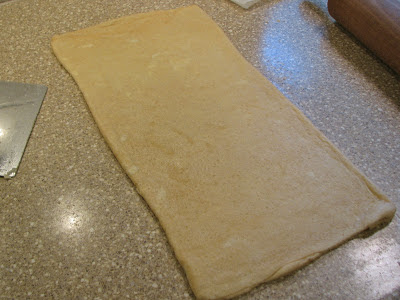
On a dry surface, place ½ of the vanilla sugar. Place one patty of dough on the vanilla sugar (leaving the other patty in the refrigerator) and roll into a 16 x 8-inch rectangle. Scoop up all the sugar from around the edges and spread evenly over top of dough.

With the long edge toward you, fold both edges toward the center, making 3 equal layers. Turn one quarter around and roll into a 16 x 8-inch rectangle. Scoop up any extra sugar and smooth onto the dough. Do not discard any of the vanilla sugar. Use it all.

Fold and roll into a 16 x 8-inch rectangle 2 more times. The dough should be about 1/4-inch thick.

Trim the edges slightly with a sharp knife to as perfect a rectangle as possible.

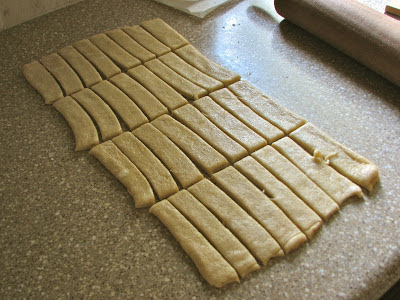
With the knife, cut the dough the long way into eight 1-inch wide strips. Cut each 16 x 1-inch strip into 4 equal pieces, each 4 inches long.

Twist half (16) of the 4 x 1-inch strips 2 times, over-twisting to stretch the dough in the middle. Place on an ungreased cookie sheet. Make sure the dough twist lies flat on the sheet. You may need to fan out the layers on the ends somewhat to make sure each is touching the sheet. Press down a little to help it adhere.

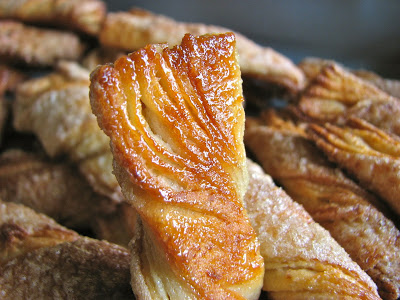
Double pan. Bake at 375 degrees F, 15 – 20 minutes or until a rich golden brown. With a spatula, remove from sheet immediately before the caramelized sugar hardens and sticks to the foil. Cool on a rack.

Discard foil on cookie sheet and replace with new foil. Repeat with remaining 16 dough strips.

Start over with the second dough ball and remaining half of sugar

Buttermilk Banana Bread

One of my biggest pet peeves is throwing leftover ingredients away because I don't know what to do with them. This happens to me every once in a while, and it really bugs me. There are a few repeat offenders that I deal with more often than others. Two come to mind right away, cream cheese and buttermilk. Both are ingredients that I absolutely love, but often recipes call for only a small amount of them, so then I'm left with the rest. Since both cream cheese and buttermilk can be used in so many different ways, throwing them away is a shame. A couple weeks ago I made a red velvet cake for a potluck and was left with a half used container of buttermilk that I vowed would not go to waste. I searched through my recipes to find some way to use it. This recipe popped out at me and sounded perfect. I love banana bread, but had never it with buttermilk, it sounded like a winner to me. This recipe turned out very nicely, it was buttery and tender with a slight tang from the buttermilk, a wonderful combination. Never again should I throw away a half used container of buttermilk!

 Creaming the butter and sugar

 Bananas, the star of the show

 Mash up the bananas

 Add the eggs, bananas and buttermilk

Mix!

Golden brown and beautiful

Perfect for breakfast with some butter or peanut butter

Buttermilk Banana Bread
From: Two Peas and Their Pod
Ingredients

  • 1/2 cup unsalted butter, softened
  • 1 cup granulated sugar
  • 2 large eggs
  • 1 cup mashed bananas (3 medium sized bananas)
  • 4 tablespoons buttermilk
  • 1/2 teaspoon vanilla extract
  • 1 3/4 cups all-purpose flour
  • 1 teaspoon baking powder
  • 1/4 teaspoon salt
  • 1/8 teaspoon baking soda

Directions
Grease and flour 1 large loaf pan. Set pans aside.

In the bowl of a stand mixer, cream butter and sugar together. Add eggs, mashed bananas, buttermilk, and vanilla until the batter is well mixed.

Add in the flour, baking powder, salt and soda. Mix until well combined. Divide batter into greased and floured pans and bake at 350 degrees for 50-55 minutes or until a toothpick comes out clean.

Let bread cool on a wire rack for 15 minutes. Loosen the bread with a knife and carefully remove from pan. Finish cooling on rack. Slice and serve once cooled.

French Silk Pie

Thanksgiving's over and the Christmas season is officially upon us. I don't know about you, but I'm pretty excited! But before all festivities begin I have to share what I made for Thanksgiving dessert this year. My whole family went to my grandparents place this year and had a wonderful time. My mom, Lara and I were in charge of bringing a couple of different things, including dessert of course! When I was trying to think of what to bring, Lara reminded me of this French Silk Pie that we have been wanting to make. Chocolate, cream, eggs, butter and sugar lying gently on a flaky, buttery pie crust. The perfect complement to our fabulous Thanksgiving dinner. It was a big hit, and a great recipe to have in your arsenal when looking for a rich, chocolaty dessert.

This pie is basically a chocolate mousse in a crust. The buttery crust is a nice complement for the smooth chocolate filling. The eggs are cooked on the stove with sugar and water so if you get worried about things like raw eggs (I don't) you have nothing to fear in this recipe. After the eggs are cooked you add in the chocolate, the butter, and finally fold in the whipped cream. Nothing too difficult, it just takes a little time. Scrape the filling into the pie crust and slide the whole thing into the fridge overnight. The next morning your dessert is ready! If you want, you can finish it off with some whipped cream, or just dig in. Either way it will be delicious!

Baked and cooled pie shell

Getting everything ready

Cook those eggs

Add in the chocolate, and then the butter

Fold in the whipped cream

Keep folding

You're done when you can no longer

see any white streaks

Transfer filling to pie crust

and let chill in the fridge for at least 3 hours

Top with a little more whipped cream

All set to eat!

Chocolaty

And delicious!

French Silk Pie 
From Treats; originally from Cook's Illustrated
Ingredients

  • 1 cup heavy cream, chilled
  • 3 large eggs
  • 3/4 cup granulated sugar
  • 2 tablespoons water
  • 8 ounces bittersweet chocolate, melted and cooled
  • 1 tablespoon vanilla extract
  • 8 tablespoons unsalted butter, cut in to 1/2" cubes and softened
  • 1 pie shell (9-inch), baked and cooled (recipe below)

Directions
With electric mixer on medium-high speed, whip cream to stiff peaks, 2 to 3 minutes. Transfer whipped cream to small bowl and refrigerate.

Combine eggs, sugar, and water in large heatproof bowl set over medium saucepan filled with ½ inch barely simmering water (don’t let bowl touch water). With electric mixer on medium speed, beat until egg mixture is thickened and registers 160 degrees, 7 to 10 minutes. Remove bowl from heat and continue to beat egg mixture until fluffy and cooled to room temperature, about 8 minutes.

Add chocolate and vanilla to cool egg mixture and beat until incorporated. Beat in butter, a few pieces at a time, until well combined. Using spatula, fold in whipped cream until no streaks of white remain. Scrape filling into pie shell and refrigerate until set, at least 3 hours and up to 24 hours. Serve with lightly sweetned whipped cream and chocolate shavings.

Foolproof Pie Crust

From

Treats

; originally from Cook's Illustrated

Ingredients

  • 1 1/4 cups (6 ounces) all-purpose flour
  • 1/2 teaspoon salt
  • 1 tablespoon sugar
  • 6 tablespoons cold unsalted butter, cut in to 6 pieces
  • 1/4 cup vegetable shortening, chilled and cut in to 2 pieces
  • 2 tablespoons cold vodka
  • 2 tablespoons cold water

Directions

Process 3/4 cups flour, salt, and sugar together in food processor until combined, about 2 one-second pulses. Add butter and shortening and process until homogenous dough just starts to collect in uneven clumps, about 10 seconds (dough will resemble cottage cheese curds with some very small pieces of butter remaining, but there should be no uncoated flour). Scrape down sides and bottom of bowl with rubber spatula and redistribute dough evenly around processor blade. Add remaining 1/2 cup flour and pulse until mixture is evenly distributed around bowl and mass of dough has been broken up, 4 to 6 quick pulses. Empty mixture into medium bowl.

Sprinkle vodka and water over mixture. With rubber spatula, use folding motion to mix, pressing down on dough until dough is slightly tacky and sticks together. Flatten dough into 4-inch disk. Wrap in plastic wrap and refrigerate at least 45 minutes or up to 2 days.

Adjust oven rack to lowest position, place rimmed baking sheet on oven rack, and heat oven to 425 degrees. Remove dough from refrigerator and roll out on generously floured (up to ¼ cup) work surface to 12-inch circle about 1/8 inch thick. Roll dough loosely around rolling pin and unroll into pie plate, leaving at least 1-inch overhang on each side. Working around circumference, ease dough into plate by gently lifting edge of dough with one hand while pressing into plate bottom with other hand. Leave overhanging dough in place; refrigerate until dough is firm, about 30 minutes.

Trim overhang to ½ inch beyond lip of pie plate. Fold overhang under itself; folded edge should be flush with edge of pie plate. Flute dough or press the tines of a fork against dough to flatten it against rim of pie plate. Refrigerate dough-lined plate until firm, about 15 minutes.

Remove pie pan from refrigerator, line crust with foil, and fill with pie weights or pennies. Bake for 15 minutes. Remove foil and weights, rotate plate, and bake for 5 to 10 minutes additional minutes until crust is golden brown and crisp.

Pumpkin Streusel Muffins

I know I've posted a lot of pumpkin things lately, but this is probably my last one, so if you are sick of pumpkin just bear with me. Personally, I don't ever get sick of it. Since muffins are always at the top of my list of things to bake, pumpkin muffins were a no brainer this fall, and these muffins didn't disappoint. A nice basic pumpkin muffin, topped with a simple streusel, they are pretty and tasty. Sometimes a simple recipe is just the thing I'm looking for. If you need a easy but delicious pumpkin muffin recipe, this fits the bill.

I actually made these muffins twice in the last couple of weeks, first for myself, and the second time to share with friends at school. For the first batch that I made, I used the streusel recipe that I found with the muffin recipe. This is the streusel that is shown in my pictures. I thought it was very pretty, and tasted quite nice, but just didn't quite cut it as a streusel topping for me. It was a little too floury. I prefer my streusel to be chunky and buttery, so for the second batch I used a different streusel recipe which worked out very nice. I've listed both options below; either one you choose will be very tasty, it's just a matter of opinion. What really matters is just that you make these muffins. They are the perfect breakfast treat for a chilly fall morning!

Pumpkin Streusel Muffins
Adapted from: Buns In My Oven
Ingredients
For the muffins:

  • 1/4 cup butter, softened
  • 1/2 cup sugar
  • 1/4 cup packed brown sugar
  • 2/3 cup canned pumpkin
  • 1/2 cup buttermilk
  • 2 eggs
  • 2 tablespoons molasses
  • 2 cups all-purpose flour
  • 1 teaspoon baking soda
  • 1/2 teaspoon baking powder
  • 1 teaspoon cinnamon
  • 1/4 teaspoon nutmeg
  • 1/4 teaspoon ginger
  • 1/8 teaspoon cloves
  • 1/4 teaspoon salt

Streusel topping option #1:

  • 1/3 cup all-purpose flour
  • 3 tablespoons brown sugar
  • 2 tablespoons cold butter

Streusel topping option #2

  • 2 ounces (4 tablespoons) unsalted butter, melted
  • 3/4 cup all-purpose flour
  • 1/4 cup granulated sugar
  • 1/4 cup packed light-brown sugar
  • 1/4 teaspoon kosher salt
  • 1/4 teaspoon ground cinnamon

Directions
For the streusel, combine the flour and brown sugar in a small bowl. Cut in butter until the mixture is crumbly. Set aside. 

For the muffins, cream together butter and sugars until creamy. Beat in pumpkin, buttermilk, eggs and molasses. 

Combine the dry ingredients in a small bowl and mix into the batter. Stir just until combined. Fill paper lined muffins cups 2/3 full with batter. Spoon streusel topping over the muffins and bake for 20 to 25 minutes at 375, or until a tester inserted in the center comes out clean. Cool in pan for 5 minutes before removing to a wire rack. Enjoy!

Beef Stroganoff

Cold weather always leaves me craving something hearty and warm for dinner. As I was perusing some recipes last week this Beef Stroganoff recipe called out my name and begged me to make it. Chunks of beef simmered with onions and mushrooms in broth and brandy, finished off with sour cream and served with egg noodles. It sounded like the perfect thing to satisfy my craving for something warm and delicious, and it was. Not only was it delicious, but this recipe is quite simple, not too many ingredients, and everything cooks in one skillet, even the noodles. I love only having to get one pan dirty!

Simple ingredients, simple recipe, outstanding results. This is a wonderful winter meal that I can definitely make again. All you need to do is cut up some meat into chunks, and brown them in a skillet. Remove the beef, add mushrooms and onions and cook until they release all of their liquid. Then you just add the broth and brandy, return the meat to the skillet and let it simmer for half and hour or so. Add in the noodles at the end and continue cooking until they are cooked through. Remove the skillet from the heat, add the sour cream, and dig in, yum!

This dish made me happy and warm as I ate it, the flavors are so nice. I ate my leftovers the next day at lunch and thought it was almost better the next day. The flavors had had a chance to sit and meld together, so if it seems like too big of a recipe for you or your family, have no fear, it reheats beautifully!

Ingredients shot

Cut the beef up

and brown it up

Then throw in the mushrooms

and onions

Add in the stock, brandy and beef

Finally it's time for the noodles

and sour cream

Mmmm...

Skillet Beef Stroganoff
Adapted from America's Test Kitchen
Ingredients

  • 1 1/2 pounds sirloin tips, pounded and cut into 1/2-inch strips
  • Salt and pepper
  • 4 tablespoons vegetable oil
  • 10 ounces white mushrooms, sliced thin
  • 1 medium onion, minced
  • 2 tablespoons flour
  • 1 teaspoon tomato paste
  • 1 1/2 cups chicken broth
  • 1 1/2 cups beef broth
  • 1/3 cup brandy
  • 6 ounces egg noodles (about 4 cups)
  • 2/3 cup sour cream
  • 2 tsp lemon juice

Directions
Pat beef dry and season with salt and pepper. Heat 1 tablespoon of oil in a 12-inch skillet until hot. Add half of the beef and cook until well browned on both sides, 6-8 minutes total. Transfer beef to a bowl and repeat with the remaining meat. 

Heat the remaining 2 tablespoons of oil in the now empty skillet. Add mushrooms and onions and 1/2 teaspoon of salt and cook until the liquid from the mushrooms has evaporated, about 8 minutes. Stir in the flour and cook for 30 seconds. Add the tomato paste, and then gradually stir in the broth and brandy, then return the beef and any accumulated juices to the skillet. Bring to a simmer, cover, and cook over low heat until the beef is nice and tender, about 30-35 minutes. 

Stir the noodles into the skillet, cover and cook for about 10-12 minutes, or until the noodles are tender, stirring occasionally. Take the skillet off the heat and add the sour cream and lemon juice. Season with salt and pepper and serve. 

Pink Cake Pops

At the end of this past summer, a friend an neighbor of mine approached Lara and I and asked us if we would be willing to make her cake pops for her wedding which was going to be in October. We said yes and were very excited to help her our. After making cupcakes for my cousin's wedding in May I felt prepared to try something new for another wedding. There was only one slight problem with all of this though, I had never made cake pops before. I wasn't too worried about it, I knew I could figure it out, but there was still some apprehension about the whole process. After doing a test run in August on cake pop making, I felt ready to go and just had to wait until October. In the end the whole process went very smoothly, and the cake pops turned out great. Congratulations Stacey!

In case you don't know, cake pops are basically cake that you destroy and then mush up with frosting, form into balls, place on a stick and dip into chocolate. It's not a complicated process, but it is time consuming and somewhat labor intense, well at least when you are making over 200 at one time it is! The nice thing about cake pops is that they keep very well for at least a week or two meaning you can make them ahead and not worry too much about them losing quality. Because they are full of frosting they are super moist, and once you dip them in the chocolate this moistness kind of gets sealed in, they don't dry out or loose flavor very quickly. This was nice for me because I didn't have to make them all in the one or two nights before the wedding, I actually started about two weeks before the wedding and was done several days before they were needed. This took some stress off of me which was very nice.

When it was all said and done I think I ended up with about 220 cake pops. There was a little bit of a learning curve with how to dip them in the chocolate, my first few weren't so pretty, but by the end I was a pro at it. Stacey wanted white cake with pink white chocolate and pink sanding sugar, all of which I ordered online. I really had no idea how much of the chocolate or the sugar I would need. In the end I used about 6 pounds of the white chocolate and 2 pounds of sanding sugar total, and this was for cake pops that were 30 grams each.

To be honest, I never could have done this all alone. Having a built in baking partner at home was a must for this project. Trying to study the anatomy of the head and neck and make 200 cake pops all alone would have been difficult. But with a partner, it wasn't so bad at all! Thanks Lara, we make a good team!

After dipping, letting the chocolate dry

All lined up, ready to wrap

200 cake pops later

Cake pops, the perfect wedding favor

Simple White Cake
Adapted from Annie Eats
Ingredients

  • 1 cup whole milk, divided
  • 6 large egg whites
  • 1 tbsp. vanilla extract
  • 2¾ cups (11 oz.) cake flour, sifted
  • 1½ cups (10.5 oz) sugar
  • 1 tbsp. plus 1 tsp. baking powder
  • ¾ tsp. salt
  • 12 tbsp. (¾ cup) butter, at room temperature

Directions
Preheat the oven to 350˚ F. In a liquid measuring cup, combine ¼ cup of the whole milk, egg whites,  and vanilla extract. Whisk to blend. In the bowl of an electric mixer, combine the cake flour, sugar, baking powder, and salt. Mix briefly on low speed to combine, about 30 seconds.

Add in the butter and mix on low speed until the mixture resembles wet sand, about 30 seconds. Mix in the remaining ¾ cup of milk, then increase the speed to medium and beat for about 90 seconds more. 

With the mixture on low speed, add the egg white mixture in three additions, mixing for about 20 seconds after each addition. Scrape down the bowl as needed.

Pour the batter into a greased 9x13-inch pan. Bake, rotating the pan halfway through, until a toothpick inserted in the center comes out clean, about 20 minutes.

Chocolate Madeleines

Chocolate cake was sounding good to me this weekend, but I didn't feel like taking the time to make a whole chocolate cake, plus what would I do with it? I just can't justify eating the whole thing on my own. Then I remembered my Madeleine pan; bite size chocolate cake that don't need to be frosted, perfect! This recipe requires an overnight chill in the fridge, so you have to think ahead a little, but the end product was delicious. Intensely rich, deep chocolate flavor packaged up in a two bite snack, just the right thing to satisfy my chocolate cake craving.

A simple and delicious recipe, it shouldn't have been a problem right? Well, when your oven decides to die the day you are ready to bake it is a problem. There my batter was, waiting patiently in the fridge, but there was no usable oven in sight. I finally texted my sister-in-law and asked if I could come over and borrow her oven, I didn't want all my efforts to go to waste. I'm glad I was able to end up baking these little guys, they made my Saturday afternoon study session much happier. If you have a Madeleine pan I highly recommend giving these little guys a try!

Wet and dry, ready to go

Time to chill in the fridge

A perfect little snack

Chocolate Madeleines
From Lemon and Anchovies
Ingredients

  • ½ cup plus 1 tablespoon (70 grams) all-purpose flour
  • 3½ tablespoons Dutch-processed cocoa powder
  • ½ teaspoon double-acting baking powder
  • ⅓ cup plus two tablespoons (90 grams) sugar
  • Pinch of salt (I don't think my pinch was quite big enough, they could have used a little more salt, so don't be afraid to take a nice big pinch!)
  • Grated zest of ¼ lemon (optional)
  • 2 large eggs, room temperature
  • 6½ tablespoons (3¼ ounces; 100 grams) unsalted butter, room temperature

Directions
Sift together the flour, cocoa and baking powder and set aside. If using the lemon zest, combine the sugar, salt and lemon zest in another bowl and rub the ingredients together with your fingertips until the sugar is moist, grainy and aromatic.

Using a whisk, beat the eggs with the lemon-sugar mixture until blended. Squish the butter through your fingers and add to the bowl. You will be left with little clumps of butter in the mixture–this is okay. Beat in the butter with the whisk until it is evenly distributed. Whisk in the sifted flour mixture just until the flour is incorporated and mixture is smooth. Press a piece of plastic wrap against the surface of the batter and chill overnight. If you can’t wait overnight, chill the batter for at least an hour before baking.

When you are ready to bake the cookies, preheat your oven to 425 degrees F. Butter a 12-mold madeleine pan then dust it with flour (even if you are using a nonstick pan) and tap out the excess.

Divide the batter evenly among the madeleine molds–you don’t have to worry about spreading the batter on the molds, the heat will do that for you. Place the pan in the oven and use a wooden spoon to keep the oven door slightly ajar. Immediately turn down the oven temperature to 350 degrees F and bake the cookies for 11 – 13 minutes, or until the cookies are domed and spring back when pressed lightly. Unmold the cookies and transfer them to a rack to cool to room temperature.