Sourdough Banana Bread

IMG_1126.jpeg
IMG_1125.jpeg

Last week I made my last baked good in my old kitchen. The day I was baking it was the first day of demo for my kitchen reno! That’s right, Lara and I are renovating our kitchen/dining room! We started thinking about this in June of last year. It was something we thought about doing “someday”, but then in June we decided to just go for it. Not sure exactly why the light switch flipped, but definitely think COVID had a lot to do with it, being stuck at home all the time. It also helped so much that the federal government changed the interest rate on all federal student loans to 0%. Yes, 0%. No interest has been collecting on my loans for months and months now. That has been so nice to see.

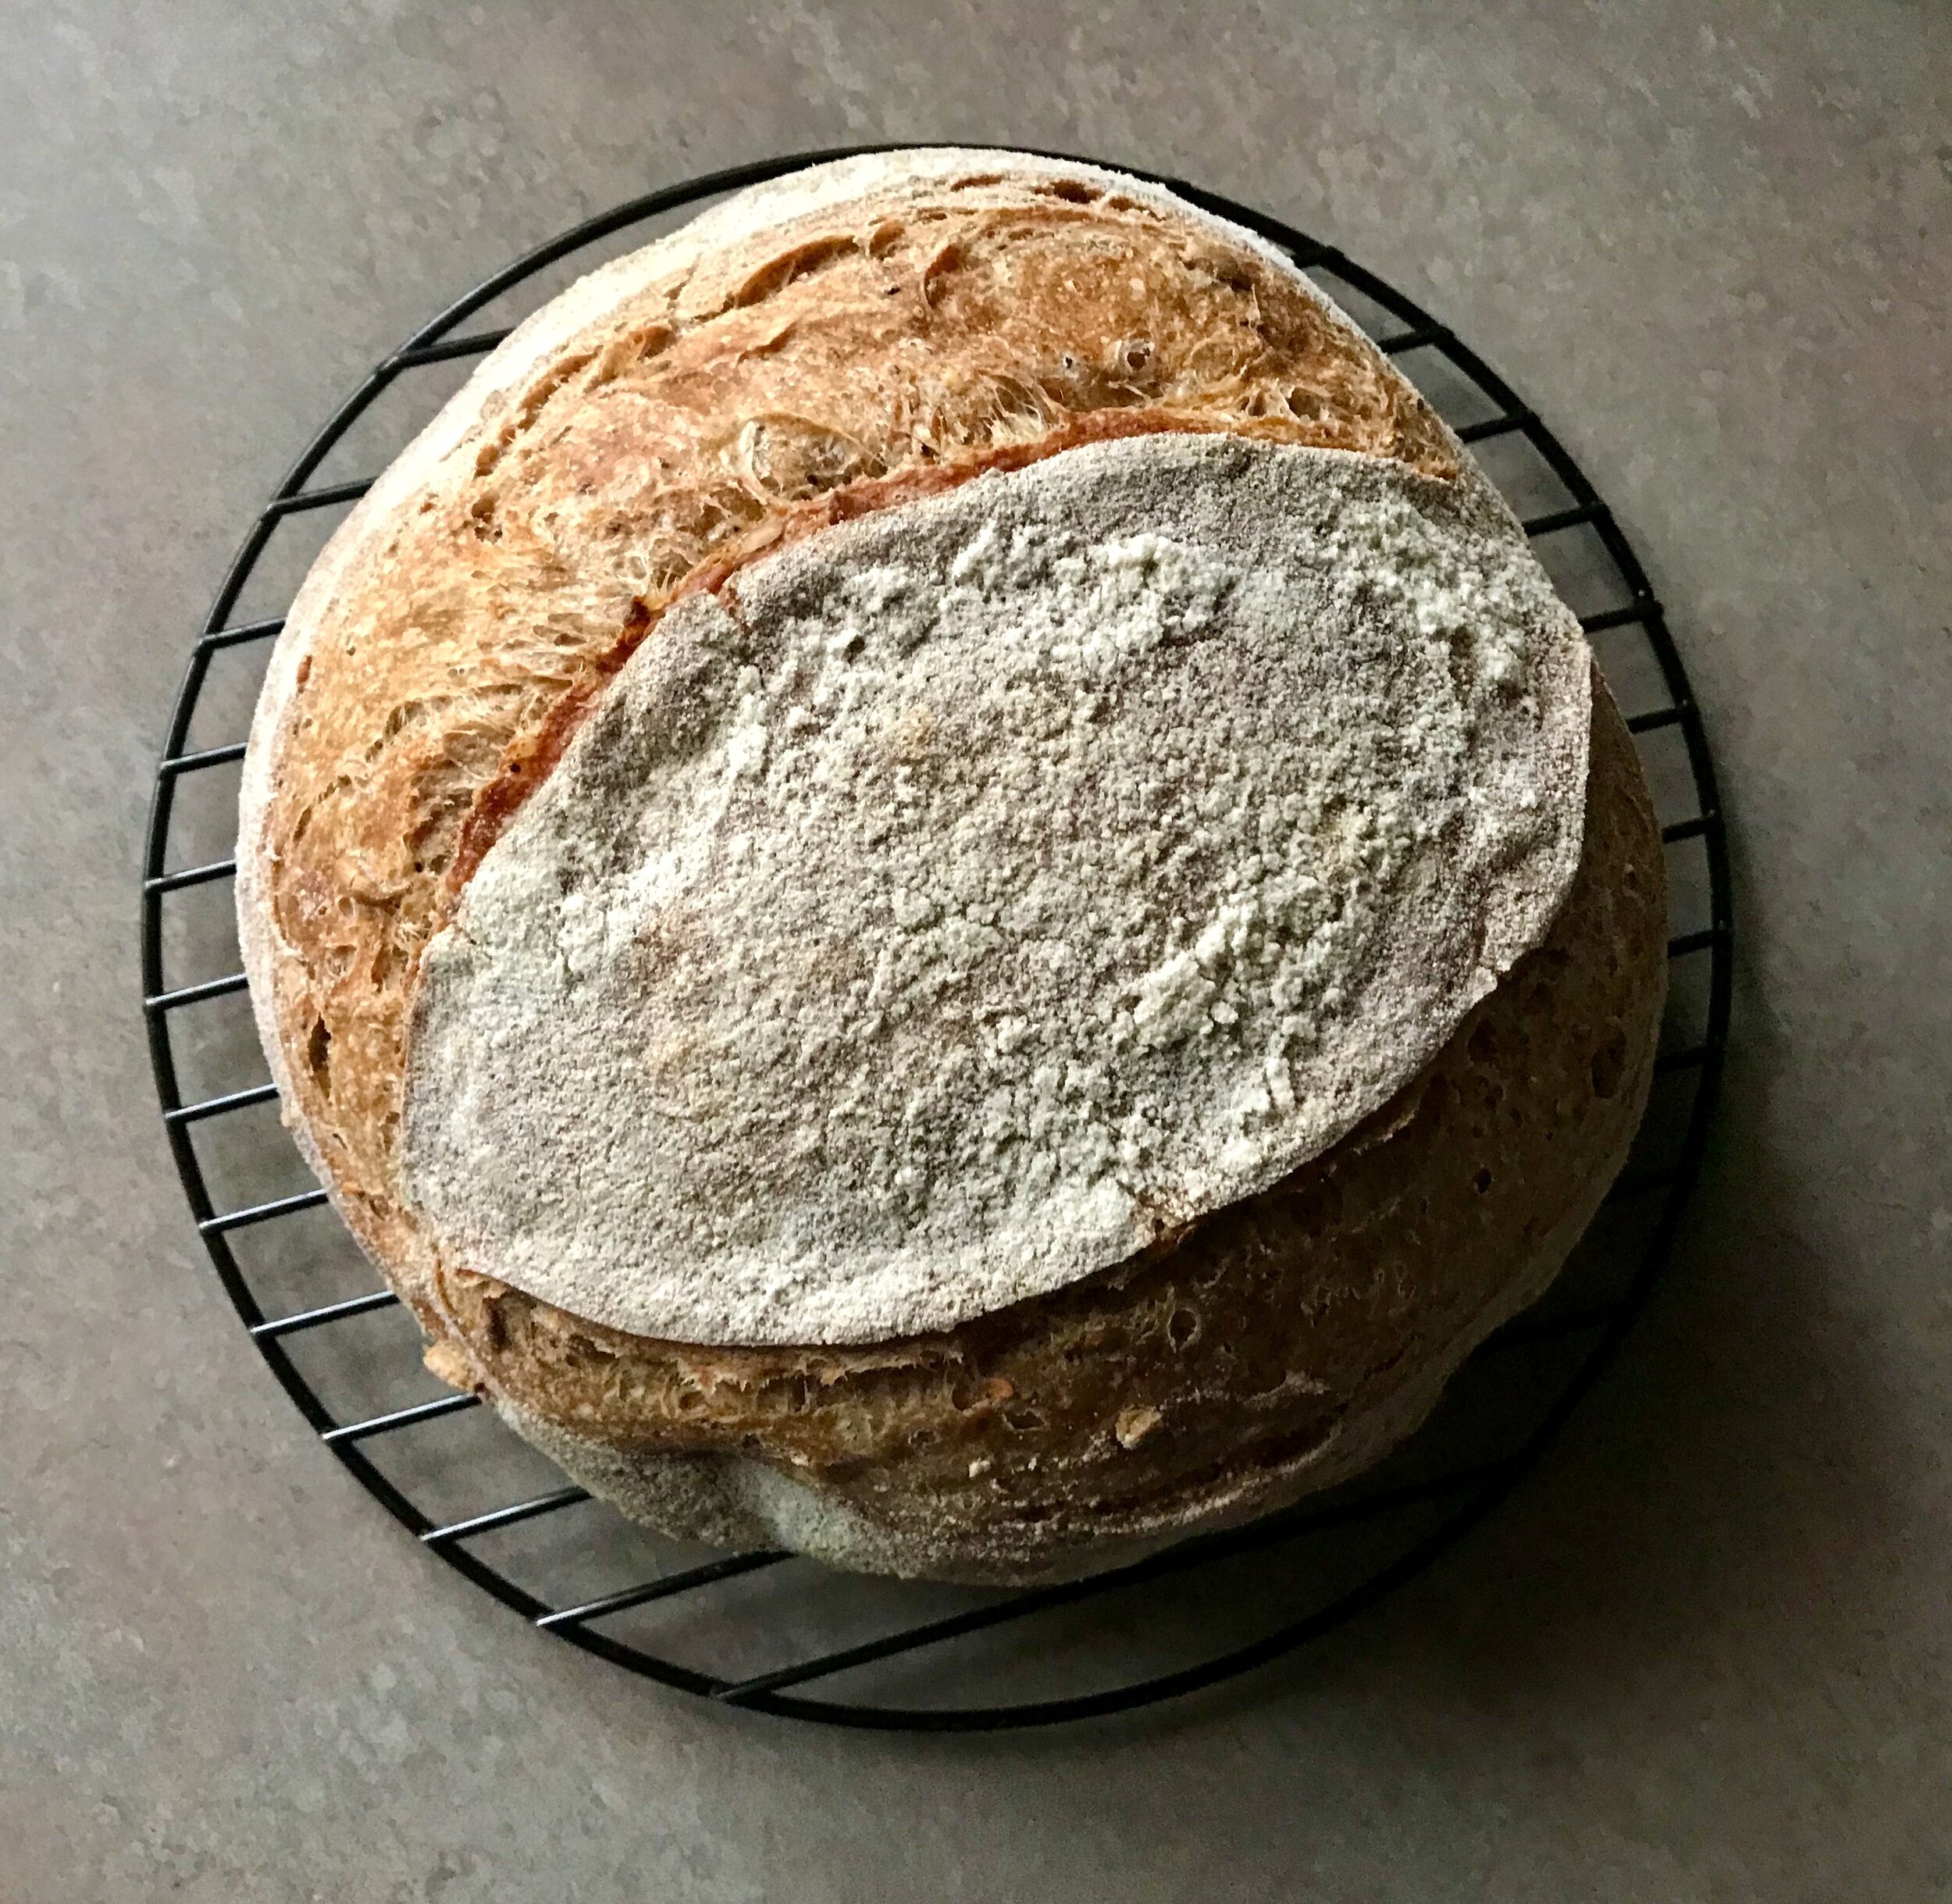
Anyway, I knew I had only a few days left in my kitchen so I did some baking and cooking. I had quite a bit of leftover sourdough starter in the fridge that I wanted to use up. I wanted a recipe that used a lot of it, but wasn’t difficult or didn’t take too long.

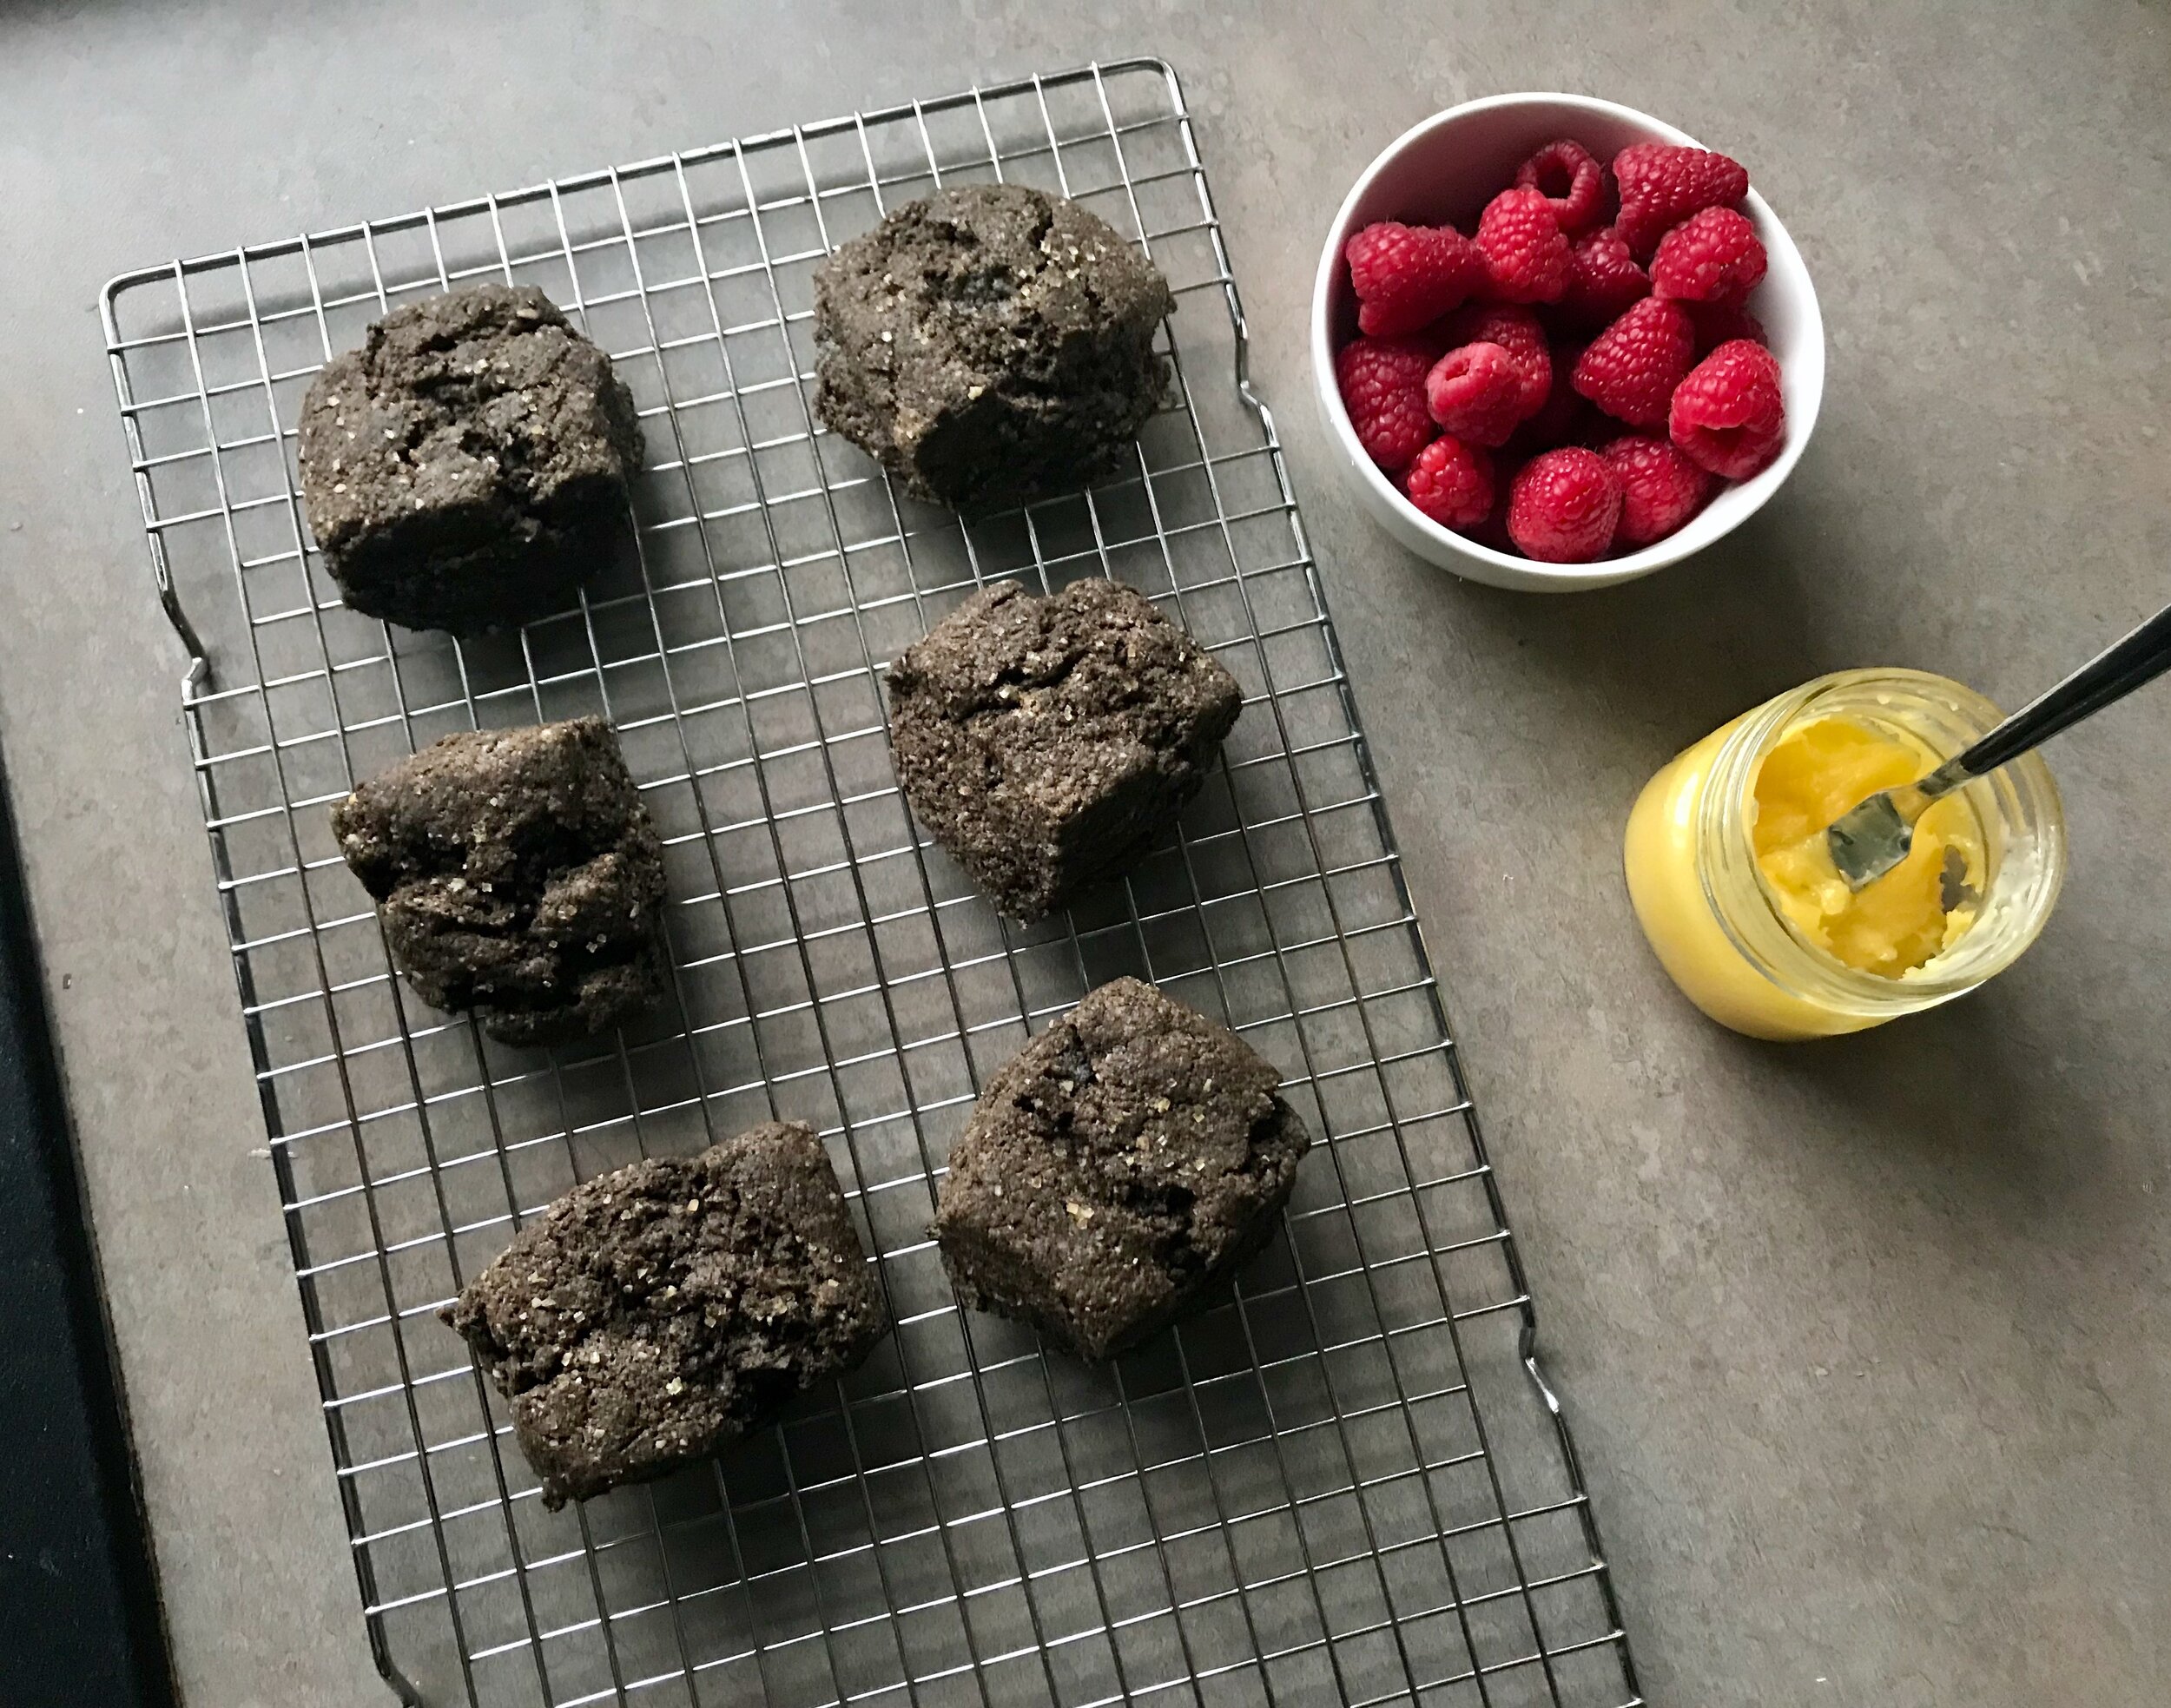
I wasn’t really even searching for a recipe that morning, but this sourdough banana bread recipe just popped up on my Instagram feed. I knew it was meant to be. I was able to get it whipped together and baked before the demolition crew showed up. Used up almost all of my leftover starter which was great.

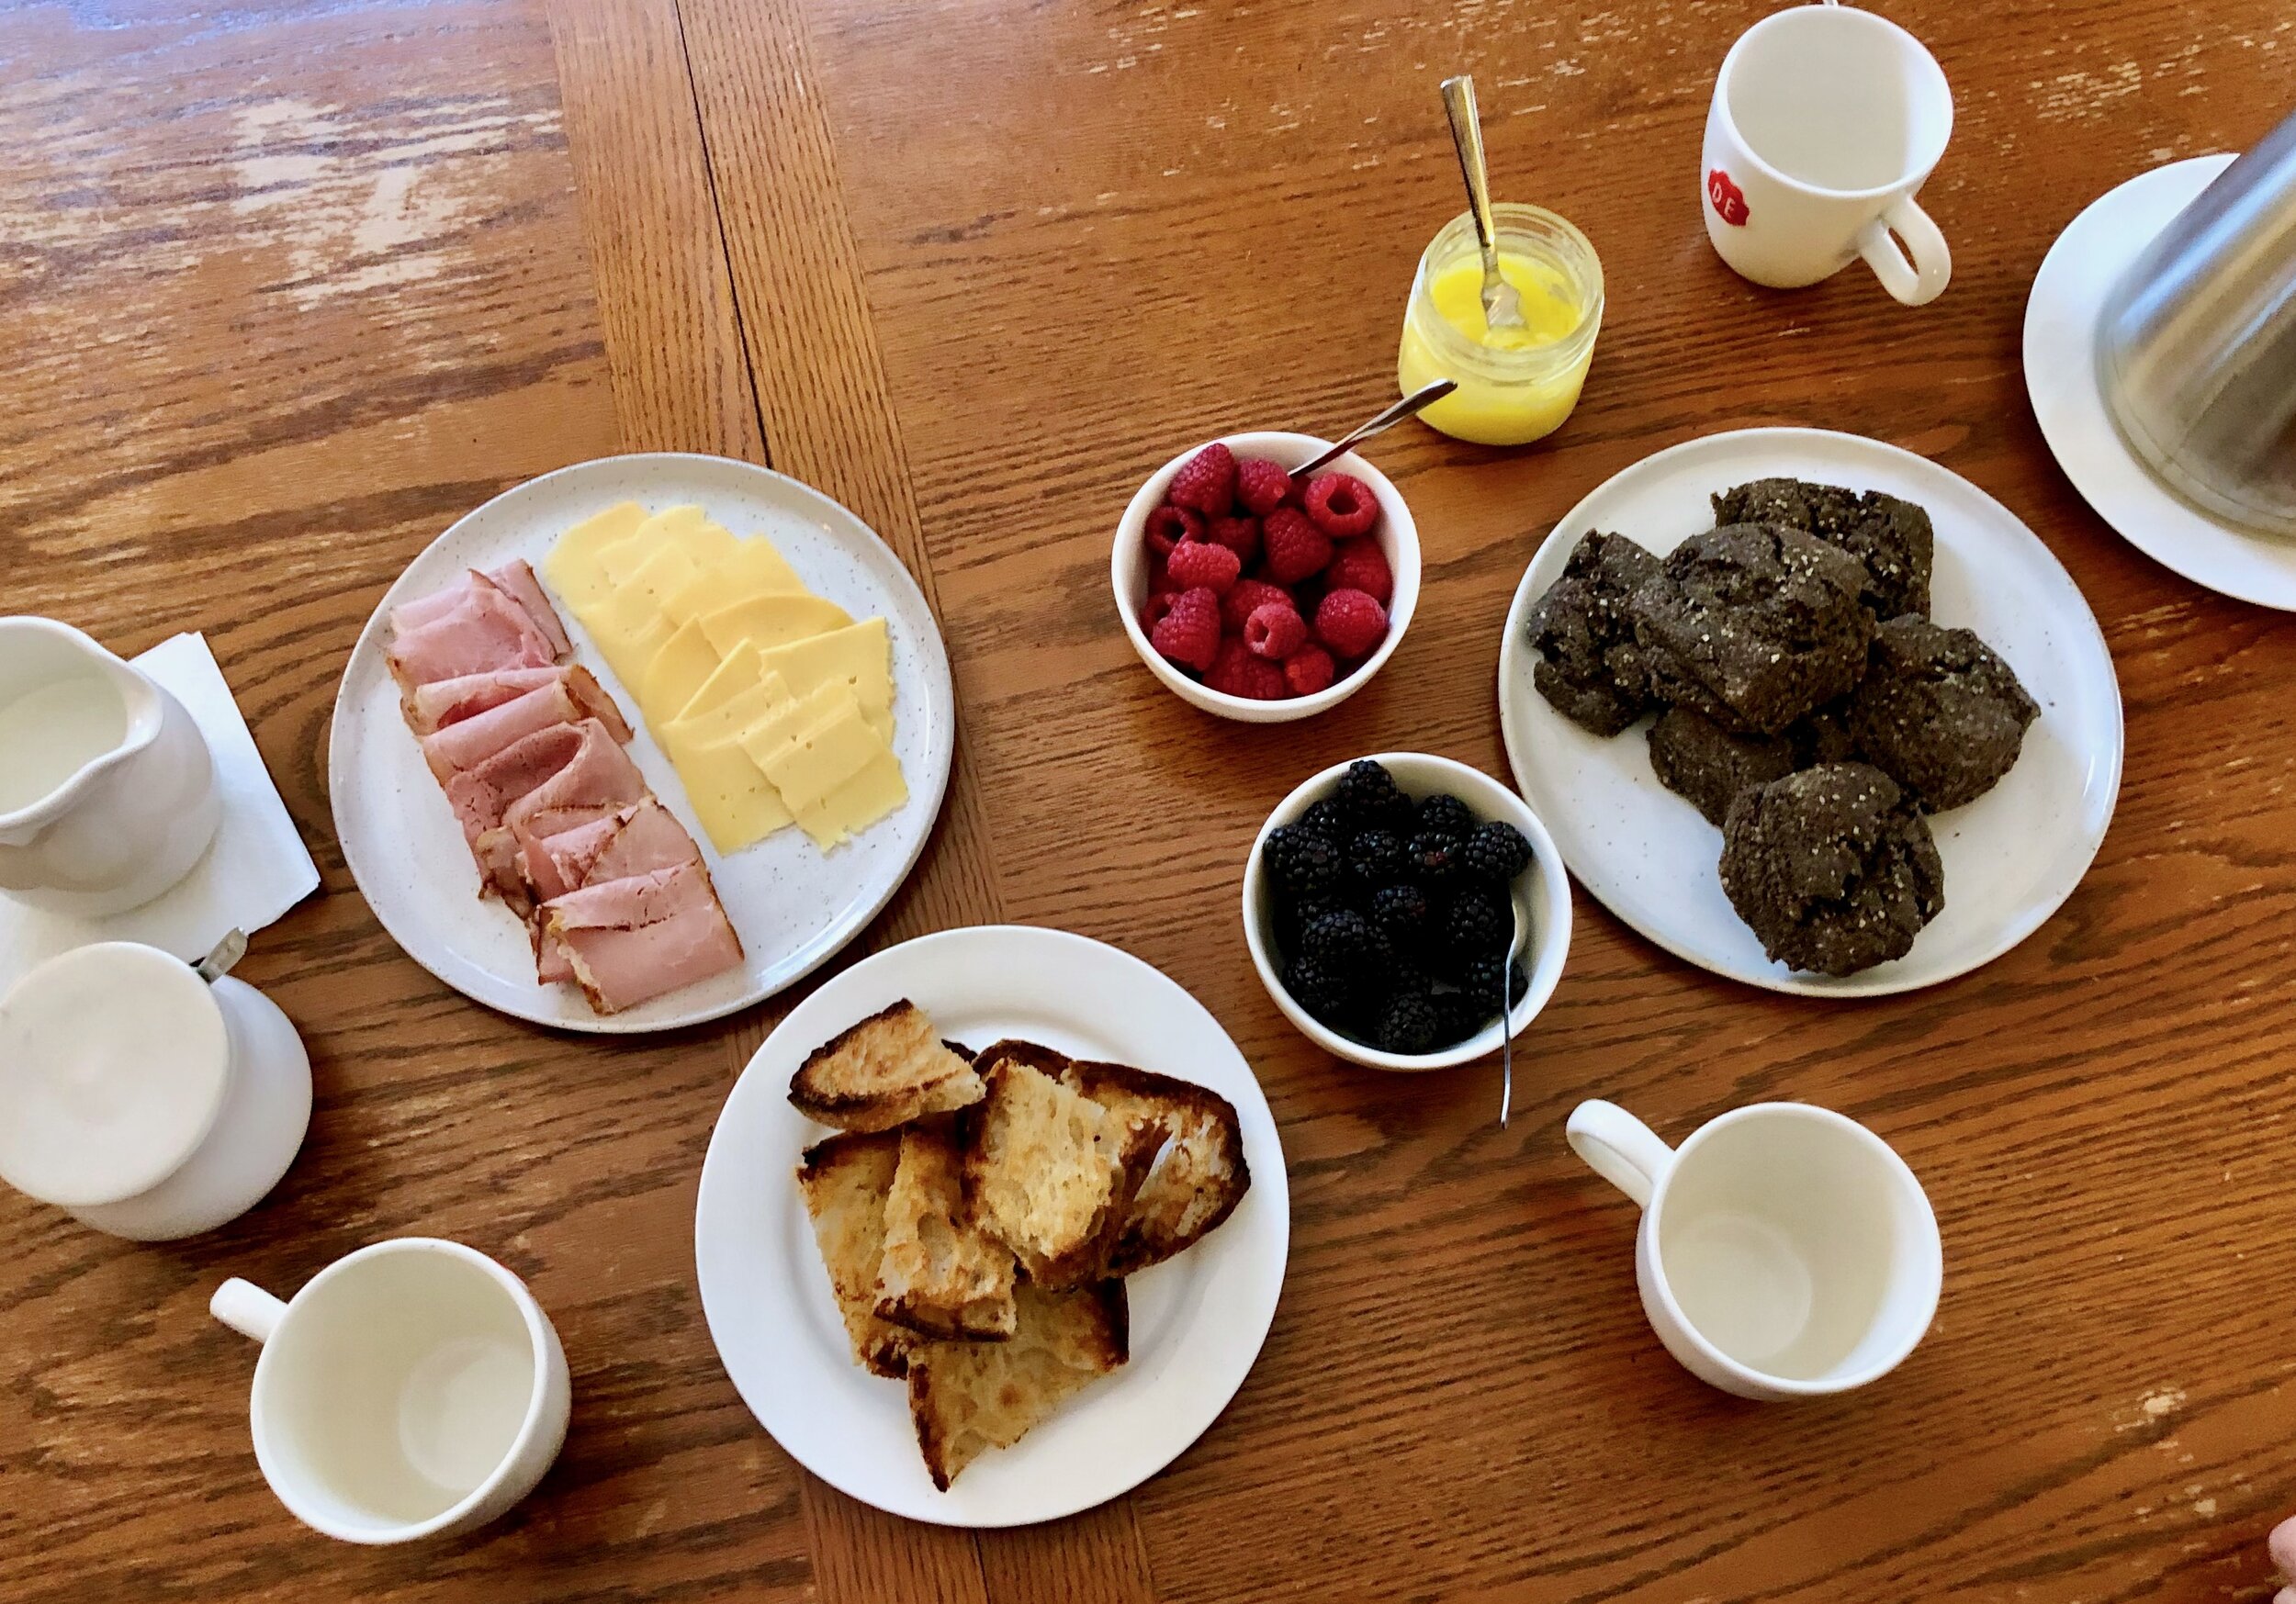
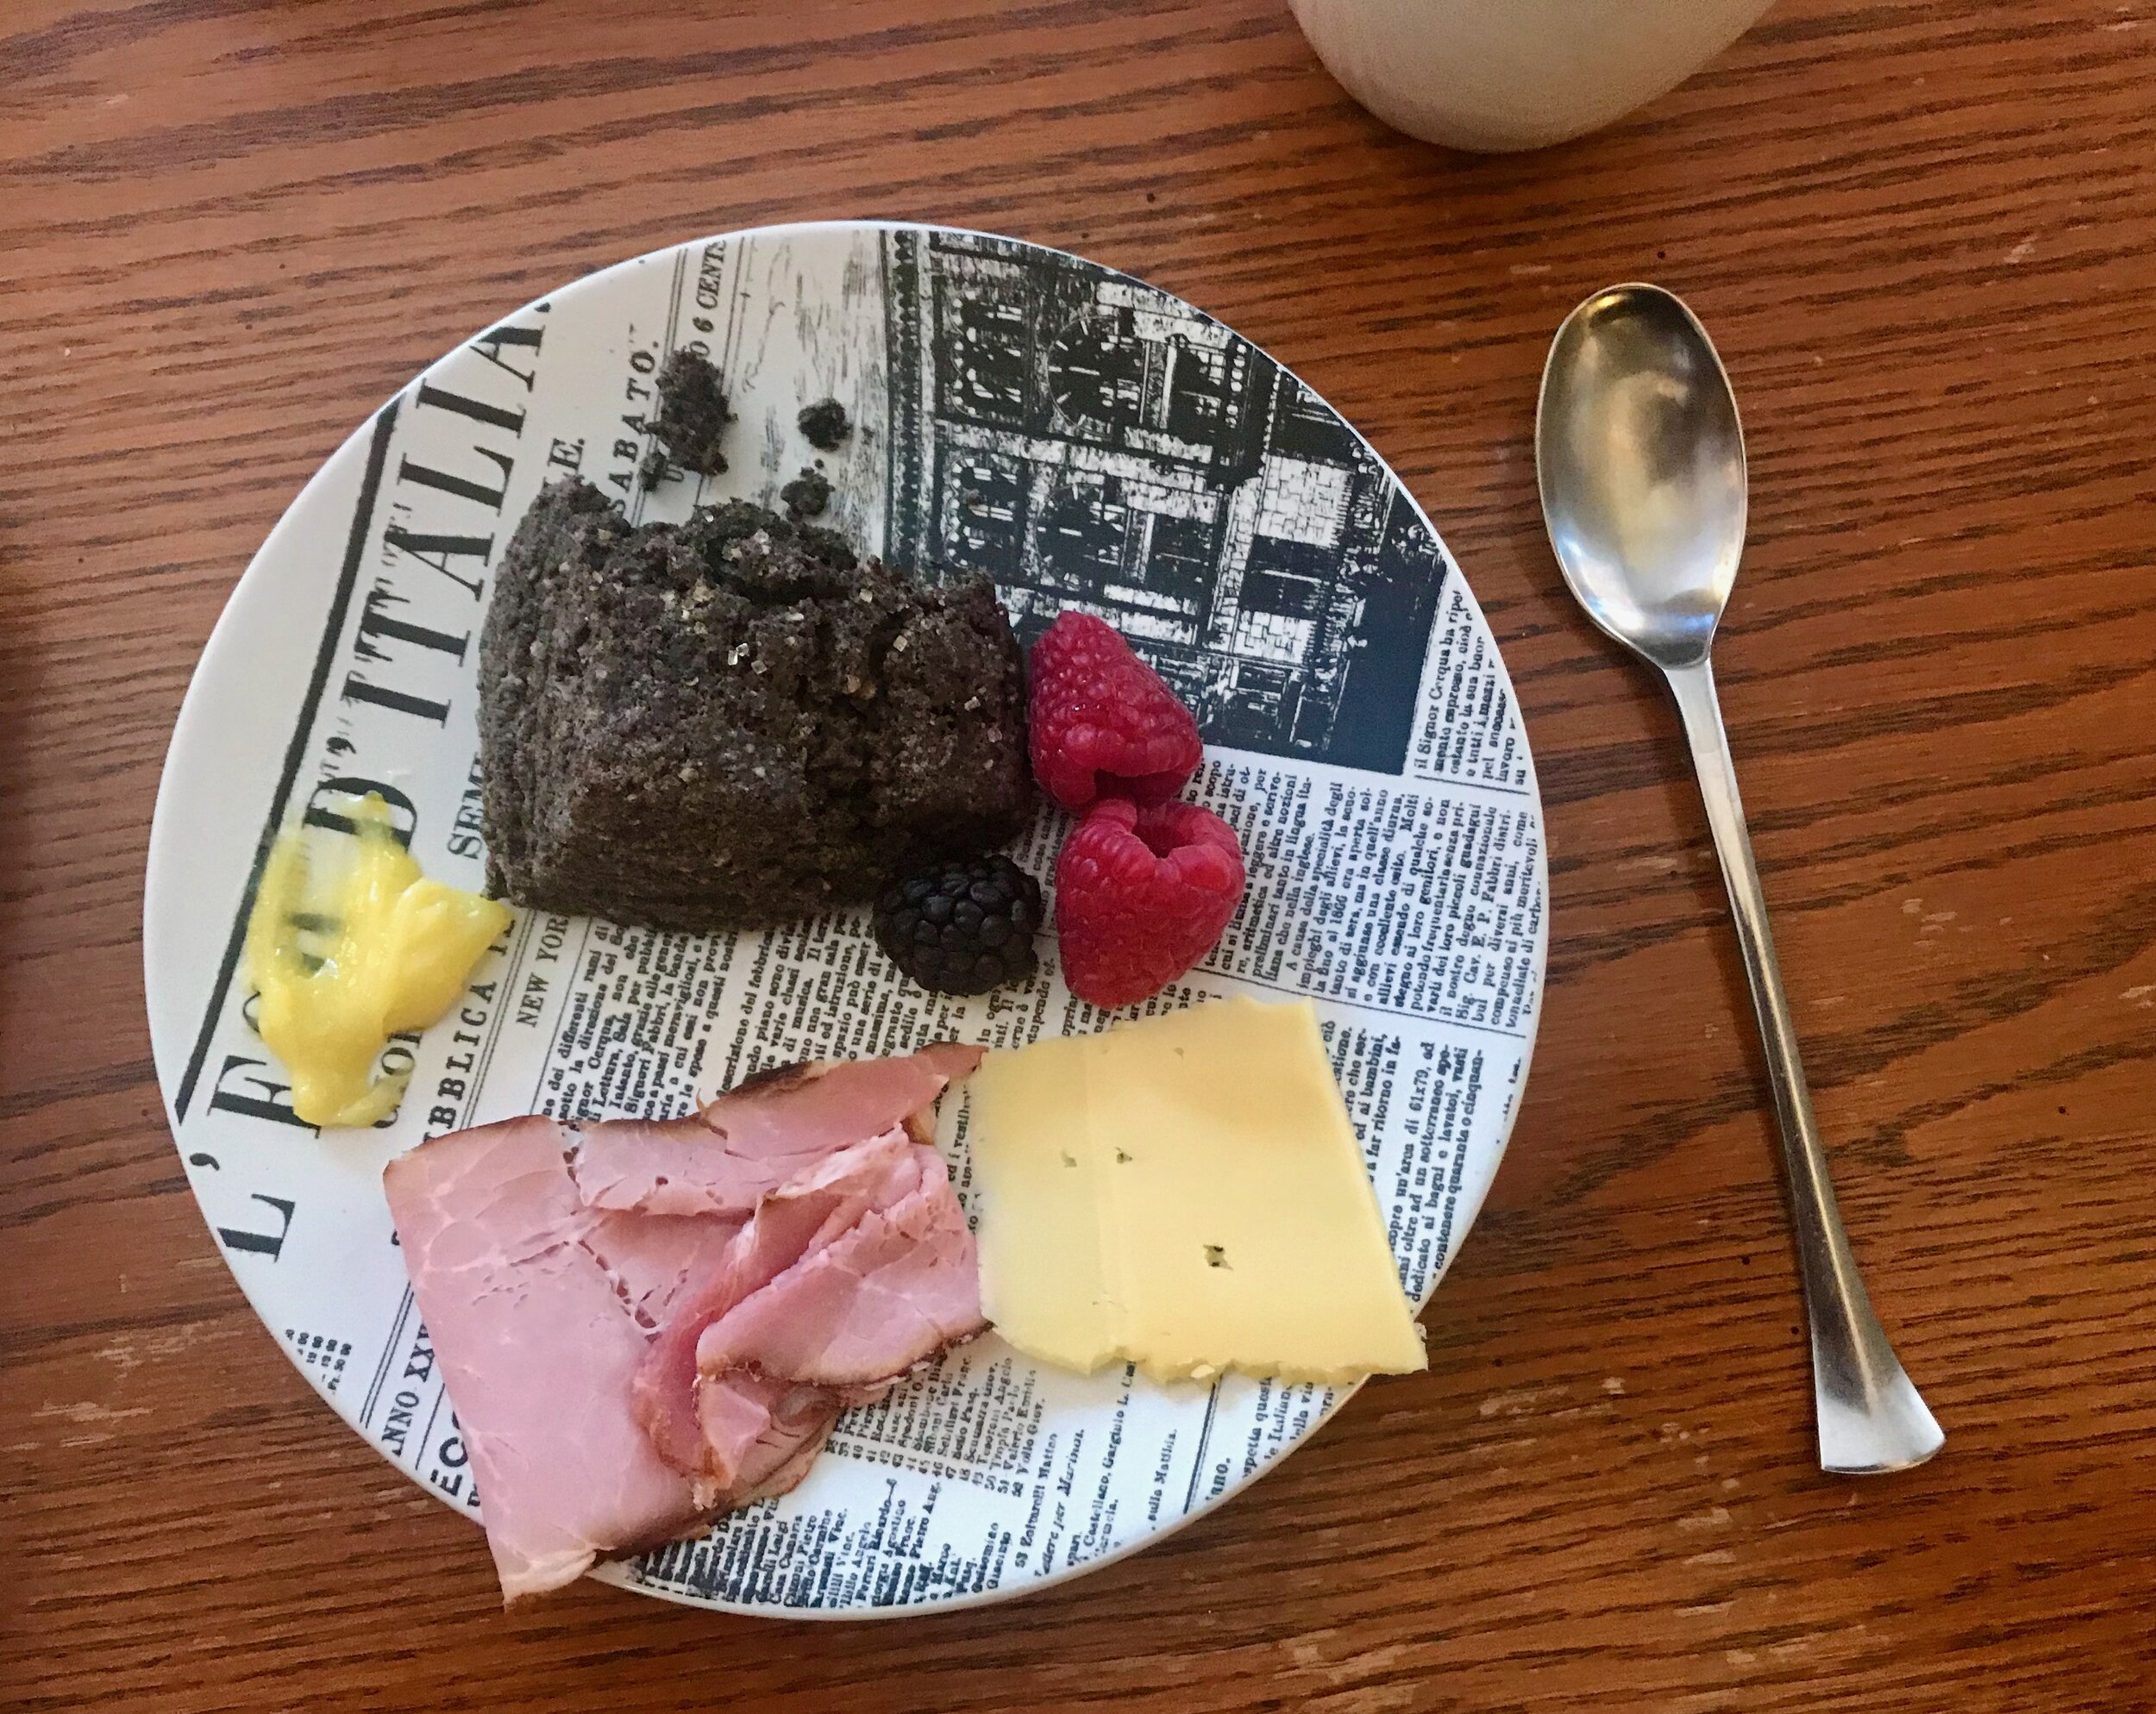
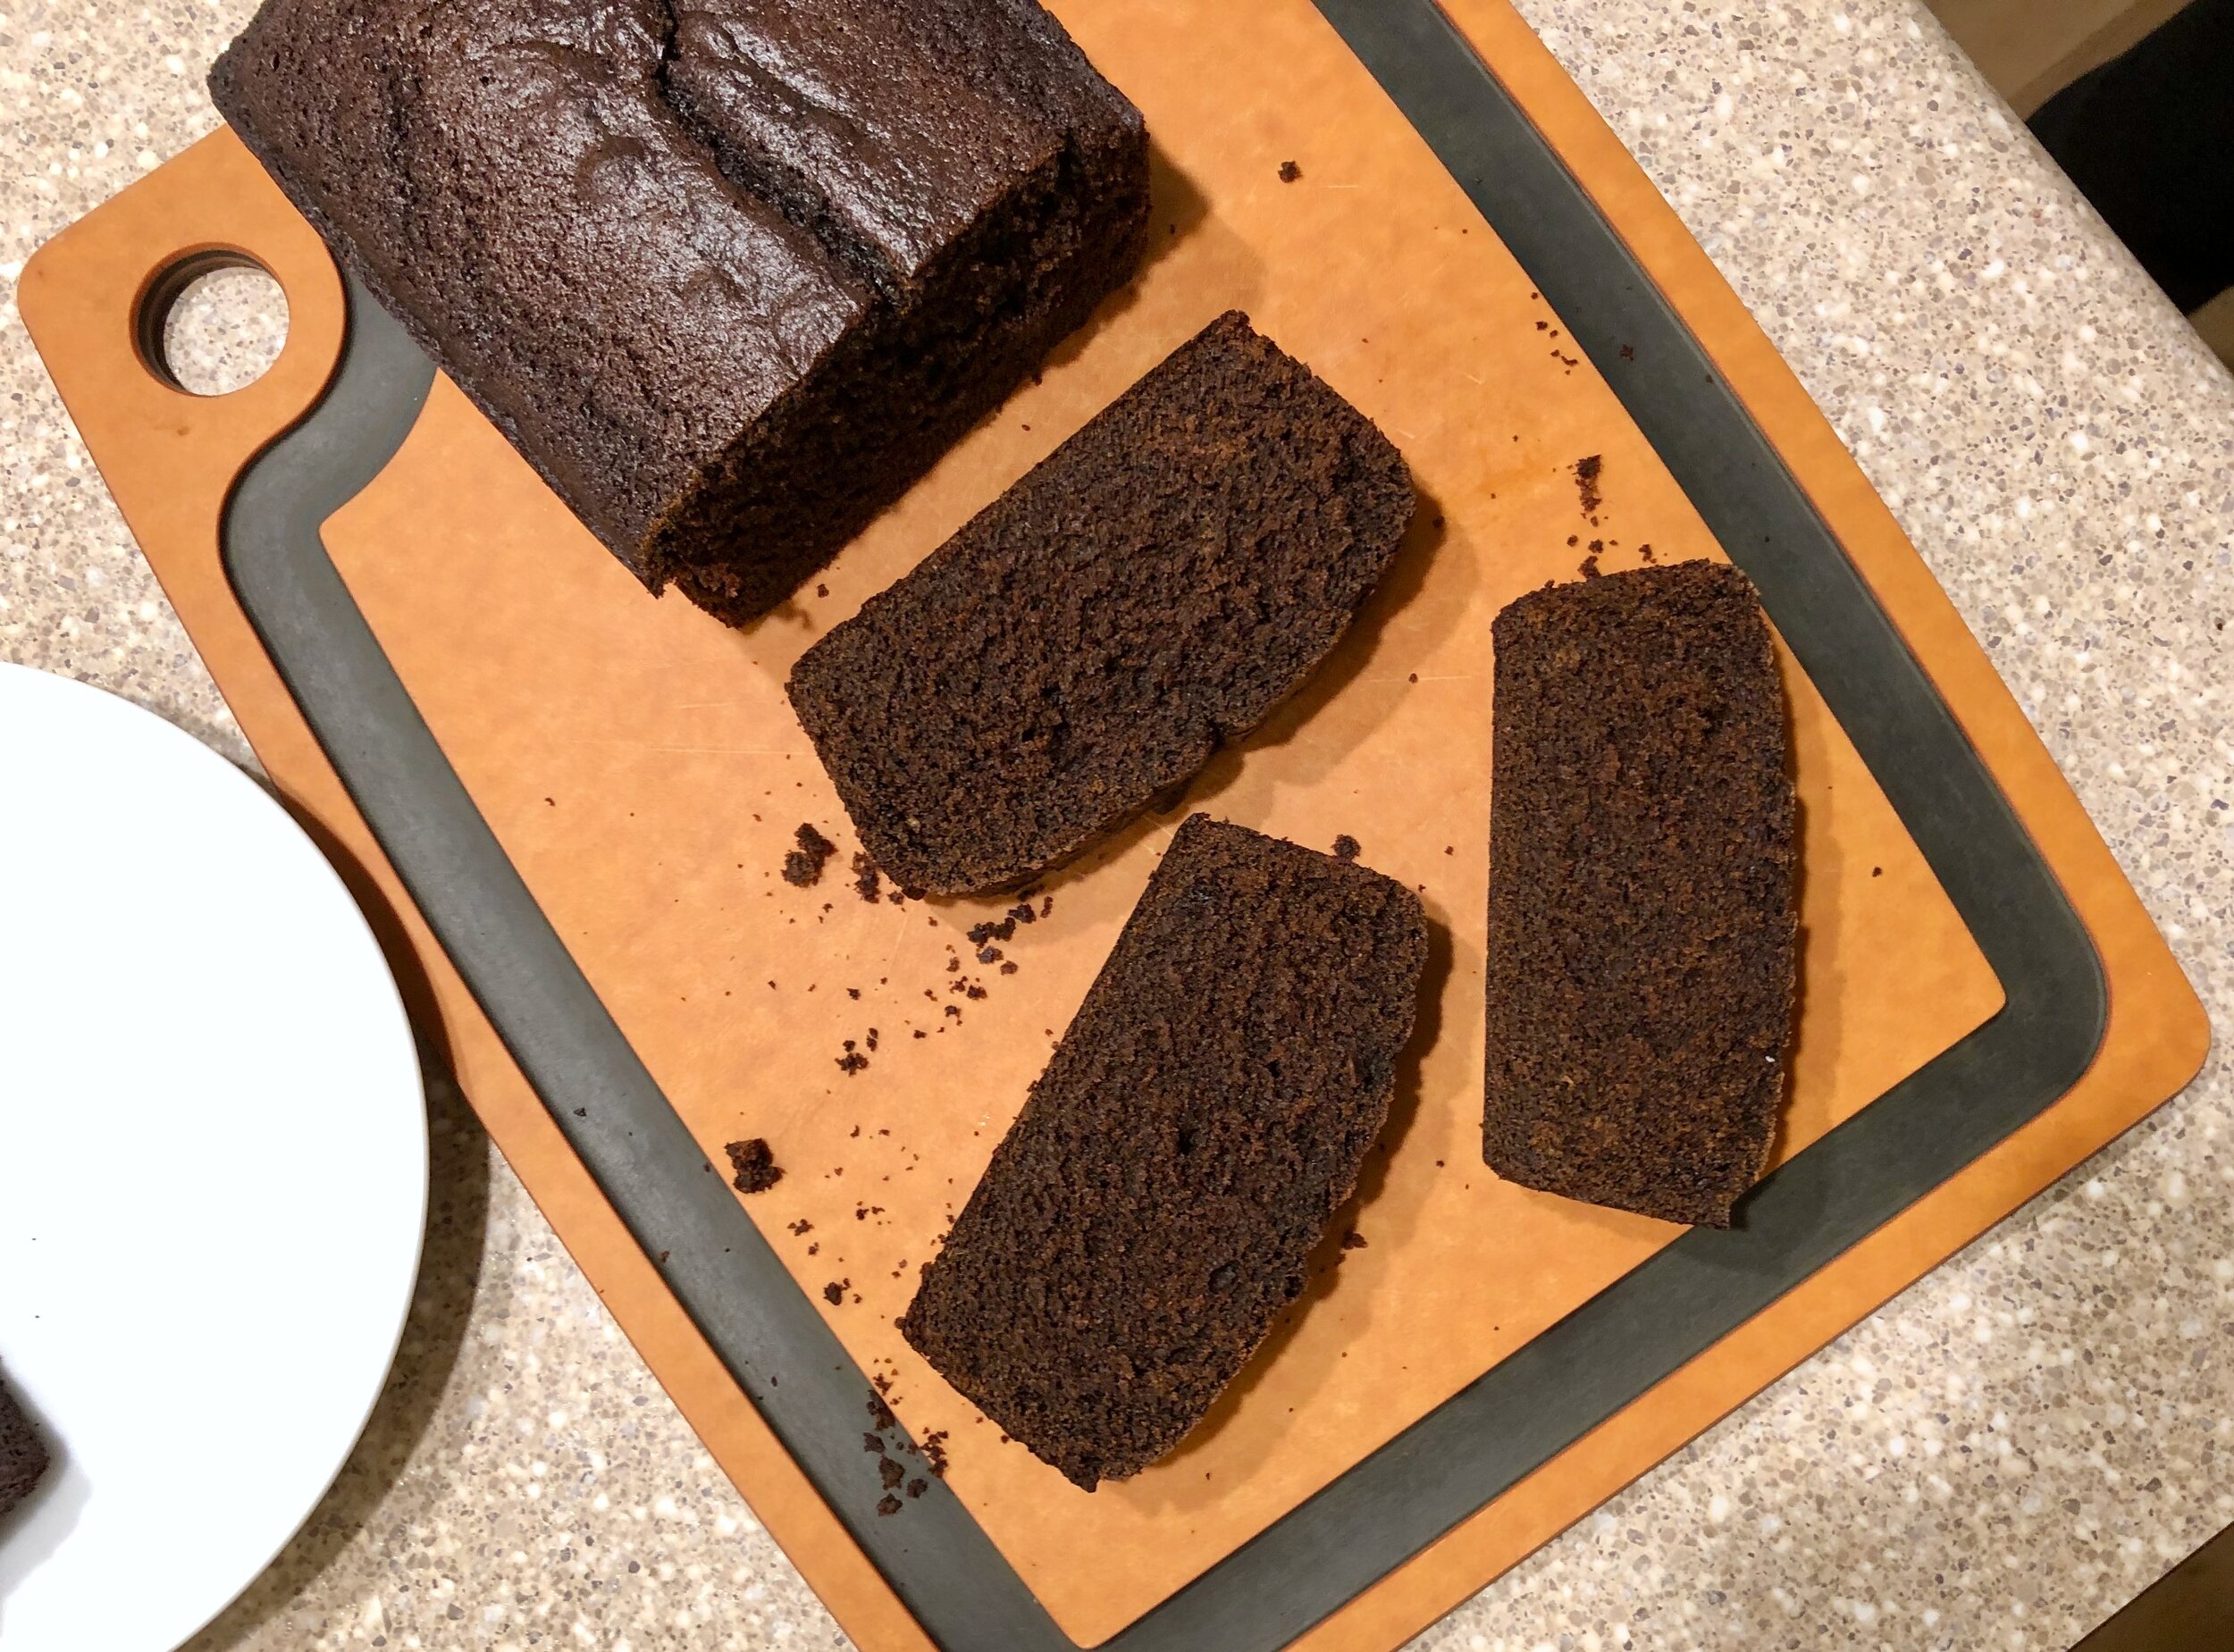
It smelled amazing, as banana bread does, while baking. I heard the demo crew immediately comment that it smelled really good! Later in the day as they were heading out, the final loaf was still sitting on the counter and they commented again, “it’s the banana bread!”. :) When I cut it later that night I just had to set aside a few pieces for the guys the next day. I heard later that they really appreciated it!

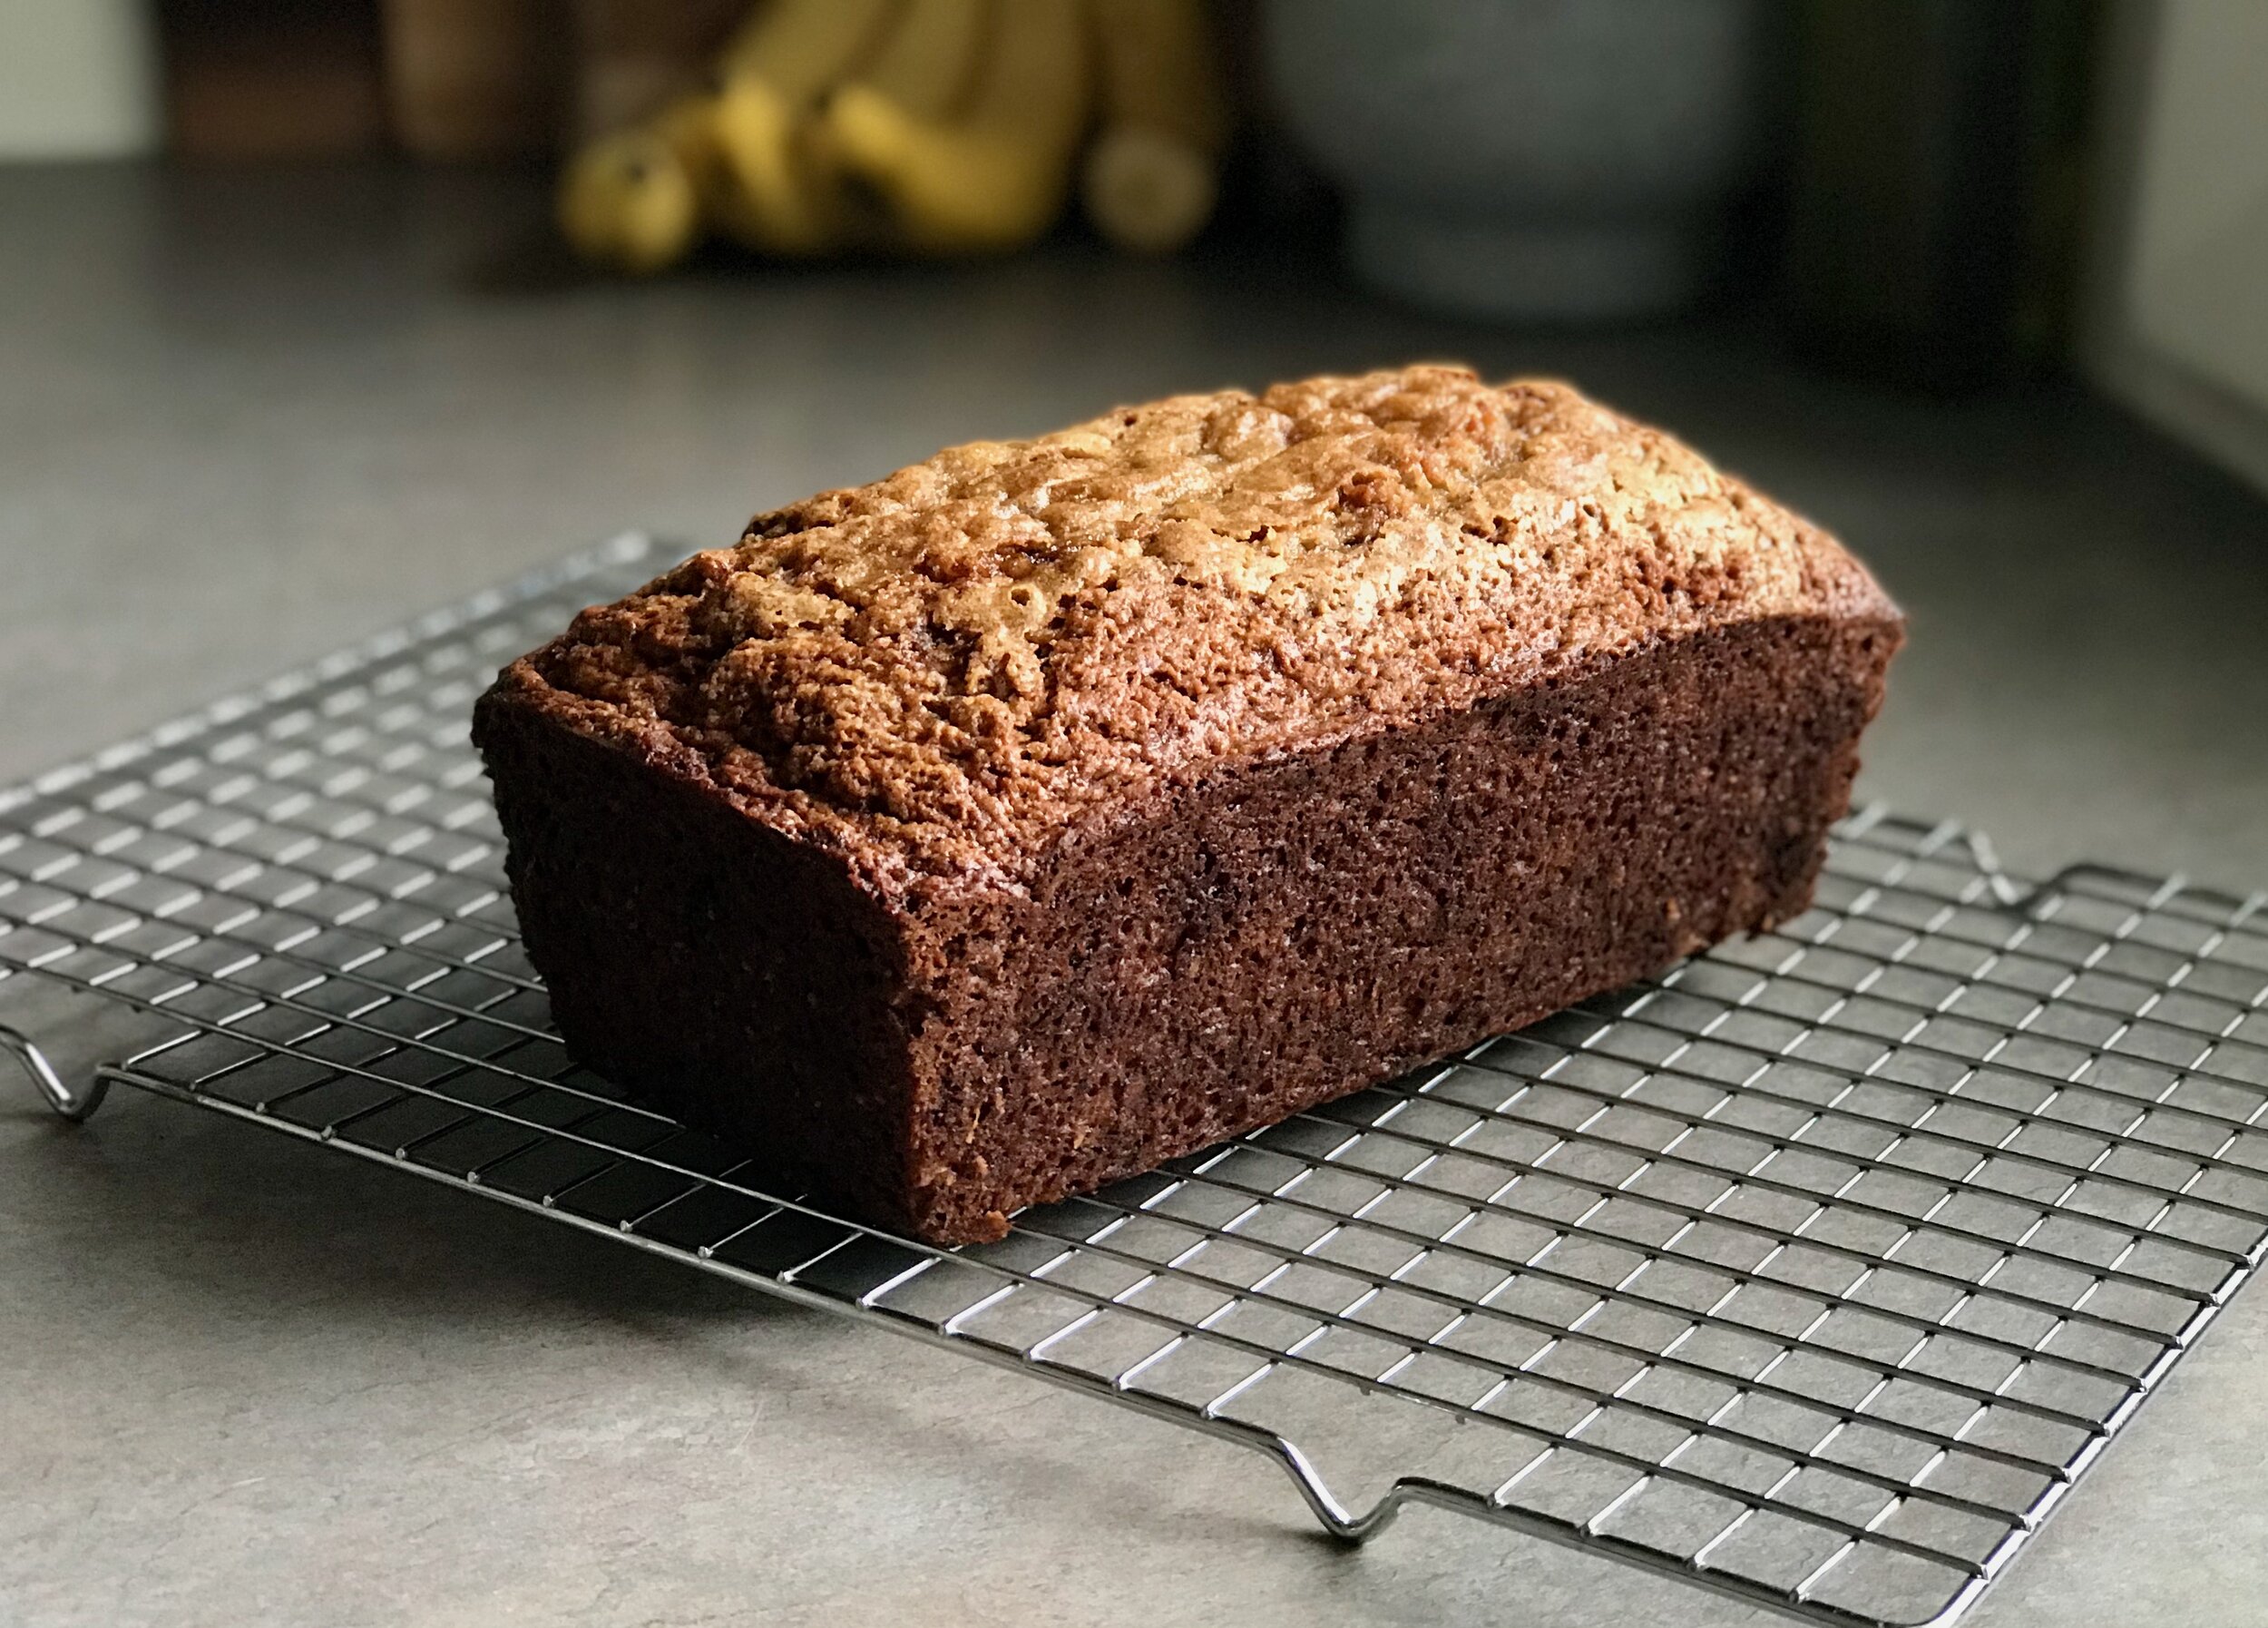
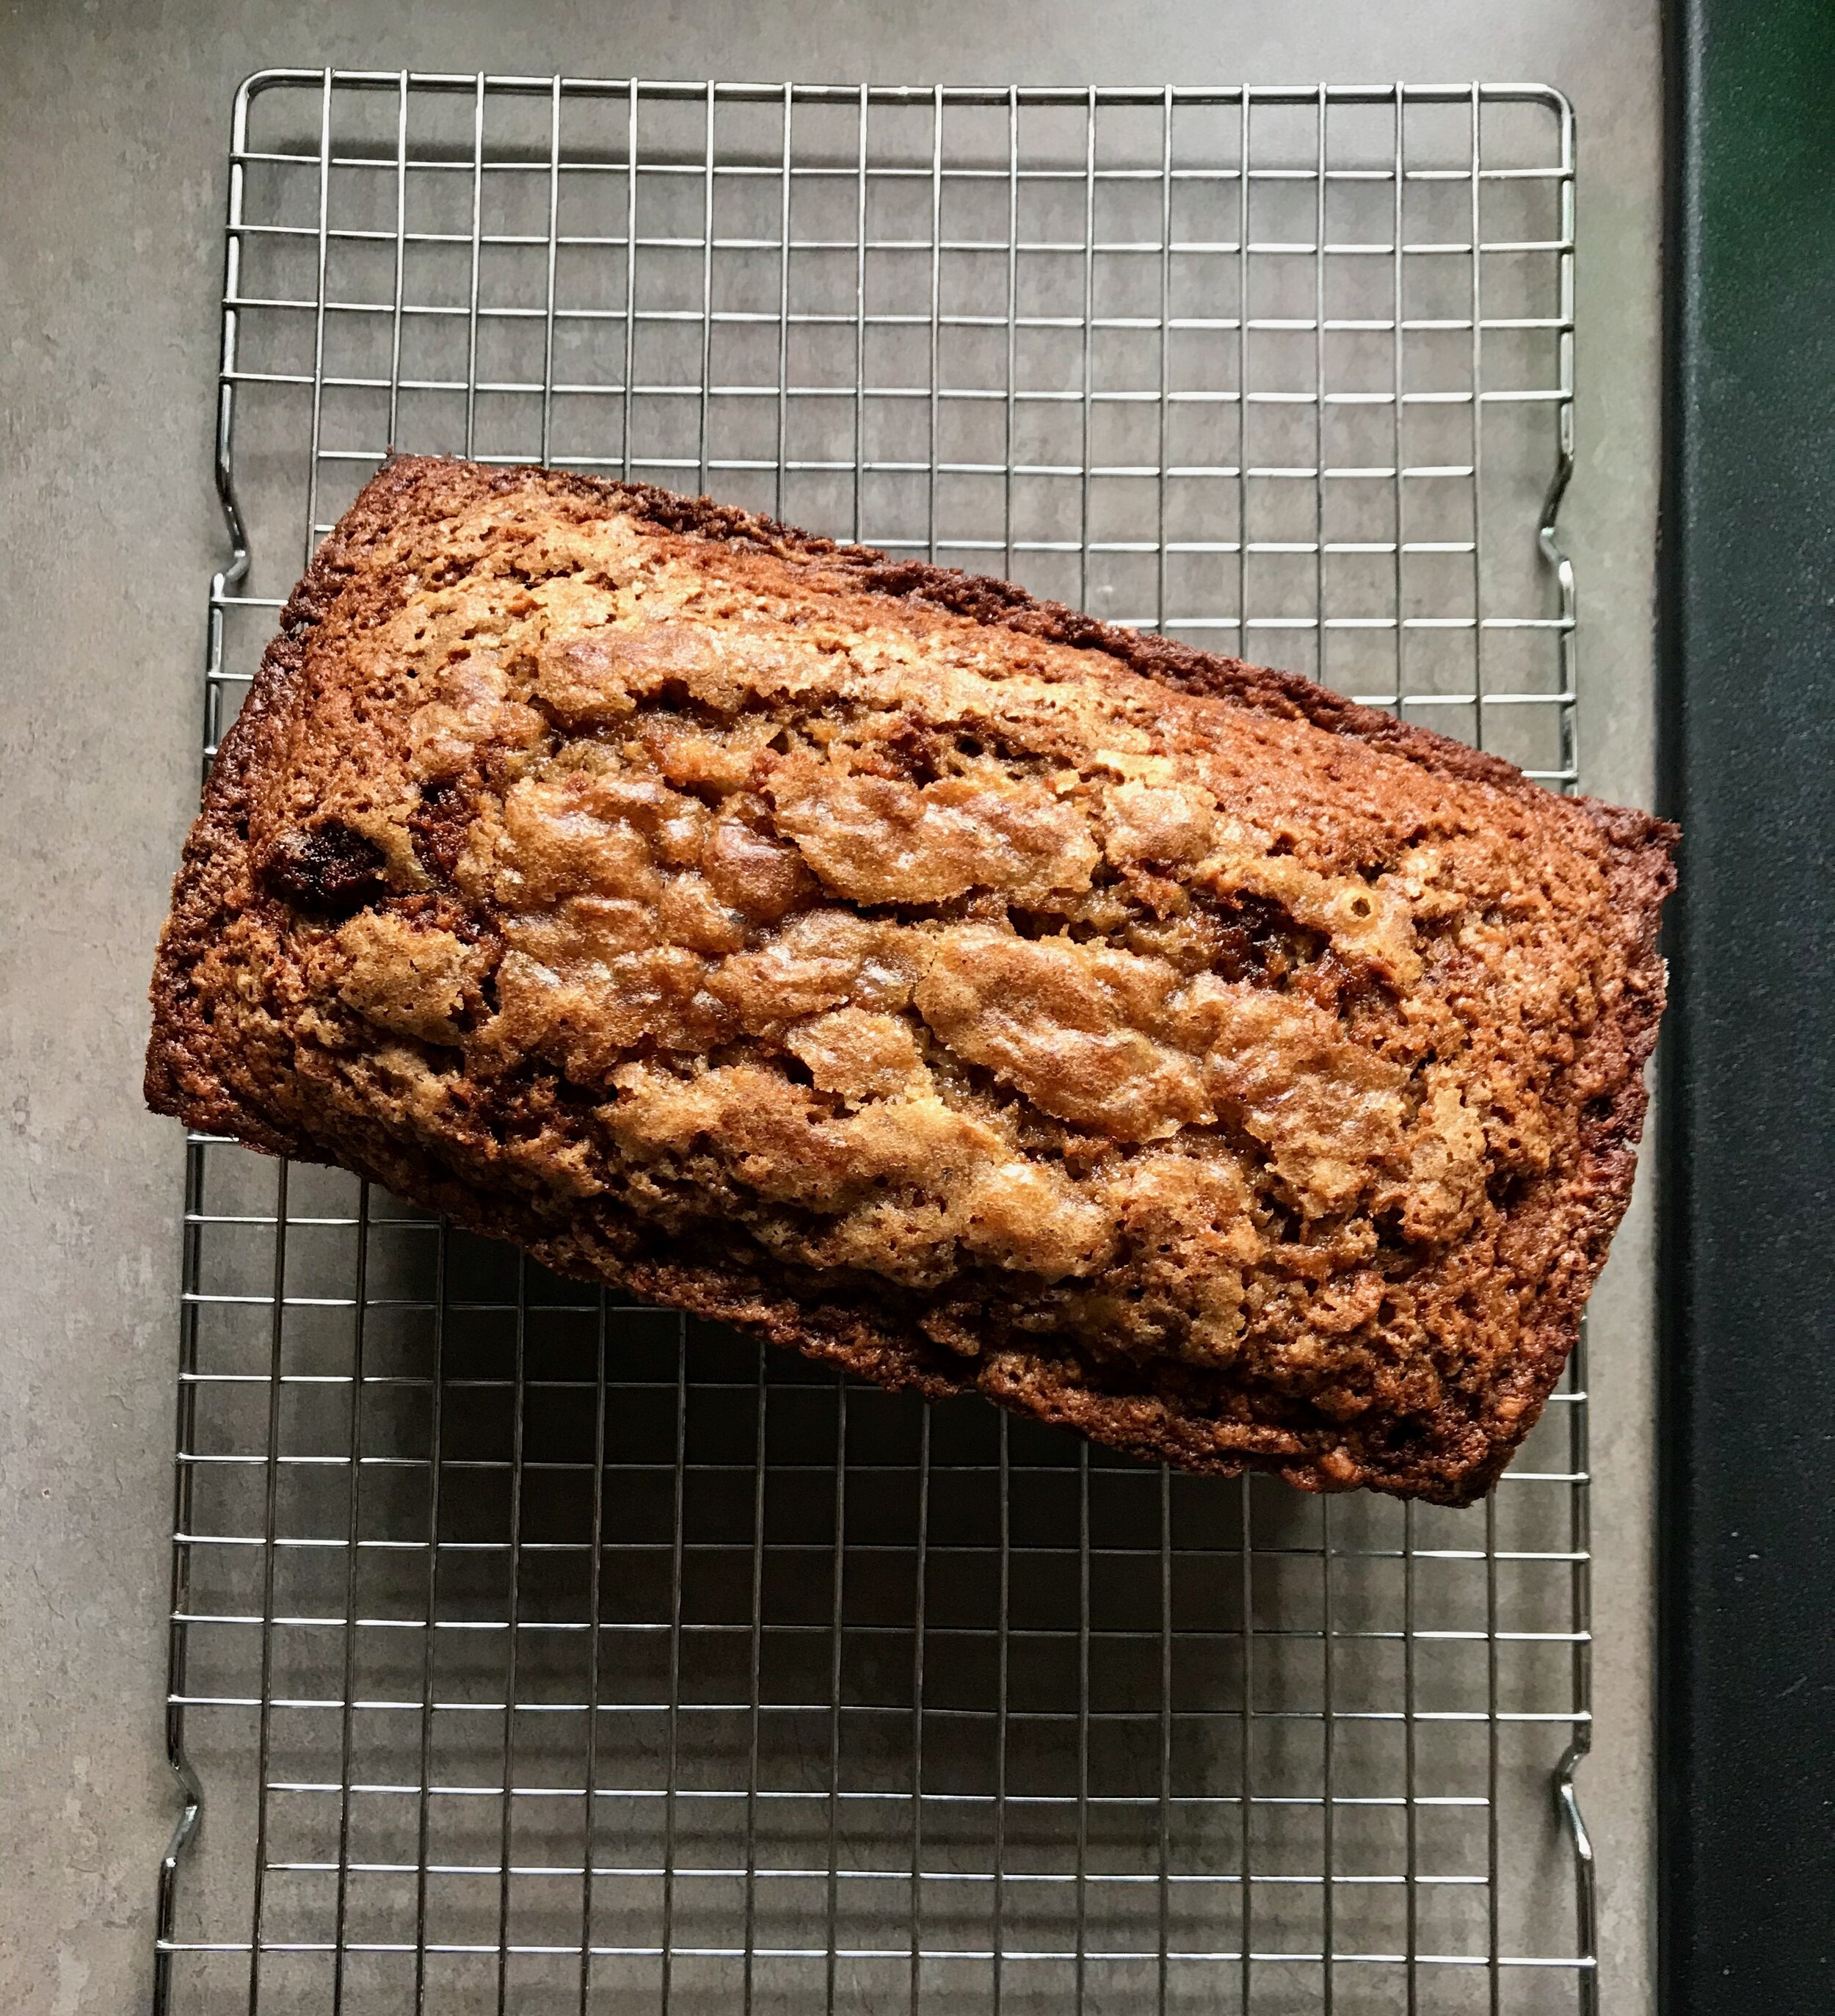
Other than having the sourdough starter, this was a pretty basic banana bread. It was quick and easy to put together and it baked up beautifully. The baking time was actually pretty accurate, it rose well, and developed a lovely rounded and crackly crust. I am a big fan. It also taste delicious. I would probably up the cinnamon and other spices next time just because I like more of them in my banana bread, as written the spices are quite subtle.

A few specifics on what I did; I used 1/2 cup (100 grams) brown sugar instead of 2/3 cup as stated in the recipe. Since there is also 1/4 cup honey I thought this would be fine, and it was. I didn’t notice any missing sugar/sweetness. I also added a few additional spices, just a pinch of allspice and cloves. But as stated above I would probably add more spices next time, if nothing else I would increase the cinnamon. I used about 3 + 1/3 medium/average sized bananas to get to 397 grams required in the recipe. I also added a little whole wheat flour, using a little under a cup of home ground white winter wheat that I ground before the kitchen was gone and am storing in the freezer. I also added in walnuts, about half of what the recipe recommends, I threw in about 45-50 grams. It was a nice addition. I could definitely add more next time.

All in all this one is a keeper. I will be using this to use up sourdough starter in the future I have no doubt!


Sourdough Banana Bread
From King Arthur Baking Company
Ingredients

  • 8 tablespoons (113g) unsalted butter, at cool room temperature

  • 2/3 cup (142g) brown sugar, packed

  • 1 teaspoon vanilla extract

  • 1 teaspoon cinnamon

  • 1/4 teaspoon nutmeg

  • 1 teaspoon baking soda

  • 1 teaspoon baking powder

  • 1 teaspoon salt

  • 1 3/4 cups (397g) mashed ripe banana (from about 1 3/4 pounds unpeeled bananas) - I was too lazy to actually mash up the bananas, so I just chopped them up and through them in in chunks. They never really smoothed out in the batter, they stayed chunky, but once it was baked up it didn’t seem to matter. No chunks or weird spots in the final bread - Yay for lazy success!

  • 1/4 cup (85g) honey

  • 2 large eggs

  • 1/2 cup (113g) sourdough starter, unfed/discard

  • 2 cups (240g) Unbleached All-Purpose Flour - I used some whole wheat, a little under a cup

  • 3/4 cup (85g) chopped nuts, optional

Directions
Preheat the oven to 325°F. Lightly grease a 9" x 5" loaf pan, set aside.

In a large bowl, combine the butter, sugar, vanilla, cinnamon, nutmeg, baking soda, baking powder, and salt, beating until smooth. Add the mashed bananas, honey, eggs, and sourdough starter, again beating until smooth. Add the flour then the nuts, stirring just until smooth.

Transfer the batter to the prepared loaf pan, smoothing the top. Let it rest at room temperature for 10 minutes.

Bake the bread for 45 minutes, then gently lay a piece of aluminum foil across the top to prevent over-browning.

Bake for an additional 20-25 minutes. Remove the bread from the oven; a long toothpick or thin paring knife inserted into the center should come out clean, with a few wet crumbs clinging to it.

Allow the bread to cool for 10 minutes in the pan. Remove it from the pan and cool completely on a rack.

50% Whole Wheat Sourdough (with flax and sunflower seed)

IMG_9899.jpeg

Back in October I felt like I was in a rut with my sourdough bread. I had been working on trying to improve a basic sourdough bread recipe, making the same bread every 1-2 weeks for months. My bread would turn out good, but my goal was to achieve a beautiful “open crumb”, instagram style. Week after week I would be some level of disappointed (just in the crumb, never with the flavor! A tighter crumb is still delicious!). I finally decided to just try something different. Instead of doing the same thing over and over again I decided to switch it up and try a different recipe.

I’m a fan of whole wheat bread, the higher the percentage of whole grains the better, but they can be tricky for sure. I admire my local bakery’s 100% whole wheat breads. I’m not sure I’ll ever get to that point, but I decided to go for a 50/50 loaf, 50% whole grains, 50% refined grains.

IMG_9909.jpeg

I used The Perfect Loaf’s Fifty Fifty Whole Wheat Sourdough Bread recipe as my base recipe, but tweaked the technique a little, using Fullproof Baking’s instructions for her Open Crumb Sourdough Bread instead (laminating the dough, coil folds, etc).

Verdict? I’ve really like this recipe and method. I’ve made it 5 or 6 times now and it has turned out really well each time. I like the increased percentage of whole grains for nuttiness, chew, and a touch more nutrition. It rises well and the crumb is lovely. No, it’s not a super “open crumb”, but I didn’t expect that, and there is nothing wrong with a little tighter crumb. And, as per usual, I haven’t followed this exact recipe each time. I’ve replaced some of the whole wheat flour with spelt flour, I’ve replaced some of the whole wheat flour with fresh ground whole wheat, I’ve added flax, and sunflower seeds, I’ve added walnuts and dates. They’ve all been delicious! Can’t wait to see what happens next!

My 50/50 Whole Wheat Bread
Ingredients
Levain

  • 26 grams active sourdough starter

  • 13 grams bread flour

  • 13 grams whole wheat flour

  • 26 grams water

Dough

  • 226 grams whole wheat flour

  • 226 grams bread flour

  • 367 grams water

  • 8.5 grams salt (1 1/8-1 1/4 teaspoon)

  • 71 grams Levain (from above)

Directions:
Build the liquid levain by mixing the starter, flours, and water in a small bowl and until everything is hydrated. Let sit somewhere around 78°F for about 5-6 hours, or until about tripled in volume.

Autolyse: Mix the flour and water from the “dough” section above, reserving 50 g water for later, in a bowl until all dry bits are hydrated. Cover the bowl and store somewhere nice and warm (around 80) for 2-3 hours.

When the levain is ready, add the called for ripe levain to your autolysed dough along with about half of the reserved 50g of water and mix thoroughly with your hands. Mix/knead the dough for about 4 minutes in the bowl just until the dough started to show signs of a smooth surface. Cover and let sit at room temperature for about 20-30 minutes. Next, spread the salt on top of the dough with the remaining water to help dissolve. Pinch through the dough thoroughly and fold the dough over itself to help incorporate and absorb the remaining water. Let rest 30 minutes.

Next perform a fold: Lightly mist the counter with water. Wet your hands with water and flip the dough out onto the counter. Using a bench scraper, pull the dough from the top down folding the dough onto itself. Repeat this process on all four sides of the dough. Flip the dough over, round it up and return to the bowl. Cover and let rest 30 minutes.

Lamination: Mist the counter with water again. Transfer dough to counter. Lift and gently stretch the dough out from the center with wet hands. Form a large, thin rectangle of dough. Pick up one edge of the dough and fold into the center approximately ⅓ of the way across, then fold the other side into the center over the first section. Finish by folding the top down halfway and then the bottom over the top forming a square in the end. Move your dough to a small square Pyrex-type dish. Let rest 45 minutes.

Stretch and Folds: For each stretch and fold, use wet hands to reach under the dough and pull it up slowly and evenly, detaching the dough on the side farther away from you. The dough will naturally wrap itself under. Rotate the dish and perform the same coil fold again on the other three sides. The top part of the dough is the part detaching from the dish and coiling under. 4 total coil folds. While doing this be sure to pop and large air pockets as these are not signs of fermentation, they are pockets introduced during mixing and lamination. Cover and let rest until time for the next stretch and fold.

The number and frequency of the folds is dependent on the length of bulk as well as your dough’s extensibility and how the dough develops over the course of the bulk. For this recipe I did 4 stretch and folds separated by about 45 minutes each and around 72 degrees F.  My total bulk fermentation was about 6-6.5 hours this time.

Shaping: 
When the dough is ready to shape it should appear puffy and somewhat light, with some roundness at the edges. Flour the counter top with flour. Release dough from top of dish and flip the dish over and allow it to release from the dish onto the counter. Use a bench scraper to tuck flour under the edges of the dough. Then remove the excess flour from the workspace. 

Use the scraper to help pick up the side (top) flap of your dough and gently pull out just a bit before folding up on top of the center of the dough (about ⅓ of the way in, like a letter). Gently pat the dough during this stage to remove any large air bubbles to ensure a more even crumb. Repeat the fold with the other side of the dough, folding it into the center. Then lift the top of the dough and begin to roll down onto itself. Use your thumbs to gently but firmly tuck the dough in creating a more taught surface on top of the dough. Once you roll fully up and get to the seam, seal the edge using your fingers. The use your fingers to pinch the edges to seal.

Dust the top of your dough with brown rice flour (this is ideal to prevent sticking to your banneton) and keeps the dough dry and prevents the surface from getting tacky. Use your scraper to flip over the dough so the seam side is up and the top of the dough is facing down. Gently lift and transfer the dough to the banneton. Cover and move on to the proofing stage. 

Proof: 
Let the dough sit at room temperature for an initial short proof (15-20 mins), then move to the fridge for an overnight retard for approximately 12-16 hours.

Bake: 
The next day it’s time to bake. Preheat oven with Dutch Oven in it for 1 hour at 450 degrees. Transfer dough, cold from fridge, to piece of parchment paper. Score at 45 degree angle. Transfer to preheated Dutch oven and put the lid on. Place in oven and bake, covered, for 20 minutes. Remove the lid and return the bread to the oven and continue baking another 30 minutes, or until the internal temperature reaches 206-210 degrees F. Remove from oven and cool on a wire rack.

Christmas 2020

I know for a lot of people Christmas was different this year. Smaller gatherings, less travel, the inability to see everyone, etc. I am thankful that for me a whole lot didn’t change. I don’t have a huge family, and I have several family members that live out of state so every year Christmas is different. This year was just another variation. No extended family gathering.

 
FullSizeRender.jpeg
 
IMG_0885.jpeg

On Christmas Eve this year, my dad actually invited Lara and I over for a prime rib dinner that he ordered from one of his favorite restaurants (The Alpen Rose in Holland. Sadly, it is closing at the end of the year so this is the last time I will eat anything from there). He ordered a 7 lb rib roast, red skin potatoes, a seasonal salad, and a charcuterie platter. It was all so lovely! I rarlely eat prime rib, but it is so good! And they did a great job with this one, it was cooked perfectly!

IMG_0877.jpeg
IMG_0881.jpeg

The four of us then headed to church for an 11:00 candlelight service. I was afraid we weren’t going to have any in-person services for Christmas because our church has been watching the COVID case trends carefully to decide which Sundays in-person services are safe. The two Sundays before Christmas we did not have in-person church, but thankfully the infection rates were looking better so we were able to have a Christmas service! I have to be honest, staying up past midnight was rough for me :) I’ve typically been in bed for hours at that point! But it was totally worth it. Beautiful music, candlelight, meditations, and being able to do this all in person - what an extra special blessing for Christmas this year.

IMG_9922.jpeg

Prior to dinner at my parent’s that evening, Lara and I took a Christmas Eve walk to Outside Coffee Co (a coffee shop place that has always been all outdoor all year! They were ahead of their time. They’ve had their igloos and fire pits since opening several years ago, way before COVID) for Christmas Eve lattes. It was cold, and a little windy, but perfect! A light dusting of snow, a fire pit, and a latte. Perfect.

On Christmas morning Lara and I started the day with a Chirsmas Day run which is always so nice, and so quiet on the roads! We then had a friend over for a Christmas morning brunch. We served buckwheat scones with lemon curd, smoked ham with double cream gouda, and some fresh berries. It was perfect. Great conversation, great company!

IMG_0916.jpeg

I hadn’t made these scones in a while and now I don’t know why, they are so good! A little crumbly and sandy due to the buckwheat, slightly sweet and nutty. The lemon curd was the perfect accompaniment. I hadn’t tried the combo in the past, but it was wonderful! I may always need lemon curd with these scones.

IMG_9951.jpeg

Lara and I then headed to our parent’s home, with a stop at the dog park for a short hike, for a little relaxation by the fire. Just hanging out which is so nice.

Later that afternoon my brother and his family came over for our (now traditional) homemade pizza dinner followed by presents. I love homemade pizza so this has been a great tradition over the past several years. I hope everyone else likes it too!

IMG_9960.jpeg
IMG_9966.jpeg

The pizzas turned out really well this year! Last year for whatever reason, I wasn’t happy with how they turned out. I tried baking them on baking sheets, and I’m not sure I even preheated the baking sheets, all I know is they were a little anemic looking and didn’t rise much in the oven. More flatbread like than puffy pizza crust. This year was completely different! I heated two baking steels for over an hour in my mom’s new oven. The dough was nice and puffy, perfectly timed to go straight into the oven after topping. If I had my choice I would let the pizza dough rest a little longer after dividing, but it didn’t really seem to matter this time.

IMG_9983.jpeg
IMG_9975.jpeg

I had people shape their dough on a flour counter, and once shaped as desired they placed the dough/crust on a square piece of parchment paper. Then they could top as desired and the pizza, parchment and all, was transferred to the hot baking steel. I was able to fit two pizzas at a time onto each steel.

IMG_9981 2.jpeg

We only had one casualty (see left); as I was sliding the whole rack back into the oven after placing my nephew and my brother’s pizzas on the steel, I watched my nephew’s pizza (which was in the back corner of the steel) slowly waterfall off the back of the steel and onto the bottom of the oven. Talk about smoke and burning dough! I was actually able to pick up most of the dough with a large spatula and put it back on the steel in one big blob, but most of the cheese burned in the bottom of the oven. Very sad. Thankfully we had some extra dough for my nephew so he was still able to have a nice pizza. Lara and I enjoyed the blob of pizza. Almost like a calzone! Just without a lot of filling, but the inside of the dough was very soft and fluffy!

All the rest of the pizzas turned out great thankfully! I found out that my mom’s oven seems to be significantly hotter than mine. The pizzas only baked for maybe 5-8 minutes (I didn’t really time it) which is so much less time than I do at home. And the bottoms of the first pizzas were even a little charred and burned in spots (which I loved, but my nephew wasn’t a fan of). Even though I preheat mine to 550 degrees for over an hour sometimes, it has never been as hot as hers was (and I think hers only preheats to 500 degrees). Now I’m questioning my ovens accuracy, it’s ability to actually get up to 500 or 550 degrees, or perhaps my electricity… I know for a fact the electric in my house is NOT great. So I’m super excited for my kitchen renovation! New electrical, new oven - I can’t wait to see how much better everything will work (as I anticipate it will!)!

IMG_9987 2.jpeg

After pizza it was time for presents. Lots of presents! This seemed to be the year of the canvas bag! I got two (one farmers market bag, and a reusable grocery bag, both from Food52), and Lara got a canvas garden bag. They’re all beautiful and will be very useful I have no doubt. I also got some great running gear, a headband and scarf from Tracksmith to add to my winter running wardrobe which has greatly improved over the past month. I finally pulled the trigger and bought myself some new winter running tops and tights and it has been glorious! The stuff I had been wearing was SO old! I was wearing some of it in college it’s that old. I’m still waiting on a new running jacket (the NDO jacket from tracksmith) which I splurged on and bought myself on boxing day, the day it was available. Should be coming this weekend and I can’t wait to try it!

IMG_0015 2.jpeg

After presents we enjoyed a short dessert time before everyone headed home. Earlier in the afternoon I had felt like baking something, so Lara found a recipe for a gingerbread loaf cake that was quick and easy to throw together, and my mom had all the ingredients in the house. So we had baked that before pizza time. I loved it! I love gingerbread and this cake was perfect! We used a combo of dark, and blackstrap molasses which is what my mom had, and I thought it was great. I like using the darker molasses in baking. It just adds more flavor, and bitterness which I like. The cake was moist and rich. It would have been perfect with a little whipped cream or my personal favorite, cream cheese frosting. But it was wonderful on it’s own as well. I will definitely make this again.


Basic Pizza Crust
From Sally’s Baking Addiction
Ingredients

  • 3 and 1/2 cups (440g) all-purpose flour

  • 2 and 1/4 teaspoons instant yeast

  • 1 Tablespoon (13g) granulated sugar

  • 3/4 teaspoon salt

  • 2 Tablespoons (1 ounce) olive oil

  • 1 and 1/3 cups water

Directions
Prepare the dough: In the bowl of a stand mixer with the dough hook in place, whisk together the flour, yeast, sugar and salt. Add the olive oil and mix until the dry ingredients are slightly moistened and coated in the oil. Then add the water and knead for 5-6 minutes until a smooth shiny dough is formed. Form the dough into a ball and place in a lightly oiled bowl.

Cover with plastic wrap and allow the dough to rise 60-90 minutes at room temperature, or until about double in size.

Shape the dough: When the dough is ready turn it out onto a lightly floured work surface. Divide the dough into two pieces and shape each piece into a round. Let these rest on the counter for 5-10 minutes to help the dough relax.

Shape the dough: press each ball of dough into a disc and stretch and flatten the disc into a circle, approximately 12-inches in diameter. Cover dough lightly with plastic wrap or a clean kitchen towel and allow to rest for a few minutes as you prepare your pizza toppings. (You can also top immediately and bake if you don’t have the time, it will turn out either way if you’re in a pinch).

For this Christmas I made 2.5 batches of the dough above. From this I ended up making 7 pizzas initially, and then an 8th after my nephew’s initial pizza fell off the steel. After all that we still had a little dough left over. Probably a little more than one pizzas worth, but I didn't weigh it. Each pizza was 215 grams which I thought was a nice size. They were definitely not too small. More than I want to eat on my own for sure. But no one else had any trouble finishing theirs off! Everyone else ate their own whole pizza, Lara and I ate 1/3 each of ours.


Spiced Gingerbread Loaf
From Sally’s Baking Addiction
Ingredients
For the Cake:

  • 2 cups (250g) all-purpose flour

  • 1 teaspoon baking soda

  • 1 and 1/2 teaspoons ground ginger

  • 1 and 1/2 teaspoons ground cinnamon

  • 1/4 teaspoon ground cloves

  • 1/4 teaspoon salt

  • 1/8 teaspoon fresh ground pepper

  • 3/4 cup (225 grams) unsulphured or dark molasses

  • 3/4 cup (6 ounces) hot water (about 100°F (38°C))

  • 1/2 cup (115g; 1 stick) unsalted butter, softened to room temperature

  • 1/3 cup (67g) packed light or dark brown sugar

  • 1 large egg, at room temperature

  • 1 teaspoon pure vanilla extract

For the Orange Icing:

  • 1 cup (120g) confectioners’ sugar, sifted

  • 2–3 Tablespoons (30-45ml) orange juice

Directions
Adjust the oven rack to the lower third position and preheat oven to 350°F. Grease a 9×5-inch loaf pan. Set aside.

In a medium bowl, whisk the flour, baking soda, ginger, cinnamon, cloves, salt and pepper together until combined. Set aside. In a separate bowl or dish, whisk the molasses and hot water together.

In a large bowl using a handheld or stand mixer fitted with a paddle attachment, beat the butter on high speed until smooth and creamy – about 1 minute. Add the brown sugar and beat on high speed for 1 minute until creamed together fairly well. Scrape down the sides and up the bottom of the bowl with a rubber spatula as needed. On medium-high speed, beat in the egg and vanilla extract until combined. Scrape down the sides and up the bottom of the bowl as needed. With the mixer on low speed, add the dry ingredients in three additions alternating with the hot water/molasses and mixing each addition just until incorporated. Avoid overmixing. Batter will be thin.

Pour batter into prepared pan. Bake for around 50-60 minutes (mine went about 47 minutes , I had to restart the timer at one point so I may have lost a few minutes, but it was perfect, so I’d probably start checking at around 45 minutes) or until baked through. All ovens are different and your loaf could take a little more or less time. To test for doneness, insert a toothpick into the center of the gingerbread loaf. If it comes out clean with only a couple moist (not wet) crumbs, it is done. Allow to cool completely in the pan set on a wire rack before removing from pan.

Make the icing: Whisk the confectioners’ sugar and orange juice together. Drizzle over cooled loaf. Tasty I’m sure, but option. Very good without the glaze.

Celery Root with Brown Butter, Oranges, Dates, and Almonds

IMG_9853 3.jpeg

This salad was the perfect complement to the stuffed pork loin roast I made last week. When I was planning this menu I first thought of making a crisp and simple garlicky kale and parmesan salad with bread crumbs - one of my staples, and always a good option. But the more I thought about it I realized that this was the perfect opportunity to go outside of my typical comfort zone and try something else new and fun. Holidays with good friends are the perfect time to do this!

I flipped through my favorite cookbook and found this seasonal recipe which look unique and not something I’m going to put together for myself on a typical weeknight. The star of this salad is the humble celery root. Admittedly not my favorite vegetable, but I’m aways up for a challenge - turn the theoretical lemon into lemonade!

IMG_9855 2 (1).jpeg
IMG_0780.jpeg

I thought this salad turned out great! There are so many assertive flavors here that the flavor of the celery root just blended into the whole dish seamlessly. There are a lot of components to this salad, so it did take some time to prep, but the end result was worth it!


Celery Root with Brown Butter, Oranges, Dates, and Almonds
From Six Seasons: A New Way with Vegetables by Joshua McFadden
Ingredients

  • 2 naval oranges, preferably Cara Caras or blood oranges

  • 1 small or 1/2 large celery root (about 3/4 lb)

  • 1/2 cup pitted dates, cut into quarters or smaller (I highly recommend Medjool dates instead of deglet noor dates, they are much softer and tastier in my opinion!)

  • 1/4 teaspoon dried chile flakes

  • Kosher salt and freshly ground black pepper

  • Extra-virgin olive oil

  • 1/4 cup Brined and Roasted Almonds (recipe below) - I would highly recommend making these, they are delicious and totally worth an additional step!

  • 1 small bunch chives, cut into 3-inch lengths

  • 1 small handful flat-leaf parsley leaves

  • 2 tablespoons unsalted butter

Directions
Grate the zest from one of the oranges, then squeeze the juice from half of that grated orange.

Cut a small slice from the navel and stem ends of the second orange and set the orange on the cutting board on one cut end. Using a sharp paring knife, cut away all the orange peel and the underlying white pith from top to bottom, working in strips around the orange. Slice off any remaining bits of pith. Halve the orange pole to pole (not through the equator). Set a half on the cutting board cut side down and cut crosswise into 1/8-inch thick half moons. Repeat with the other half and put all slices in a large bowl.

Using a sharp paring knife, cut away all tough exteriors of the celery root; if there are dark fissures remaining, cut those away too. Cut the whole thing in half, and if the circumference of the halves is still big and unwieldy, halve them again. Set one piece of celery root on the cutting board on a cut side, and slice as thin as you can. When the piece of celery root gets wobbly, turn to another side and keep cutting — it’s okay if the slices are shaped differently Put the celery root in the bowl with the oranges.

Add the juice from the orange half you squeezed, half the grated zest (save the other half), the dates, chile flakes, 1 teaspoon salt, and lots of twists of fresh black pepper and toss. Taste and adjust the salt, black pepper and chile flakes until the salad is very zippy. Add a glug of olive oil and toss again. Add the almonds, chives, and parsley and toss. Taste and adjust one more time.

Melt the butter in a small saucepan or skillet over medium heat. Cook the butter, swirling the pan every few seconds, until all the water inside the butter has sizzled off and the milk solids at the bottom of the pan begin to turn a pale golden color, 1 to 2 minutes. Cook the butter until it turns golden brown and smells nutty and delicious, another few seconds. When the butter looks and smells perfect, immediately — so the butter stops cooking and doesn’t get too dark — pour it into a little bowl.

Arrange the salad on plates or a platter and pour the warm brown butter over top. Sprinkle with the reserved orange zest and serve.


Brined and Roasted Almonds
From Six Seasons: A New Way with Vegetables by Joshua McFadden
Ingredients

  • 1 cup water

  • 1/3 cup kosher salt

  • 1 ½ cups raw skin-on almonds (about 8 ounces)

Directions
Bring water to boil in a saucepan. Add the salt and stir to dissolve. Add the almonds to the hot brine, remove from the heat, and let them soak for 30 minutes.

Heat the oven to 375 degrees.

Drain the almonds thoroughly and spread them evenly in a single layer on a baking sheet.

Roast until they are lightly toasted and fragrant, about 12 minutes. Take one out to test by biting into it – the interior should be a light brown, almost the color of a paper bag. The nuts will be soft at this stage, but once completely cooled they will be very crunchy and nicely salty. Store in an airtight container for up to 2 weeks.

Stuffed Pork Loin with Chimichurri

IMG_0783.jpeg

Last Saturday Lara and I hosted a small Christmas gathering with our friend Lindsay and her husband Andrew. They both enjoy good food and trying new things so we were excited to try a new recipe, something fun we’ve never done before.

We thought that a stuffed pork loin sounded festive, fun, and celebratory. Something we won’t typically cook for ourselves, and sadly something our family just won’t enjoy that much so not something to make for them. I’m very thankful for friends who are excited about trying new things, because my family (however much I love them) isn’t.

We did some recipe hunting and settled on this recipe for an Argentinian style pork roast stuffed with olives, roasted red peppers, Chimicurri and other tasty things - a combination of things I would never think about putting together which is why I was excited to try it.

IMG_0792.jpeg

This was good to get me out of my typical routine (which for the last few months has been FULL of fresh lemon, parmesan, and garlic… so good!).

IMG_0800.jpeg
IMG_0758.jpeg

This recipe definitely had a lot of steps, but wasn’t difficult. Getting your mise en place done ahead of time is extremely helpful so I recommend prepping everything before starting to put the roast together. Make your chimichurri (or buy a good store bought version if that’s more your style, no shame in that if that’s what works for you). Get your spice mixture together, and then lay everything else out so it’s at hand and ready to go; your olives, peppers, capicola, breadcrumbs, and eggs (if using).

I made the chimichuri in the recipe below with a slight variation. I didn’t have any fresh oregano but could get fresh cilantro and parsley from the farmers market so I used that combination. I also made 2/3 of the recipe as printed and there was still plenty of it.

IMG_0723.jpeg

I do think a really good cut of pork is critical to the best final product. I bought a gorgeous 3.3 lb (I went slightly smaller than the recipe called for without any issues) center cut pork loin from my favorite butcher (Louise Earl Butcher for those in Grand Rapids, Matt is the best!). This roast was gorgeous! It had a beautifully thick cap of fat which roasted up so tasty. The recipe says to not trim this fat cap, but I did end up trimming a little from mine because it was so thick to start. It did not detract from the finished roast, there was still an ample amount of fat.

The most challenging/technical part of the recipe was cutting the roast open so that I could stuff it. I watched a video which helped. It’s important to have a good sharp knife, and to go slow. This was the first time I had done this and it turned out fine.

Once that step was done the rest was pretty easy. Just start layering everything, starting with the spice mixture and chimichuri, then the capicaola that you cover with the festive combination of green olives (I used castelvetrano olives) and roasted red peppers (I roasted my own, but jarred are easy and delicious. I ended up roasting two large red bell peppers and probably used just a little over half of this in the roast).

Roll it up and tie it tightly with butchers twine to keep everything in place. Place the finished product on a wire rack over a baking sheet and into the oven. I think this could all easily be done in advance, the day prior if desired. I don’t see why it would be a problem to refrigerate at this point if you want to make it easy on yourself the day you’ll be serving this.

IMG_0784.jpeg

I ended up baking the roast for a total of 1 hour and 28 minutes (not the 1.5-2 hours as stated in the recipe, but I did have a slightly smaller roast) - it came in at just over 135 degrees, a little over 140 degrees in a few spots, so probably could have come out a minute or two earlier, but I don’t think it was a big deal, it was not overcooked or dry at all. I let it rest about 15-20 minutes before slicing and it was perfect. The nice thing about something like this is that the timing isn’t so so crucial. It can sit and rest anywhere from 15 minutes to an hour, so you have a lot of flexibility.

IMG_9855 2.jpeg

I served the roast with a Celery Root salad with Brown Butter, Oranges, Dates, and Almonds from Joshua McFadden’s Six Seasons (one of my all time favorite cookbooks!), as well as some fresh sourdough bread that I baked earlier that morning. It was a perfect combination.

Final verdict? This was amazing. I couldn’t have picked a better recipe for our party. It was beautiful, smelled amazing while roasting, and was one of the best tasting things I have made all year. I will definitely be making it again. The fat cap was crispy and fatty and basted the entire roast. The filling was perfect, an amazing combination of flavors as well as some texture differences.

Highly recommended for your next party!


Stuffed Pork Loin with Chimichurri
From 177 Milk Street
Ingredients

For the Chimichurri:

  • 3 cups lightly packed fresh flat-leaf parsley

  • 1/3 to 1/2 cup lightly packed fresh oregano

  • 7 medium garlic cloves, smashed and peeled

  • 1 1/2 teaspoons ground cumin

  • 1 1/2 teaspoons ground coriander

  • 3/4 teaspoon red pepper flakes

  • Kosher salt and ground black pepper

  • 1/4 cup red wine vinegar

  • 3/4 cup (6 ounces) extra-virgin olive oil

For the Roast:

  • 1 tablespoon ground cumin

  • 1 tablespoon ground coriander

  • 2 teaspoons packed light brown sugar

  • Kosher salt and ground black pepper

  • 4 -pound boneless center-cut pork loin

  • 6 ounces thinly sliced capicola or mortadella

  • 1/2 cup pitted green olives, roughly chopped

  • 1 1/2 cups drained roasted red peppers, patted dry and torn into large pieces

  • 1/3 cup panko breadcrumbs

  • 3 hard-cooked large eggs, peeled and halved crosswise (optional in my opinion, I did without and it was just fine)

  • 1 1/2 tablespoons extra-virgin olive oil

  • Flaky sea salt, to serve (optional)

Directions
To prepare the Chimichurri: in a food processor, combine the parsley, oregano, garlic, cumin, coriander, pepper flakes, 1 teaspoon salt and ½ teaspoon black pepper. Process until finely chopped, 30 to 45 seconds. Scrape the bowl, add the vinegar and oil, then process until as smooth as possible, 45 to 60 seconds. Measure ¼ cup of the chimichurri into a small bowl and set aside; transfer the remainder to a serving bowl; cover and refrigerate until ready to serve.

Heat the oven to 350°F with a rack in the lower-middle position. Line a rimmed baking sheet with extra-wide foil and a fit with a wire rack.

To prepare the roast: in a small bowl, stir together the cumin, coriander, brown sugar, 3½ teaspoons salt and 1½ teaspoons pepper. Set aside. Heat the oven to 350°F with a rack in the lower-middle position. Line a rimmed baking sheet with extra-wide foil and a fit with a wire rack. To prepare the roast, in a small bowl, stir together the cumin, coriander, brown sugar, 3½ teaspoons salt and 1½ teaspoons pepper. Set aside.

Cut eight 24-inch lengths of kitchen twine. Place the roast fat side down on a cutting board, perpendicular to the counter's edge. With a sharp boning or carving knife, cut along the length of the roast, down its center, stopping about ½ inch from the bottom. Starting at the base of the cut and with the knife blade held as parallel as possible to the cutting board, slice along the length of the roast, unrolling the meat with your free hand as you go. Continue cutting and unrolling the meat until the half is a flat, fairly even surface ½ to ¾ inch thick. Rotate the roast 180° and repeat with the second side. If there are areas that are slightly too thick, use a meat mallet to pound those areas to the same thickness.

Season the pork on both sides with the spice mixture. Place the meat fat side down and with a short side nearest you. Spread the reserved ¼ cup chimichurri evenly on the meat. Shingle on the capicola slices, covering the entire surface, then sprinkle evenly with the olives. Lay the red peppers on top, tearing as needed to cover the entire surface. Sprinkle evenly with the panko. Place the egg halves cut sides down in a row about 3 inches from the bottom edge. Lift the bottom edge over the eggs and continue rolling the meat into a tight cylinder. Position the cylinder seam side down and tie at even intervals with the twine, then snip off excess twine. If any bits of filling fall out, simply tuck them back in. Brush the roast on all sides with the oil.

Transfer the roast fat side up to the prepared baking sheet. Bake until the top is nicely browned and center of the roast reaches 135°F, 1½ to 2 hours. Let rest on the wire rack for 30 to 60 minutes. Remove the chimichurri from the refrigerator about 30 minutes before serving. Cut the roast into ½-inch-thick slices, removing the twine as you go. Arrange the slices on a platter, sprinkle with flaky salt (if using) and serve with chimichurri.

Tip: Don't trim the fat off the pork loin. The fat cap lends richness to an otherwise lean cut and gives the roast an appealing burnished-brown appearance. Don't rush when butterflying the pork loin. Short, small cuts allow for the best control so you can maintain an even slice and adjust as you go. Don't worry if the surface of the butterflied meat is not perfectly flat or even; it won't matter in the finished dish.

Christmas Cookies 2020

IMG_0619.jpeg

Last week both Lara and I took some time off and decided it was the perfect opportunity to do our yearly Christmas cookie baking. We knew that we had to make our favorite molasses cookies which we’ve made for several years in a row now. It’s the only time I make these deep, rich and chewy cookies, and they are just so good that I can’t pass them by. Along with this we decided on a buttery sprinkle cookie for a visual and flavor contrast; light and buttery, scented with a little almond extract and with a slight tang from some cream cheese. Finally, we went with a chocolate peppermint biscotti. I really like biscotti, and in cookie bags I love the contrast in shape - long and narrow which gives more visual interest to the bags. I have made a lot of biscotti in the past, but never chocolate in the past. I was a big fan of the chocolate version!

IMG_0671 2 (1).jpeg

Along with this trio, Lara also made one version of her famous decorated sugar cookies. She had seen a new technique for marbling the icing into beautiful swirls so decided to try it out. It turned out great, and was pretty easy which is always a win-win! She finished them off (the next day after the icing had dried) with some luster powder.

IMG_0623.jpeg

We had to balance all that sugar and butter with some kale from the farmer’s market… ;)

IMG_0536.jpeg

I decided to try a variety of sprinkles. As I expected, my favorites were the nonpareils, and the jimmies. I didn’t like the colored sugar as much as the sprinkles. But there is no “right” sprinkle to use!

IMG_0556.jpeg

Whenever I’m making a new cookie, I get a little nervous not knowing exactly how it’s going to spread during baking. These two photos show the before and after of the confetti cookies. They baked up nicely. A little spreading, but still a nice puffy center. I was happy with the final outcome.

Shot a few pictures in natural light the next day, alongside a few loaves of bread I made as well.

IMG_0648.jpeg

Overall, I heard great feedback about all the cookies. More for the molasses and sprinkle cookies which I expected. But all three were great options and worth doing again!


IMG_0559.jpeg

Chocolate Peppermint Biscotti
Adapted from Allrecipes
Ingredients

  • 1/2 cup butter, softened

  • 2/3 cup (133 grams) white sugar

  • 1/4 cup (20 grams) unsweetened cocoa powder

  • 1 1/2 teaspoons baking powder

  • 1/2 teaspoon salt

  • 2 eggs

  • 1/4 teaspoon peppermint extract

  • 1 3/4 cups (210 grams) all-purpose flour

  • ~1 cup (4 ounces) chopped dark chocolate

Directions
In a large mixing bowl, cream butter and sugar with an electric mixer until light and fluffy. Gradually beat in cocoa, baking powder and salt. Beat for 2 minutes. Beat in the eggs one at a time, followed by the peppermint extract. Stir in flour by hand. Mix in chopped chocolate. Cover dough, and chill for about 1 hour.

Preheat oven to 375 degrees. Divide dough into two parts, and roll each part into a 9 inch long log. Place logs on lightly greased cookie sheet, about 4 inches apart. Flatten slightly.

Bake for 20 to 25 minutes, or until toothpick inserted in center comes out clean. Cool on cookie sheet for 5 minutes, then carefully transfer to a wire rack to cool for one hour.

Cut each loaf into 1/2 inch wide diagonal slices. Place slices on a baking sheet, and bake at 325 degrees for 25-30 minutes, until completely dried through and crisp.


IMG_0545.jpeg

Christmas Confetti Cookies
From Smitten Kitchen
Ingredients

  • 3 cups (375 grams) all-purpose flour

  • 1 teaspoon baking powder

  • 1/4 teaspoon baking soda

  • 3/4 teaspoon fine sea or table salt

  • 1 cup (8 ounces, 225 grams or 2 sticks) unsalted butter

  • 1/4 cup (2 ounces, 55 grams) cream cheese

  • 1 1/4 cups (250 grams) granulated sugar

  • 1 large egg

  • 2 teaspoons vanilla extract

  • 1/4 teaspoon almond extract

  • Sprinkles

Directions
Heat oven to 375 degrees. Line two baking large sheets with parchment paper.

Place flour, baking powder, baking soda and salt in the work bowl and pulse a few times to blend. Add butter and cream cheese in large chunks, plus sugar and blend until mixture is powdery. Add egg, vanilla and almond extracts and run machine until the dough balls together.

Scoop dough into balls, approximately 1 1/2 tablespoons each. Roll them briefly in the palms of your hands before dropping them in a bowl of sprinkles and gently rolling to coat them evenly.

Transfer balls of sprinkle-coated dough to baking sheets at least two inches apart. Use the bottom of a drinking glass to press down on the cookies until they are about 1/2-inch tall. Bake for 9 to 10 minutes until they look underbaked but lightly golden underneath. Let set on the baking sheet on a rack for a few minutes before transferring to cooling racks to cool the rest of the way.


Molasses Cookies
Ingredients

  • 2 cups (260 grams) all-purpose flour

  • 2 teaspoons baking soda

  • 1 1/2 teaspoon ground cinnamon

  • 1 teaspoon ground ginger

  • 3/4 teaspoon ground cardamom

  • 1⁄2 teaspoon salt

  • 1 large egg

  • 1⁄2 cup (1 stick) unsalted butter, melted

  • 1⁄3 cup granulated sugar

  • 1⁄3 cup robust-flavored (dark) molasses

  • 1⁄4 cup (packed) dark brown sugar

  • Coarse sanding or raw sugar (for rolling)

Directions
Place racks in lower and upper thirds of oven; preheat to 375°. Whisk flour, baking soda, cinnamon, ginger, cardamom, and salt in a small bowl. Whisk egg, butter, granulated sugar, molasses, and brown sugar in a medium bowl. Mix in dry ingredients just to combine.

Place sanding sugar in a shallow bowl. Scoop out dough by the tablespoonful and roll into balls (if dough is sticky, chill 20 minutes). Roll in sugar and place on 2 parchment-lined baking sheets, spacing 2” apart.

Bake cookies, rotating baking sheets halfway through, until cookies are puffed, cracked, and just set around edges (overbaked cookies won’t be chewy), 8–10 minutes. Transfer to wire racks and let cool.


IMG_0651.jpeg

Vanilla-Almond Sugar Cookies
Ingredients

  • 3 cups all-purpose flour

  • 2 teaspoons baking powder

  • 1 cup sugar

  • 2 sticks butter, cold

  • 1 egg

  • 3/4 teaspoon pure vanilla extract

  • 1/2 teaspoon pure almond extract

Directions
Combine the flour and baking powder, set aside. Cream the sugar and butter. Add the egg and extracts and mix. Gradually add the flour mixture and beat just until combined, scraping down the bowl, especially the bottom.

The dough will be crumbly, so knead it together with your hands as you scoop it out of the bowl for rolling 

Roll onto a floured surface and cut into shapes. Place on parchment lined baking sheets and freeze for 5 minutes. Bake chilled cookies for 10-12 minutes at 350. Let sit a few minutes on the sheet, then transfer to a cooling rack to cool completely. 


Royal Icing
Ingredients

  • 6 oz (3/4 cup) warm water

  • 5 tablespoons meringue powder

  • 1 teaspoon cream of tartar

  • 1 kilogram (2.25 pounds) powdered sugar

Directions
Pour the warm water and meringue powder into the bowl of an electric mixer. Mix it with a whisk by hand until it is frothy and thickened, about 30 seconds.Add the cream of tartar and mix for 30 seconds more.

Pour in all of the powdered sugar at once. Using the paddle attachment, mix slowly, on the LOWEST speed, for a full 10 minutes. Icing will get thick and creamy.

Cover the bowl with a dampened towel to prevent crusting and drying.

Tint with food colorings and thin the icing with small amounts of warm water to reach the desired consistency.


Thanksgiving 2020

IMG_0389.jpeg

Thanksgiving 2020. A different holiday than usual that’s for sure. Our family didn’t really have any big yearly traditions for Thanksgiving when I was growing up, each year was different, so to me a COVID19 Thanksgiving was just one more variation. However, I know there are so many people that had to adjust their plans and traditions significantly.

Thankfully, I was still able to get together with my immediate family and have a nice dinner and conversation which is what I want the most. Food and good company.

IMG_0347.jpeg

Lara and I ordered a turkey from the same place we’ve been getting the turkey for the past 5 or 6 years, and once again it did not disappoint. We got a 16 lb bird, more than we needed, but I had heard that some turkey farmer’s were worried about how things would go this year so I decided to just buy a big bird, cut it into parts, and only roast 1/2 of it. The other 1/2 would go into our freezer for another day. This worked great!

Half of the turkey was the perfect size for our group of 6 adults (several light eaters) and 3 children. It was also super easy to roast. One leg/thigh combo, one wing, and 1/2 the breast. I dry brined it overnight (uncovered) with salt, thyme and lemon zest. On Thanksgiving day, I added butter under the skin and then roasted on a cooling rack placed over a baking sheet that was lined with (3 layers) of foil. I started the turkey at 425 degrees for 20 minutes, then decreased the oven to 325 and roasted another 30-50 minutes until everything was done. The wing was done first, followed by the leg and then the breast. I was able to take them out as they were done to ensure nothing overcooked. (breast done at 155-160 degrees, dark meat done at 170 degrees).

I also made a chopped kale salad with parmesan cheese and bread crumbs. This was modeled after Joshua McFadden’s recipe, The Kale Salad that Started it All from the cookbook Six Seasons (which I LOVE and highly recommend!). I didn’t follow the recipe exactly this time, but used it as inspiration, and then added a mixture of shredded Brussels sprouts and leeks that I broiled with salt and oil (one of my favorite things to do).

Next was cranberry sauce which I love at Thanksgiving. I do a very simple sauce, typically I use just cranberries, water and sugar, but this year I switched it up slightly and instead of using sugar, I added in my last small jar of homemade orange marmalade from one or two years ago. Lara had made it for our dad for his birthday, but we had a jar leftover. Neither of us is a huge orange marmalade fan, but an orange marmalade/cranberry sauce was great!

Finally, I made dinner rolls. I used the same recipe as last year. A nice rich, butter, and slightly sweet roll. Nice and soft. Lara wanted to try shaping them a little differently, so we rolled them out like a cinnamon roll and brushed melted butter on them before rolling up. Once they baked up they were a little flakier and fun to pull apart. I would try this again for sure, but I’d try switching up how I laid them in the pan. Nothing wrong with how they turned out, but they looked a little silly in the pan after baking. Some had fallen over, and some had stayed upright, and it all looked a little jumbled.

IMG_0364 2.jpeg
IMG_0366 2.jpeg

I decided to not make a dessert this year, but did pick up a few packages of Thanksgiving macaroons from my local macaroon shop. They do such an amazing job I figured I’d let them do the work this year! I got 6 flavors; pumpkin, pumpkin creme brulee, cranberry sauce, speculaas, maple walnut and apple pie. My mom made some chocolate chip cookie bars, and then made a homemade angel food cake that she frosted with a caramel whipped cream. It was delicious! I don’t love angel food cake, a cake without any fat seems pointless to me, but when you cover it in whipped cream this completely changes things. Plenty of fat in that case!

IMG_0378.jpeg

I couldn’t resist a little snack board as well, because I need to have cheese at any party! This year I got Cabot Clothbound Cheddar and Comte. I don’t think I’ve tried the cheddar before and I loved it! It was a lot different than I expected, crumbly and dry, carmely and a little sweet with some crystals. Complex and interesting without being funky (at least in my opinion). I will DEFINITELY get this one again. And Comte is always yummy!

The last item that Lara and I brought was one of Lara’s favorite wines, a Beaujolais that she’d enjoyed at a local restaurant a few times. Our family members aren’t huge wine drinkers, but they’ll sip on a glass, so we brought a couple bottles of one we like and everyone enjoyed.


Soft and Buttery Dinner Rolls
From Sally’s Baking Addiction
Ingredients

  • 1 cup (240ml) milk, around room temperature

  • 2 and 1/4 teaspoons instant yeast

  • 2 Tablespoons granulated sugar, divided

  • 1 large egg

  • 1/4 cup (60g) unsalted butter, softened to room temperature and cut into 4 pieces

  • 1 teaspoon salt

  • 3 cups (375g) all-purpose flour or bread flour

  • Optional topping: 2 Tablespoons melted unsalted butter mixed with 1 Tablespoon honey

Add flour, salt, sugar and yeast to the bowl of your stand mixer fitted with a dough hook. Whisk to combine. In a separate bowl whisk together the milk and egg - add to the flour mixture. Beat on low speed for 30-60 seconds, scraping down the sides of the bowl with a rubber spatula as needed until all of the flour is moistened. Then increase to medium speed and knead until the the dough is well developed and comes together to form a soft dough. It will be sticky. Add flour as needed to make it manageable but don’t add too much so it becomes too dry.

Lightly grease a large bowl with oil or nonstick spray. Place the dough in the bowl, turning it to coat all sides in the oil. Cover the bowl with plastic wrap, or a clean kitchen towel. Allow the dough to rise in a relatively warm environment for 1-2 hours or until double in size.

Grease a 9×13 inch baking pan or two 9-inch square or round baking pans. Set aside.

When the dough is ready, turn it out onto a lightly floured surface. Divide the dough into 14-16 equal pieces. Shape each piece into a smooth ball. Arrange in prepared baking pan. (For a 9x13 inch pan, 15 rolls is nice to arrange in 3 rows of 5 rolls each).

Cover shaped rolls with plastic wrap, or a clean kitchen towel. Allow to rise until puffy, about 1 hour. Near the end of the rising time, preheat oven to 350°F. Bake for 20-25 minutes or until golden brown on top, rotating the pan halfway through. If you notice the tops browning too quickly, loosely tent the pan with aluminum foil. Remove from the oven, brush with optional honey butter topping, and allow rolls to cool for a few minutes before serving.


Stewed Beans with Shredded Pork and Salsa Fresca

IMG_9843.jpeg

A few weeks back now Lara and I spent the weekend working on this shredded pork and beans recipe. We had bookmarked it (figuratively) months prior and finally got to it, phew! It wasn’t challenging, and doesn’t call for that many ingredients, but there are a fair amount of steps. But it’s super easy to split them up into different days and make the whole thing more manageable.

IMG_9866.jpeg

The description of the recipe calls this “the best beans in the world”. Inspired by traditional stewed beans from Mexico City with optional version enriched with shredded pork (which I opted for!). It all starts with a sofrito of onion, garlic, tomatoes and jalapeños added to tender and fully cooked cranberry beans (recommended instead of the traditional pinto beans as the recipe testers found that the pinto beans available in the U.S. do not cook up with the same plumpness and velvety texture as the ones they tasted in Mexico; cranberry beans were a closer approximation).

They finish the beans with a fresh tomato salsa that I’m sure is a great addition, but I didn’t get around to making. Maybe next time. I topped mine with plain yogurt (or you could use sour cream) and fresh cilantro.

IMG_9861.jpeg

There are two main recipes, one for the beans and one for the pork. The recipe for beans states that the pork is optional. And it certainly could be, but I highly recommend doing both the pork and beans. The pork recipe gives you some delicious pork broth that you can use in the beans so that’s fun, and it was super tasty!

In the end, what this recipe really seemed like was a slightly different take on what I guess you would call an American chili. It was warming and filling. Perfect to eat by the fire on a cool fall night which Lara and I opted to do at the last minute! It was lovely. And our neighbors even brought us over some carrot cake to end the night with a bang! What a lovely surprise!

IMG_9873.jpeg

Stewed Beans
From 177 Milk Street
Ingredients:
For the Beans

  • 1 pound dried cranberry beans

  • kosher salt and ground black pepper

  • 1 tablespoons lard or neutral oil

  • 1 medium white onion, chopped

  • 2 medium garlic cloves, thinly sliced

  • 1 bunch cilantro, stems finely chopped, leaves roughly chopped, reserved separately

  • 1 1/2 quarts chicken broth, pork broth (recipe follows; optional) or water

For the Sofrito

  • 2 tablespoons lard or neutral oil

  • 1 large white onion, chopped

  • kosher salt and ground black pepper

  • 4 medium garlic cloves, minced

  • 2 pounds ripe tomatoes, cored and roughly chopped

  • 2 jalapeño chilies, stemmed, seeded and finely chopped

Directions:
To prepare the beans, in a large bowl, combine the beans with 2 quarts water and 2 tablespoons salt; stir to dissolve salt. Cover and soak the beans overnight at room temperature.

Drain the beans. In a large Dutch oven, heat the oil over medium heat until shimmering. Add the onion and 1 teaspoon salt, then cook, stirring occasionally, until it begins to brown, about 5 minutes. Stir in the garlic and cilantro stems. Cook, stirring, until fragrant, about 30 seconds. Stir in the beans and broth, then bring to a boil over medium-high. Cover, reduce to low and cook, stirring occasionally, until the beans are tender, about 1 hour.

While the beans cook, make the sofrito. In a 12-inch nonstick skillet over medium, heat the lard until shimmering. Add the onion and ½ teaspoon salt, then cook, stirring occasionally, until well browned, 5 to 7 minutes. Stir the garlic and cook until fragrant, about 30 seconds. Add the tomatoes and jalapeños and cook, stirring often, until the tomatoes have broken down, the liquid they released has cooked off and the mixture begins to sizzle, 10 to 15 minutes. Remove from the heat and set aside.

When the beans are done, remove the pot from the heat and let stand uncovered for 30 minutes to allow the liquid to thicken slightly. Return the beans to a simmer over medium, stirring occasionally. Add the sofrito and shredded pork (if using). Cook, stirring occasionally, until heated through, about 5 minutes. Taste and season with salt and pepper, then stir in the cilantro leaves. Serve with salsa fresca on the side.


Shredded Pork
Ingredients:

  • 2 pound boneless pork shoulder, trimmed and cut into 1 1/2-inch cubes

  • 2 jalapeño chilies, stemmed

  • kosher salt

Directions:
In a large pot, combine the pork, jalapeños, 1 teaspoon salt and 7 cups water. Bring to a boil over high, then reduce to low, cover and cook until a skewer inserted into the pork meets no resistance, 60 to 75 minutes.

Using a slotted spoon, transfer the pork to a medium bowl; set aside to cool slightly. Meanwhile, pour the broth through a fine mesh strainer set over a large bowl and let cool.

When the pork is cool enough to handle, shred into bite-size pieces, discarding any fat and gristle. Cover both the broth and shredded meat and refrigerate until ready to use or up to 3 days.


Salsa Fresca
Ingredients:

  • 1 pound ripe tomatoes, cored and finely chopped

  • 3 tablespoons finely chopped red onion

    1/4 cup lightly packed fresh cilantro, chopped

  • 1/2 jalapeno chili, stemmed, seeded and minced

  • 2 teaspoons white vinegar

  • 2 teaspoons extra virgin olive oil

  • Kosher salt

Directions:
In a medium bowl, stir together the tomatoes, onion, cilantro, jalapeño, vinegar, oil and 1 teaspoon salt. Let stand at room temperature for 15 minutes. Using a slotted spoon, transfer the salsa to a serving bowl, leaving behind the liquid. Taste and season with salt.