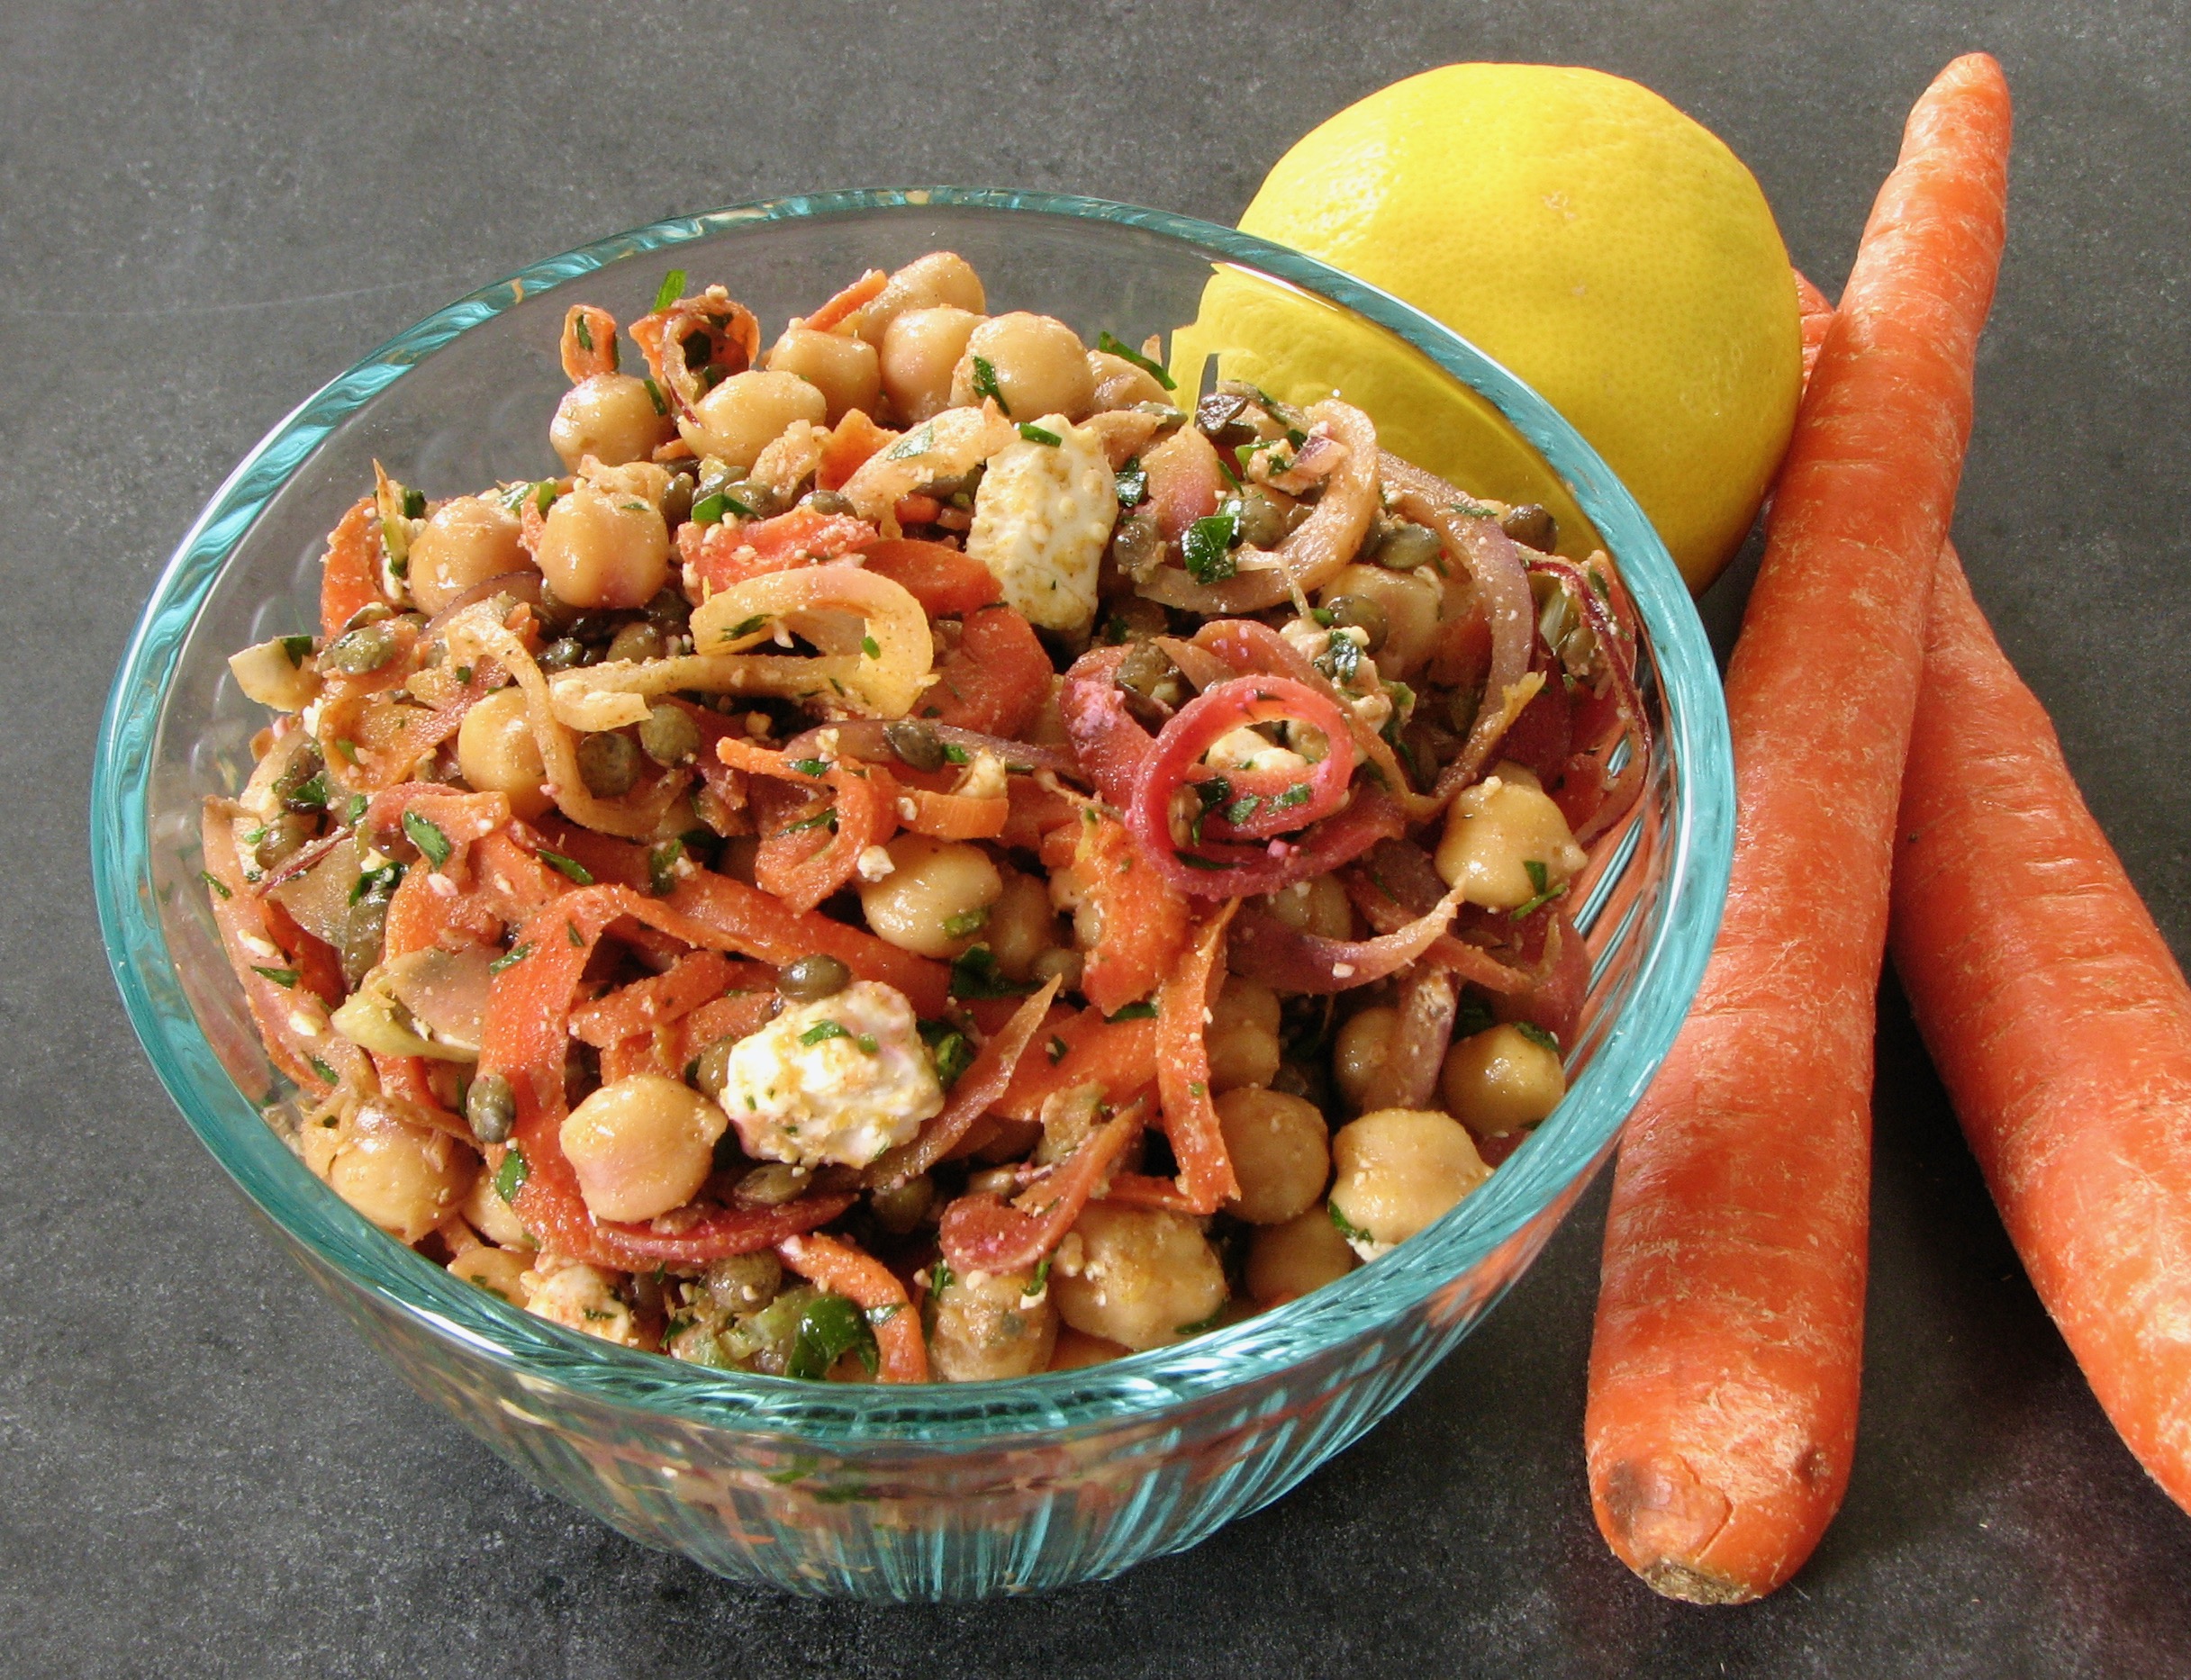
Carrot and Lentil Salad with Chickpeas and Feta
We had a potluck at work this past week which always gets me excited. The instant I hear about a potluck my mind goes into overdrive coming up with different options for what I might take. The first question is always, should I bring something savory or something sweet? My mind was filled with cupcakes, cookies, whoopie pies and macaroons, cinnamon rolls and brownies, but in the end I went with something savory this time. Since you never know what's going to show up at a potluck, it's always a good idea to bring something that you really like and wouldn't mind eating for lunch if the rest of the options are less than stellar.
After a lot of thinking I decided to go with a lentil salad. Healthy, easy, and perfect to make ahead. In fact, this type of salad is actually better made ahead so it has time to sit overnight and let the flavors meld. A mix of both lentils and chickpeas sounded perfect along with some lightly roasted carrots, finished with feta and lots of lemon and herbs. Light and fresh and delicious. A definite winner and something to make again and again!

For the carrots, I used my new gadget that I got for Christmas, a spiralizer! I have been eying them for so long, and this year my sister-in-law gave me one and it's been a lot of fun experimenting with. It was quick and easy to slice these carrots up into thin ribbons. I then roasted them for a short time to soften them up a bit, but not too long so that they started falling apart. It worked out really well for this salad. If you don't have a spiralizer you could either slice the carrots into thin matchsticks by hand, or do what I would do in that case and cut them into chunks and just roast for a lot longer until nice and tender. This would also work well in this salad.
Don't skimp on the lemon and parsley, they're both key to a well balanced and fresh final product. It would be a little flat without them. And the feta, oh the feta, I could could add feta to just about everything I eat and be happy. It really makes this salad, and turns it into a full meal. Enjoy!

Carrot and Lentil Salad with Chickpeas and Feta
From Delectably Mine
Ingredients
- 1 cup (200 grams) dried chickpeas
- 1 cup (180 grams) dried green lentils
- 4 large carrots, spiralized
- 1 green onion, sliced thin
- 1/4 red onion, sliced thin
- 1 lemon, zested and juiced
- 1/3-1/2 cup olive oil
- 3 cloves garlic, minced
- 1 teaspoon cumin
- 1/2 teaspoon coriander
- 1/4 teaspoon sweet paprika
- 1/4 teaspoon smoked paprika
- 1/8 teaspoon cayenne
- 1/4 teaspoon cinnamon
- 1/8 teaspoon allspice
- 1/8 teaspoon ginger
- 1-2 teaspoons honey
- 4 ounces feta cheese
- 1/2 cup chopped parsley
Directions:
Cook both the lentils and the chickpeas in boiling water until tender. Drain and place in a large bowl.
While the legumes are cooking, preheat the oven to 425 degrees. Toss the carrots with a little olive oil and salt and roast for approximately 15 minutes until tender, yet still retain some bite and texture. Add the carrots to the bowl with the chickpeas and lentils. Add the green onion, red onion, lemon juice and lemon zest. Give everything a quick toss to combine.
Preheat a small saucepan over medium-low heat. Add the olive oil and swirl around the pan. Add the garlic and let it cook for a minute or two until just starting to take on a little color. Watch it closely so it does not burn. Add the spices to the garlic oil and let them toast for 30-60 seconds until nice and fragrant. Remove pan from heat.
Pour the oil and spice mixture over the salad, add the honey, and toss until everything is well combined. Let the salad cool slightly and then finish with the feta and parsley, tossing once again to combine everything. Can eat warm or at room temperature. The flavors improve as they sit so this is a good dish to make the night before and pull out of the fridge when ready. Let come to room temperature before eating.