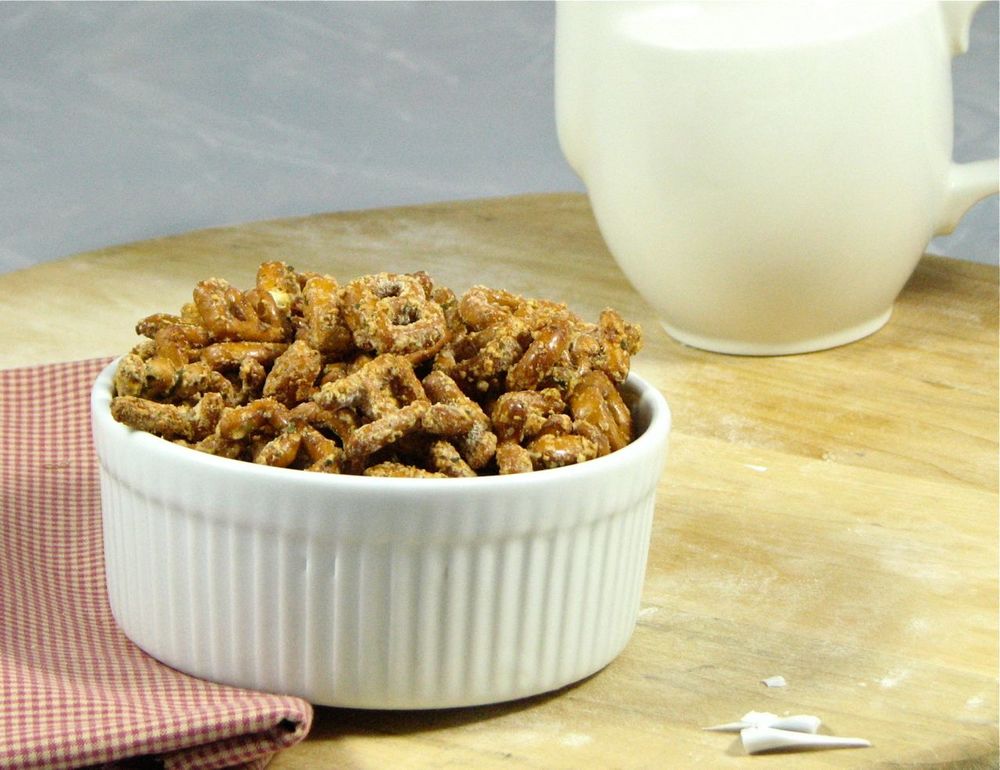
Homemade Ranch Party Pretzels
If you are in the mood for some good snack food I have just the thing for you. Homemade Ranch Party Pretzels are addicting and delicious, and as snack foods go, not too unhealthy. I made this recipe up because I was craving something salty and snacky, but I wasn't going to waste my money on a bag of some snack mix at the store when I can make something better and cheaper at home.
I'm always a sucker for Chex Mix, but just can't justify buying something full of ingredients such as "partially hydrogenated vegetable oil," "hydrolyzed soy protein," and "distilled monoglycerides" with "color added," especially when it's so easy to make yourself at home. It was time to make my own snack mix but I decided to switch it up a little and use ranch flavors instead of the traditional Chex Mix seasoning. I also didn't feel like going out and buying all the different components that make up normal Chex Mix so I grabbed a bag of pretzels and decided that was good enough, and I love these little alphabet pretzels, they are so cute!
It was all worth it, this snack mix is amazing! Covered in delicious homemade ranch seasoning, these pretzels satisfied my craving for some addictive snack. It's a dangerous thing but I'll risk it!

Like I said, I was too lazy to go buy the different cereals, nuts, bagel chips and whatever else you often see in mixes like this. The pretzels worked great by themselves, but it you're looking for all the different textures have at it, I think that would be great too. I covered the pretzels in a homemade ranch seasoning mix, the recipe for which I found online and have been wanting to try. It uses buttermilk powder and a whole bunch of dried herbs and couldn't be easier to mix together. There are so many things you can do with this homemade seasoning besides make this mix so it's totally worth whipping together a batch.
Also, one of the things that makes homemade Chex Mix so wonderful is the stick of butter on it. However, I wanted something that I didn't feel quite as guilty eating by the handfuls in the middle of the afternoon so I nixed the butter and used a lightly beaten egg white and a drizzle of olive oil instead. Honesty, I didn't notice the missing butter, not to say it wouldn't be absolutely fantastic, but I wanted these pretzels to be a little leaner than that. In the end I think I ended up with a super easy and absolutely delicious mix that you won't feel too bad about eating. Give it a try, I bet you'll agree.

Homemade Ranch Party Pretzels
From Delectably Mine
Ingredients
- 1 15-oz bag small pretzels
- 1 egg white, lightly beaten
- Drizzle of olive oil, if desired
- 1/2 recipe homemade ranch seasoning mix (see below)
Directions
Place entire bag of pretzels in a large bowl. Pour in the egg white and a drizzle of olive oil (if desired, for a little more flavor). Mix together until evenly coated. Pour on the ranch seasoning and mix until well combined.
Spread pretzels on a large baking sheet and bake for 25-30 minutes at 325 degrees, mixing halfway through the baking time.
Cool to room temperature and enjoy!
Homemade Ranch Seasoning Mix
From
Ingredients
- 1 cup dried buttermilk powder
- 2 tablespoons dried parsley, divided
- 2 teaspoons dried dill, divided
- 2½ teaspoons garlic powder
- 2¼ teaspoons kosher salt
- 2 teaspoons onion powder
- 2 teaspoons dried minced onion
- 1 teaspoon granulated sugar
- ½ teaspoon ground black pepper
- ½ teaspoon paprika
- ¼ teaspoon cayenne pepper
Directions
Place the buttermilk, 1 tablespoon of the parsley, 1 teaspoon of the dried dill, garlic powder, onion powder, dried minced onion, salt, sugar, black pepper, paprika and cayenne in a food processor or blender. Process until all of the ingredients are evenly distributed, about 15 seconds. Transfer the mixture to an airtight container or glass jar, add in the remaining 1 tablespoon dried parsley and 1 teaspoon dried dill and whisk to combine.
Store the mixture in the refrigerator for up to 3 months, or in the freezer for up to 6 months.
Note: 3 tablespoons of this mix is equivalent to a 1-ounce packet of ranch seasoning mix.