French Bread

I'm on a seemingly never ending hunt to find the perfect bread recipe. I want a flavorful loaf of bread the is soft and tender on the inside with a fine crumb. This bread must have a thin, crunchy, crackly, chewy, lightly golden crust that explodes when you take a bite and peppers the table with crumbs. So far I haven't even come close to finding this recipe. But that's okay, I will continue my quest. I am determined to find this bread recipe.

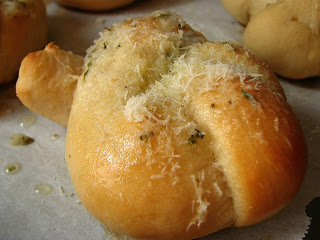
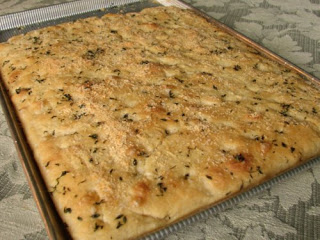
I started this loaf of French bread with the slight hope that this might be the bread. I realized rather quickly that it was not to be. While it turned out quite beautiful and rather tasty, it was not the bread I was hoping for. This recipe makes a very nice loaf. A little dense, I would cut back on the flour next time to create a lighter, softer loaf. The crust was more chewy, not the crackly surface I am looking for. However, the braid turned out lovely, and was easy to do. My search for the perfect loaf of bread continues!


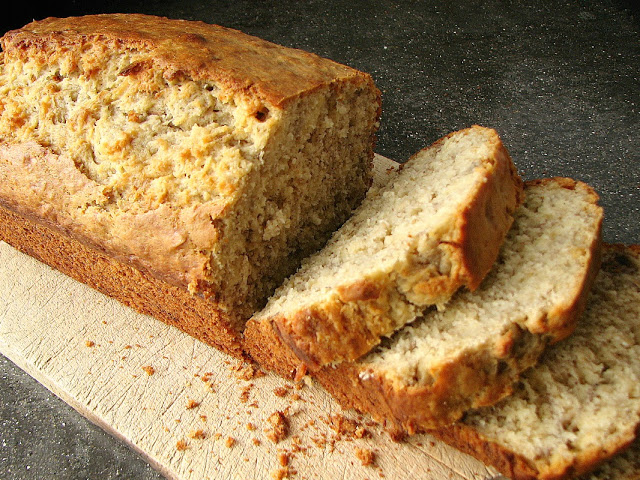
 Sliced and ready to butter

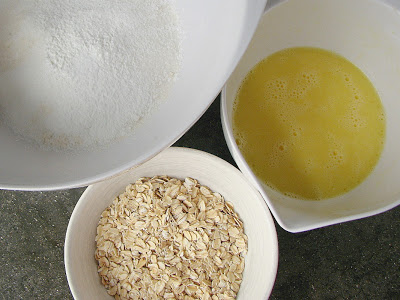
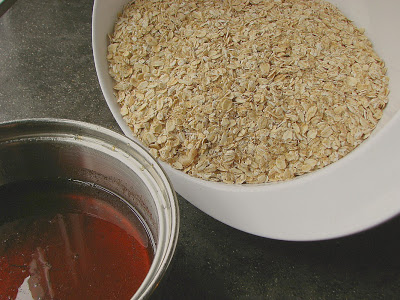
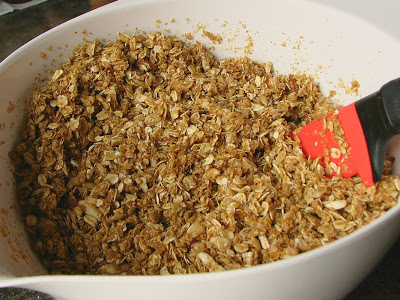
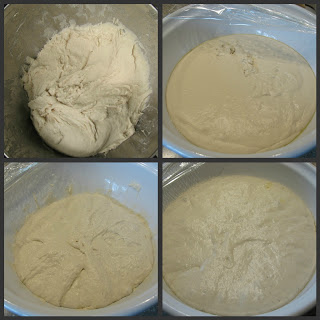
 Throw the starter in with the rest of the ingredients
on day two

 Ready for rise #1

 Nice and poofy 

 Gently deflate and turn over

 After rise #2

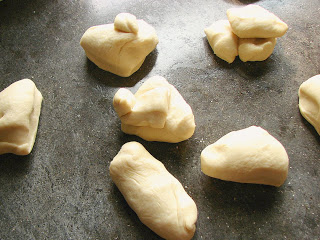
 Divide the dough into three pieces

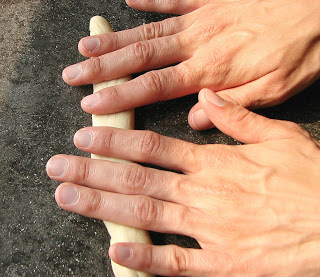
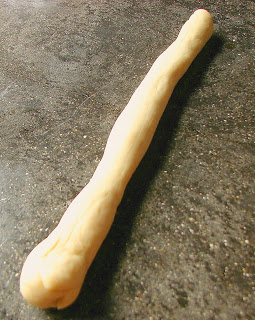
 Form them into some nice long ropes

 Pull out your hairstylist skills and start braiding

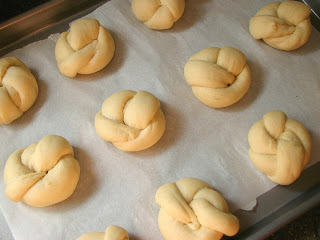
 Tuck the ends under, such a cute braid

 Cover the braid and let it get nice and poofy

 Perfect!
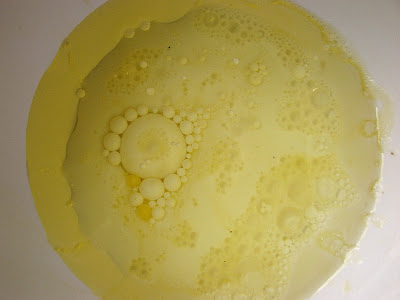
 Grab an egg white, mix it with some water...

 and brush the bread all over

 Bake the bread, then turn off the heat
and let it cool in the oven

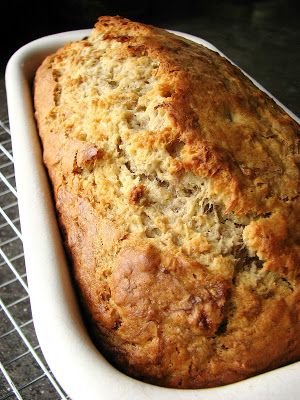
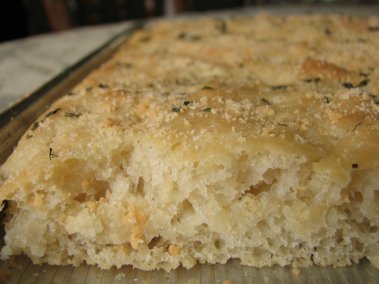
Perfect, golden brown and ready for slicing!
 Recipe
Ingredients 
Overnight Starter
  • 3/4 cup King Arthur Unbleached All-Purpose Flour
  • 1/2 cup lukewarm water
  • 1/8 teaspoon instant yeast  
Dough
  • 2 teaspoons instant yeast
  • 2/3 cup water
  • 2 3/4 cups King Arthur Unbleached All-Purpose Flour
  • 1 1/4 teaspoons salt
Topping
  • 1 egg white beaten with 1 tablespoon water
  • sesame seeds (optional)

The Starter: Mix the starter ingredients in a small bowl, cover, and let rest at room temperature overnight. 

The Dough: In a large bowl, combine the starter and the remainder of the dough ingredients. Using the dough hook, knead the dough for about 5 minutes; it should form a ball, but its surface will still be a bit rough. Transfer the dough to a lightly greased bowl, cover the bowl, and allow the dough to rise for 90 minutes, turning it over and gently deflating it after 45 minutes. 

Transfer the dough to a lightly greased work surface, and divide it into three pieces. Roll each piece into an 18-inch rope. Braid the ropes (tucking the ends under), set the braid on a lightly greased or parchment covered baking sheet, cover, and let rise it rise for about 60 to 90 minutes, or till it's very puffy.

Brush the braid with the egg white glaze. Sprinkle it heavily with sesame seeds if using. Bake the bread in a preheated 425°F oven for 25 to 35 minutes; the longer it bakes, the crunchier it'll be. Remove it from the oven and cool it on a wire rack (or cool it in the turned-off, door-propped open oven).

Shatila Bakery: A Review

Since my spring class is almost finished (thank goodness!), I'm getting ready to head back to GR for a couple of months. Monday cannot come fast enough. Although I've really enjoyed anatomy, I'm ready for it to be done and for summer to start! However, I decided that before I leave Dearborn for the summer, there were two things I must do. Funny enough, both of these goals involved food, hmm. My first goal was to do one of my favorite things, visit a pastry shop. There is a catch however, this pastry shop specializes in Mediterranean pastries.


I'd heard of Shatila Bakery from several different people over the past year and it sounded fabulous. Although it took me 10 months to get there, I finally made it, and was it ever worth it! The whole place was just amazing. Walking through the door and seeing cases full of tray after tray of the most amazing and exotic pastries, pies, cookies and ice cream almost made me feel like I had walked through a door that instantly transported me to the Middle East. The building, inside and out, was just as gorgeous as the food. It's a good thing I don't live any closer to this place, or I would be spending way too much money here.

Since Lara and I had almost no idea of what everything was, we just pointed to a handful of tasty looking concoctions and hoped for the best. It was difficult because I wanted to try a piece of everything in the store, it all looked so interesting and delicious. Although about half of the bakery is filled with French inspired goodies (tortes, cakes, tiramisu, eclairs etc.) that looked equally as tempting, I stuck with the Middle Eastern side since that's what I really wanted to try. I will definitely be back sometime to try out some of these more familiar treats.

The bakery also serves sandwiches and ice cream and has a nice place to sit down and enjoy all the deliciousness. I will most certainly be back to try this out sometime. I went a little crazy with the pictures, but it was all so beautiful I couldn't help but take more pictures. I just found it very interesting, so if you're interested take a look. Everything I tried is shown below. I think Lara and I got a nice sampling of this new cuisine. In the descriptions, I did my best to name everything correctly and to describe what it tasted like. I probably got some things wrong, so if anyone out there knows any better, feel free to correct me. Any mistake were completely unintentional.

And stay tuned, my second successfully completed Dearborn food goal will be explained in an upcoming post!


Case after case of deliciousness

More sweets, and tables to enjoy them at

A couple of close ups of the pastries, I wanted to take more pictures but I was
trying to be inconspicuous and not look like a tourist.

On the left is kanafeh, it's a cheesy base layer covered with shredded phyllo dough
with a simple syrup poured on top.

The right picture shows a couple different types of baklawa, the top tray is called
burma, the bottom left are mini roses and on the bottom right
are birds nests.

 Lara, excited to try our purchases!

 Our sample tray.
Five treats along with a thick, gooey simple
syrup (to dip the pastries in I guess)

 On the left: I couldn't remember what it was called at the bakery, but I googled it and it
seems to be called Kings Crown or taaj al-malek. The cup is
made of shredded phyllo dough which is filled with pistacios
and covered in a thick, sticky and sweet syrup. The bottom
reminded me of shredded wheat, dry and relatively flavorless,
but eaten with the sweet nuts, the combo was very nice.
It was fun, but difficult to eat, very messy!

On the right: This pastry is called Katayif Dashta-Asafeer. Itwas very mild in flavor and not
extremely sweet. It is basically a folded over pancake (katayif) filled with
some kind of cheese. The cheese filling has the texture of ricotta but
doesn't taste like it. It is slightly sweet and is flavored with something
I can't identify.This flavor showed up in several of the pastries, it is a
very unique taste that I wouldn't say I love, but it is very interesting. I
am guessing that it is either rose water or orange blossom water, both
very common in Arabic cooking.


 This was one of my favorites, how could it not be, look how completely fried it is.
The outer layer was extremely thick, crispy and delicious while the inner layer was filled
with chopped up walnuts and was tender and very sweet (a lot of honey is my guess).
I can't remember the name of this one :(

 This is called Shouiebieh Fresh Kashta. It is sheets of phyllo dough filled with the same kind
of cream as shown above. I think the cream is called Kashta and is a type
of clotted cream. 

 Here is pistachio baklawa. Whenever I would think of baklawa, this was what I would think of, but I now know that baklawa comes in many different forms with various fillings. This was probably my favorite
sweet. It was tender and extremely buttery, very "juicy" (for lack of a better word), it literally
oozed with buttery sweetness, absolutely delicious!

 Another look

 Close ups

My sample platter, it was delicious! A few of the pastries were not 
extremely sweet. I think that's where the sugar syrup comes in (at the top
of the picture). It was extremely thick and sweet. One dip in this
stuff leads to an explosion of sweetness. It's kind of nice
to be able to choose your own level of sweet.

Banana Oat Bread

This past year, I have eaten a lot of bananas. They are cheap, delicious, healthy and versatile. I've gotten pretty good at making sure I eat all of the bananas I buy before they go bad, but once in a while one slips by. When that happens I peel it and stick it in the freezer to await its fate. While I love bananas, I think I love what overripe bananas turn into even more, banana bread!

Banana bread is so delicious, and it's quick and easy to throw together. There are so many different recipes out there for banana bread that you might think I'm wasting my time posting this one. However, this is my absolute favorite banana bread recipe. I've tried quite a few different ones and I always come back to this one. It's a little different than other recipes due to the addition of some oats which give it a nice chewy texture and a wonderful heartiness. The banana flavor is subtle and delicate, not overpowering at all which I really like. It's perfect for slicing up and spreading with a nice thick smear of butter for a delicious and (somewhat) healthy breakfast. If you think this will just be another normal banana bread recipe, think again.


Thick, hearty, delicious slices

 Eggs, oil and milk, they make such a
pretty design

 Flour mixture, egg mixture and oats,
awaiting their delicious fate

 Soak the oats for a few minutes

 Grab some very tasty looking bananas, yum?

 Adding the oat mixture to the dough

 A gentle mix

Pour it into the loaf pan

Ready to bake
So beautiful


Banana Oat Bread
from The Sweeter Side of Amy's Bread
Ingredients
  • 5 large eggs 
  • 7/8 c (7 oz/198 g) vegetable oil 
  • 1 1/4 c + 2 Tbs (11 oz/312 g) milk 
  • 1 3/4 c +2 Tbs (5.22 oz/148 g) old-fashioned rolled oats 
  • 4 1/8 c (21.16 oz/600 g) all purpose flour 
  • 1 1/4 c (8.8 oz/250 g) sugar 
  • 1 Tbs + 2 tsp (0.81 oz/23 g) baking powder 
  • 1 Tbs + 1/2 tsp (0.39 oz/11 g) kosher salt (NOT table salt) 
  • 1/4 tsp baking soda 
  • 2 c (16 oz/455 g) ripe bananas, coarsely mashed 
Directions
In a large bowl, whisk together the eggs, oil and 1/4 cup plus 2 tablespoons of the milk. Set aside.

Pour the remaining 1 cup of milk over the oats and let sit for 5 minutes.

In another large bowl, whisk together the flour, sugar, baking powder, salt and baking soda.

Pour the egg mixture into the flour mixture and mix until just moistened, then add the oat mixture and the bananas. Gently mix together until just combined.

Divide the batter into two greased 9 x 5-inch loaf pans lined on the bottom with parchment paper. Bake for 10 minutes at 375 degrees, then reduce the temperature to 350 degrees and continue baking for 45-55 more minutes. A toothpick inserted into the middle of the loaf should come out cleanly and and top should spring back when lightly touched.

Cool the loaves for 15 minutes in the pans, then turn them out onto a wire rack until completely cool.

Soft Garlic Knots

So, I love bread and I love garlic so when these cute little rolls started showing up all over the internet, I knew I would have to try them very soon. Soft, fluffy bread covered in butter, garlic and cheese, it doesn't get much better than this. There are quite a few versions of this recipe floating around, I picked this one because it came from the King Arthur Flour website, a source that I have come to trust.

These rolls did turn out soft and buttery, a perfect pairing for a plate of pasta, or a couple of slices of pizza (see the last photo!). However, I would have liked a bit more garlic flavor, I found it to be quite mild. I did use roasted garlic and not raw, perhaps roasting the garlic mellowed the flavor out too much. I guess I will just have to make these rolls again soon and compare; it's a tough job but somebody has to do it!

Cheesy, garlicky goodness

Dividing the dough into 16 pieces

Roll them out, nice and skinny

 So much potential...

 turned into a lovely knot

Let rise on baking sheet until nice and puffy

 Cover with garlic butter and cheese when 
done baking

Yum!

Serve alongside something equally 
as healthy, you mind as well go all the way!

Soft Garlic Knots
from King Arthur Flour
Ingredients

Dough
  • 3 cups (12 3/4 ounces) All-Purpose Flour 
  • 1/4 cup (1 ounce) Baker's Special Dry Milk 
  • 1/2 cup instant mashed potato flakes 
  • 1 tablespoon sugar 
  • 2 teaspoons instant yeast 
  • 1 1/4 teaspoons salt 
  • 2 tablespoons (7/8 ounce) olive oil 
  • 1 cup (8 ounces) lukewarm water* 
*Add an additional 2 tablespoons water in the winter, or if you live in a very dry climate.

Garlic Butter
  • 2 to 6 cloves peeled, crushed garlic
  • 4 tablespoons melted butter
  • 1/2 teaspoon Pizza Seasoning or Italian seasoning, optional
Directions
Whisk together flour, dry milk, potato flakes, sugar, salt and yeast. Stir in the olive oil and water and knead until a soft, smooth, elastic dough forms. Place the dough in a greased bowl, cover it and allow it to rise at room temperature until doubled, about 1 hour.

Divide the dough into 16 pieces and roll each piece into a 11 inch rope. Tie each rope into a knot, tucking the loose ends into the center of each knot. Place the knots on a parchment covered baking sheet, cover and let rise for 45 minutes to an hour until very puffy looking.

Meanwhile, mix together melted butter and garlic, set aside.

Bake the knots for 15 to 18 minutes at 350 degrees. They should be set but only slightly browned. Brush each knot with the garlic butter and sprinkle with freshly grated Parmesan cheese and Italian seasoning if desired. Knots taste best when eaten warm (of course!).

Big Fat Chewy Chocolate Chip Cookies

I love chocolate chip cookies. I don't know how you can not like them. Flour, sugar and butter with chocolate chips, what's not to like? Tragically, I do know one person who doesn't like them. I've seen her pick all of the chocolate chips out of a cookie and just eat the cookie part. What a sad, sad way to live one's life. Growing up, we always had chocolate chip cookies in the house. It was the one thing my mom baked on a regular basis, thanks to my dad's insatiable love for them. He's kind of picky though, he only really loves my mom's cookies. All other recipes seem to pale in comparison for him.

The same is not true for me. While I've always loved my mom's cookies, I am always on the lookout for something new. However, after making this recipe, I may be able to quit looking. These are my (current) favorite chocolate chip cookies. I have made them many times over the past few years, the recipe has been in my recipe binder for quite a while now. I've tried a few other recipes throughout, but I always come back to this one. It is chewy yet crispy, thick and satisfying with undertones of brown sugar and caramel and it's filled with a boatload of chocolate chips. If you proclaim even a slight interest in chocolate chip cookies, you must make these cookies today!

The perfect cookie

 Gather all the ingredients

Mix the melted butter and sugar, it doesn't
get better then that

 Add in the egg, egg yolk and vanilla
(looks kind of like abstract art)

 Mix it all up until creamy

 Get the dry ingredients
and the chippers

 Combine the dry and wet 

And now, the magic can happen!

Pour in those yummy chocolate chips

 A mountain of chocolate

 Hmm, someone's finger got in the way

 Caught red handed!

Ready to bake

Cool 5 minutes on the cookie sheet...

 then move to a cooling rack

 A few weeks worth of bed time snacks,
ready to chill in the freezer

Note: Take a look at my cookies and tons of other delicious looking treats at Sweet as Sugar Cookies

Chocolate Chip Cookies
From Allrecipes.com
Ingredients
  • 2 cups all purpose flour 
  • 1/2 teaspoon baking soda 
  • 1/2 teaspoon salt 
  • 3/4 cup butter, melted 
  • 1 cup packed brown sugar 
  • 1/2 cup white sugar 
  • 1 tablespoon vanilla extract 
  • 1 egg 
  • 1 egg yolk 
  • 2 cups semi sweet chocolate chips 
Directions
In a small bowl, mix together flour, baking soda and salt.

In a medium bowl, mix together melted butter, brown sugar and white sugar until well blended. Beat in vanilla, egg, and egg yolk until creamy.

Mix in the dry ingredients until just combined. Stir in the chocolate chips

Bake cookies for 14-17 minutes at 325 degrees, do not over bake. (They should be lightly brown on the edges but still look gooey in the middle, that's okay, they will finish cooking on the baking sheet after they're out of the oven.) Let cool for 5 minutes on baking sheet before removing to cooling racks.  

Spaghetti with Squash and Tomatoes

Summer has officially begun. This past week has been glorious, hot and sunny every day with blue skies and white fluffy clouds. I've been waiting months for this. It makes me want to throw on my suit and head to the beach. Unfortunately my summer class is making it a little more difficult to really enjoy the weather, but it will be over soon thank goodness.

All of this hot weather means I've been looking for some tasty summer dishes to make. This meal was based on a side dish I made a couple times last summer and really loved. It makes a delicious, healthy main course mixed with some pasta. It's super colorful which makes it look even more delicious!I will definitely be making this meal a throughout the summer. It will be especially delicious when tomatoes start ripening and filling the farmers market. It's going to be a fabulous couple of months.

So pretty
The colors of summer

Chop them all up

Throw the squash in a pan with a little oil
(and some salt)

Then add the onions a few minutes later

Finally, add the tomatoes

Add some cooked pasta and cheese, 
then plate it up, and dig in!

Spaghetti with Squash and Tomatoes

Ingredients
  • Olive oil 
  • 1/2 a summer squash 
  • 1/2 a zucchini 
  • 1/2 an onion 
  • 2 small tomatoes (I used Roma's) 
  • 1-2 garlic cloves, minced 
  • 4-6 oz spaghetti 
  • salt 
  • pepper 
  • cheddar cheese, cut into chunks (or whatever kind you like) 
Directions
Chop up the squashes and throw them in a skillet with a little olive oil and salt and pepper. Cook them until softening, 5-10 minutes. Add the chopped onion and cook for around 10 minutes or so, until they start softening nicely. Throw in the garlic. Chop the tomatoes and pull out the mushy middle part if you want (I do). Add them to the skillet and continue cooking.

While this is going on, heat up some salted water and cook the pasta al dente. When the pasta is finished, add it into the skillet with all the veggies. Mix it all around and then add the cheese to the top and let it melt.  

Maple Almond Granola

I love granola.What's not to love about crunchy, chewy oat clusters, slightly sweetened and baked to golden brown perfection. In the last year I've turned to making my own granola. Not only is it cheaper, it's better than anything you'll get at the grocery store, and you can customize it to fit your own tastes. It can also be healthier depending on what recipe you use. I know there are about a gazillion granola recipes out there but this is the one I've been using for a while now, it is really delicious. Maybe someday I'll try so different granola recipes, but for now I'm happy with this, and I bet you will be too. Give it a try!


 Golden brown deliciousness

 Toasting the oats

 Oats and liquid sweetener, ready to be 
combined

 Throw in whatever floats your boat, 
this time I did almonds and sunflower seeds

Mix it all up together

 Throw on a cookie sheet and bake to perfection

Yum!

Note: My granola turns out different every time. It's so easy to switch up ingredients, so just through in whatever you like. If you want to add dried fruit, bake the granola for 30 minutes at 275 and then throw in the fruit for the last 15 minutes of baking. It is also super easy to double, or triple this recipe, just make sure you use two pans if doubling.


Maple Almond Granola
adapted from USA Weekend
Ingredients
  • 2 cups old-fashioned oats
  • 1/2 cup wheat germ
  • 2 Tbs. dark brown sugar
  • 1/3 c sliced almonds 
  • 1/4 tsp. salt
  • 1/4 cup maple syrup 
  • 3 Tbs vegetable oil 
  • 2 Tbs water 
  • 1/2 tsp vanilla
  • 1 tsp cinnamon
Directions
Place oats on a cookie sheet or in a 9x13 inch pan and toast them for 8-10 minutes at 350 degrees. Reduce heat to 275 degrees.

Mix the oats, wheat germ, sugar and salt as well as any extra ingredients in a large bowl.

In a small saucepan bring syrup, oil, water, vanilla and cinnamon to a simmer over low heat.

Drizzle syrup mixture over oat mixture and stir so combine. Pour mixture into a lightly greased 9x13 inch pan. Use your hands to squeeze the mixture into small clumps. Bake for 45 minutes at 275 degrees, stirring two or three times.

Focaccia

I've been wanting to make focaccia for a while now but there are so many recipes out there that I never know which one to try. I finally just picked one made it and it turned out quite good, crispy and chewy and flavorful. Sadly, the only olive oil I had in the house wasn't the best and that came through in the bread. With a really good olive oil I think this recipe would be great. I also had to replace the rosemary with thyme, I would have preferred the rosemary but hey, go with what you got, right? I want to try some other focaccia recipes now, and see the different forms focaccia can take, but this was a good start.

Chewy, crunchy goodness

The dough lifecycle

Golden brown, yum
 
I cut myself a nice big slice!

Note: This was a very wet dough, I wouldn't even attempt to knead it by hand like the recipe said to. Pull out the Kitchen Aid and let it do all the work!

Focaccia
from Amy's Bread
Ingredients

Biga
  • 200 g/7 oz (¾ c plus 2 Tbs) very warm water (105-115 degrees) 
  • 1/8 tsp active dry yeast 
  • 227 g/8 oz (1½ c plus 2 Tbs) all-purpose flour 
Focaccia
  • 425 g/15 oz (1¾ c plus 2 Tbs) warm water (85-90 degrees) 
  • ½ tsp active dry yeast 
  • 340 g/12 oz (1½ c) Biga 
  • 638 g/22.5 oz (4½ c) bread flour 
  • 42 g/1.48 oz (2 Tbs plus 2 tsp) Milk 
  • 36 g/1.27 oz (2 Tbs plus 2 tsp) Extra virgin olive oil 
  • 13 g/0.45 oz (1 Tbs plus 1 1/4 tsp) Kosher salt 
  • 10 g/ 0.35 oz (2 Tbs plus 1 tsp) Fresh rosemary, about 2½ branches, chopped 
  • Additional olive oil and kosher salt, as needed, for topping 
Directions
For the Biga: in a medium bowl, mix together the warm water and yeast. Add the flour and stir for 1 to 2 minutes, until a smooth batter has formed. The batter will be fairly thick and stretchy, but don't worry, it will improve after rising. Put the biga into the container and cover the container with plastic wrap.

Let it rise at room temperature (75-78 degrees) for 6 to 8 hours, or for 1 hour at room temperature, then place it in the refrigerator for 8 hours or overnight. Remove it from the refrigerator and let it sit at room temperature for 3 to 4 hours before use it should more than double in volume. If you use the starter while it's still cold from the refrigerator, be sure to compensate for the cold temperature by using warm water (85-90 degrees) in your dough.Use the starter while it is still bubbling up, but before it starts to deflate.

For the Foaccaia: Place the warm water and yeast in a large bowl, stir with a fork and allow to stand for about 3 minutes. Add the biga to the yeast mixture and mix with your fingers for 1 to 2 minutes to break it up. The mixture should look milky and foamy. Add the flour and mix it together When the dough becomes a shaggy mass, move to a very lightly floured surface and knead until it becomes smooth and somewhat elastic, about 5 minutes. Place the dough back into the mixing bowl, cover with oiled plastic, and let rest for 20 minutes.

After the rest add the milk, oil, and salt to the dough in the mixing bowl and knead until it is all incorporated.

Move the dough to a lightly floured work surface and knead until it is very smooth, silky and elastic, 7 to 10 minutes.

Put the dough in a lightly oiled bowl, turn it to coat with oil, and cover it tightly with oiled plastic wrap. Let the dough rise at room temperature (75 to 77 degrees) for 1 hour.

Turn the dough while it is still in the mixing bowl. Gently deflate the dough in the middle of the bowl, then fold the left side over the middle and the right side over the middle. Fold the dough in half, and then turn it over so the seam is underneath. Let it rise again for 1 to 1½ hours, until nearly doubled in volume.

When the dough has risen, loosen it from the bowl and gently pour it onto the center of the oiled baking sheet. Pat it gently with your fingertips to stretch it evenly out to the edges of the pan. Be careful not to tear the dough. If the dough resists stretching, let it rest for 2 to 5 minutes, until it becomes supple enough to stretch again, then continue to press it out to the edges of the pan. (If the dough is dry, you may have to repeat the resting/stretching procedure several times.) Brush the top of the dough lightly with olive oil, cover with lightly oiled plastic wrap, and let rise for 1 to 2 hours, until the dough has doubled and fills the pan (a finger pressed into the dough will leave an indentation).

Brush and dot the surface of the dough gently with olive oil, dimple it in several spots with your fingertips to prevent air pockets from developing underneath, and sprinkle the surface lightly with kosher salt. Sprinkle with chopped rosemary all the way to the edges.

Bake for 15 minutes, then reduce the oven temperature to 350 degrees and bake for 15 to 20 minutes longer, until golden brown and custy but still very soft inside.

Remove the focaccia from the oven and immediately brush it lightly with olive oil. Cool in the pan 10 minutes, then carefully slide it onto a cooling rack. Remove the parchment (to prevent steam from softening the bottom crust) and let cool. Serve warm or at room temperature, cut into squares.