Chana Dal Lentil Soup

I woke this morning and checked the old temperature gauge (aka my phone) to discover it was a balmy -6° Fahrenheit, not the windchill, the actual temperature (the windchill was a lovely -20°). In these kinds of conditions I crave something warm and hearty, simple yet filling and flavorful. This recipe was the first time I've tried chana dal. I spent some time researching exactly what chana dal is, and to be honest I'm still a little confused as to whether it is split lentils or split chickpeas or something else. Whatever the case, it is some kind of dried pulse or legume. If anyone has a good explanation of what dal is please let me know, I'd love a good definition. 

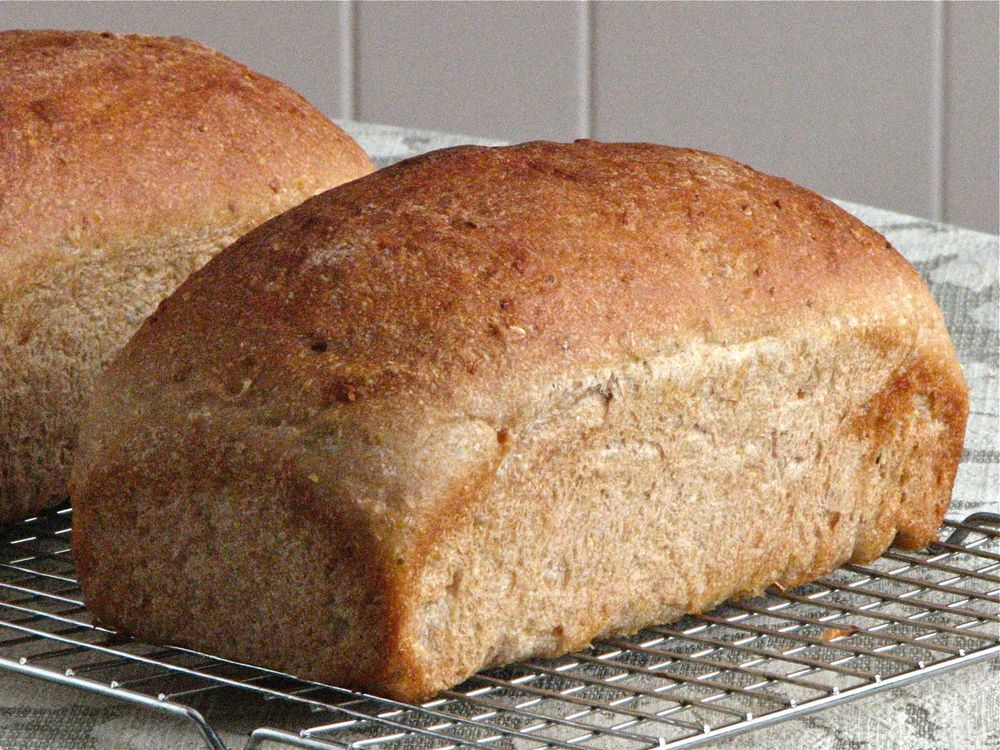
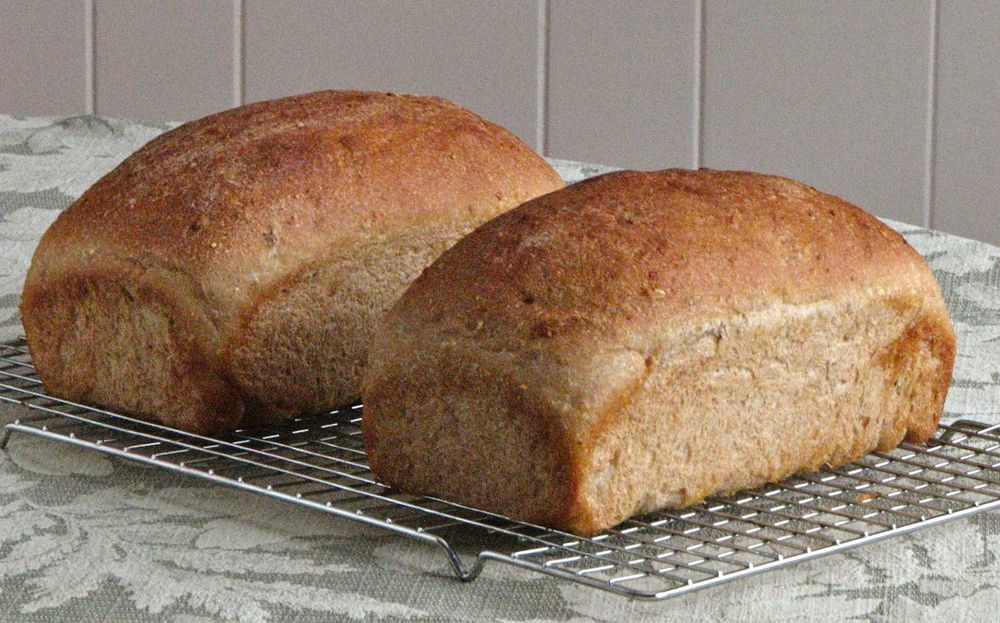
Regardless of what exactly dal is, this recipe is simple and filling. Dal cooked with tomatoes, onions and various spices. and finished with cilantro and a squeeze of fresh lemon juice. It doesn't get much easier than this, and it is so healthy. If you are looking for something hearty and warming this winter that's a little different than the norm, give this recipe a try. A thick slice of hearty bread on the side to mop up all the extra juice is the only other thing you need to finish off this delicious meal. 

All this recipe really requires of you is a little time. Chop a few vegetables, throw them into a pan with the lentils and a few spices and let it all cook away for an hour or two. When it's finished cooking you just need to add a few garnishes for freshness and a little more flavor. Then plate up and dig in. There is also so much room for innovation and creativity in this dish. Add some extra veggies, some different spices, another herb, whatever you like. In the end, I don't think you will be disappointed. 

Chana Dal Lentil Soup

From 

The Spice Spoon

Ingredients

  • 2 tbsp corn or any other neutral oil
  • ½ small onion sliced thinly
  • 3 small tomatoes, blanched, skins removed and diced
  • 1 tsp tomato paste (optional)
  • ¼ tsp turmeric powder (haldi)
  • 1 tsp salt (or more, to taste)
  • ½ tsp red chilli pepper (to taste-or can be omitted altogether if you don’t like spicy soups)
  • 1½ litre of boiling water (approximately 6 cups)
  • 400g chana lentils (approximately 2 cups)
  • 2 1-cm thick slices (a little less than ½-in.) of peeled ginger
  • fresh cilantro (or your favourite herb) for garnishing
  • paprika or sumac for garnishing (optional)
  • olive oil for drizzling
  • lemon wedges

Directions

Note: If you soak the lentils in cold water overnight or for an hour prior to cooking, you can reduce the cooking time from 1½ to 1 hour.

Coat bottom of a large pot with oil and place on medium-low heat. Add sliced onions and cook for 30 minutes; checking every 10 minutes. Cook till onions wilt and turn golden.

Add chopped tomatoes, tomato paste, turmeric, salt and chilli pepper and turn flame to medium-high. Sauté for 2-3 minutes till tomatoes look jammy (i.e., their liquid has reduced).

Add boiling water, lentils and ginger. Reduce heat to low. Stir and cover pot with lid.

Simmer until lentils are tender- test a grain between your thumb and forefinger- about 1½ hour.

Remove and discard the ginger slices.

The proceeding steps are optional; they are for those who want a thicker, soup-like consistency. If you don’t want a soup, but a traditional Pakistani-style Chana Dal, once the lentils are tender, loosen them with a little bit of water till the desired consistency is achieved and taste for salt and red chilli pepper. Serve with fresh, chopped coriander on top.

When lentils have cooled, transfer 1 cup of lentils and process in a blender till smooth and creamy. Loosen with a little bit of water. Pour back into pot. (For those of you who have an immersion blender, you can blend the soup directly in the pot.) Slowly add boiling water to soup till desired consistency is achieved. Taste for salt and red chilli pepper.

Serve with fresh coriander or your favourite herb; a sprinkle of paprika or sumac (optional); a drizzle of very good olive oil and lemon wedges to add tanginess.

American Style Vanilla Biscotti

I've found myself making a lot of biscotti lately. I just can't seem to sit down with a cup of coffee without wanting something small and sweet to snack on and biscotti are the perfect way for me to fix this problem. They are easy to make, usually make a large batch, and can be shaped into whatever size you might want. For the last couple of rounds of biscotti making I've been playing around with different variations on this recipe from King Arthur Flour. They call it American style biscotti because it is not quite as rock hard as some of the traditional Italian biscotti recipes. These cookies bake up crisp and light, crunchy without being teeth shattering. I think they have the perfect balance of crunchy sweetness to go alongside my cup of afternoon coffee. And the great thing about biscotti is they last for several weeks in an airtight container on you counter or in the cupboard. That means not having to worry about running out anytime soon or having them go bad. It is the perfect way to ensure you always have a sweet treat around for snacking on for those moments when you just need a little something to get yourself through the afternoon. 

These cookies are wonderful just straight up and plain, but for this batch I decided to go with a little drizzle of chocolate for a little added visual interests and of course to boost the flavor up just one more notch. This is a great recipe to use as a starting point for any number of wonderful combinations you might want to try. I've made several other batches that might make an appearance on the blog in the future. Really any dried fruit, any type of chocolate, or any nut/seed would make a wonderful add in. You can't go wrong so let your imagination go wild and give this recipe try. 

American Style Vanilla Biscotti

From 

King Arthur Flour

Ingredients

  • 6 tablespoons butter, salted or unsalted
  • 2/3 cup sugar
  • 1/2 teaspoon salt
  • 2 to 3 teaspoons vanilla extract
  • 1/4 teaspoon almond extract
  • 1 1/2 teaspoons baking powder
  • 2 large eggs
  • 2 cups all-purpose flour

Directions

Preheat the oven to 350°F. Lightly grease (or line with parchment) one large (about 18" x 13") baking sheet.

In a medium-sized bowl, beat the butter, sugar, salt, vanilla, almond extract (if you're using it), and baking powder until the mixture is smooth and creamy.

Beat in the eggs; the batter may look slightly curdled. At low speed of your mixer, add the flour, stirring until smooth; the dough will be sticky.

Plop the dough onto the prepared baking sheet. Divide it in half, and shape it into two 9 1/2" x 2" logs, about 3/4" tall. Straighten the logs, and smooth their tops and sides; a wet spatula or wet bowl scraper works well here. Sprinkle with coarse white sparkling sugar, if desired, pressing it in gently.

Bake the dough for 25 minutes. Remove it from the oven.

Using a spray bottle filled with room-temperature water, lightly but thoroughly spritz the logs, making sure to cover the sides as well as the top. Softening the crust just this little bit will make slicing the biscotti much easier. Reduce the oven temperature to 325°F.

Wait 5 minutes, then use a sharp chef's knife or serrated knife to cut the log crosswise into 1/2" to 3/4" slices. Or cut the biscotti on the diagonal, for fewer, longer biscotti. As you're slicing, be sure to cut straight up and down, perpendicular to the pan; if you cut unevenly, biscotti may be thicker at the top than the bottom, and they'll topple over during their second bake.

Set the biscotti on edge on the prepared baking sheet. Return the biscotti to the oven, and bake them for 25 to 30 minutes, until they feel very dry and are beginning to turn golden. They'll still feel a tiny bit moist in the very center, if you break off a piece; but they'll continue to dry out as they cool.

Remove the biscotti from the oven, and transfer them to a rack to cool. Store airtight at room temperature; they'll stay good for weeks.

Yield: 30 to 40 biscotti, depending on size.

Crisp Rosemary Garlic Crackers

I love a good cracker. They are the perfect simple appetizer or snack, either on their own or along with a nice slice of cheese or a really good dip. I'm a sucker for almost any type of cracker, but those long thin "artisan" crackers are my favorite. And while there are a lot of really nice crackers out there available for buying, the other week I decided to try my hand at making a batch from scratch. I found a recipe for a beautiful looking artisan style cracker online and just had to try it. I only had to adjust it slightly to fit with the ingredients I had on hand, replacing the assorted seeds (which I didn't have) with some dried rosemary and garlic (which I did). 

The verdict? They turned out wonderfully! I've made crackers in the past, but these turned out far better then any of my past attempts. It really helps to use a pasta roller to get the dough perfectly thin and even. The rosemary flavor really shown through giving these crackers a warm herbal aroma and a nice punch of flavor. I plan on playing around with other flavors in the future, this is only the beginning...

Homemade crackers are great, but there is no doubt that they are not the quickest thing in the world to make. It definitely takes some time to roll out all the dough, cut it into whatever shape you want, transfer them to a baking sheet, and bake them up, but it is all worth it in the end. If you have an open afternoon and are looking for a fun project, try some crackers! They will be worth it, I promise!

Rosemary Garlic Crackers

Adapted from 

True Food

Ingredients

  • 2 cups flour (I used 7.5 oz whole wheat and 2.5 oz all purpose)  
  • 1 teaspoons salt
  • 1 teaspoons sugar
  • 1 teaspoon minced dried rosemary
  • 1/4 teaspoon garlic powder
  • 1/2 cup water (plus 2 tablespoons as needed)
  • 3 tablespoons ghee (clarified butter), room temperature (I used 1 oz)
  • Sea salt, for sprinkling

Directions

In a standing mixer with a bread hook, combine flour, sugar, salt, rosemary and garlic. Slowly add the ghee and water to the mixture. Mix on medium speed until a ball of dough forms, stopping the machine once or twice to scrape the sides and roll excess flour from the bottom of the bowl into the ball of dough. Note: You may need the extra 2 tablespoons water to get the dough to form, but allow it to mix for several minutes before adding any additional water. The dough should be slightly shiny and a little sticky to the touch, but should easily form into a ball without getting all over your hands

Preheat your oven to 425˚F and position the rack to the middle. Divide the dough into four equal parts. Working with one piece of dough at a time, feed one end through a pasta machine on the first setting (see note below if you do not have a pasta machine). I usually do this a few times until I get a nice supple dough. Then continue on to setting 2 and work your way up to setting 6 (this is where I stopped on my Atlas pasta machine).

Lay the flattened strip of dough onto a lightly floured surface and using a bench scraper or sharp knife, slice it into equally sized rectangles or squares, whatever you prefer.

Note: If you do not have a pasta machine roll the dough as evenly as possible with a rolling pin, so it’s about 1/8 of an inch thick (not see-through, but close) strip. If you find the dough snaps back, allow the dough to rest for 5 minutes before continuing to roll it out. Cut into crackers from there. It requires more elbow grease and they’ll have a more rustic look this way. Be sure to flour the surface so it doesn’t stick once you’re rolled the dough out thin.

Place the crackers onto a parchment lined baking sheet and sprinkle lightly with sea salt, pressing the salt in gently to ensure it sticks. Bake in the preheated oven for about 10-12 minutes, turning the pan once partway through for even browning. Be sure to watch them carefully, they’re done when the edges are golden brown. Cooking time will vary based on the thickness of your crackers.

Continue with the remaining three parts of dough until you’ve shaped and baked all your crackers. Depending on the size and shape you should yield about 50 crackers. Serve with cheese, dips, and spreads at your next get together. The crackers will store at room temperature in an airtight container for up to a week.

Yields: How many crackers you get obviously depends on how big you cut them and how thick you roll the dough out. However, just to give you an idea, I'll let you know that I got 65-70 crackers from one recipe.

Crackly Sugar Cookies

The simple sugar cookie: so simple, so basic, and so delicious.  Whether thin and crispy, thick, and chewy, or soft and tender, all are delicious in their own way. While I do love pretty much every sugar cookie there is, I am partial to the thick and chewy sort, but for whatever reason I have found it difficult to find the perfect recipe for this style sugar cookie. Every recipe I try seems to turn out more of a thin crispy cookie, still buttery and delicious, but missing that substantial chew that I am looking for. 

Thankfully, I recently stumbled across this recipe which has produced the best cookie yet! They are pretty thick (maybe not yet quite as thick as I'd like, but I can work on fixing that) and nice and chewy. With a nice crackly top that is covered in sugar they are a winner. I made them pretty big to ensure a nice soft and chewy center and a slightly crisp edge which was wonderful, but I'm sure a little smaller cookie would be just as delicious. With a base of butter, sugar and flour there is no way they couldn't be!

I baked up one batch of these cookies pretty quickly after I had made the dough because I needed them right away and they turned out very nice. The rest of the dough I put in the fridge to chill a little while and then baked them. This definitely helped the cookies stay a little thicker and even chewier, so if you have the time I would recommend chilling the dough before baking. But either way, if you're looking for a thick, chewy and delicious sugar cookie, look no further, this is it!

Crackly Sugar Cookies
Adapted from Chow.com
Ingredients

  • 2 sticks (8 ounces) unsalted butter, softened
  • 1 1/4 cups granulated sugar
  • 3 large egg yolks
  • 1 tablespoon vanilla extract
  • 2 1/2 cups all-purpose flour
  • 1 teaspoon baking soda
  • 1/4 teaspoon fine salt
  • 1 teaspoon corn starch
  • 1/2 teaspoon cream of tartar
  • 1/4 cup sugar (sanding or granulated) for rolling cookies

Directions
Heat the oven to 350°F and arrange a rack in the middle. Combine butter and granulated sugar in the bowl of a stand mixer fitted with a paddle attachment and mix on medium speed until light and fluffy, about 2 minutes. Scrape down the bowl sides and bottom. Add yolks and vanilla, and mix on medium speed until smooth, about 30 seconds.

Add flour, baking soda, salt, corn starch and cream of tartar. Mix on low speed until dough comes together. Scoop dough by rounded tablespoons and roll between your hands until smooth.

Roll dough in sanding or granulated sugar to coat and place on parchment-paper-lined baking sheets. Bake cookies until they are golden brown around the edges but still soft in the center, about 16- 18 minutes. Immediately transfer to a rack to cool completely.

Yields: 9 very large (100 gram) cookies, approximately 455 calories each or 18 more average sized cookies, approximately 230 calories each

Homemade Ranch Party Pretzels

If you are in the mood for some good snack food I have just the thing for you. Homemade Ranch Party Pretzels are addicting and delicious, and as snack foods go, not too unhealthy. I made this recipe up because I was craving something salty and snacky, but I wasn't going to waste my money on a bag of some snack mix at the store when I can make something better and cheaper at home. 

I'm always a sucker for Chex Mix, but just can't justify buying something full of ingredients such as "partially hydrogenated vegetable oil," "hydrolyzed soy protein," and "distilled monoglycerides" with "color added," especially when it's so easy to make yourself at home. It was time to make my own snack mix but I decided to switch it up a little and use ranch flavors instead of the traditional Chex Mix seasoning. I also didn't feel like going out and buying all the different components that make up normal Chex Mix so I grabbed a bag of pretzels and decided that was good enough, and I love these little alphabet pretzels, they are so cute! 

It was all worth it, this snack mix is amazing! Covered in delicious homemade ranch seasoning, these pretzels satisfied my craving for some addictive snack. It's a dangerous thing but I'll risk it!

Like I said, I was too lazy to go buy the different cereals, nuts, bagel chips and whatever else you often see in mixes like this. The pretzels worked great by themselves, but it you're looking for all the different textures have at it, I think that would be great too. I covered the pretzels in a homemade ranch seasoning mix, the recipe for which I found online and have been wanting to try. It uses buttermilk powder and a whole bunch of dried herbs and couldn't be easier to mix together. There are so many things you can do with this homemade seasoning besides make this mix so it's totally worth whipping together a batch. 

Also, one of the things that makes homemade Chex Mix so wonderful is the stick of butter on it. However, I wanted something that I didn't feel quite as guilty eating by the handfuls in the middle of the afternoon so I nixed the butter and used a lightly beaten egg white and a drizzle of olive oil instead. Honesty, I didn't notice the missing butter, not to say it wouldn't be absolutely fantastic, but I wanted these pretzels to be a little leaner than that. In the end I think I ended up with a super easy and absolutely delicious mix that you won't feel too bad about eating. Give it a try, I bet you'll agree. 

Homemade Ranch Party Pretzels

From Delectably Mine

Ingredients

  • 1 15-oz bag small pretzels
  • 1 egg white, lightly beaten
  • Drizzle of olive oil, if desired
  • 1/2 recipe homemade ranch seasoning mix (see below)

Directions

Place entire bag of pretzels in a large bowl. Pour in the egg white and a drizzle of olive oil (if desired, for a little more flavor). Mix together until evenly coated. Pour on the ranch seasoning and mix until well combined. 

Spread pretzels on a large baking sheet and bake for 25-30 minutes at 325 degrees, mixing halfway through the baking time. 

Cool to room temperature and enjoy!

Homemade Ranch Seasoning Mix

From 

Brown Eyed Baker

Ingredients

  • 1 cup dried buttermilk powder
  • 2 tablespoons dried parsley, divided
  • 2 teaspoons dried dill, divided
  • 2½ teaspoons garlic powder
  • 2¼ teaspoons kosher salt
  • 2 teaspoons onion powder
  • 2 teaspoons dried minced onion
  • 1 teaspoon granulated sugar
  • ½ teaspoon ground black pepper
  • ½ teaspoon paprika
  • ¼ teaspoon cayenne pepper

Directions

Place the buttermilk, 1 tablespoon of the parsley, 1 teaspoon of the dried dill, garlic powder, onion powder, dried minced onion, salt, sugar, black pepper, paprika and cayenne in a food processor or blender. Process until all of the ingredients are evenly distributed, about 15 seconds. Transfer the mixture to an airtight container or glass jar, add in the remaining 1 tablespoon dried parsley and 1 teaspoon dried dill and whisk to combine.

Store the mixture in the refrigerator for up to 3 months, or in the freezer for up to 6 months.

Note: 3 tablespoons of this mix is equivalent to a 1-ounce packet of ranch seasoning mix.

Sourdough Sandwich Loaf

I've had my sourdough starter for a while now and love how versatile and easy it is to use. I only need to make sure that at least every few I use it in a recipe, or if for whatever reason that just doesn't happen, I only need to feed it to make sure it continues to do well. Since I love making bread and trying out new recipes it usually isn't much of a problem to find something to do with it. 

I discovered this sandwich loaf a little while back when I was looking for a quick and easy way to use my sourdough starter. Since I was in the mood for a few sandwiches I searched around for a simple sourdough sandwich loaf. This recipe, adapted from King Arthur Flour, fit the bill perfectly. A nice, pretty basic yeasted bread recipe with the addition of sourdough starter as well as a combination of seeds and grains for some chew and nuttiness. I changed up the recipe just a little bit to suit my needs without any real problem, and ended up with a perfectly delicious sourdough sandwich loaf, just what I needed for a few really fantastic sandwiches. 

If I'm going to make bread I like to make sure I make it worth my while so I decided to double the original recipe and make two loaves instead of just one and I was able to do this without any real problem. I've also increased the amount of whole wheat flour in my recipe to make the bread even more nutritious. Throwing in a few handfuls of whatever grains/seeds/nuts I have on hand gives the final product a nice heartiness that I really enjoy, especially in whole wheat bread. I think you could just skip this part all together if you wanted to, but it really does add a nice touch to your bread. In other words, this is a very forgiving bread that I've made several times now and really enjoyed. Play around with it to make it work for you, I don't think you'll be disappointed.

Sourdough Sandwich Loaf

Adapted from 

King Arthur Flour

Ingredients

  • ~2 cups (11 oz) fed sourdough starter
  • 1 1/2 cups (11-12 oz) lukewarm water
  • 1 1/2 tablespoon (3/4 oz) olive oil
  • 1 1/2 tablespoon sugar
  • 2 teaspoons salt
  • 1 cup (5 oz) All-Purpose Flour
  • 3 cups (15 oz) Whole Wheat Flour
  • 2/3 cup your favorite blend of seeds and/or grains (such as coarse cornmeal, sesame seeds, poppy seeds, and whole oats)    
  • 2 1/2 -3 teaspoons instant yeast

Directions

Combine all of the ingredients in the bowl of an electric mixer fitted with the dough hook and knead to form a smooth dough, about 5-7 minutes. Cover the dough, and allow it to rise for 1 1/2 to 2 hours; it'll become puffy, though it may not double in bulk.

Lightly grease two 8 1/2" x 4 1/2" bread pan. Gently deflate the risen dough, shape into two logs and place in the pans. Cover lightly with greased plastic wrap, and allow to rise until it crests at least 1" over the rim of the pan, 1 1/2 to 2 hours. The bread doesn't have much oven-spring (i.e., it won't rise much once it's in the oven), so be sure to let it rise fully before baking. A loaf risen 1" over the rim of the pan will be denser and more close-grained; letting it rise higher will give you a "spongier," lighter bread. Towards the end of the rising time, preheat the oven to 350°F.

Bake the bread for 30 to 35 minutes, tenting it with foil after 20 minutes if it's as brown as you like it. When it's done, the bread will be golden brown, and will register 190°F on an instant-read thermometer inserted into the center.

Remove the bread from the oven, and turn it out of the pan onto a rack, to cool completely.

Yields: 2 loaves, about 15 slices per loaf

Cranberry Dark Chocolate Gingerbread Muffins

It may be January, but I have one last Christmas-y recipe to share. I am a big gingerbread fan (as you could probably already tell from the  Gingerbread Bundt Cake I made for my big family Christmas party) but it seems to be something that is only eaten at Christmas, so I have to try and fit in as many different recipes during December as I can. Since I'm such a huge muffin fan I couldn't resist a gingerbread muffin of course. I decided to fill it with dark chocolate and fresh cranberries, one of my favorite combinations. Along with some molasses, spices and a little butter, this blend of flavors packs the perfect punch of flavor that can be enjoyed all winter long. 

Nothing fancy in this recipe, just a lot of nice add in's and spices that can be customized to your tastes. Don't have any fresh cranberries, how about dried cranberries? Or dried cherries for that matter. Try switching out the dark chocolate with some white chocolate, or skip the chocolate + fruit combination and throw in some cinnamon chips. Whatever you like and have on hand. That's what I love so much about muffins, they are so easy to adapt. So go ahead, have some fun!

Cranberry Dark Chocolate Gingerbread Muffins

Adapted from 

Sweet Phi

Ingredients

  • ½ stick (4 tablespoons) butter, melted (I've also replaced 2 tablespoons of butter with 2 tablespoons Greek yogurt and they still turn out great!)
  • ½ cup milk
  • 2 tablespoons molasses
  • 1 egg
  • 1 teaspoon vanilla extract
  • 1¾ cups flour
  • ¼ cup brown sugar
  • ¼ cup granulated sugar
  • 1 teaspoon baking soda
  • 1 teaspoon cinnamon
  • ½ teaspoon ginger
  • ½ teaspoon salt
  • ¼ teaspoon all spice
  • 1 cup fresh cranberries, finely chopped
  • 1/4 cup dark chocolate, finely chopped

Directions

Preheat oven to 350 degrees. Line a muffin pan with liners. 

In a microwave safe bowl microwave butter for 30 seconds, then remove from microwave and add milk, molasses, egg and vanilla. Whisk until combined, it's ok if there are a few lumps.

In another bowl add all dry ingredients except the cranberries and chocolate. Add wet ingredients to dry and stir a few times, then add the cranberries and chocolate, mixing until everything is just combined, don't over-mix. Spoon batter into muffin liners. Bake for 15-18 minutes, remove from oven and allow to cool.

Yields: I got 10 medium sized muffins

Christmas Morning Breakfast Wreath

Today I'm excited to share one of the most beautiful and delicious recipes I've ever made. Last week I went to one of my favorite bakeries because I had to get a loaf of their stollen before Christmas was over. I'd never actually tried stollen, but I knew I would love this dense, heavy fruitcake filled with boozy dried fruit and almond paste, covered in butter and sugar. I was right, it is one of the most delicious breads I have ever eaten. Inspired by this bread, I decided to make something along the same lines for my Christmas morning breakfast. This recipe that I found from The Kitchn was the reminiscent of a traditional stollen, but with a twist, perfect for a festive breakfast to celebrate Christmas morning.

The ingredient list may look long for this recipe, but it really isn't any more difficult than most yeasted breads. The whole concept is similar to making cinnamon rolls, but with a filling of dried fruit and almonds instead of cinnamon sugar. 

I actually halved the original recipe since there was only two of us to eat this cake and we certainly didn't need the whole recipe. There were no problems halving the recipe, the only thing that changed was that the wreath wasn't as big as the original, there wasn't much of a hole in the middle, but this this didn't affect the finished product in any way other than looks. 

The recipe called for the wreath to be baked for 25 minutes, but when I checked mine at this point it wasn't anywhere near being done. I ended up baking it for about 50 minutes total. I don't know where this discrepancy came from, but I thought my wreath was baked perfectly at 50 minutes, I don't know why it took double the time called for in the original recipe. The only thing I can think of is that since I halved the recipe and my wreath was much more compact, it took longer for it to cook through, but who knows. Regardless, this recipe turned out so absolutely delicious, the perfect way to start off my Christmas morning!

Christmas Morning Breakfast Wreath
Adapted from The Kitchn
Ingredients
For the bread:

  • 1 1/2-1 3/4 cups unbleached all-purpose flour
  • 1 1/2 tablespoons sugar
  • 3/4 teaspoons salt
  • 1/2 teaspoon cardamom powder
  • 1 teaspoon instant yeast
  • 1/2 teaspoons grated lemon peel
  • 1/2 teaspoon grated orange peel
  • 2 tablespoons butter, softened to room temperature
  • 2 tablespoons warm water 
  • 1/4 cup warm milk
  • 1 large egg, lightly beaten 

For the fruit-almond filling:

  • 1/3 cup dried cranberries, cherries, and/or raisins soaked in 1/2 cup brandy or other liqueur
  • 2-3 tablespoons butter, softened to room temperature
  • 2 1/2 tablespoons unbleached all-purpose flour 
  • 1/3 cup finely chopped almonds
  • 1 1/2 tablespoons sugar
  • 4 oz almond paste, crumbled
  • 1/2 teaspoon freshly grated lemon peel
  • 1/2 teaspoon freshly grated orange peel
  • 1/2 teaspoon almond extract

For the sugar glaze:

  • 1/2 cup powdered sugar
  • 1 tablespoons water
  • 1 teaspoon lemon juice
  • 1 teaspoon orange juice
  • 1/8 teaspoon cardamom powder

Directions
Prepare the dough: In the bowl of a stand mixer fitted with the dough hook, mix together the flour, sugar, salt, cardamom powder, yeast, lemon and orange peel. Add the butter, water, milk and egg and mix until starting to form a shaggy mass. Then turn on the mixer and knead until it forms a smooth and supple dough (add more water if it is too dry and more flour if it is too wet as needed).

Place dough in a lightly oiled mixing bowl large enough to accommodate dough when doubled in size. Cover with plastic wrap and let it rise in a warm place until doubled in bulk, about 1 1/2 hours.

Prepare the cranberry-almond filling: Drain the dried fruit from the liqueur and reserve the liqueur for another use. In a small bowl, combine the drained fruit with remaining filling ingredients. Cover and refrigerate.

Shape the dough: When dough has doubled in size, punch it down and turn it out onto a lightly floured board, kneading just enough to release any air bubbles. Roll the dough into a long rectangle. Crumble the filling over the dough to within 1 inch of the edges. Starting along a long side, tightly roll up the dough, pinching edge against loaf to seal. With a sharp knife, cut roll in half lengthwise. Carefully turn the halves so the cut sides are facing up, and then loosely twist the halves around each other, keeping cut sides up. (Check out the photos from The Kitchn if you're having a difficult time visualizing this.)

Line a baking sheet with parchment or non-stick baking mat. Carefully transfer the rope to the baking sheet and shape into a wreath, pinching the ends together to seal. Let it rise, uncovered, in a warm place until puffy, about 45 minutes. (Alternatively, place wreath immediately into the fridge and let it rise overnight. In the morning, remove from fridge and allow to come to room temperature, 1/2-1 hour before proceeding with baking.)

Preheat the oven to 350°F. Bake the wreath until lightly browned, 45-50 minutes. While the wreath is baking, stir together the ingredients for the glaze and set aside.

When wreath is done, transfer to a cooling rack by picking up the sides of the parchment and then sliding the parchment out from underneath. Cool for a few minutes then drizzle the glaze over the warm wreath. Serve with extra butter if you're feeling decadent.