Christmas Cookies 2014

Merry Christmas! Once again this year Lara and I had way too much fun in the kitchen baking Christmas cookies and lots of other goodies to share with friends and family members. It has been a blast, and I am sad that it is now over for another year. But that's okay, I can always look back on my photos and remember the good times. I hope you all have a wonderful Christmas, however you celebrate, and a blessed New Year!

The traditional rolled sugar cookies made their yearly appearance, decorated solely by Lara, I can't claim to have had anything to do with those. Gingerbread men are my favorite so they also joined the fun. I also made some mini almond pound cakes for another option this year using a pan my sister-in-law gave me a little while back. I am pleased with how it all turned out.

I brought a tray of cookies to my families Christmas party, and then made bags of cookies for friends, as well as boxes to hand out to the neighbors. Both Lara and I had so much fun with the whole process as we do every year. Now off to celebrate Christmas!

Gramercy Tavern’s Gingerbread

We had our Christmas party for my mom's side of the family yesterday. It was a wonderful time of food, conversation and festivities! I had such a fun time seeing everyone and catching up on what is going on in everyone's lives. Of course I offered to supply a few dishes to the lunch menu along with a few other family members. Everything turned out deliciously from the roasted beef tenderloin provided by my grandma to the salads and desserts brought by everyone else. My contribution to the dessert table this year was a rich and dark gingerbread cake that I had spotted on Smitten Kitchen some time ago. It had intrigued me, but until now I had never had the opportunity to make it. Gingerbread is not really something you can make year round so I was excited to have the opportunity to try it out. 

I ended up loving the cake. It really does pack a punch of flavor thanks to the oatmeal stout, the dark molasses, and the 2 tablespoons of ground ginger. It is an intense cake, definitely not for the faint at heart. A scoop of ice cream or a dollop of freshly whipped cream are the perfect accompaniment. I think a simple lemon glaze or some lemon curd would also be wonderful options. If you're looking for something different from the typical sugar cookies or chocolate cake this Christmas, give this cake a try, it will be difficult to forget. 

Other than needing to go out and buy a few extra ingredients to make this cake (the stout and the dark molasses) there was nothing difficult about this cake. I mixed it all together by hand, didn't even need a mixer thanks to the use of oil. It came together easily and baked up beautifully, perfectly done at 50 minutes, exactly as the recipe said. 

From what I read about this cake, it is very prone to stick to the pan so I heeded all the advice I read and made sure to butter and flour my bundt pan very, very throughly. It seemed to work as I didn't have really any sticking at all. However, my bundt pan is pretty new and releases cakes easily. My old bundt pan was notorious for having cakes stick and come out in two or more pieces, not so pretty. But regardless of how nice your pan is, I'd advise making sure you spend a little extra time greasing and flouring it up before pouring the batter in. It would be so disappointing to have this cake fall apart on it's way out of the pan. 

Gramercy Tavern's Gingerbread

From 

Smitten Kitchen

Ingredients

  • 1 cup oatmeal stout or Guinness Stout
  • 1 cup dark molasses (NOT blackstrap)
  • 1/2 teaspoon baking soda
  • 2 cups all-purpose flour
  • 1 1/2 teaspoons baking powder
  • 2 tablespoons ground ginger
  • 1 teaspoon ground cinnamon
  • 1/4 teaspoon ground cloves
  • 1/4 teaspoon freshly grated nutmeg
  • Pinch of ground cardamom
  • 3 large eggs
  • 1 cup packed dark brown sugar
  • 1 cup granulated sugar
  • 3/4 cup vegetable oil
  • Confectioners sugar for dusting

Directions

Preheat oven to 350°F. Very, very, generously butter a bundt pan and dust with flour, knocking out excess. This cake will stick badly if pan is not thoroughly greased. 

Bring stout and molasses to a boil in a large saucepan and remove from heat. Whisk in baking soda, then cool to room temperature.

Sift together flour, baking powder, and spices in a large bowl. Whisk together eggs and sugars. Whisk in oil, then molasses mixture. Add to flour mixture and whisk until just combined.

Pour batter into bundt pan and rap pan sharply on counter to eliminate air bubbles. Bake in middle of oven until a tester comes out with just a few moist crumbs adhering, about 50 minutes. Cool cake in pan on a rack 5 minutes. Turn out onto rack and cool completely.

Serve cake, dusted with confectioners sugar, with whipped cream or ice cream.

Do ahead: I'm told this gingerbread is even better if made a day ahead. I made mine 2 days ahead and it was fantastic. I didn't try it freshly baked, but it didn't appear to suffer at all in the 2 day wait. 

Thomas Train 2nd Birthday Cupcakes

Just a couple of weeks ago my nephew turned 2 years old. It's amazing how fast he's grown. (Check out his first birthday here). All of a sudden it seems like he is talking nonstop and running around everywhere, it's so much fun, and super cute! My sister-in-law Lindsey once again asked Lara and I if we would be willing to make some cupcakes for his birthday party. Of course I said yes! It's only one of my all time favorite reasons to bake. I love baking cakes and cupcakes for birthdays and other special occasions. They are so fun to make, and can be so festive and celebratory. 

Since the theme of the birthday party was going to be Thomas the Tank Engine she asked that we just make a couple dozen cupcakes of any flavor and frost them simply with red and blue frosting to match the theme. This was simple enough to do of course. I just went to my trusty Martha cookbook,

Martha Stewart's Baking Handbook

 and picked out her yellow and a chocolate cupcake recipes and whipped them together. Simple and delicious! Lara frosted them in the Thomas blue and red and then Linsey finished them off with some super cute Thomas flags. I think they turned out adorable, and at the party Lindsey had them arranged as the cars of a Thomas train, super cute. It was a wonderful party and a great way to celebrate Tyce's second birthday!

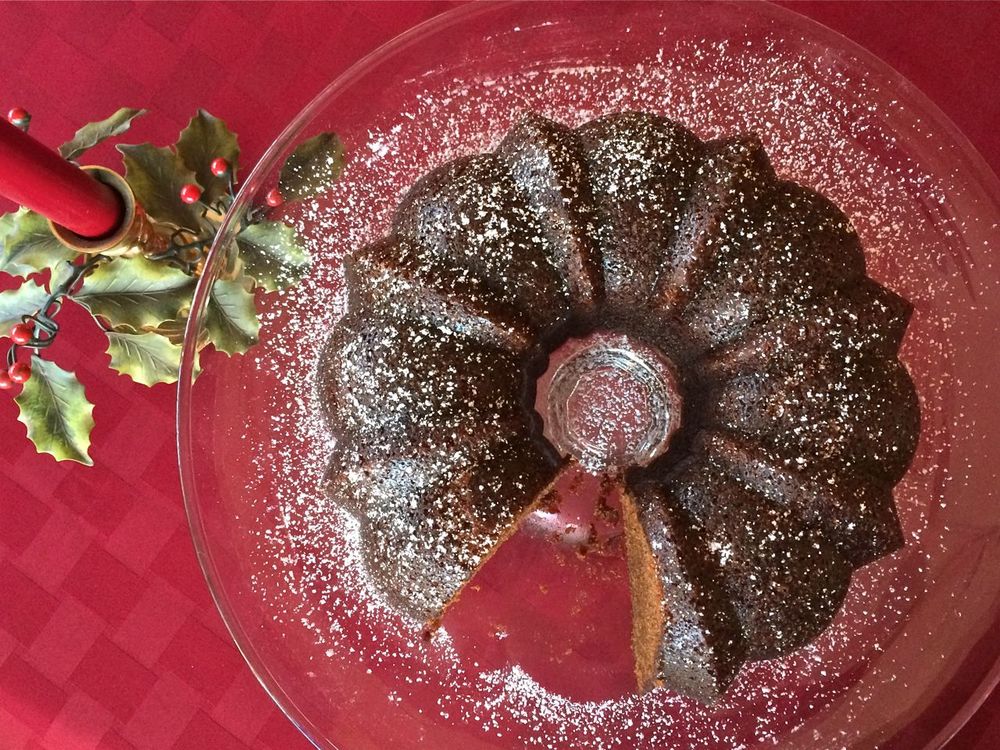
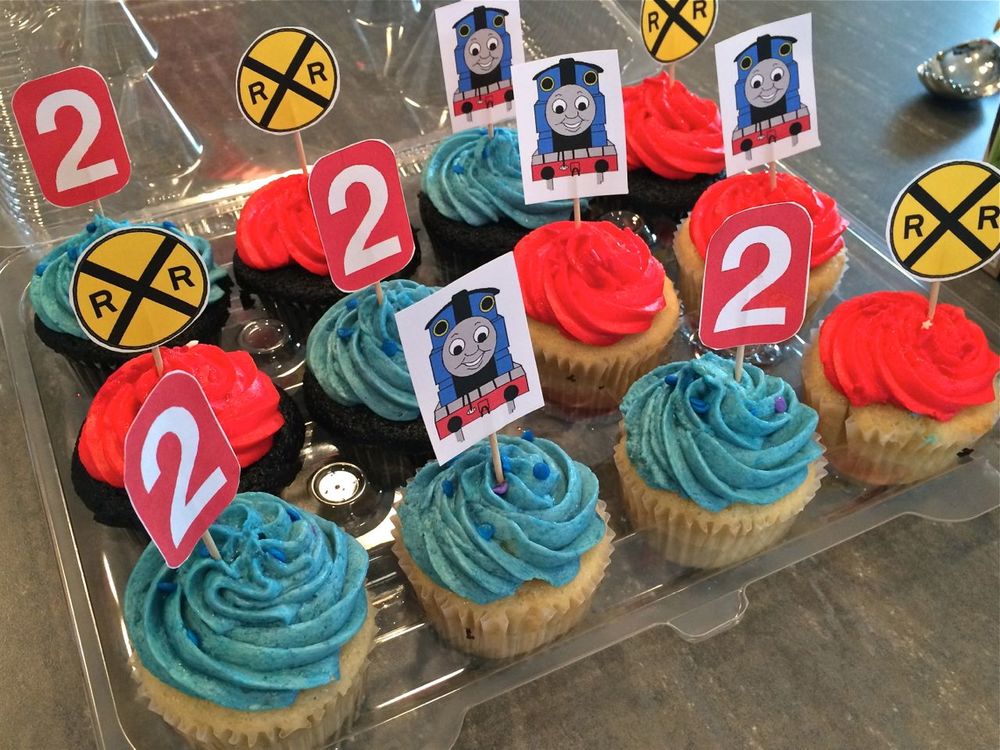
Yellow Butter Cupcakes

Ingredients

  • 1 stick butter, at room temperature
  • 3/4 cup all-purpose flour, plus more for dusting pans
  • 3/4 cups cake flour
  • 1 1/2 teaspoon baking powder
  • 1/4 teaspoon salt
  • 3/4 cup + 2 tablespoons sugar
  • 2 large eggs
  • 1 teaspoon vanilla extract
  • 1/2 cup plus 2 tablespoons milk

Directions

Preheat the oven to 350˚ F. Line cupcake pan with paper liners. In a medium bowl, combine the all-purpose flour, cake flour, baking powder, and salt; whisk together to blend well and set aside.

In the bowl of an electric mixer, combine the butter and sugar. Beat on medium-high speed until light and fluffy, about 4 minutes, scraping down the bowl as needed. Mix in the eggs one at a time, beating well after each addition. Blend in the vanilla. With the mixer on low speed, add in the dry ingredients in three additions, alternating with the milk. Beat each addition just until incorporated.

Spoon the batter into lined cupcake pan. Bake, rotating the pans halfway through baking, until the cakes are golden and a toothpick inserted in the center comes out clean, 17-18 minutes. Remove cupcakes from pan and cool on a wire rack. Let the cakes cool completely before frosting. 

Yields: 12-14 cupcakes

One Bowl Chocolate Cupcakes

Ingredients

  • 1 1/4 cups all-purpose flour
  • 1/2 cup plus 2 tablespoons (100g) dutch-process cocoa powder
  • 1 1/4 cups sugar
  • 1 1/4 teaspoons baking soda
  • 1/2 teaspoon plus 1/8 teaspoon baking powder
  • 1/2 teaspoon plus 1/8 teaspoon salt
  • 1 large eggs
  • 1/2 cup plus 2 tablespoons milk
  • 1/4 cup vegetable oil
  • 1/2 teaspoon pure vanilla extract
  • 1/2 cup plus 2 tablespoons warm water

Directions

Preheat oven to 350F and line or spray two standard 12-cup muffin pans. 

Sift into the mixer bowl: flour, cocoa powder, sugar, baking soda, baking powder and salt. Add the eggs, yolk, milk, oil, vanilla and warm water. 

Beat with a paddle attachment on low speed until smooth and combined, about 3 minutes; scrape down the sides of the bowl if needed.

Divide batter evenly among the muffin cups. Fill each muffin cup about 1/2 full. The batter is quite runny and if you overfill them they can make a mess as they rise in the oven. 

Bake, rotating pans halfway through the baking time, until a cake tester inserted in the center of a cupcake comes out clean, 18-20 minutes. Cool in the pan for a little bit and then transfer onto a wire rack or board to cool completely.

Yields: 14-16 cupcakes

Pumpkin Cornbread

I think every good meal should have a starch of some kind, whether that's some kind of bread, pasta, rice, potato, you know what I mean. When I had my brother and sister-in-law over for lunch a few weeks ago I decided to make chicken fajitas and even though I had already made some soft flour tortillas, that was more of the main dish and I decided that we needed something else on the side, some kind of starch. I have had this pumpkin cornbread pinned for a while now, and since it is fall and I'm in the pumpkin spirit it sounded like the perfect thing. 

It was the perfect thing. I thought this cornbread was absolutely delicious. I'm a big cornbread fan in general so it wasn't too big of a jump for me to love this recipe too. I was pleasantly surprised by the fact that it is fairly healthy as cornbread goes. I like my cornbread sweet and moist, I am not a big fan of the leaner, dry and crumbly cornbread that some people like. A lot of recipes (my favorite Cornbread Muffins included) are nice and rich, full of butter, milk and sugar. All good things but sometimes I want something a little leaner and this recipe fit the bill. 1/4 cup oil is the main fat, and I think next time I'll see what happens if I replace some of the oil with yogurt. Some sugar and a few eggs round out the main ingredients, and the pumpkin too of course, a nice amount of it for a good amount of moisture. They all come together to create this perfectly delicious, and beautifully golden cornbread, good as a simple side dish with any meal all year long. 

If you are worried about adding pumpkin to cornbread, don't be. I couldn't at all tell that it was there. The only thing I noticed was the beautiful golden color that it added to the bread, the flavor wasn't affected in the least bit. A good way to sneak a little vegetable into your meal without even trying. Like most cornbread, this recipe is a synch. Mix together the dry ingredients, then mix together the wet ingredients. Combine the two and throw the whole thing into the oven. Couldn't be simpler, and really couldn't be more delicious. If you like cornbread at all I highly recommend you give this recipe a try, I think you'll be pleasantly surprised. 

The perfect side to a wonderful lunch of chicken fajitas

Pumpkin Cornbread

Adapted from 

Deliciously Yum

Ingredients

  • 1 cup flour
  • 1 tablespoon baking powder
  • 1 teaspoon salt
  • 1/3 cup brown sugar
  • 1 cup cornmeal
  • 2 eggs
  • 1 cup pumpkin purée
  • 1/4 cup canola oil

Directions

Preheat oven to 400 degrees F. Grease an 8 x 8 baking dish and set aside. Whisk together the flour, baking powder, salt, brown sugar, and cornmeal.

In another bowl, beat 2 eggs and add pumpkin purée, oil and honey. Mix until well combined and slowly stir into the dry cornmeal mixture. Stir until well incorporated and pour into baking dish. Even out the surface of the cornbread mixture and put into oven. Bake for 25-30 minutes or until a toothpick inserted in the middle comes out clean. Let cool for at least 15 minutes before cutting.

Thanksgiving 2014

I truly do love all holidays, but there is something special about Thanksgiving. Everyone gets together on the same day every year and stuffs themselves with turkey and all the trimmings. The camaraderie makes me smile, and the fact that the main focus of a lot of people (myself included) is the food makes me love the day even more. For one day I am not the only one doing all of the food talk. 

My sister Lara and I made the Thanksgiving meal for our family again this year. We have such a fun time doing it and have been thinking about it and preparing for weeks. Instead of going full out and roasting an entire turkey we decided to do something a little different this year. One of my biggest pet peeves about Thanksgiving is that the turkey hogs the oven for the entire morning and I can't use it for anything else. (I am jealous of everyone who has more than one oven in their house.) We decided to utilize the grill instead. And for a different spin on the traditional we skipped the whole turkey and decided to grill up a whole bunch of turkey kabobs. 

It turned out great! I loved not cooking an entire turkey, and it was fun to use the grill while standing in a bit of snow. An experience for sure. We tried to keep the sides simple and light as well because that's how we like to eat. Everything went off without a hitch, we were so happy with how it all turned out. I would definitely do it again next year!

As for the rest of the meal, it started off with some butternut squash soup with leeks and carrots, finished with a little yogurt for creaminess. Next, the salad was a spin on the Fuji apple chicken salad from Panera; we sliced up a few apples and dried them out for apple chips, toasted some pecans with a hint of cinnamon sugar, thinly sliced red onion, dried cranberries and some feta cheese rounded out the toppings. The mixed greens were dressed with a simple white balsamic, apple cider vinaigrette with honey and dijon. It was a fantastic salad, Panera sure knew what they were doing when they created it!

We also served some homemade bread and my favorite Clementine Brown Rice Salad. A few extras finished the meal off, a simple cranberry sauce as well as a yummy lemony sage yogurt sauce, both for dipping the turkey into if desired (which I did!). 

While we were finishing up the cooking we served our guests a simple platter of cheese and crackers with some grapes and carrots. Just a little something to whet the appetite. I made a simple sangria and had some apple cider for some festive drinks to go along with the meal. And finally, a pumpkin bundt cake added the finishing touch to a fantastic Thanksgiving. I was so glad to be able to share my love of cooking with my family on this festive day. I am so thankful for all my family members who were able to come and celebrate the holiday together, as well as for all the delicious food we were so privileged to eat. I am so blessed, and for that I am extremely grateful, all year long! God is good is an understatement.

 Simple, yet scrumptious appetizer

 A little cold weather grilling never hurt anyone

 Plenty of drink options

 Dried fruit, pecan and feta salad

 Squash soup

And don't forget the turkey!

Turkey kabobs, my take on the traditional 

 This is what I like to see on Thanksgiving

And never, ever forget about dessert

Chocolate Cocoa Nib Biscotti

It's time for another biscotti recipe. One of my favorite baked goods to make. I love the transformation from long, flat log of dough, into cute, crunchy little cookies. It amazes me every time. I also love how long they last in an airtight container in my cupboard. This is one of the few baked goods I make that I don't freeze right away. Because they are completely dried out they don't really go stale or lose their texture, at least not very fast anyway. 

This chocolate cocoa nib biscotti turned out perfectly. I decided to add a few cocoa nibs to the dough and I loved the combination with the chocolate chips. The cocoa nibs add a different flavor and texture to the cookie that really help them stand out. A hint of espresso powder in the dough complements the chocolate and brings all the flavors together into a perfectly balanced treat.

Don't worry if you don't have any cocoa nibs, the biscotti will still be wonderful without them, but if you happen to have some on hand I highly suggest the addition. The same with the espresso powder. You can really add whatever flavors you have on hand. Be creative and do what you like. Don't have espresso powder, how about some cinnamon instead, for that chocolate-spice mix? Have an orange lying in your fridge? Zest it up and throw it in for a wonderful chocolate orange combo. How about swapping out some or all of the chocolate for some dried fruit, or some chopped nuts, or both! Let your imagination go wild!

Chocolate Cocoa Nib Biscotti

Adapted from 

Deliciously Declassified

Ingredients

  • 1/2 cup (1 stick) butter, room temperature
  • 2/3 cup (4 1/2 ounces) brown sugar
  • 2 large eggs
  • 1 tsp vanilla extract
  • 1 cup all purpose flour 
  • 1 cup whole wheat flour
  • 1 1/2 tsp baking powder
  • 1/4 tsp salt
  • 1/2 teaspoon instant espresso 
  • 1/2-3/4 cup semisweet chocolate chips
  • 1-2 tablespoons cocoa nibs 
  • Turbinado sugar, for sprinkling on top

Directions

In a small bowl, whisk together the flours, baking powder, salt and espresso, set aside. 

In the bowl of a stand mixer fitted with the paddle attachment beat together the butter and sugar until light and fluffy. Add in the eggs, one at a time followed by the vanilla, mixing well after each addition.

Add the dry ingredients to the butter mixer in two parts, mixing until just combined after each addition. 

Mix in the the chocolate chips and cocoa nibs, if using. 

Split the dough in half, and shape each half into a long log, about 1 1/2 inches wide on a parchment paper lined baking sheet, leaving a little room between each log. Sprinkle the top of each log with turbinado sugar. 

Bake the cookies at 350°F for 25 minutes, until a light golden color. Remove from the oven and allow to cool for 30 minutes. Meanwhile, reduce the oven temp t o 300°F

After the 30 minutes, slice the biscotti to your desired thickness (I got about 25 cookies) and arrange the slices on the parchment lined baking sheet.

Bake for an additional 35-45 minutes, until biscotti are completely dried through. Cool on a wire rack and then store in an airtight container. 

Salted Chocolate Espresso Cookies

Chocolate chip cookies, always a winner and my go-to dessert when I'm stuck in a rut and can't decide what to make. Even though I think I have dozens of chocolate chip cookie recipes, and I think they are all delicious, it's always fun to try something new. When I saw these cookies they just called to me. The addition of a hint of espresso as well as some whole wheat flour sounded like the perfect combination of bitterness and nuttiness to help these cookies stand out. And I was right, another winner for my chocolate chip cookie collection. They turned out slightly soft and gooey in the center with a touch of crunch around the edge. I love the combination of espresso and chocolate that brings a bit of sophistication and complexity to a simple cookie. 

I didn't have a chance to chill the dough for these cookies before I baked them because I needed them quickly. Otherwise I always chill the dough which I think helps bring the flavor together and helps them bake up just a little bit nicer. No big deal if you don't have the time, but always a nice touch. It would probably make them bake up a bit puffier, not spread quite as much. But either way, they will be delicious!

Salted Chocolate Chunk Cookies
From Pastry Affair
Ingredients

  • 1/2 cup (113 grams, 1 stick) butter, room temperature

  • 2/3 cup (150 grams) brown sugar, packed

  • 1/3 cup (75 grams) granulated sugar

  • 1 large egg

  • 1 tablespoon vanilla extract

  • 1 1/2 teaspoons espresso powder

  • 1 teaspoon baking soda

  • 1/4 teaspoon salt

  • 1 cup (125 grams) all-purpose flour

  • 2/3 cup (88 grams) whole wheat flour

  • 4 ounces (113 grams) bittersweet chocolate, coarsely chopped

  • Fleur de sel or flaked sea salt, for sprinkling (not table salt)

Directions
Preheat oven to 350 degrees F (180 degrees C).

In a large mixing bowl, beat together the butter and sugars until light and fluffy. Add the egg and vanilla extract and continue beating until smooth. Gradually add the espresso powder, baking soda, salt, and flours, mixing until uniform. Stir in the chopped chocolate chunks.

Form cookies using 2 tablespoons of cookie dough (or 1 tablespoon for standard sized cookies). Drop onto a cookie sheet and sprinkle lightly with fleur de sel. Bake for 10-12 minutes, or until lightly browned. Allow the cookies to rest on the cookie sheet for a few minutes before transferring to a cooling rack to cool completely.

Yields: 9 large (75 gram) cookies

Chai-Spiced Pumpkin Oatmeal Muffins

I am a complete morning person. I love waking up early and getting my workout out of the way first thing in the morning. Then it's time for breakfast, one of my favorite parts of the day. Relaxing over a mug of coffee and some sort of baked good along with some fruit or a fruit smoothy. It doesn't get much better than that. I hate having to rush around in the morning shoving some breakfast down as I walk out the door, it just doesn't cut it for me. This means I always have something in my freezer, most often muffins or slices of a quickbread, ready and waiting for me. All I have to do is pull one out the night before and I'm done, ready for the next day. 

Last week the freezer was running a little low on baked goods so I decided it was time for some pumpkin muffins. Sometimes I go all out and bake something rich and decadent, but this time I decided to go with something on the healthier side and I baked up these spiced pumpkin muffins with oats. I really liked how they turned out, moist and full of spicy fall flavors. They are hearty and dense, most definitely not decadent, but a wonderful way to start a cold fall morning off right. 

These muffins are definitely not sweet, but they are incredibly moist and flavorful. If you're looking for something a little sweeter, I would advise adding some chopped chocolate or some dried fruit (cranberries or raisins, etc.), or even increasing the sugar a bit, there isn't much in them as written. I don't mind this at all, but others might need a bit more sweetness to really be happy. But give them a try and see what you think. Play around with the recipe and make it your own. I do that all the time, and it makes baking even more fun!

Chai-Spiced Pumpkin Oatmeal Muffins

Adapted from 

Ambitious Kitchen

Ingredients

  • 1 1/2 cups whole wheat pastry flour
  • 1 cup old fashioned oats
  • 1 1/4 teaspoons baking powder
  • 3/4 teaspoon baking soda
  • 1/4 teaspoon salt
  • 3/4 teaspoon cinnamon
  • 1/2 teaspoon cardamom
  • 1/2 teaspoon ginger
  • 1/2 teaspoon cloves
  • pinch of nutmeg
  • 1 cup (8 oz) canned pumpkin 
  • 1/4 cup dark brown sugar
  • 1 large egg
  • 1/3 cup unsweetened applesauce
  • 1 tablespoons olive oil 
  • 2 teaspoons vanilla extract
  • 1 cup milk

Directions

Preheat oven to 375 degrees F. Line 12 muffin tin with paper cups or spray with nonstick spray. If you use muffin cups, make sure to spray the inside of the cups.

In a large bowl whisk together flour, oats, baking powder, baking soda, and salt. Add in ginger, cinnamon, cardamom, cloves, and a pinch of nutmeg; whisk again.

In a separate large bowl combine pumpkin, brown sugar, egg whites, applesauce, oil, and vanilla; mixing until smooth. Slowly whisk in milk.

Add wet ingredients to dry ingredients and mix until just combined. Do not over mix! Bake for 16-18 minutes or until toothpick inserted into center of muffins comes out clean. Cool for approximately 10 minutes before transferring to wire racks to finish cooling.

Yields: 12 muffins