Simple Maple Granola

I've been making my own homemade granola for years now and I absolutely love it. I see absolutely no reason to buy a bag of granola at the store. First of all it's expensive, way more expensive than oats and sugar need to be. Second, it's never anywhere near as good as what I can make at home, customizing to my own individual preferences. My Homemade Granola Bars are still at the top of my list of favorite recipes, and they are the most popular post on this blog by far. If you've ever wanted to try making your own crunchy granola bars I highly recommend you give this recipe a try! 

I've also done Chocolate Granola, and Spiced Pumpkin Granola, both fun, a little different, and delicious. The pumpkin granola would be perfect to make right now, just as pumpkin baking season is taking off!

Recently though, I was looking for something simple, an easy recipe that I could whipped together quickly, and that was a little on the healthier side so I could eat it as a snack without feeling too guilty. A lot of granola recipes delicious, but they have tons of sugar and fat in them. I wanted something a little lighter. I decided to try out The Smitten Kitchen Cookbook's Big Cluster Maple Granola with a few adjustments to fit my needs. It's a winner folks! Just what I was looking for. Light and simple and perfect for snacking!

This recipe is actually similar to my Maple Almond Granola, also a great recipe, but was just a little closer to what I wanted this time. Like I said, I made a few changes to the recipe so it was a little more my style. I cut out the coconut and replaced it with extra oats because I don't usually have coconut on hand and I'm not a big fan of it in my granola anyway. I also cut back slightly on the sugar because I was looking for something that wasn't too sweet and I added an extra egg white because it seemed like the oats needed a little more moisture to hold them together.

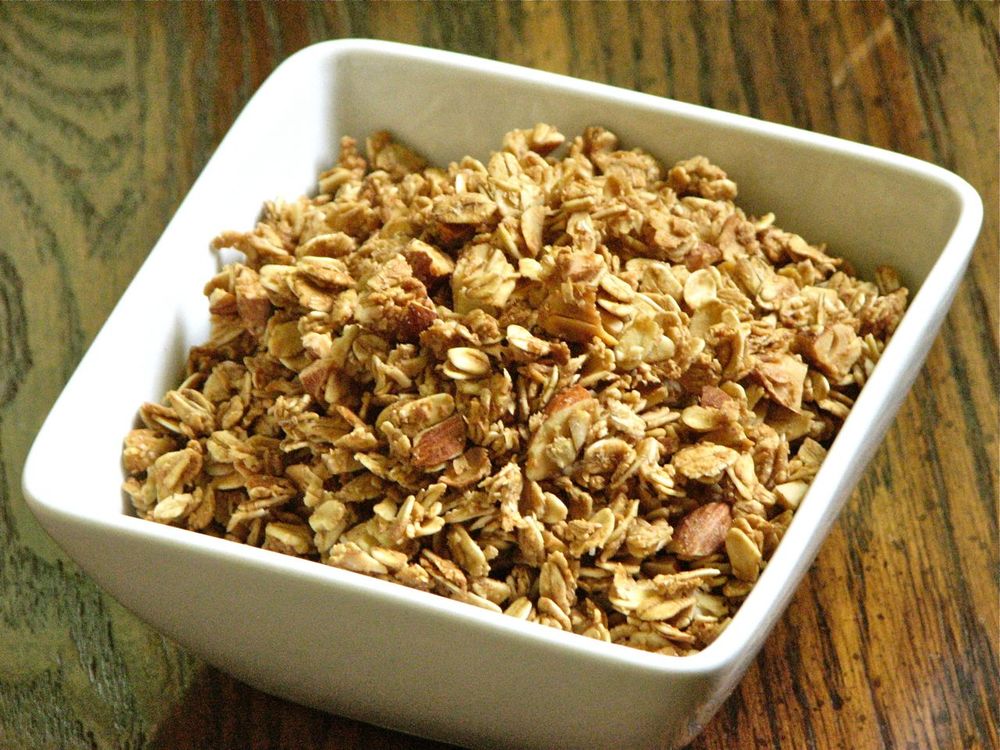
So when all was said and done I've got new favorite snack. Lightly sweetened, crunchy and toasty granola to sprinkle on my yogurt, eat as cereal with some milk, or snack with out of hand when my mouth is craving something sweet. I've made this recipe several times now and it's still making me happy every time.

Lightly Sweetened Maple Granola

Adapted From

The Smitten Kitchen Cookbook

via 

Serious Eats

Ingredients

  • 8 cups (640 grams) old-fashioned rolled oats
  • 1 cup (~100 grams) walnuts, almonds or pecans, coarsely chopped
  • 1/2 cup (50 grams) wheat germ (toasted if you'd like)
  • 4 tablespoons olive oil
  • 1 teaspoon coarse salt
  • 2/3 cup maple syrup
  • 1/2 teaspoon ground cinnamon
  • 3 large egg whites
  • 3 cups (430 grams) dried cherries or another dried fruit (optional)

Directions

Preheat your oven to 300 degrees. Combine all ingredients but the egg whites and dried fruit (if using) in a large bowl, tossing to coat evenly. Whisk the egg whites in a small bowl until frothy. Stir into the granola mixture, distributing it throughout. Spread it in a single layer on one or two baking sheets.

Bake for 55 to 60 minutes. About halfway through the baking time, use a large spatula to turn over sections of the granola carefully, breaking them up as little as possible. Rotate the pan if granola is baking unevenly. When it is evenly browned and feels dry to the touch, transfer the pan from the oven to the cooling rack (make sure it's completely dry before you take it out, you don't want soft granola, you can add more time if you need too). Cool completely. Sprinkle in dried fruit if using.

Store granola at room temperature in an airtight container. It lasts for several weeks. 

Lemon Poppy Seed Cake

I baked this lemon poppyseed cake on a whim one afternoon a few weeks ago, I knew it would be good, but I didn't know just how good. It turned into one of the best things that I have baked this year without a doubt. I'd had the recipe pinned for quite a while now, but it was one of those things that I never did anything about, just looked at the pretty picture and thought, "that looks good." Then, a few weeks ago there was a ton of yogurt in my fridge for whatever reason, and I knew I wouldn't be able to eat it all before it started to go bad. That's when I started brainstorming ideas for using it up, ideas that consisted of mostly baked goods to be honest! This cake originally called for sour cream, not yogurt, but I decided to give it a try anyway. Besides, cutting a few calories sounded like a good idea.

Believe me, I didn't even notice the missing fat. There's plenty of butter in this cake to begin with, so no worries there! Anyway, this cake baked up beautifully and was absolutely delicious, light and moist, packed with poppy seeds and a hint of lemon. The perfect everyday cake to keep on your counter for snacking all week long. It took Lara and I a week to finish it off, and even on the 7th day it was still tasting pretty darn good, definitely not too difficult to force down. I'm still thinking of this cake weeks later, and waiting, not too patiently, for the next time I can find an excuse to make it. Maybe I need to head back to the store and "accidentally" buy a little too much yogurt....

Lemon Poppyseed Cake
Adapted from Gourmeted
Ingredients
For the Cake:

  • 2 large eggs, at room temperature
  • 1 large egg yolk, at room temperature
  • 3/4 cups and 1 tablespoon Greek yogurt (or sour cream)
  • 1 ¾ teaspoons vanilla extract
  • 2 ½ cups (250 grams) cake flour (or all purpose flour)
  • 1 ¼ cups sugar
  • 1 ½ teaspoons baking powder
  • ½ teaspoon baking soda
  • ½ teaspoon salt
  • 2-3 teaspoons loosely packed lemon zest, finely grated (you can use up to 5 teaspoons if you want a stronger lemon flavor)
  • 1/3 cup poppy seeds
  • 1 ¾ sticks (14 tablespoons or 200 grams) unsalted butter at room temperature

For the Syrup:

  • ¼ cup sugar
  • 3 tablespoons water
  • 1/8 teaspoon almond extract

Directions
Butter and flour a metal fluted tube pan and preheat the oven to 350°F 

Whisk together whole eggs, yolk, ¼ cup sour cream, and vanilla in a medium bowl until just combined.

Mix the flour, sugar, baking powder, baking soda, salt, lemon zest and poppy seeds in the bowl of a stand mixer fitted with a flat beater, on low speed for 30 seconds. Add butter and remaining sour cream and continue to mix on low speed until just blended. Increase to medium speed and beat for another 1 ½ minutes. The batter will be light in color.

Scrape down the sides of the bowl and re-start the mixer on low speed. Add half of the egg mixture and beat on medium speed for 30 seconds, do the same for the remainder of the mixture. Transfer the batter into the prepared tube pan and level the surface with a small spatula.

Bake for 45 to 55 minutes, or until a cake tester inserted into the lowest of the tube comes out clean and the cake springs back when pressed lightly.

To make the syrup: While the cake is baking, combine sugar and water in a small microwavable bowl. Heat in the microwave for about 30 seconds and stir until the sugar is dissolved. Add in the almond extract and set aside. 

Once the cake is done, place the pan on a wire rack. Poke the cake all over using a thin skewer and brush it with a third of the syrup. Let the cake cool for 10 minutes before inverting onto a serving plate. Brush the entire surface of the cake with the remaining syrup.

Roasted Tomato Basil Soup

I don't know where summer went, but this weekend is definitely feeling like fall. It's so funny though, the leaves have not even started changing colors yet which is super late. So even though it feels like fall, it has yet to look like fall, a very strange combination. I'm not quite ready for the cool weather to start moving in, I want to eek out every last drop of summer that I can. Pining for summer, but dressing for fall, this soup is the perfect way to get the best of both worlds. A creamy and comforting tomato soup using fresh, perfectly ripe tomatoes from the farmers market and basil straight from the garden. It's pure summer in a bowl, yet warming enough to fight off the beginning of autumn chill that has decided to drop by, a winning combination. 

Before making this soup, I looked at a few different tomato soup recipes and then I put together my favorite parts of all of them, using what I had on hand. Tomato soup is so easy to make, and it is so delicious. If you've never had homemade tomato soup, and have only ever suffered through a bowl from a can, you don't know what you're missing. I used to think I didn't like tomato soup. Then I discovered that I just don't like canned tomato soup. Homemade is infinitesimally better, it isn't even comparable to the stuff out of a can. And while I used fresh tomatoes, canned tomatoes make a pretty good soup too, so in the middle of winter you can still whip up a batch. So if you've never tried making your own tomato soup, I urge to to give it a try, it is so easy and so worth it. 

Roasted Tomato Basil Soup

From Delectably Mine

Ingredients

  • 1 1/2 pounds tomatoes
  • 1/2 medium onion
  • 2 garlic cloves
  • Olive oil
  • 2 cups chicken or vegetable stock
  • 1 teaspoon salt
  • 1-2 tablespoon sour cream to taste
  • 1/2 teaspoon lemon juice
  • pinch sugar
  • pinch red pepper flakes
  • 1 tablespoon chopped basil, plus more to garnish

Directions

Cut tomatoes in half or in quarters and place on a baking sheet lined with foil. Add the onion and garlic cloves. Drizzle with olive oil and sprinkle with salt and pepper. Roast for 20-30 minutes at 450 degrees. 

Once vegetables are roasted, transfer to a small sauce pot and add the stock. Bring to a boil. Remove from heat and use an immersion blender to puree the soup until smooth. Return pot to heat and add the salt, sour cream, lemon juice, sugar, red pepper flakes and basil. Let soup simmer for 15-20 minutes to allow the flavors to blend. Serve, garnishing with more basil and parmesan cheese, or more sour cream. 

Chocolate Fudge Cookies

As a huge chocolate lover, I'm always on the lookout for any recipe that will satisfy my chocolate craving. There are just days that desperately call for chocolate, and nothing else will do. Sometimes it's no problem to whip together a pan of brownies, or break into that secret stash of chocolate bars hiding in the closet, but what about those days where there is no time to bake something, and for some funny reason that chocolate stash seems to have disappeared? That's where this recipe comes in. With a batch of these cookies stored in the freezer for emergency situations, you will not have to worry about being without a chocolate fix, which is always a comforting thought. 

While I do already have this amazing death by chocolate chip cookie recipe, and these awesome double chocolate chip cookies on the blog, both of these recipes have a good amount of chocolate melted right into the dough. I love having this chocolate melted in, it makes the most intensely rich chocolate cookies, but there are times when I either don't have enough chocolate, or I don't feel like dealing with that. So these chocolate fudge cookies skip the melted chocolate and use only cocoa powder along with some strong espresso to bring out that chocolate flavor. 

Now, if you're afraid that this lack of actual chocolate will diminish their chocolate-ness, have no fear, they are still super chocolate-ty and awesomely rich. Trust me, you won't even miss the melted chocolate. In fact, these cookies are just fantastic. If you are in dire need of some chocolate, these cookies are exactly what you need. 

One word of caution with this recipe; only use natural cocoa powder, don't try substituting with Dutched. The first time I made these cookies I tried them with Dutched cocoa powder and while they tasted really nice, they did not turn out like they are supposed to. The original recipe did not specify whether the cocoa powder should be natural or not, so I just decided to go for it with the Dutched. 

Looking at it now, I should have realized that this wouldn't work. Dutched cocoa is cocoa powder that has been alkalized during processing. Because of this, Dutched cocoa will not react with baking soda during baking because baking soda requires and acid in order to react and do its job. Since this recipe calls for baking soda as a leavener it makes sense to use natural cocoa powder. 

But it all turned out in the end, I made them again with the natural cocoa powder and they turned out great, and in the meantime I also got a bit of a science lesson. So if you're looking for a super delicious chocolate cookie, grab some natural cocoa powder and head straight into the kitchen, you won't regret it!

Chocolate Fudge Cookies
Adapted from Pinch of Yum
Ingredients

  • 1 cup salted butter (1 stick melted and cooled, 1 stick room temperature, see directions)
  • 1½ cups granulated sugar
  • 2 teaspoons vanilla
  • 2 eggs
  • 3 tablespoons strong coffee
  • 2⅔ cup all purpose flour 
  • ½ cup natural cocoa powder (not Dutched)
  • 1 teaspoon baking soda
  • ½ teaspoon salt
  • 2 cups chocolate chips

Directions
Start by melting ½ cup (1 stick) butter in the microwave for 30-45 seconds or until completely melted. Transfer to the refrigerator or freezer and cool until solid, about 30 minutes. Leave the other ½ cup butter out on the counter to bring it to room temperature. 

With an electric mixer, cream the melted and chilled butter, room temperature butter, sugar, and vanilla until creamy and fluffy. Add the eggs one at a time, mixing well after each addition. Add the coffee and mix to incorporate. 

In a separate bowl, combine the flour, cocoa powder, baking soda, and salt. Add the flour mixture to the butter mixture and mix until incorporated. The dough should be thick and sticky, but dry enough to touch with your hands without making a huge mess. If it's still too sticky, add more flour. Stir in the chocolate chips.

Roll the dough into even balls and place on a baking sheet lined with parchment paper. Bake for 10- 12 minutes at 350 degrees until just set, don't overbake. Cool for a few minutes on the cookie sheet, then transfer to wire rack to cool completely. 

Yields: I was able to make 25 50-gram cookies

Oat Bread with Dried Fruit and Almonds

Baking bread is one of my favorite things to do in the kitchen. I just love the whole process, kneading together a handful of individual ingredients and turning them into this live creature that rises and grows before your eyes. Tame it through shaping into loaves, and then into the oven for its final transformation where it becomes your desired creation. It is one of the most satisfying tasks in the kitchen.  Pulling out those final loaves, and seeing what you've been able to do with a few simple ingredients, some time and heat is simply amazing. 

These loaves are my most recent creation. I found the recipe online and for whatever reason it sounded so perfectly delicious that I had to give it a try. This whole wheat and oat sandwich loaf, slightly sweetened with honey and filled with roasted nuts and dried fruit called my name, I simply had to try it. It turned out a couple very large and beautiful loaves that have been perfect for a variety of sandwiches, a hearty snack and a healthy breakfast. 

One of my favorite quick and easy lunches in the past week has been a gourmet peanut butter sandwich with mashed banana and sliced strawberries. Add a drizzle of honey for a little extra sweetness and lunch is served, simple and delicious. It almost feels like eating dessert for lunch. I've also made a variety of other different sandwiches including an heirloom tomato BLT and a grilled vegetable and hummus sandwich with feta. So whatever type of sandwich is calling your name, this bread will get the job done. 

Oat Bread with Dried Fruit and Almonds
Adapted from A Shaggy Dough Story
Ingredients

  • 200g Dried Fruit (I used a mix of prunes and frozen cranberries instead of dried, just because I had them, and it turned out fine)

  • 161g Whole Wheat Flour

  • 130g Rolled Oats

  • 403g Water (I used the reserved water from soaking the fruit and made up the difference with fresh water)

  • 484g Bread Flour

  • 136g Milk

  • 48g Honey

  • 48g Vegetable Oil

  • 19g Salt

  • 4g Instant Yeast

  • 130g Toasted Almonds (or whatever you have, walnuts, pecans, etc)

  • Additional Rolled Oats for coating loaves

Directions
Put dried fruit in a heat-proof bowl, add enough boiling water to cover and let sit for about an hour. Drain, reserving water, and let cool.

Put whole wheat flour and rolled oats in the bowl of a mixer, add the reserved soaking liquid (adding fresh water to make up the difference) and stir to combine. Let sit for 30 minutes.

Add bread flour, milk, honey, oil, salt and yeast to the oat mixture. Using the dough hook of your mixer, blend on low speed until combined, then increase the speed to medium for about 7 minutes. Add the soaked, drained fruit and the pecans and mix on low speed until combined (it took a little bit of time to make sure they were fully incorporated).

Place the dough in a large bowl or container with oil that's been lightly coated with oil. Cover and let rest. After one hour, uncover the dough and fold, then cover and let rest for another hour.

Turn dough out onto a lightly floured surface and divide into two rounds. Cover with plastic and let rest for 15 minutes. Lightly butter or oil two 9-inch loaf pans. Uncover and lightly flour your work surface, if needed. Degas each dough round and shape into a loaf. Place loaves seam side down in the prepared pans. Lightly mist each loaf with water and them cover with oats, if desired. Cover with plastic and proof for about 90 minutes.

Place a steam pan in the bottom of your oven and preheat to 450°. At baking time, uncover the loaf pans, place in the oven and immediately add about 1 cup of ice to the pan to create steam. Bake for 15 minutes, then reduce the temperature to 400° and bake for another 30 minutes or until golden brown (cover them with foil if they start browning too soon). Remove from the oven, transfer to a cooling rack and let cool completely.

Preserving Summer - Canning Tomatoes

Growing up, there was a day or two every August set aside by my mom for a marathon canning session. She would spend all day in the kitchen canning jar after jar of beautiful Red Haven peaches to have on hand all winter long. It seemed like whatever day she decided to can was the hottest day of the whole summer. There she would be, spending all day in the hot, hot kitchen, stove burners on high, boiling water steaming up the entire room, sticky peach juice everywhere. It was worth all the effort however when, in the middle of the winter, she would head to the basement and come back up with a jar, one of these labors of love, adding peaches to the dinner menu and reminding us of the joys of summer produce. 

Over the last few years I've started to do some canning every summer. I've been trying out different recipes, deciding what I find worth while, and what I don't. While I haven't followed in my mom's footsteps by canning peaches, I have found some of my own favorites. My top food to preserve so far has been tomatoes. Tomatoes are probably my favorite fruit/vegetable (however you want to classify them). They are so utterly versatile and fantastically delicious when perfectly ripe. You can use them in so many different ways and in all kinds of different foods from countries all over the world. I just love them, so preserving them via canning has been a no brainer. 

Canning tomatoes is not a difficult task, but it definitely takes some time, and involves quite a few different steps. Just know ahead of time that you'll be spending a few hours in the kitchen, but that's okay because it will all be worth it in the end, on those cold winter days when you can pull out some preserved summer produce and enjoy the product of all your hard work. It brings  a little bit of light to some of those long, cold, dark winter nights. 

Tomatoes Whole, Halved or Quartered - Packed in Juice

From 

Ball

Ingredients

  • 2-­1/2 to 3-­1/2 lb ripe tomatoes (about 8 to 11 medium) per quart 
  • Water
  • Citric Acid or bottled lemon juice
  • Salt, optional 

Directions 

Prepare  boiling water canner. Heat jars and lids in simmering water until ready for use. Do not boil. Set bands aside. 

Wash  tomatoes. Dip in boiling water 30 to 60 seconds. Immediately dip in cold water. Slip off skins. Trim away any green areas and cut out core. Leave tomatoes whole or cut into halves or quarters. 

Add  1⁄2 teaspoon citric acid or 2 tablespoons bottled lemon juice to each hot quart jar, or 1⁄4 teaspoon citric acid or 1 tablespoon bottled lemon juice to each hot pint jar. 

Pack  tomatoes in hot jars until space between tomatoes fills with juice leaving 1/2 inch headspace. Add 1 teaspoon salt to each quart jar, 1/2 teaspoon to each pint jar, if desired. Remove air bubbles. Wipe rim. Center hot lid on jar. Apply band and adjust until fit is fingertip tight. 

Process  filled jars in a boiling water canner 1 hour and 25 minutes for pints and quarts, adjusting for altitude. Remove jars and cool. Check lids for seal after 24 hours. Lid should not flex up and down when center is pressed.

Blueberry Orange Muffins

Blueberry season is still going strong around here, and I am so happy that I have finally jumped on the blueberry bandwagon, they are just so good. It wasn't really until last summer that I truly began to love blueberries, but now there is no doubt that they are one of my favorite fruit. They are so sweet, and juicy, and so much fun to bake with. There is so much you can do with a blueberry. 

Today I'm sharing a classic, the blueberry muffin, but it's a blueberry muffin with a twist. To add some pizzaz and an extra punch of flavor to these muffins, grab an orange and add the zest and juice straight to the batter. Then whip up a nice chunky streusel and sprinkle on top. The sweet citrus notes from the orange and the buttery goodness of the streusel compliment the juicy blueberries and tender muffin. It's the perfect match, and one of the best blueberry muffins I've ever had. 

This is a quick and easy recipe. Combine wet ingredients and dry ingredients and then just mix them together and fold in the blueberries. A quick streusel for the top and you're done. I have made this recipe a couple times now, and it's always good. However, one time I decided to try and cut back a little on the oil, make it a little healthier if I could, so I replaced half of the oil with yogurt. They turned out pretty well, baked up just fine, the texture was pretty normal, but I have to admit, the flavor just wasn't there. Still a nice muffin, but without that wow factor. Fat just tastes good! So if you want to cut back a bit on the oil, go right ahead, but be warned, they won't be quite as good. But still worth making for sure. 

Blueberry Orange Muffins

From

Sarabeth's Bakery: From My Hands to Yours

by Sarabeth Levine 

Ingredients

For the muffins:

  • 1 large seedless orange
  • ⅔ cup canola oil
  • ½ cup plus 1 tbsp whole milk
  • 2 eggs, at room temperature
  • 2¼ cups bread flour
  • 1 cup packed brown sugar
  • 1 tbsp baking powder
  • ¼ tsp salt
  • 1 cup fresh or frozen blueberries

For the streusel topping:

  • 6 tbsp unbleached white flour
  • 1 tbsp cane sugar
  • 1 tbsp brown sugar
  • ⅛ tsp ground cinnamon
  • 2½ tbsp butter, melted

Directions

Position the rack in the center of the oven and preheat the oven to 400 degrees. Line muffin tin with muffin liners or brush the insides of the cups with butter.

Grate the zest of the orange and set it aside. Slice the orange in half and juice both sides. You should have about ⅓ cup of juice.

Whisk the oil, milk, orange juice, orange zest, and eggs together in a medium-sized bowl. Whisk the flour, brown sugar, baking powder, and salt together in another bowl. Add the dry ingredients to the liquids and stir with a spoon, just until combined. Carefully fold in the blueberries.

Portion the batter out into the muffin cups, filling almost to the top.

To make the streusel topping, mix the flour, sugar, brown sugar, cinnamon, butter, and vanilla in a small bowl, using your fingers, until well combined and crumbly.

Sprinkle the muffin tops with the streusel.

Bake for 10 minutes. Reduce the oven to 375F degrees and continue to bake until the tops of the muffins are golden brown and a cake tester inserted into the middle comes out clean, about 10-15 minutes more. (If you are using frozen berries, allow for a few extra minutes.)

Cool the muffins in the pan for 10 minutes. Remove the muffins to a baking rack and cool completely.

Classic White Cake with Vanilla Buttercream

It was my mom's birthday this past week, and what do birthdays mean?? Cake of course! And the chance for me to make a cake, one of my favorite things to do. I'm lucky that I am on an easy rotation at school right now, so it wasn't a big deal to take some time out of my schedule and bake a nice birthday cake for my mom. She is a fan of white on white cakes, so that's what I made. Classic white cake, with sweet and sugary American buttercream frosting. Simple to be sure, but always a winner. 

While I love cake, a normal double or triple layer 9-inch cake is so big for our family. We can usually finish it off eventually, but it can take a while, and even though I absolutely love cake, I start to feel bad about eating it every night for a week straight! So this time I decided to try something new. I took my favorite white cake recipe, cut it in half, and baked it in a smaller 12x9 inch rimmed baking sheet. Once it was cool, I cut it into three rectangles and stacked those rectangles to make a triple layer cake. It turned out to be the perfect size for us. On the night of my mom's birthday, we had 8 people over for cake and they all got nice sized (but not jumbo) pieces, and there was just enough cake left over to snack on for a day or two, perfect!

I frosted this cake very simply because I was trying to quick get it done before my mom came home from work so didn't have the time for anything fancy, but I think it still turned out pretty cute. Just one color of frosting jazzed up a bit with some colored sprinkles, quick and easy.

Love you mom!

The birthday girl and her cake

You can do it!

Classic White Cake

Adapted from

Martha Stewart's Baking Handbook

Ingredients

  • 1 1/2 cups all purpose flour 
  • 1 teaspoon baking powder
  • 1/2 teaspoon salt
  • 1 1/2 sticks butter, room temperature
  • 1 cup plus 2 tablespoons sugar
  • 1/4 teaspoon vanilla extract
  • 1/2 cup milk
  • 4 large egg whites

Directions

Butter and flour a 12x9-inch rimmed baking sheet. In a medium bowl, sift together flour, baking powder, and salt; set aside.

In the bowl of an electric mixer fitted with the paddle attachment, beat the butter and 1 cup of sugar until light and fluffy, 3-4 minutes, scraping down the sides of the bowl as needed. Beat in the vanilla. With mixer on low speed, add flour mixture in three parts, alternating with the milk and beginning and ending with the flour; beat until just combined. Transfer mixture to a large bowl; set aside.

In the clean bowl of an electric mixer fitted with the whisk attachment, beat egg whites on low speed until foamy. With mixer running, gradually add remaining 2 tablespoons sugar; beat on high speed until stiff, glossy peaks form, about 3-4 minutes. Do not overbeat. Gently fold a third of the egg-white mixture into the butter-flour mixture until combined. Gently fold in the remaining whites.

Transfer batter to prepared baking sheet. Bake, rotating pans halfway through, until a light, golden brown and a cake tester inserted in the center comes out clean, 20-25 minutes. Transfer pans to a wire rack and let them cool completely. 

Frost the cakes with vanilla buttercream, recipe follows. 

Vanilla Buttercream Frosting

Adapted From 

Savory Sweet Life

Ingredients

  • 1 cup unsalted butter (2 sticks), softened
  • 4 cups (16 ounces) powdered sugar, sifted
  • ¼ teaspoon table salt
  • 2 teaspoons vanilla extract
  • 1/4 teaspoon almond extract
  • 2-4 tablespoons milk or heavy cream

Directions

On medium speed, beat the butter in the bowl of a stand mixer fitted with the paddle attachment until creamy, 1-2 minutes. Add the powdered sugar and beat on low until all the sugar has been incorporated (you may want to do this in a couple additions to prevent the powdered sugar from getting everywhere). Increase mixer speed to medium and add vanilla and almond extracts, salt, and 2 tablespoons of milk or cream and beat for 3-5 minutes, until light and creamy. Add remaining milk 1 tablespoons at a time, until you reach desired consistency.