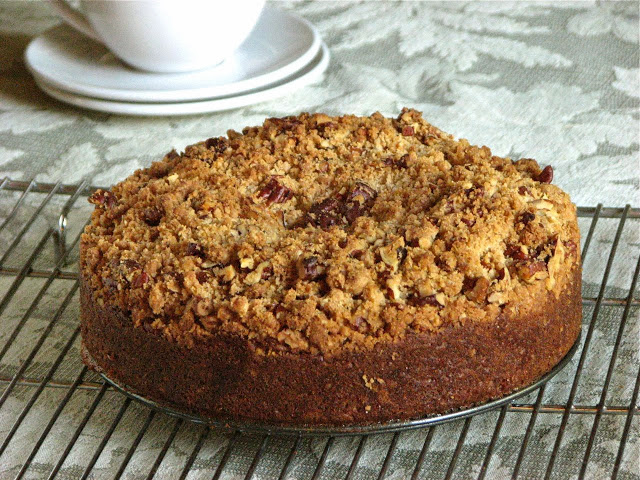
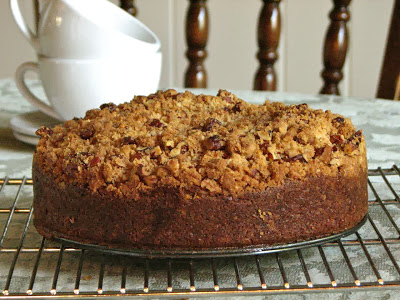
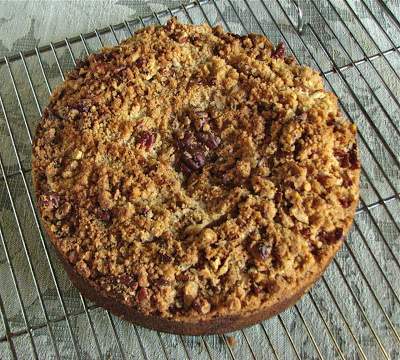
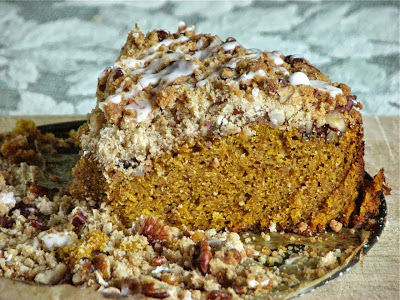
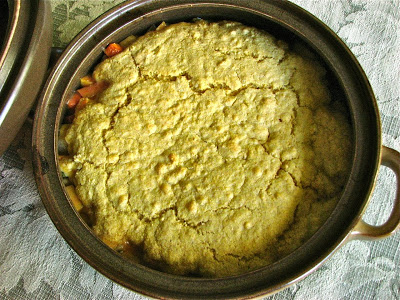
Classic Apple Pie

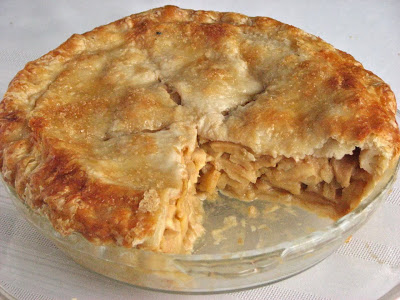
I haven't always been a big pie fan. In fact, it's only been in the last year that I've really changed my tune and started to really like pies, a lot! (Don't worry cake, you will forever be my first love.) I was never a big fan of soft, warm fruit, and while it is still not on my top 10, when it's encased in a flaky and buttery crust, generously sprinkled with sugar, and baked until golden perfection it's difficult for me not to like. Since I've jumped on the pie band wagon I decided it was time that my Thanksgiving dinner included an apple pie, it just seemed right. No doubts here; this pie was tall and handsome, but more importantly the taste was spot on, the perfect blend of sweet and buttery, tender apples and flaky crust. A wonderful start to my holiday season.

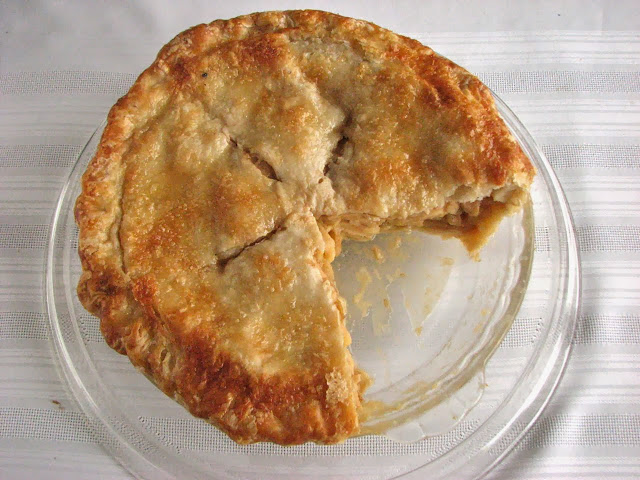
First ever double crusted pie! I was a little nervous, but knew it would work. It baked up beautifully with no worries. I did cover it with foil about halfway through baking because I do not at all like over-baked crusts. I like a light golden brown, not dark and hard. The perfect ending for my delicious Thanksgiving meal.

Classic Apple Pie
Crust adapted from Martha Stewart
Pie Adapted from Williams Sonoma
Ingredients
Crust

  • 2 1/2 cups all-purpose flour
  • 1 teaspoon salt
  • 1 tablespoon sugar
  • 2 sticks (1 cup) unsalted butter, very cold
  • 1/4 to 1/2 cup ice water

Pie

  • 5 pounds apples, or about 14 apples (I used Northern Spy)
  • 1/2 cup brown sugar
  • 1/4 cup white sugar
  • 1/2 teaspoon ground cinnamon
  • 1/4 teaspoon salt
  • 1/4 teaspoon freshly grated nutmeg
  • 4 teaspoons cornstarch
  • 1 tablespoon fresh lemon juice

Directions
For the crust: using a cheese grater, grate the butter into a bowl and place in the freezer for a few minutes to freeze. In a large bowl mix together flour, salt and sugar. Add the frozen butter and quickly mix together. Add in the ice water a little bit at a time just until the dough comes together in a ball. Add as little water as needed, it's okay if the dough is a little shaggy. Split the dough into two pieces and shape into a disc. Wrap each disc in plastic wrap and place in fridge for at least 2 hours.

On a lightly floured work surface, roll out half of the dough into a 12-inch round about 1/8 inch thick. Transfer the dough to a 9-inch deep-dish pie dish and gently press the dough into the bottom and sides of the dish. Trim the edges and refrigerate for 30 minutes.

Roll out the remaining dough disk into a 12-inch round about 1/8 inch thick.  Refrigerate for 30 minutes.

Meanwhile, make the filling: In a large Dutch oven, stir together the apples, brown sugar, granulated sugar, cinnamon, salt, nutmeg and cornstarch. Set over medium heat, cover and cook, stirring occasionally, until the apples are just tender but not mushy, about 20 minutes. Uncover and cook until the liquid has thickened and become glossy, 5 to 7 minutes more. Remove from the heat, stir in the lemon juice and let cool to room temperature, about 30 minutes.

Position a rack in the lower third of an oven, place a baking sheet on the rack and preheat the oven to 400°F.

Transfer the apple filling to the pie shell, and gently invert the top over the pie. Trim the edges flush with the rim of the dish and press the top and bottom crusts together to seal. Brush the entire top crust with egg wash and sprinkle with the granulated sugar. Cut a couple of slits in the dough to allow steam to escape.

Place the pie dish on the preheated baking sheet. Bake at 400 degrees for 20 minutes, then reduce the temperature to 350 degrees and continue baking until the crust is crisp and golden brown, about 40 minutes more, covering the edges with aluminum foil if they become too dark. Transfer the pie to a wire rack and let cool for at least 1 1/2 hours before serving.

Rosemary Onion Focaccia

The idea of focaccia always sounds so appealing to me, a flatbread rich with olive oil and topped with any number of delicious things. It's really like a pizza in disguise, dressed a little differently so you can eat several slices without feeling too guilty. In the past however, I've attempted to make focaccia a couple of different times and have never been very successful at it. It's always been, well, just okay. But I want more than okay, I know it can be so much more than that. With this recipe I've found my stride, I have found a focaccia that is well beyond okay. This bread was soft and light, tender and rich, topped with just a few simple accompaniments. It really was what I've been looking for. I can't wait to play around with different toppings and flavors. With this focaccia as a base I know they will all be great!

This recipe was very simple, and pretty quick as yeasted bread goes. Knead everything together and let it rise for about an hour. I was in a little bit of a hurry and only let it rise for about 45 minutes and it didn't seem to matter at all. Then all you have to do is press it into your pan and let it sit for only about 20 minutes. While it's resting you can get your toppings together. I went simple this time with some thinly sliced onion, rosemary, a sprinkling of pecorino and some sea salt, but there are so many options when it comes to focaccia, you can really do whatever you want. After the 20 minutes rest, just top it off and stick it in the oven. In another 20 minutes you'll have a beautiful golden brown round of rich, savory bread. You really can't go wrong.

Rosemary Onion Focaccia

Adapted From 

Food and Wine

Ingredients

  • 1 1/4 cup all purpose flour
  • 1 1/2 tsp instant yeast
  • 1/2 teaspoon kosher salt
  • 1/2 cup warm water
  • 1/2 teaspoon honey
  • 1/4 cup extra virgin olive oil, divided
  • Thinly sliced sweet onion
  • Roughly chopped rosemary
  • Grated pecorino or parmesan cheese
  • Sea salt

Directions

In the bowl of a stand mixer fitted with the dough hook, combine the flour, yeast and salt. Add the water, honey and 2 tablespoons of the olive oil. Knead the dough on medium speed until smooth and supple, 5-6 minutes. Place the dough in a well oiled bowl, cover with plastic wrap and let rest for about 1 hour. 

Transfer the dough to a well oiled 9-inch cake pan, pressing it down to fit and dimpling it all over with your fingers. Drizzle the dough with 1 tablespoon of olive oil and let rise until puffed, about 20 minutes. Sprinkle the dough to taste with the thinly sliced onion, rosemary, cheese and salt. Drizzle the remaining 1 tablespoon of olive oil over the focaccia. Bake for 18-20 minutes at 450 degrees until golden brown. Transfer to wire rack to cool. 

Oatmeal Chocolate Fudge Bars

Last week my dad asked me if I'd be willing to bake him something for his Bible study on Sunday night. Of course I said yes, any excuse to bake something, especially something I might not normally make for myself. I looked at some recipes I had set aside and settled on these oatmeal fudge bars. A sweet and buttery bar full of oats and covered in a layer of rich and smooth chocolate fudge. They sounded heavenly. They sounded so rich and made such a big batch that I knew this was something I wouldn't' just make for myself on a whim, so this was the perfect opportunity. I never actually asked what everyone at the Bible study thought, but I know what I thought: they are rich and delicious!

These bars were really easy to make, and use pretty basic ingredients. The only ingredient that maybe might be a little more unique is the sweetened condensed milk, but I almost always have at least one can in the pantry. Other then that, you're probably all set! Throw it together and then into the oven. These bars also freeze very well, and they actually taste really good straight from the freezer. They don't get super hard so it's easy enough to eat. But however you store them, they are pretty delicious!

Oatmeal Chocolate Fudge Bars

From: 

The Hub of Our Home

Ingredients

  • 1 Cup Salted Butter, softened
  • 2 Cups Brown Sugar
  • 2 Eggs
  • 2 Teaspoons Vanilla Extract
  • 2 and 1/2 Cups Flour
  • 3 Cups Old Fashioned Rolled Oats
  • 1 Teaspoon Baking Soda
  • 1/2 Teaspoon Salt
  • 1/2 Teaspoon Ground Cinnamon

Fudge Layer:

  • 14 Ounces Canned Sweetened Condensed Milk
  • 2 Cups Semi Sweet Chocolate Chips
  • 2 Tablespoons Salted Butter
  • 1 Teaspoon Vanilla Extract

Directions

In a small mixing bowl whisk together the flour, baking soda, salt, and cinnamon, set aside. In the bowl of your mixer beat the butter and sugar together until light and fluffy(about 2 minutes). Add the eggs one at a time beating for one minute after each egg. Beat in the vanilla. Add the dry ingredients. Mix just until combined. Stir in the oats. 

Set aside 1&1/2 to 2 cups of the mixture. Spread the remaining oatmeal mixture evenly in a greased 9x13 pan. Set aside and prepare the fudge layer. 

 In a medium saucepan add the sweetened condensed milk, chocolate chips, and butter. Heat over low heat, stirring continually, just until the chocolate is melted and the ingredients are combined. Be sure to watch the chocolate carefully. 

 Pour the warm fudge mixture into the 9x13 pan over top the oatmeal layer. Drop small bits of the reserved oatmeal mixture evenly over the fudge layer. Don't try to spread it. Dropping it creates an open lacy pattern allowing the fudge to show through. Bake in a preheated 350 degree oven for 25-30 minutes or until the top is golden brown and the chocolate layer is dull and starting to come away from the sides of the pan. 

 Cool on the counter for 2 hours and then refrigerate for 1 more hour before cutting. Store in an airtight container. 

Olive Oil Cornmeal Cake

This cake actually made its appearance a couple of months ago, but I kind of forgot about it. Not because it wasn't memorable, but because I forgot I took any picture of it. I'm happy to share it today because it brings back some wonderful memories of the end of summer, spending time with friends, and eating outdoors on a beautiful late summer night. This simple cake is an elegant ending to any meal. The flavors of the olive oil and the wine really shine through, but in a subtle and wonderful way. They add such a unique flavor that, combined with the slightly gritty texture of the cornmeal, perfectly finish off a relaxing evening. 

I really enjoyed the wine in this cake, but I'd like to also try it with the orange juice. I didn't end up using the orange zest when I made it, but if I ever make it with orange juice instead of the wine I would definitely add the zest. I also wondered if buttermilk would work instead of the wine or orange juice, just as something different. I might give that a shot some time. But then again, I liked the wine so much, I might not try anything else!

Olive Oil Cornmeal Cake
From Martha Stewart
Ingredients

  • 1/2 cup olive oil
  • 2 eggs
  • 1 cup sugar, plus 1/3 cup for topping
  • 1/2 cup dry white wine (or orange juice)
  • 1 1/4 cup flour
  • 1/2 cup cornmeal
  • 2 teaspoons baking powder
  • 1 teaspoon salt
  • Finely grated zest of 1 orange (optional)

Directions

Preheat oven to 375 degrees. Brush bottom and sides of an 8-inch round cake pan with oil; line bottom with a round of wax or parchment paper, and brush paper with oil.

In a large bowl, whisk together oil, eggs, 1 cup sugar, and wine until smooth. Add flour, cornmeal, baking powder, salt, and orange zest; whisk gently to combine.

Pour batter into prepared pan; sprinkle top evenly with remaining 1/3 cup sugar (topping will be thick). Bake until cake begins to pull away from sides of pan and a tester inserted in center comes out clean, 35 to 40 minutes.

Cool in pan 20 minutes. Run a knife around edge of cake; invert cake gently onto a plate, and remove parchment paper. Reinvert cake onto a rack to cool completely. Serve with orange segments, if desired.

Pumpkin Coffee Cake with Brown Sugar Pecan Streusel

Pumpkin season is here again for the year, and I'm loving it! Fall baking is my absolute favorite, especially fall baking with pumpkin. I really do love all things pumpkin, as long as they're not over spiced. It's a pet peeve of mine when people tell me they don't like pumpkin, because it is so too spicy for them. I like to tell them that pumpkin actually has no spices, it's just a squash, they just don't like what is often put with the pumpkin. I think it's very hard to dislike pumpkin on it's own, it doesn't have much flavor, especially when baked into something sweet and buttery and delicious. Something like this absolutely fantastic coffee cake. Trust me, this one is a keeper.

A moist, delicate pumpkin cake topped with a hearty amount of brown sugar and pecan streusel, and finished with a simple icing. This is one of the best new things I've baked recently, I just loved it, and will probably make it again before the fall is over!

Pumpkin Coffee Cake with Brown Sugar Pecan Streusel
From Williams Sonoma
Ingredients:
For the streusel:

  • 1/3 cup all-purpose flour
  • 1/2 cup firmly packed light brown sugar
  • 1 tsp. ground cinnamon
  • Pinch of kosher salt
  • 6 Tbs. (3/4 stick) cold unsalted butter, cut into small chunks
  • 1 cup chopped pecans, lightly toasted (see note below)

For the batter:

  • 1 1/2 cups all-purpose flour
  • 2 tsp. baking powder
  • 1/2 tsp. baking soda
  • 2 tsp. ground cinnamon
  • 1 tsp. ground ginger
  • 1/4 tsp freshly grated nutmeg
  • 1/2 tsp. kosher salt
  • 8 Tbs. (1 stick) unsalted butter
  • 1 cup firmly packed light brown sugar
  • 2 eggs
  • 1/2 cup pumpkin puree
  • 1/2 cup sour cream

For the glaze:

  • 1/2 cup confectioners’ sugar, sifted
  • 1 tsp. whole milk
  • 1 tsp. vanilla extract

Directions:
Preheat an oven to 350°F. Butter and flour a 9-inch springform pan or a 9-inch cake pan with 3-inch sides.

To make the streusel, in a bowl, combine the flour, brown sugar, cinnamon and salt. Toss in the butter and, using 2 table knives or a pastry cutter, cut it into the dry ingredients until the mixture looks like coarse crumbs. Alternatively, whir the ingredients in a food processor. Stir in the pecans. Set aside.

To make the batter, in a bowl, sift together the flour, baking powder, baking soda, cinnamon, ginger, nutmeg and salt. In the bowl of an electric mixer fitted with the flat beater, beat together the butter and brown sugar on medium-high speed until well combined. Beat in the eggs, one at a time, scraping down the sides of the bowl with a rubber spatula. Add the pumpkin puree and sour cream and mix with the spatula. Stir in the flour mixture. The batter will be quite thick.

Spread half of the batter in the prepared pan. Sprinkle half of the streusel over the batter. Dollop the remaining batter over the streusel and spread the thick batter as best you can. Top with the remaining streusel. Bake until a toothpick inserted into the center of the cake comes out clean, about 50 minutes. Transfer the pan to a wire rack and let cool for about 15 minutes. Remove the sides from the pan and slide the cake onto the rack.

To make the glaze, in a small bowl, whisk together the confectioners’ sugar, milk and vanilla. Drizzle over the top of the cake. Cut into thick wedges and serve. Makes one 9-inch coffee cake

Baker’s note: To toast pecans, preheat an oven to 325°F. Spread the nuts out on a rimmed baking sheet and bake, stirring often, until fragrant and lightly toasted, about 10 minutes.

Chickpea Pot Pie

I found this recipe last fall and the idea stuck with me for a while until I couldn't resist any longer. A potpie with chickpeas instead of chicken intrigued me. Since I love chickpeas I know it just had to be a great idea. I've played around with the recipe just a little bit, tweaking it for my tastes, and while I may make a couple more minor alterations in the future, I had to share this recipe now because I think it's so yummy! Chickpeas, sweet potatoes, onions, carrots and peas, all mixed together in a slightly thickened stock and covered with a healthy layer of cornbread. It's a modern day pot pie, and that's just how I like it.

The only thing I might do differently in the future for this recipe is increase the filling. It's such a good filling, and with the amount of cornbread that's on top, I found myself wanting more. Other than that I don't think I'd change a thing. The filling is so colorful and delicious, and the cornbread is an amazing idea for a topping. So much easier than pie dough! This is a recipe I'll be coming back to again and again.

Chickpea Potpie with Cornbread Crust
Adapted from Eats Well With Others
Ingredients
Veggie Base

  • 2 cups chopped sweet potatoes

  • 1/2 cup chopped carrots

  • 1 tbsp olive oil

  • 1 medium onion, chopped

  • 2 cloves garlic, minced

  • 1/4 white wine

  • 1/4 cup AP flour

  • 2 cups vegetable broth

  • 2 cups cooked chickpeas

  • 3/4 cup frozen baby peas

  • 1 tsp kosher salt

  • cracked pepper

  • dash of Sriracha

Topping

  • 3/4 cup cornmeal

  • 3/4 cup AP flour

  • 1 tbsp baking powder

  • 1 1/2 tbsp sugar

  • 1/2 tsp salt

  • 3/4 cup milk

  • 2 tbsp vegetable oil

  • 1 large egg yolk, slightly beaten

Directions
Boil the potatoes and carrots until tender but not soft and set aside, or alternately, toss with olive oil, salt and pepper and roast at 400° until tender, 20-25 minutes. 

Spray a 2-quart casserole with cooking spray. Preheat oven to 400° if you aren't already using it for the carrots and potatoes. 

For the filling, heat a large saucepan until hot. Add the oil and onions. Saute onions until they are soft, about 5 minutes. Add the garlic and sauté for about 30 seconds more. Add the wine and cook until it has mostly evaporated. Sprinkle in the 1/4 cup flour and cook for about 1 minute, until no longer raw. Slowly pour in the vegetable stock whisking well with a wire whisk. Still using the whisk, cook the mixture over medium heat until thickened and bubbly, about 2 to 3 minutes. Add the chickpeas, peas, cooked potatoes and carrots, salt, pepper to taste, and Sriracha. Cook on medium heat until the mixture is heated through, about 2 to 3 minutes. turn into the prepared casserole dish, spreading evenly. 

For the crust, in a bowl combine the cornmeal, 3/4 cup flour, baking powder, sugar, and salt. In a small bowl, combine the milk, oil and egg yolk. Add to the dry ingredients and mix until uniform but a bit lumpy. Spoon the batter evenly over the filling. It might not look like a lot, but it will poof up nicely while cooking and cover all the filling.

Bake until the top is golden brown, about 22 to 25 minutes. Let cool 5-10 minutes before digging in. 

Ciabatta

Sometimes all I want is a good sandwich. Versatile and delicious, I could probably eat a sandwich every day. And we all know (I hope) that a good sandwich demands excellent bread. Sub-par, stale grocery store bread just doesn't do it for me anymore. I need something better. For me, that means I have two options; head to the bakery (which, trust me, I do a lot!) or make some of my own. One of these options is more convenient and, let's be honest, probably better, but the other option is super cheap, absolutely delicious, and extremely satisfying. Pulling warm loaves of homemade bread out of my oven only 4 ingredients later is one of my favorite ways to spend an afternoon. I highly recommend it!

This recipe is easy, and simple, although it does take some advanced planning and to be honest, some practice (at least for me). It turned out 3 beautiful loaves of ciabatta that were perfect for my sandwich craving. 

Ciabatta
From The Bread Baker's Apprentice by Peter Reinhart
Ingredients
Poolish

  • 2 1/2 cups (11.25 ounces) bread flour

  • 1 1/2 cups (12 ounces) water, at room temperature

  • 1/4 teaspoon instant yeast

Dough

  • 3 1/4 cups (22.75 ounces) poolish

  • 3 cups (13 1/2 ounces) unbleached bread flour

  • 1 3/4 teaspoon salt

  • 1 1/2 teaspoon instant yeast

  • 6 tablespoons to 3/4 cup (3 to 6 ounces) water, lukewarm

Directions
For the Poolish: stir together the flour, water and yeast until all the flour is moistened. It will be soft and sticky, like very thick pancake batter. Cover the bowl with plastic and let sit at room temperature for 3 to 4 hours, until bubbly and foamy, then place in the refrigerator where it will keep for up to 3 days.

For the ciabatta: remove the poolish from the refrigerator 1 hour before starting. Stir together flour, salt and yeast in the bowl of a stand mixer fitter with the paddle attachment. Add the poolish and 6 tablespoons of the water and mix on low speed until the ingredients form a sticky ball, adding additional water as needed. Increase the speed to medium and mix for 5 to 7 minutes or until the dough is smooth and sticky. Switch to the dough hook and mix for 2 more minutes. The dough should clear the sides of the bowl but still stick to the bottom. You may need to add additional flour, but don't add too much, the final dough should be quite soft and sticky.

Spray about an 8-inch square part of your counter with cooking spray. Using a dough scraper, transfer the dough to the counter. Dust the top of the dough liberally with flour, patting it into a rectangle. Wait 2 minutes for the dough to relax. Coat your hands with flour, lift the dough from each end, stretching it to twice its size. Fold the dough over onto itself, like folding a letter, returning it to its originally shape. Dust the top of the dough with flour, and loosely cover with oiled plastic wrap.

Let rest for 30 minutes. The repeat the stretch and fold as above. Dust with flour and cover with plastic again. Let the dough ferment and rise on the counter for 1 1/2 to 2 hours. It should swell, but won't necessarily double in size.

Set up a couch with a cotton dish towel, sprayed with oil and generously floured. Carefully remove the plastic wrap from the dough. Using a pastry scraper, divide the dough into 3 rectangles, making sure not to degas the dough. Sprinkle the dough generously with flour and use the scraper to gently lift each piece from the counter and lay it on the floured cloth, folding each piece of dough from left to rich, letter-style, into an oblong about 6 inches long. Bunch the cloth between the pieces to provide a wall.

Proof for 45 to 60 minutes at room temperature, or until the dough has noticeably swelled. Meanwhile, place a baking stone in the oven and preheat to 500 degrees, placing an old heavy duty sheet on the lower rack.

When the dough is ready, gently transfer each piece of dough to a 9x12-inch piece of parchment paper, lifting from each end and gently tugging the dough out to just smaller than the piece of parchment. Slide the dough, parchment and all, onto the preheated baking stone. Pour one cup of hot water into the sheet pan and close the door. After 30 seconds, open the door and spray the sides of the oven with water from a spray can. Repeat twice more at 30 second intervals. After the last spray, turn the oven temperature down to 450 degrees and bake for 10 minutes. Rotate the loaves 180 degrees and continue baking for 5-10 minutes, or until done, the bread should register 205 degrees in the center and be golden brown. Allow loaves to cool at least 45 minutes before slicing and serving.

Washington Food Finds

It's been a busy couple of weeks with school starting, and over the labor day weekend I was involved in my cousin's wedding so I was unfortunately unable to post anything last week, too much craziness. Hopefully I can make up for that today. I don't have a recipe this time, but I did want to share some photos from my trip to Washington this summer. In July I spent 4 weeks in Vancouver, Washington working at New Heights Clinic, a church based health clinic for the underserved. It was a great experience and I learned a lot from my time there.

Thankfully I also had a lot of time in my month there to explore the area and get to know this part of the country. And what did I focus on, the food culture of course. I received so many recommendations of places to visit and foods to try that I couldn't even begin to do it all. I did however manage to get a pretty good sampling of some of my favorite things. In other words, I visited a lot of coffee shops and bakeries! Washington has some great coffee that is for sure, and I enjoyed it immensely. It was a great trip, great experiences, and great food!

One of the doctors from the clinic showed me around the area on my first weekend. She drove me along the Columbia River Gorge for some beautiful scenery and magnificent waterfalls. We finished up our tour at La Bottega Cafe and Deli, a cute little Italian restaurant with fantastic sandwiches, the perfect place for lunch. I decided on the Giuseppe; prosciutto, salami, fresh mozzarella, roasted garlic mayo and tomato basil vinaigrette on ciabatta. I'm a sucker for cured Italian meats. Since it was July I had to get the berry crisp for dessert, a la mode of course!

Also on my first weekend, I headed across the river to Oregon to check out the Portland farmer's market. I had a wonderful time taking in all of the fresh fruit, baked goods, flowers and the people. I loved the fresh seafood too, we just don't have that at our farmer's markets back in Michigan. The colors, smells and sounds of an early morning farmers market make me happy.

After the farmer's market I needed some coffee, so I drove around until I found just the right place. The Dragonfly Coffee House. It was a small little place, but cozy and relaxing, perfect for enjoying a late morning coffee and cookie.

For lunch I drove around a little more until I found Ken's Artisan Bakery, one of the bakeries on my list. It took me a while to find it and then find parking, but boy am I glad I did! I ordered the banh mi; 5 spice pork terrine, pickled daikon carrots, wasabi mayo and sriracha on a baguette. One of the best sandwiches I've had, all thanks to the baguette. It was crisp and crackly on the outside without being hard or tough, and the inside was pillowy, soft and super tender. I wish I could go back everyday for a baguette. I also bought a loaf of ciabatta to take home, which was just as fantastic. A very successful lunch.

One night I went out for Thai with some people from the clinic to a place called Thai Orchid in downtown Vancouver. I'm no Thai connoisseur but I thought it was delicious. We ordered all kinds of different dishes and ate them family style so I got to try a little bit of everything.

 My breakfast one morning from Great Harvest Bread Company. I kind of felt like I was cheating since we have a couple Great Harvest's in the Grand Rapids area, but my blueberry cream cheese scone was so good I didn't even care.

Basically my life while in Washington; fresh fruit and yogurt for breakfast. There were berries galore the whole time I was there. The family I was staying with also had a few blueberry bushes that were exploding with berries. I picked and ate more blueberries in a few weeks than I've eaten in my whole life up until this point. I have now officially become a blueberry lover, but I've been spoiled with the freshest, most plump and juicy berries, I don't think I can go back.

I was able to drive up to Seattle one weekend to see the city and visit my friend Hannah from college. To start out with I visited Pike's Place Market. It was one place I had to see. The whole experience was super interesting, there was so much to see, so many different people and all kinds of restaurants and food booths and knick knack-y shops. Of course it was crazy busy, but I managed to explore and get a good feel for the place.

For dinner my first night in Seattle, my friend brought me to Paseo, just down the street from her apartment. We both got the Caribbean roast sandwich which was to die for. Absolutely one of the best things I've ever put in my mouth. It may not look like much but it was so incredibly good. Pork shoulder, coated in their special marinade, slow roasted until falling apart, served on a lightly toasted baguette slathered with aioli, fresh cilantro, pickled jalapeños, a leaf of romaine and caramelized onions. What a mess, a fantastic mess.

Late night ice cream at Bluebird ice cream. Strawberries and cream, so good. 

 We walked around the neighborhood a little bit, and I met a troll!

Breakfast the next morning at Hannah's favorite bakery, Cafe Besalu. A tiny little shop with top notch croissants and danishes. We were there early, around 8, and the line was already out the door. I got the apricot danish, delicious.

Coffee break at Ballard Coffee Works. The perfect place to spend the dreary morning with a cappuccino, catching up on some emails.

The sun came out in the afternoon and we headed to Kerry Park to get a great view of the city.

Dinner was burgers and fries at Uneeda Burger, a casual burger shack with lots of character. Tons of different options for burgers and homemade shakes, I could hardly decide what to get. I decided on the Philly smash; charred peppers and onions with swiss and their special sauce. Sometimes I just need a burger, and this was one of those times. The perfect way to finish off the day.

One last breakfast in Seattle before heading back to Vancouver at Fresh Flours. This place was interesting because they had not only the basic breakfast options, croissants, scones and danishes, but they also had some Japanese influenced pastries. It was a kind of Japanese-French fusion, not something I would ever think of but I decided to give it a try and went with the Azuki croissant. Basically a basic croissant folded over slightly sweetened bean paste. I really did enjoy it immensely. The croissant itself was very flavorful and flaky, and the mild filling adding just a hint of extra sweetness.

Back in Portland the next weekend, trying out Lovejoy Bakers which was just wonderful. A bright and busy contemporary bakery with windows everywhere, and so many delicious and fun options to try. Tons of great outdoor seating as well. A wonderful place to spend a sunny summer morning. I opted for the butterhorn, with a name like that it was just impossible to pass up. I don't know exactly what it was, but I know a lot of butter was involved, and the whole thing was covered with a delicious layer of streusel. It seemed like there was some kind of laminated dough hiding in there, but it's hard to know.  

A nice little cafe was lunch for the day. Grilled ham and swiss with a fresh cucumber salad. Sometimes the basics are just the right thing.

A friend I met at the clinic took me hiking in Portland which turned out to be a lot of fun. Who knew there were some great hikes in the actual city. It's hard to believe that these two worlds are so close to one another. The end of our hike brought us by another awesome French bakery; St. Honore' Bakery. It was packed with people, which was good because it gave me time to look around, and there was so much to see. They not only had amazing looking bread, but the cases were full of cakes, tarts, eclairs, pies, danishes, croissants, quiche, and sandwiches, to name just a few. It was wonderful. We only stopped for a few minutes, but I managed to buy a canele' to try. I've always wanted to try one so when I saw it I knew I had to give it a go. It was absolutely delicious, a crisp and firm outer layer gave way to a smooth, custardy inside. Eggy with a hint of rum, so good.

My host family took me out for dinner one of the last nights I was around to one of there favorite local spots, Woody's Tacos. It was kind of a hole-in-the wall, lots of fun. They had a ton of different options for tacos to try. I decided on roasted corn and grilled zucchini with roasted tomatillo, avocado and green chili salsa and a homemade chorizo and potato taco with fire roasted salsa, both very tasty. And the atmosphere was fun too, sitting outdoors under cheerful yellow umbrellas.

Thatcher's Coffee became my go-to coffee shop in Vancouver. Great coffee, great atmosphere, and it was located pretty close to where I was staying. It is located in a strip mall in a newly developed area, so the first time I went there I didn't really expect much. From the outside it doesn't look special in any way. Inside however is a different story. It's on the end of the strip of stores, and so basically the entire side of the shop is windows letting in so much beautiful natural light. The decor is modern yet warm which is how I like it. Plenty of seating and free wifi rounded out this wonderful spot. I only ever got coffee except the last time I went. I had to splurge on my last day for a berry scone, and it was worth it. Huge and tender and sweet and delightful, a perfect way to say goodbye.

My friend from the clinic took me on one last hiking adventure before I had to leave. We went about 5 miles I think to see several waterfalls and some beautiful scenery. We ended up at triple falls which you can see from the picture is an apt name. The northwest sure is some beautiful country.

One last night out before I went home. I went out with one of the doctors from the clinic to Pho Green Papaya to get some pho. I'd never had pho before, and so didn't know what to expect. I was pleasantly surprise with this flavorful Vietnamese soup. It was full of different cuts of meat and noodles, and we could customized it however we wanted with fresh basil, jalapeños, lime juice and bean sprouts. It is definitely something I'd like to try again. 

And on my last morning in Washington, I had to drive back in to Portland to spend some time at St. Honore' Boulangerie. I really wanted to enjoy a leisurely breakfast of coffee and a freshly made French pastry. Deciding on what to buy was difficult, but I finally settled on the almond croissant and it was absolutely fantastic. Crispy and flaky on the outside, and creamy and custardy on the inside. I don't know how they do it, but I was in heaven. It was a fitting way to end my culinary explorations of the northwest. I will definitely miss all of my delicious finds!