Pink Cake Pops

At the end of this past summer, a friend an neighbor of mine approached Lara and I and asked us if we would be willing to make her cake pops for her wedding which was going to be in October. We said yes and were very excited to help her our. After making cupcakes for my cousin's wedding in May I felt prepared to try something new for another wedding. There was only one slight problem with all of this though, I had never made cake pops before. I wasn't too worried about it, I knew I could figure it out, but there was still some apprehension about the whole process. After doing a test run in August on cake pop making, I felt ready to go and just had to wait until October. In the end the whole process went very smoothly, and the cake pops turned out great. Congratulations Stacey!

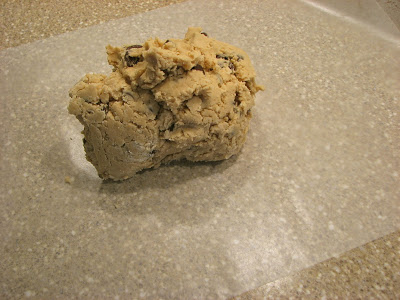
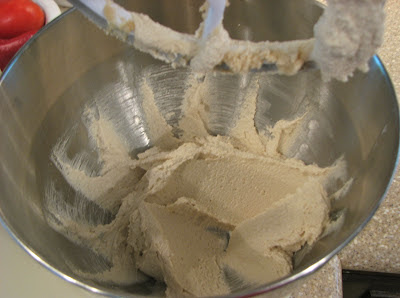
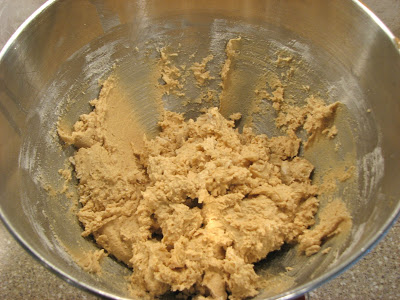
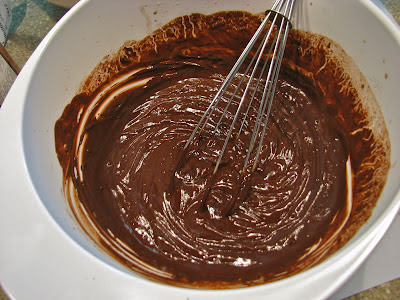
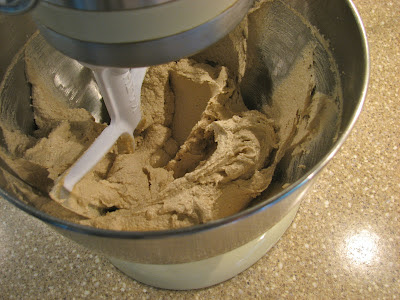
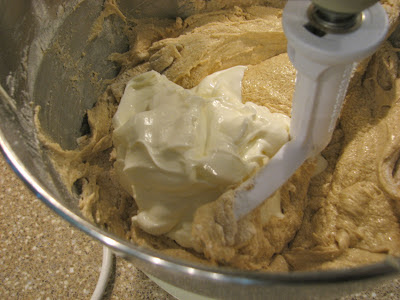
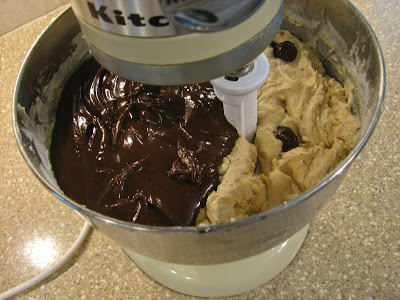
In case you don't know, cake pops are basically cake that you destroy and then mush up with frosting, form into balls, place on a stick and dip into chocolate. It's not a complicated process, but it is time consuming and somewhat labor intense, well at least when you are making over 200 at one time it is! The nice thing about cake pops is that they keep very well for at least a week or two meaning you can make them ahead and not worry too much about them losing quality. Because they are full of frosting they are super moist, and once you dip them in the chocolate this moistness kind of gets sealed in, they don't dry out or loose flavor very quickly. This was nice for me because I didn't have to make them all in the one or two nights before the wedding, I actually started about two weeks before the wedding and was done several days before they were needed. This took some stress off of me which was very nice.

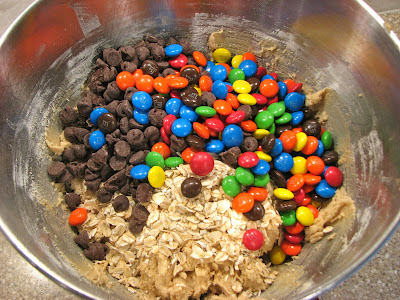
When it was all said and done I think I ended up with about 220 cake pops. There was a little bit of a learning curve with how to dip them in the chocolate, my first few weren't so pretty, but by the end I was a pro at it. Stacey wanted white cake with pink white chocolate and pink sanding sugar, all of which I ordered online. I really had no idea how much of the chocolate or the sugar I would need. In the end I used about 6 pounds of the white chocolate and 2 pounds of sanding sugar total, and this was for cake pops that were 30 grams each.

To be honest, I never could have done this all alone. Having a built in baking partner at home was a must for this project. Trying to study the anatomy of the head and neck and make 200 cake pops all alone would have been difficult. But with a partner, it wasn't so bad at all! Thanks Lara, we make a good team!

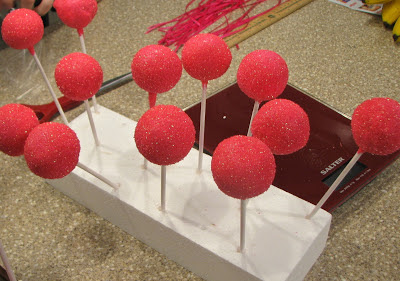
After dipping, letting the chocolate dry

All lined up, ready to wrap

200 cake pops later

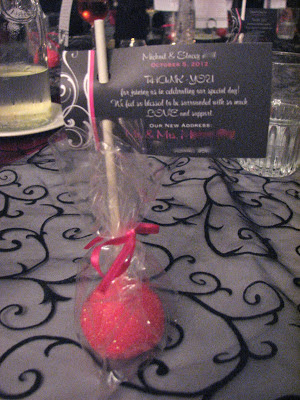
Cake pops, the perfect wedding favor

Simple White Cake
Adapted from Annie Eats
Ingredients

  • 1 cup whole milk, divided
  • 6 large egg whites
  • 1 tbsp. vanilla extract
  • 2¾ cups (11 oz.) cake flour, sifted
  • 1½ cups (10.5 oz) sugar
  • 1 tbsp. plus 1 tsp. baking powder
  • ¾ tsp. salt
  • 12 tbsp. (¾ cup) butter, at room temperature

Directions
Preheat the oven to 350˚ F. In a liquid measuring cup, combine ¼ cup of the whole milk, egg whites,  and vanilla extract. Whisk to blend. In the bowl of an electric mixer, combine the cake flour, sugar, baking powder, and salt. Mix briefly on low speed to combine, about 30 seconds.

Add in the butter and mix on low speed until the mixture resembles wet sand, about 30 seconds. Mix in the remaining ¾ cup of milk, then increase the speed to medium and beat for about 90 seconds more. 

With the mixture on low speed, add the egg white mixture in three additions, mixing for about 20 seconds after each addition. Scrape down the bowl as needed.

Pour the batter into a greased 9x13-inch pan. Bake, rotating the pan halfway through, until a toothpick inserted in the center comes out clean, about 20 minutes.

Chocolate Madeleines

Chocolate cake was sounding good to me this weekend, but I didn't feel like taking the time to make a whole chocolate cake, plus what would I do with it? I just can't justify eating the whole thing on my own. Then I remembered my Madeleine pan; bite size chocolate cake that don't need to be frosted, perfect! This recipe requires an overnight chill in the fridge, so you have to think ahead a little, but the end product was delicious. Intensely rich, deep chocolate flavor packaged up in a two bite snack, just the right thing to satisfy my chocolate cake craving.

A simple and delicious recipe, it shouldn't have been a problem right? Well, when your oven decides to die the day you are ready to bake it is a problem. There my batter was, waiting patiently in the fridge, but there was no usable oven in sight. I finally texted my sister-in-law and asked if I could come over and borrow her oven, I didn't want all my efforts to go to waste. I'm glad I was able to end up baking these little guys, they made my Saturday afternoon study session much happier. If you have a Madeleine pan I highly recommend giving these little guys a try!

Wet and dry, ready to go

Time to chill in the fridge

A perfect little snack

Chocolate Madeleines
From Lemon and Anchovies
Ingredients

  • ½ cup plus 1 tablespoon (70 grams) all-purpose flour
  • 3½ tablespoons Dutch-processed cocoa powder
  • ½ teaspoon double-acting baking powder
  • ⅓ cup plus two tablespoons (90 grams) sugar
  • Pinch of salt (I don't think my pinch was quite big enough, they could have used a little more salt, so don't be afraid to take a nice big pinch!)
  • Grated zest of ¼ lemon (optional)
  • 2 large eggs, room temperature
  • 6½ tablespoons (3¼ ounces; 100 grams) unsalted butter, room temperature

Directions
Sift together the flour, cocoa and baking powder and set aside. If using the lemon zest, combine the sugar, salt and lemon zest in another bowl and rub the ingredients together with your fingertips until the sugar is moist, grainy and aromatic.

Using a whisk, beat the eggs with the lemon-sugar mixture until blended. Squish the butter through your fingers and add to the bowl. You will be left with little clumps of butter in the mixture–this is okay. Beat in the butter with the whisk until it is evenly distributed. Whisk in the sifted flour mixture just until the flour is incorporated and mixture is smooth. Press a piece of plastic wrap against the surface of the batter and chill overnight. If you can’t wait overnight, chill the batter for at least an hour before baking.

When you are ready to bake the cookies, preheat your oven to 425 degrees F. Butter a 12-mold madeleine pan then dust it with flour (even if you are using a nonstick pan) and tap out the excess.

Divide the batter evenly among the madeleine molds–you don’t have to worry about spreading the batter on the molds, the heat will do that for you. Place the pan in the oven and use a wooden spoon to keep the oven door slightly ajar. Immediately turn down the oven temperature to 350 degrees F and bake the cookies for 11 – 13 minutes, or until the cookies are domed and spring back when pressed lightly. Unmold the cookies and transfer them to a rack to cool to room temperature.

Pumpkin Chocolate Chip Squares

Time for round two of the pumpkin recipes. It's the fall so I think two pumpkin recipes in a row is perfectly acceptable. Since I had some leftover pumpkin puree from the pumpkin bundt cake cake I just made I decided that I was obligated to make something else. When I saw the recipe for these bars they just sounded good. Chocolate and pumpkin is one of my favorite combinations so I was sure this recipe would be a winner. I was definitely right. I know it may not look or sound all that exciting, it's just a bar, but don't be fooled by it's humble appearance. This bars turned out even better than I had hoped. The pumpkin leant it's characteristic mild flavor and moistness to each bite, the two kinds of chocolate were bursts of delicious sweetness, and the fall spices warmed the whole thing up. A perfect combination.

This is a simple recipe, not much to say other than that you should try it. All you need is a can of pumpkin, chocolate and lots of butter. There is no reason not to make this, it is so yummy!

The ingredients, ready to go

Spread the batter in the pan

Ready for the oven

Baked!

Ready to dig in

Enjoy!

Pumpkin Chocolate Chip Squares
Adapted from Martha Stewart 
Ingredients

  • 2 cups all-purpose flour
  • 1 1/2 tablespoon cinnamon
  • 1/2 teaspoon ginger
  • 1/4 teaspoon nutmeg
  • 1/4 teaspoon allspice
  • 1/4 teaspoon cloves
  • 1 teaspoon baking soda
  • 3/4 teaspoon salt
  • 1 cup (2 sticks) unsalted butter, room temperature
  • 1 1/4 cups sugar
  • 1 large egg
  • 2 teaspoons vanilla extract
  • 1 cup pumpkin puree
  • 4 ounces white chocolate, cut into chunks
  • 8 ounces semi sweet chocolate chips

Directions
Preheat oven to 350 degrees. Grease a 9 x 13 inch pan and set aside. In a medium bowl, whisk together flour, spices, baking soda, and salt; set aside.

With an electric mixer, cream butter and sugar on medium-high speed until smooth; beat in egg and vanilla until combined. Beat in pumpkin puree (mixture may appear curdled). Reduce speed to low, and mix in dry ingredients until just combined. Fold in chocolate.

Spread batter evenly in prepared pan. Bake until edges begin to pull away from sides of pan and a toothpick inserted in center comes out with just a few moist crumbs attached, 35 to 38 minutes. Cool completely in pan.

Cut into squares and enjoy!

Pumpkin Bundt Cake

I know I'm stating the obvious but it's fall. So what does fall mean for baking? Pumpkin of course! I love all pumpkin baked goods, pumpkin bread, pumpkin muffins, pumpkin scones, pumpkin donut holes, pumpkin granola, the list could go on and on. (Everything except pumpkin pie actually, I'm not a huge pumpkin pie fan.) Pumpkin lends such a beautiful color to baked goods, I just love the way it looks, I think that this lovely color plays a big role in why I love using pumpkin in these different yummies. But of course, another reason I love baking things with pumpkin is because of the wonderful warm spices that are usually added to the various breads and cakes. Cinnamon, nutmeg, cloves and ginger are the perfect complement to the mild flavor of the pumpkin.

Since a beautiful, new bundt pan has recently made it's way into my kitchen, baking a pumpkin bundt cake was the perfect way to spend a cold, rainy fall weekend. The aroma of all of those fall spices lingering in the air as the cake baked was soothing and the best way I can think of to welcome fall with open arms.


This was a pretty straightforward cake. Cream together butter and sugar, add eggs, add dry ingredients in batches alternating with milk, and finally mix in the pumpkin. Voila! I did do a little tweaking with the amount of spices in the cake. I know that above I stated how much I love these fall spices, and I do, but I like them in small doses. I therefore decreased the amount of nutmeg, cloves and ginger and increased the amount of cinnamon (I love cinnamon!). For me this amount of spiciness was perfect, not too overpowering, but definitely present. If you prefer a little spicier cake feel free to add a bit more than I have written below. Either way I'm sure it will turn out wonderfully! I think this cake might be a nice alternative to pumpkin pie for a delicious Thanksgiving dessert.


 Pour batter into greased pan

 Bake!

 The new bundt pan worked beautifully!

 Finish off with a little powdered sugar

 Dig in!

 Mmmm

I'm glad it made a big cake


Pumpkin Bundt Cake
Slightly adapted from Martha Stewart
Ingredients
  • 4 cups flour, plus more for dusting
  • 4 teaspoons baking powder
  • 1 teaspoon baking soda
  • 1 teaspoon salt
  • 1 1/2 teaspoons ground ginger
  • 1 tablespoon ground cinnamon
  • 1/2 teaspoon freshly grated nutmeg
  • 1/4 teaspoon ground cloves
  • 1 cup (2 sticks) unsalted butter, room temperature, plus more for pan
  • 2 1/2 cups packed light-brown sugar
  • 4 large eggs
  • 1 cup buttermilk
  • 1 1/2 cups canned pumpkin puree
  • Confectioners' sugar, for dusting
Directions
Preheat oven to 350 degrees. Spray a 14-cup Bundt pan with cooking spray. Dust with flour, and tap out excess.

Whisk together flour, baking powder, baking soda, salt, ginger, cinnamon, nutmeg, and cloves. Set aside.

Beat butter and brown sugar together in the bowl of an electric mixer fitted with the paddle attachment, on medium speed until pale and fluffy, 2 to 3 minutes. Add eggs, one at a time, beating well after each addition and scraping down sides of bowl. Reduce speed to low. Beat in flour mixture in 3 additions, alternating with the buttermilk. Beat until just combined. Add pumpkin puree, and beat until combined. Pour batter into prepared pan.

Bake cake until golden and a wooden skewer inserted into the center comes out clean, about 55 minutes. Let cool on a wire rack for 30 minutes. Carefully turn cake onto rack too cool completely. Before serving, dust with confectioners' sugar.

Baked Egg "Muffins"

Now that I am super busy with school, it's a goal of mine to come up with recipes that I can make in large quantities and then freeze for a quick lunch or dinner during the week. Last weekend I looked in my fridge and found some leftover egg yolks that I didn't want to go to waste so I decided to bake them up in a muffin tin for some individual egg "muffins" that I can throw onto an english muffin along with some cheese and ham for a nice breakfast or lunch. Not fancy, but simple and delicious. It works for me!

There is no recipe with this, it is more of an idea. I just whisked together the egg yolks and a few whole eggs with a little milk, salt and pepper. Then just throw in whatever else you want; I did peppers and onions but cheese, or some type of meat would be delicious too. It's kind of like making scrambled eggs but instead of scrambling them in a frying pan, pour them into a (liberally) greased muffin tin and bake. Super easy and very versatile.

One word of caution; you don't want to fill up the muffin tins very full, about halfway is plenty. You can't tell from the pictures, but as they bake the egg really poofs up and you can have a mess on you hands if it all overflows. Once they come out of the oven they collapse and aren't nearly as tall, but mine looked almost like mini soufflés when they were fresh out of the oven.

I bake my little frittatas at 350 degrees for maybe 20-25 minutes. I didn't set a timer, but just kept my eyes on the oven and waited until they all looked set up. Just watch them to make sure they don't overbake. I threw the finished product into the freezer and have been eating them all week, yum!

Peanut Butter Chocolate Chip Shortbread Cookies

Well, I've been busy at med school for about a month and I am loving it. It is a ton of work, but it's work I want to be doing so I don't mind it at all. You may have noticed however that I haven't been quite as busy on the blog. To be honest, I haven't had that much time to bake or cook. Hopefully now that I've gotten settled in to the routine of school I'll have a little more time to spend in the kitchen, but we'll see. Regardless, I'm still here and will put up some posts whenever I can.

I pulled this recipe from the archives of the summer. I never got around to posting it then, so here it is. If you like shortbread, chocolate and peanut butter you will love these. They may look like a regular chocolate chip cookie, but they have that wonderful, sandy shortbread texture, a texture I love!

The only trouble I had with this recipe involved cutting the cookies up. The chocolate chips kept getting in the way so it was hard to cut an even cookie. Because of this, the cookies weren't really very uniform in shape or thickness. This didn't seem to affect the taste at all however, they were still wonderfully delicious!

The dough, ready to chill

Rolled into a nice log and chilled, ready to cut

Onto the baking sheet

A delicious stack 

Peanut Butter Chocolate Chip Shortbread Cookiesa
From: The View From the Great Island
Ingredients

  • 1 stick, (1/2 cup) unsalted butter, room temp 
  • 1/3 cup creamy peanut butter
  • 1/2 tsp vanilla extract
  • 1 1/4 cup all purpose flour 
  • 1/4 cup confectioner's sugar
  • scant 1/2 tsp sea salt
  • 3/4 cup chocolate chips

Directions
Cream the butter and the peanut butter together in a stand mixer, with a hand mixer, or a wooden spoon. Beat in the vanilla.

Whisk the dry ingredients together and add to the butter mixture. Mix until the dough comes together.

Stir in the chips, and turn the dough out onto a piece of waxed paper. Gently pull the dough together and form it into a log. If it is still crumbly, work it with your hands until it holds together smoothly. Roll it up in the paper, smoothing the shape as you go. Twist the ends securely and refrigerate for at least a couple of hours.

Slice the log into slices with a sharp knife. Not too thick, not too thin, about 1/3 inch. If a slice crumbles a bit, just smoosh the dough back together. These don't have to be perfect disks.

Bake on a parchment or silpat lined baking sheet at 325 for about 12-14 minutes. The cookies will not be browned, and they may look undone, but don't over bake. One of the joys of shortbread cookies is that they fall apart and melt in your mouth. 

Let the cookies cool on the pan for 5 minutes before transferring to a rack.

Peanut Butter Oatmeal Chocolate Chip Cookies with M&M's

Well, I have been gone for quite a while! It's been a very busy couple of weeks and I just couldn't get around to posting anything. First of all, I had a week of orientation to start out med school with a bang. An entire week of get to know you games, lectures, and information overload. It was crazy, but wouldn't have been so bad, except that in the middle of the week the hard drive on my computer decided to die. So I was computer-less for about a week, and didn't have any of my food photos. When I finally did get my computer back med school started. Just let me say that they don't ease you into school. It was a super busy week, but a good one. Now that I have a few minutes on Sunday morning I'm going to share a new cookie that I tried out a few weeks ago. A very delicious PB oatmeal chocolate chip cookie with my favorite addition, M&M's!

I took these cookies out to the lake one day to go boating and they were very well received. They're kind of like the cross between a monster cookie and a chocolate chip cookie. A hint of nuttiness from the PB, a bit of chew from the oats, and of course a nice, hefty dose of chocolate. You really can't go wrong with this combination. A definite keeper!

 Start with butter of course!

 Add the sugar and cream until

nice and fluffy

 Next is the PB, egg, and vanilla

 Nice and creamy

 Time for the dry ingredients

 Mix until just combined

 Finally, the oats!

 And the chocolate!

 Mix it all up

 Onto a cookie sheet

 Ready to bake

 Bake until just golden on the edges

 Cool them off on a wire rack

Grab a nice big glass of milk, and enjoy!

Peanut Butter Oatmeal Chocolate Chip Cookies with M&M's
Adapted from: Pinch of Yum
Ingredients

  • 1/2 cup butter
  • 1/2 cup white sugar
  • 2/3 cup unpacked brown sugar
  • 1/2 cup peanut butter 
  • 1/2 teaspoon vanilla extract
  • 1 egg
  • 1 cup all-purpose flour
  • 1 teaspoon baking soda
  • 1/4 teaspoon salt
  • 1/2 cup rolled oats
  • 3/4 cup chocolate chips
  • 3/4 cup M&M's

Directions
Preheat oven to 350 degrees. Cream together the butter, white sugar and brown sugar until smooth. Beat in the peanut butter, vanilla and egg until well blended. 

Add the flour, baking soda and salt. Stir until just moistened. 

Mix in the oats, chocolate chips, and M&M's until evenly distributed. 

Drop by tablespoonfuls on to lightly greased cookie sheets.

Bake for 10 to 12 minutes in the preheated oven, until the edges start to brown. Cool on cookie sheets for about 5 minutes before transferring to wire racks to cool completely.

Chocolate Sour Cream Bundt Cake

If I learn one important thing this summer, it is that the best thing to bring to a potluck is something chocolatey. My parents were headed to a cookout/potluck last week, and so I of course volunteered to bake something. Any excuse to try a new recipe that I might not normally make for just me and my family. This recipe has been on my mind for a while now, but I couldn't find a good reason for making a huge chocolate bundt cake, that is until the potluck appeared on my radar. I was so excited to whip together this cake that I just ignored how expensive it actually was to bake (over a pound of chocolate, almost 3 sticks of butter, 5 eggs, heavy cream, sour cream, you get the picture), I don't let that kind of thing bother me. For how rich and heavy this cake was, it was gone in a flash according to my parents. The came home with nary a crumb and said it was a huge hit. I was able to try a little bit of it and I concur, it was fantastic!

Like I said before, this was an extremely rich cake, but that's what makes it so much fun to make. Putting the cake together was simple enough, it took some time, but nothing unusual. The recipe does call for a 15 cup bundt pan, and I only have a 12 cup bundt pan, but it wasn't a big issue. I filled my 12 cup pan as full as I dared, and then used the rest of the batter to make some mini bundt cakes with my mini bundt cake pan. If you don't have a mini bundt pan, I'm sure you could just use a muffin tin and make some cupcakes with the leftover batter.

So making and baking the cake was no problem. Everything worked out perfectly, right up until I had to unmold the cake that is. As you can see from my pictures, I buttered and dusted the pan with cocoa about as much as I possibly could. That didn't seem to prevent the cake from sticking to the sides however. I have to admit, I used a very old bundt pan that probably was never a great pan. But after this fiasco, I won't be using it again. When I inverted the cake onto a wire rack, I felt it fall. The problem was, only half of it came out. When I lifted the pan I think I almost cried, the bottom of the cake was sitting nicely on the wire rack, but the entire top half of the cake was still still stuck inside the bundt pan.

Since I didn't have the time (or the money!) to remake this cake, I did the only thing I could. I scooped the remaining half of the cake out of the bundt pan, and tried my best to arrange it on top of the bottom of the cake. In the end it actually didn't look as bad as I thought it would. And it was at this point that I learned how to save a bundt cake that won't release from it's pan, one word: glaze. In this case my glaze was a nice thick layer of ganache. Once I poured the ganache over top of the almost ruined cake, you couldn't even tell that there had ever been a problem. This is a lesson I will keep in mind in case I have this kind of problem again in the future. As long as it taste good, a cake can be saved with a nice layer of chocolate (or another type of glaze I'm sure)!

A pile of ingredients

Grease and dust your bundt pan 

The yummy chocolate mixture

Time to cream

Putting it all together

Adding in the sour cream

Now it's time for chocolate

Almost ready

Because there wasn't enough chocolate already

Into the pan it goes

And baked

Here's where things got a little interesting, but as 

you can see, it isn't too horrible

Covered with ganache, you can't even tell that the structural integrity of this cake has been compromised 

Chocolate Sour Cream Bundt Cake
From: Lick the Bowl Good
Ingredients
For the cake:

  • 1 cup cocoa powder, sifted, plus more for dusting pan
  • 7 1/2 oz. semisweet chocolate, finely chopped
  • 1 cup boiling water
  • 2 1/4 cups all-purpose flour
  • 1 1/2 tsp. baking soda
  • 1 1/4 tsp. kosher salt
  • 20 Tbsp. (2 1/2 sticks) unsalted butter
  • 2 1/2 cups firmly packed light brown sugar
  • 5 eggs, lightly beaten
  • 4 tsp. vanilla extract
  • 1 1/2 cups sour cream
  • 1 1/2 cups semisweet chocolate chips

For the ganache:

  • 6 oz. semisweet chocolate, finely chopped
  • 2 Tbsp. unsalted butter
  • 1/2 cup heavy cream

Directions
Preheat an oven to 325 degrees F. Grease a bundt pan and dust with cocoa powder; tap out the excess.

To make the cake, in a bowl, combine the 1 cup cocoa powder and the chocolate. Add the boiling water and whisk until the chocolate melts and the mixture is smooth and blended. Set aside.

Over a sheet of parchment, sift together the flour, baking soda and salt. Set aside.

In the bowl of an electric mixer fitted with the flat beater, beat the butter on medium speed until smooth and creamy, 30 to 45 seconds. Reduce the speed to low, add the brown sugar and beat until blended. Increase the speed to medium and continue beating until the mixture is light and fluffy, about 5 minutes, stopping the mixer occasionally to scrape down the sides of the bowl. Add the eggs a little at a time, beating until incorporated before adding more and stopping the mixer occasionally to scrape down the sides of the bowl. Beat in the vanilla until incorporated, about 1 minute.

Reduce the speed to low and add the flour mixture in three additions, alternating with the sour cream and beginning and ending with the flour, beating just until blended and no lumps of flour remain. Slowly pour in the chocolate-cocoa mixture and beat until no white streaks are visible, stopping the mixer occasionally to scrape down the sides of the bowl. Using a rubber spatula, gently fold in the chocolate chips.

Pour the batter into the prepared pan, spreading the batter so the sides are about 1 inch higher than the center. Bake until a toothpick inserted into the center of the cake comes out with only a few moist crumbs attached to it, 60 to 65 minutes. Transfer the pan to a wire rack and let the cake cool upright in the pan for 15 minutes. Invert the pan onto the rack and lift off the pan. Let the cake cool completely, at least 1 hour.

Meanwhile make the ganache: In a heatproof bowl, combine the chocolate and butter. In a small saucepan over medium-high heat, bring the cream just to a boil. Immediately pour the cream over the chocolate and butter. Whisk until the melt and the mixture is smooth.

Pour the ganache over the top of the cake, allowing the ganache, to drip down the sides. Let the cake stand until the ganache is set, at least 15 minutes.