Triple Layer Chocolate Cake

Last week my dad came home and asked my sister and I if we wanted to bake a birthday cake for his secretary at work. Of course I said yes, practically before he had a chance to finish his sentence. Cakes are one of my all time favorite things, both to eat and bake, so I get super excited anytime I have the change to make one. When I asked him what kind of cake she liked his answer was so typical, "I don't know...but I like chocolate!" So of course, I baked a chocolate cake.

After browsing my options, I decided to make this cake. Lara had seen it on tastespotting a few months ago and decided she had to make it someday very soon. Since it looked like a good option I set about making it. It turned out to be a simple cake to make, nothing fancy, and it came together quickly. Since I only had two cake pans I ended up baking it in two batches, but this didn't seem to affect the quality of the finished product. The cake was delicious, but what I loved most of all was the frosting. This frosting was an unusual frosting for me. Basically only cream, butter and chocolate that are cooked for a short time on the stove and then left to cool completely. Before it cools all the way, it is hard to believe that this combination is going to harden up enough to be able to frost with, but have faith, it will work! In the end it reminded me of store bought frosting, only ten times better. Absolutely delicious, definitely a keeper. The only thing I would change about this recipe is to make a bit more frosting. I like a thick layer on my cakes and with the recipe as written I just scraped by with enough. But even so, everyone loved this cake, including me, and it will be making another appearance in my household, preferably soon!


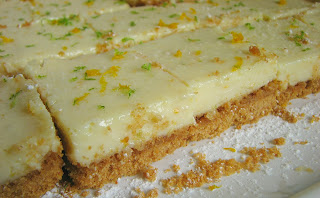
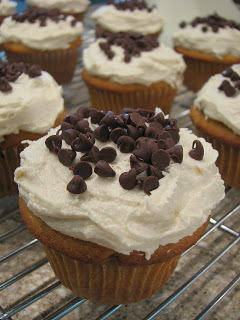
A close up of the finished product

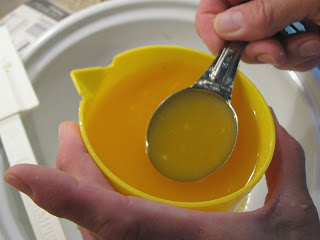
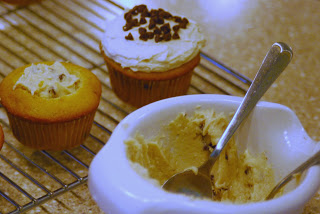
 The frosting, cooled and ready to go

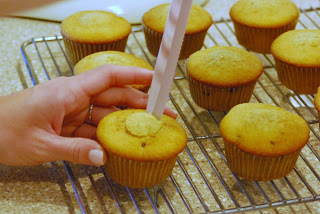
 Had to sneak this in, this is how
my dad "helps" when I bake :)

 Start frosting

 Almost done
(look at the puppy sleeping in the corner, so cute!)
 Done, I squeaked by with 
just enough frosting

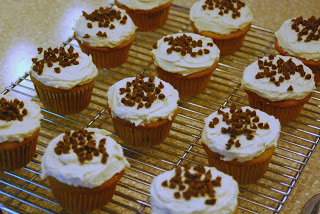
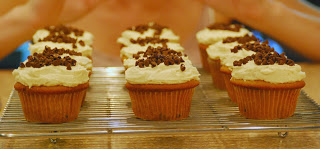
Finished it with some fun sprinkles

 Beautiful! Three layers are always
better than two (the more the better in my opinion)


Triple Layer Chocolate Cake
Ingredients 

Frosting
  • 1 3/4 cups (350 gr) sugar
  • 1 1/2 cups heavy cream
  • 7.5 oz (213 gr) unsweetened chocolate, finely chopped
  • 12 Tbspn unsalted butter, cut into small pieces
  • 1 1/2 tspn vanilla extract
Directions
In a saucepan, bring the sugar and heavy cream to a boil over medium heat.

Reduce the heat to low and simmer the cream and sugar for six minutes. Be careful not to let the saucepan overflow.

Remove from heat and stir in the chocolate and butter until they have completely melted.

Stir in the vanilla extract.

Let the frosting cool completely, whisking every now and then during cooling.  (You can do this step in the refrigerator to speed up the process)  Once completely cool at room temperature, the frosting will be spreadable.

Cake
  • 3 cups (600 gr) sugar
  • scant 3 cups (425 gr) AP flour
  • 1 cup + 2 Tbspn (135 gr) Dutch-processed cocoa powder
  • 1 1/2 tspn salt
  • 2 1/4 tspn baking powder
  • 2 1/4 tspn baking soda
  • 3 eggs
  • 3/4 cup vegetable oil
  • 1 1/2 cup whole milk
  • 1 1/2 cup hot coffee 
Directions
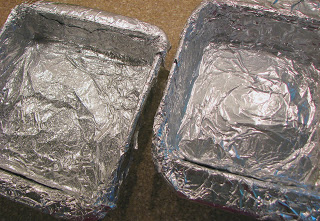
Preheat oven to 350 degrees F. Grease, flour, and line the bottoms of three 8 inch round cake pans (9 inch cake pans also work, the cake will just be shorter).

In a mixer bowl, combine the sugar, flour, cocoa powder, salt, baking powder, and baking soda. Mix to combine.

In a separate bowl, combine the beaten eggs, vegetable oil, and milk. Stir to mix. Then, with the mixer on low, pour the wet ingredients into the dry ingredients. Mix on low until evenly distributed.

Pour the hot coffee into the batter and mix on medium low until smooth. The batter will be soupy.

Divide the batter between the cake pans.

Bake for 35-45 minutes. When a toothpick inserted into the center of the cakes comes out cleanly, the cakes are done. Remove from the oven and let cool completely.

Level the cakes if necessary. Stack the cakes, spreading a layer of frosting in between each cake layer and frost the outside of the cake.

Whimsical Sugar Cookies

A few weeks ago my church hosted its annual Vacation Bible School. While I didn't get as involved this year as I have in years past, both Lara and I signed up to bring cookies one night for the kiddos attending. Any excuse to bake something fun and different without having to eat the whole batch is great! We came up with the idea to make decorated sugar cookies. I always want to make them throughout the year but I only ever end up making them at Christmas. This was the perfect reason to make them in the summer.

We used the cookie and frosting recipe that we used last Christmas and I really loved. We were going for a cookie similar to what you get in a cookie bouquet and these fit the bill. The key is to roll the dough quite thick. That way you don't get a thin, crunchy cookie, but a cookie with some substance to it which I prefer. This past Christmas was the first time I used royal icing and I had a lot of fun with it. I want to do more in the future because you can do some really fun things with it. The flowers on these cookies were pretty simple but I still think they turned out rather cute!

Unfortunately, the day we were supposed to bring these cookies to church we got a phone call telling us that they had enough cookies left over from the first two days of VBS, and that we didn't have to bring any in :( So that means these cookies went straight into the freezer where they still sit. I have to figure out what to do with them before they get too old. Any ideas?

Bright pink flowers are fun and festive for summer

Just bake some sugar cookie rounds

Pipe the center in the middle
and let it dry overnight

Then pipe on the rest of the flower
and you have a cute, summery frosted sugar cookie
I think they turned out quite well, they remind 
me of Dr. Seuss


Vanilla-Almond Sugar Cookies
from bakeat350
Ingredients
  • 3 cups all-purpose flour 
  • 2 teaspoons baking powder 
  • 1 cup sugar 
  • 2 sticks butter, cold 
  • 1 egg 
  • 3/4 teaspoon pure vanilla extract 
  • 1/2 teaspoon pure almond extract 
Directions
Combine the flour and baking powder, set aside. Cream the sugar and butter. Add the egg and extracts and mix. Gradually add the flour mixture and beat just until combined, scraping down the bowl, especially the bottom.

The dough will be crumbly, so knead it together with your hands as you scoop it out of the bowl for rolling

Roll onto a floured surface and cut into shapes. Place on parchment lined baking sheets and freeze for 5 minutes. Bake chilled cookies for 10-12 minutes at 350. Let sit a few minutes on the sheet, then transfer to a cooling rack to cool completely.


Royal Icing
from sweetopia
Ingredients
  • 6 oz (3/4 cup) warm water 
  • 5 tablespoons meringue powder 
  • 1 teaspoon cream of tartar 
  • 1 kilogram (2.25 pounds) powdered sugar 
*** Note: if your meringue powder has no vanilla flavor in it, you may add a teaspoon of clear vanilla to this recipe

Directions
Pour the warm water and meringue powder into the bowl of an electric mixer. Mix it with a whisk by hand until it is frothy and thickened, about 30 seconds.

Add the cream of tartar and mix for 30 seconds more.

Pour in all of the powdered sugar at once. Using the paddle attachment, mix slowly, on the LOWEST speed, for a full 10 minutes. Icing will get thick and creamy.

Cover the bowl with a dampened towel to prevent crusting and drying.

Tint with food colorings and thin the icing with small amounts of warm water to reach the desired consistency.

Decorate!

***Note: For tips on using royal icing and ideas for decorating, visit sweetopia.net. This site has lots of tips and tricks for decorating cookies along with other fun things. It really helped me out the first time I used royal icing.

Triple Citrus Bars

My mom had to make a dessert for a potluck cookout earlier this month and she chose to make these bars. I helped out a little and took some pictures to document the process. In the past several years, whenever I'm around I am usually the one to make the dessert or the salad or whatever else is needed, so it was nice to see my mom back in the kitchen making her own dessert (although, it makes me want to jump right in and make my own too!). It was fun to double team these yummy bars, sharing the excitement of preparing a beautiful dish.

If you are looking for a light, fresh and citrusy dessert this summer, this is the bar for you. It was the perfect choice for an outdoor party by the pool. They weren't too difficult to make and they are a nice twist on the traditional lemon or lime bars. I enjoyed the three kinds of fruits and the beautiful flavors and color they added to the bars. The buttery, sandy crust is a nice contrast to the smooth and tart citrus filling. And the best part, they can be made the night before and chilled in the fridge overnight. It doesn't get much better than that! Overall, a fresh and satisfying dessert for a hot summer night.

Fresh and tart, a refreshing dessert

All the fruit, ready and waiting

Graham crackers for the crust

Crush them up and add some butter

All mixed and ready for the pan

The prepared pans, we made a double batch

Pour the crumbs into the pan

Press and bake!

Get the filling ready, start with the cream cheese and zest

Then the juice

Ready to go

Grab an egg yolk

Once it's all together, pour into the pans,
it's as easy as that!

Cut and ready to eat

Ahhh...refreshing!

Triple Citrus Bars
from The Complete America's Test Kitchen TV Show Cookbook
Ingredients
Crust
  • 5 ounces animal crackers (I didn't have any so I used graham crackers and they turned out just fine) 
  • 3 tablespoons brown sugar 
  • Pinch of table salt 
  • 4 tablespoons (1/2 stick) butter, melted and slightly cooled 
Filling
  • 2 ounces cream cheese, room temperature 
  • 1 1/2 teaspoons grated lime zest 
  • 1 1/2 teaspoons grated lemon zest 
  • 1 1/2 teaspoons grated orange zest 
  • Pinch of table salt 
  • 1 (14 ounce) can sweetened condensed milk 
  • 1 large egg yolk 
  • 6 tablespoons lime juice 
  • 1 tablespoon lemon juice 
  • 1 tablespoon orange juice 
Directions
Adjust an oven rack to the middle position and heat oven to 325 degrees. Line an 8-inch square pan with foil and spray with vegetable oil spray.

For the crust: pulse crackers in food processor until fine (about 10 seconds), you should have about 1 1/4 cups of crumbs. Add the brown sugar and salt, process to combine. Drizzle butter over the crumbs and pulse until crumbs are evenly moistened with butter. Press the buttered crumbs firmly and evenly into the prepared pan. Bake for 18-20 minutes, until deep golden brown. Cool on a wire rack.

For the filling: In a medium bowl, stir together cream cheese, zest and salt with a spatula until softened, creamy and thoroughly combined. Add sweetened condensed milk and whisk until smooth and completely incorporated. Whisk in the egg yolk. Add the lime, lemon and orange juice and whisk gently to incorporate (the mixture should thickened slightly).

Pour the filling into the cooled crust and spread to corners, smoothing the surface with a rubber spatula. Bake until the filling is set and the edges begin to pull away slightly from the sides, 15-20 minutes. Cool on a wire rack to room temperature, 1-1 1/2 hours. Cover with foil and refrigerate until thoroughly chilled, at least two hours.

Lift the bars from the pan using the foil and cut into 16 squares. May be sprinkled with toasted coconut if desired.

Grilled Salmon with Tomatoes and Basil

I am a huge seafood fan. I especially love crustaceans (shrimp, crab, lobster!). When it comes to fish, I really like salmon. It's not boring and it's not fishy tasting, it's just delicious, and healthy too! However, when it comes to loving salmon my dad takes the cake. He absolutely loves salmon. He gets super excited every single time it shows up in the fridge.

When I came home a couple weeks ago, I noticed some salmon in the freezer just waiting for me. It was sockeye, bright red and gorgeous looking, which I have never had before. After defrosting it I went on a search for a delicious and healthy grilled salmon recipe. It's summer after all, I don't want to use the oven if I can use the grill instead. I found this yummy recipe online at Eating Well. I had all of the ingredients on hand, which is amazing, and it looked both healthy and delicious. I was right. This turned out to be one of the best salmon recipes I have tried yet. It was quick and easy but still impressive and tasty. I will definitely be making this one again.


The finished product


A beautiful fillet

Garlic and oil for the top

Spread the garlic oil on the fish

Add some basil (yum!)

Layer on the tomatoes

Grilled, ready to devour

Grilled Salmon with Tomatoes and Basil
from eatingwell.com
Ingredients
  • 2 cloves garlic, minced 
  • 1 teaspoon kosher salt, divided 
  • 1 tablespoon extra-virgin olive oil 
  • 1 whole wild salmon fillet 
  • 1/3 cup plus 1/4 cup thinly sliced fresh basil, divided 
  • 2 medium tomatoes, thinly sliced 
  • 1/4 teaspoon freshly ground pepper 
Directions
Preheat grill to medium.

Mash minced garlic and 3/4 teaspoon salt on a cutting board with the side of a chef’s knife or a spoon until a paste forms. Transfer to a small bowl and stir in oil.

Measure out a piece of heavy-duty foil (or use a double layer of regular foil) large enough for the salmon fillet. Coat the foil with cooking spray. Place the salmon skin-side down on the foil and spread the garlic mixture all over it. Sprinkle with 1/3 cup basil. Overlap tomato slices on top and sprinkle with the remaining 1/4 teaspoon salt and pepper.

Transfer the salmon on the foil to the grill. Grill until the fish flakes easily, 10 to 12 minutes. Serve the salmon sprinkled with the remaining 1/4 cup basil.

Chocolate Chip Cookie Dough Cupcakes

My cousin Bailey came over today for a cupcake baking extravaganza. We had a lot of fun putting together a fabulous cupcake recipe. I saw this recipe several months ago and knew that I would be making them in the future so today was the perfect opportunity. I love chocolate chip cookies and I love cake so I knew this recipe would be a winner. I was right. This recipe consists of quite a few steps, but none of them are difficult. I think we had the whole recipe done in about two hours (we did put the cupcakes in the freezer so they would cool faster). They were absolutely delicious! Just a warning, they are incredibly sweet and rich, which is fine with me, but if you don't have quite as big as a sweet tooth as me, half a cupcake might be all you can take. But believe me, I ate my whole cupcake along with several fingers of frosting and batter. I might not need dinner tonight. It was worth it :)

Updated Pic!
Made these again for my mom's birthday, 
finally have the right decorating tip and they turned out beautifully!

Fill the liners with cake batter

 Baked!

 Cut out the centers

 Ready to fill

 Fill in those holes with yummy filling

 Frosting anyone?

 In process

All done, ready to eat

 A beautiful dozen

 A lot of the afternoon consisted of photography!

 Yum!

Cousins, enjoying the fruits of our labor

 In mid eat, look at that filling, 
the cupcakes really did taste like a chocolate chip cookie

 Updated Pic
Happy Birthday Mom!


Recipe
Ingredients

Cupcakes
  • 3 sticks unsalted butter, at room temperature 
  • 1½ cups light brown sugar, packed
  • 4 large eggs
  • 2 2/3 cups all-purpose flour
  • 1 tsp. baking powder
  • 1 tsp. baking soda
  • ¼ tsp. salt
  • 1 cup milk\
  • 2 tsp. vanilla extract 
  • 1 cup chocolate chips (semisweet or bittersweet)   
 Filling
  • 4 tbsp. unsalted butter, at room temperature
  • 6 tbsp. light brown sugar, packed
  • 1 cup plus 2 tbsp. all-purpose flour
  • 7 oz. sweetened condensed milk
  • ½ tsp. vanilla extract
  • ¼ cup mini semisweet chocolate chips

Frosting
  • 3 sticks unsalted butter, at room temperature
  • ¾ cup light brown sugar, packed
  • 3½ cups confectioners’ sugar
  • 1 cup all-purpose flour
  • ¾ tsp. salt
  • 3 tbsp. milk
  • 2½ tsp. vanilla extract

To make the cupcakes, preheat the oven to 350° F.  Line two cupcake pans with paper liners (24 total).  In the bowl of a stand mixer fitted with the paddle attachment, combine the butter and brown sugar.  Beat together on medium-high speed until light and fluffy, about 3 minutes.  Mix in the eggs one at a time, beating well after each addition and scraping down the sides of the bowl as needed.


Combine the flour, baking powder, baking soda, and salt in a medium bowl.  Stir together to blend.  Add the dry ingredients to the mixer bowl on low speed, alternating with the milk, beginning and ending with the dry ingredients, mixing each addition just until incorporated.  Blend in the vanilla.  Fold in the chocolate chips with a spatula.

Divide the batter evenly between the prepared cupcake liners.   Bake for 18-20 minutes, until a toothpick inserted in the center comes out clean.  Allow to cool in the pan 5-10 minutes, then transfer to a wire rack to cool completely.

To make the cookie dough filling, combine the butter and sugar in a mixing bowl and cream on medium-high speed until light and fluffy, about 2 minutes.  Beat in the flour, sweetened condensed milk and vanilla until incorporated and smooth.  Stir in the chocolate chips.  Cover with plastic wrap and refrigerate until the mixture has firmed up a bit, about an hour.

To fill the cupcakes, cut a cone-shaped portion out of the center of each cupcake.  Fill each hole with a chunk of the chilled cookie dough mixture.

To make the frosting, beat together the butter and brown sugar in the bowl of a stand mixer fitted with the paddle attachment until creamy.  Mix in the confectioners’ sugar until smooth.  Beat in the flour and salt.  Mix in the milk and vanilla extract until smooth and well blended.

Frost the filled cupcakes as desired, sprinkling with mini chocolate chips and topping with mini chocolate chip cookies for decoration.


Light Wheat Bread

Recipes like this are why I love baking bread. A couple of months again I shared a recipe for soft white sandwich bread which turned out great, but I think this bread may have surpassed it. I'd have to do a side by side taste test to know for sure. Whatever the case, both breads are delicious. One big difference is that this bread contains a little whole wheat flour, but not very much of it. The finished loaf was so soft and airy that I would never have been able to tell there was whole wheat flour in it without looking at it.

This bread would be wonderful for anything you would normally do with grocery store bread. It toasted up like a dream. I often have a problem with homemade bread toasting up unevenly, with the crust turning too brown and hard before the center is browned, but not with this bread. It made the best toast I've had to date, toasting up golden brown without getting hard (and it was perfect with my homemade strawberry rhubarb jam). The loaf disappeared so fast that I didn't have a chance to make any sandwiches with it but with tomato season fast approaching I think BLTs are are my next goal.

Soft, delicious slices, ready for anything

The players

Mix it all together

And knead
Ready to rise

Beautiful!
 Shaped and ready for the second rise

Perfect
 Bake it off and pull out this
beautiful golden brown loaf

Ready to slice, waiting 2
hours was an eternity!
Gorgeous and delicious

Perfect Toast

Light Wheat Bread
from The Bread Baker's Apprentice by Peter Reinhart
Ingredients
  • 2 1/2 cups (11.25 oz) unbleached high-gluten or bread flour 
  • 1 1/2 cups (6.75 oz.) whole-wheat flour 
  • 1 1/2 tablespoons (.75 oz.) granulated sugar or honey 
  • 1 1/2 teaspoons (.38 oz.) salt 
  • 3 tablespoons (1 oz.) powdered milk 
  • 1 1/2 teaspoons (.17 oz.) instant yeast 
  • 2 tablespoons (1 oz.) shortening or unsalted butter, at room temperature 
  • 1 1/4 cups (10 oz.) water, at room temperature 
Directions
Stir together the high-gluten flour, whole-wheat flour, sugar (if using), salt, powdered milk, and yeast in a 4-quart mixing bowl (or in the bowl of an electric mixer). Add the shortening, honey (if using), and water. Stir until the ingredients form a ball. If there is still flour in the bottom of the bowl, dribble in additional water. The dough should feel soft and supple. It is better for it to be a little too soft that to be too stiff and tough.

Sprinkle high-gluten or whole-wheat flour on the counter, and transfer the dough to the counter, and begin kneading (or mix on medium speed with the dough hook). Add more flour if needed to make a firm, supple dough that is slightly tacky but not sticky. Kneading should take about 10 minutes (6 minutes by machine). The dough should pass the windowpane test and registers 77 to 81 degrees F. Lightly oil a large bowl and transfer the dough to the bowl, rolling it around to coat it with oil. Cover the bowl with plastic wrap.

Ferment at room temperature for 1 1/2 to 2 hours, or until the dough doubles in size.

Remove the dough from the bowl and press it by hand into a rectangle about 3/4 inch thick, 6 inches wide, and 8 to 10 inches long. Form it into a loaf by working from the short side of the dough, rolling up the length of the dough one section at a time, pinching the crease with each rotation to strengthen the surface tension. It will spread wider as you roll it. Pinch the final seam closed with the back edge of your hand or with your thumbs. Place the loaf in a lightly oiled 8 1/2 by 4 1/2 inch bread pan; the ends of the loaf should touch the ends of the pan to ensure an even rise. Mist the top with spray oil and loosely cover with plastic wrap.

Proof at room temperature for approximately 60-90 minutes or until the dough crests above the lip of the pan.

Preheat the oven to 350 degrees F with the oven rack on the middle shelf.

Place the bread pan on a sheet pan and bake for 30 minutes. Rotate the pan 180 degrees for even baking and continue baking for 15 to 30 minutes, depending on the oven (mine was definitely done in 15 minutes). The finished loaf should register 190 degrees F in the center, be golden brown on the top and the sides, and sound hollow when thumped on the bottom.

When the bread is finished baking, remove it immediately from the loaf pan and cool it on a rack for at least 1 hour, preferably 2 hours, before slicing or serving.

Strawberry Rhubarb Jam

Strawberries are my absolute favorite fruit. They are simply delicious, and beautiful too. Because of this, June is always an exciting month. As the strawberry season winds down, I try to make a batch of strawberry jam to preserve the beauty and flavor of June for many months ahead. In the middle of January, when the sun has been missing for days, it's wonderful to pull out a jar of summer and slather it on a slice of toast. It brings me back to the warmth and beauty of June at least for a few minutes.

Strawberry rhubarb jam is my favorite. You can't really taste the rhubarb, but it adds a nice tartness and complexity to the jam that is missing from plain strawberry jam. I was lucky this year, when I went to buy my strawberries for the jam, the lady at the farm stand told me it was the last day for strawberries. I just made it! Now I have a half dozen gorgeous jars of jam patiently waiting for me. It doesn't get much better than that.

Fresh and delicious


Berry beauties

 For tartness-Rhubarb!

 Cut the top off the berries, and slice them a little smaller
so they're easier to crush

 Crush them up, I use
a potato masher

 Chop up the rhubarb
Put the berries and rhubarb in a 
large pot (along with pectin and some lemon juice)

Bring to a boil, then add the sugar!

Time to fill the jars

Wipe those tops off, we want a good seal

Ready to go

Into the water bath

 All done
Ready to eat

 Perfect on homemade bread for breakfast


Recipe
from the Ball Blue Book
Ingredients
  • 4 c strawberries, crushed
  • 2 c rhubarb, chopped 
  • 1/4 cup lemon juice
  •  1 (1 3/4 oz) package dry pectin 
  • 5 1/2 c sugar

Combine strawberries, rhubarb, lemon juice and pectin in a large saucepot. Bring to a boil over high heat.

Add sugar, stirring until dissolved. Return to a rolling boil.

Boil hard 1 minute, stirring constantly. Remove from heat. Skim foam if necessary.

Ladle hot jam into hot jars, leaving 1/4 inch headspace. Adjust two-piece caps.

Process 10 minutes in water bath.

Marinated Chicken Kabobs

I love grilling in the summer. It just makes everything taste better. Digging through the freezer the other day, I came upon some frozen chicken breast and thought, kabobs! While working at Bob's Butcher Block  for several years while in college, I became a pro kabob maker. We would make hundreds of kabobs a week, so throwing a few together for dinner is a piece of cake. All you need is some skewers, and some combination of meat and veggies. My favorite vegetables for kabobs are peppers and onions, but you can also do tomatoes, mushrooms, zucchini, potatoes or whatever else you like. Weave those veggies onto a skewer between some chunks of meat (beef, chicken, pork, whatever) and you have a meal on a stick.

I almost always marinate my chicken before grilling it, this helps it keep from drying out and boosts its flavor. For these kabobs I used a yummy Greek marinade that I use all the time on chicken. It really makes the chicken taste nice. But you can really do whatever you like, use your favorite marinade or skip it altogether (though I wouldn't). Whatever the case, give it a try, it's a delicious summer treat!

 Nicely charred and ready to eat

 Grab some chicken

And the vegetables of your choice

 cut them up into nice sized chunks

 Soak those skewers

And put it all together

 Head to the grill

There she blows!

 And pop the kabobs onto the grate

Pull them off when they look done

Get ready to feast

Greek Marinade
from food.com
Ingredients
  • 1 c olive oil 
  • 1/4 c lemon juice 
  • 3 cloves garlic, minced 
  • 2 Tbs Dijon mustard 
  • 2 Tbs dried oregano 
  • 1 Tbs chopped fresh thyme or 1 tsp dried tyme 
  • 2 Tbs chopped fresh parsley 
  • 1 tsp freshly ground black pepper 
  • 1 Tbs chopped fresh rosemary or 1 tsp dried rosemary 
Directions
In a small bowl, mix together all the marinade ingredients.

Pour over lamb, beef, poultry or fish and marinate in the refrigerator for 1-2 hours before cooking.