Maple Almond Granola

I love granola.What's not to love about crunchy, chewy oat clusters, slightly sweetened and baked to golden brown perfection. In the last year I've turned to making my own granola. Not only is it cheaper, it's better than anything you'll get at the grocery store, and you can customize it to fit your own tastes. It can also be healthier depending on what recipe you use. I know there are about a gazillion granola recipes out there but this is the one I've been using for a while now, it is really delicious. Maybe someday I'll try so different granola recipes, but for now I'm happy with this, and I bet you will be too. Give it a try!


 Golden brown deliciousness

 Toasting the oats

 Oats and liquid sweetener, ready to be 
combined

 Throw in whatever floats your boat, 
this time I did almonds and sunflower seeds

Mix it all up together

 Throw on a cookie sheet and bake to perfection

Yum!

Note: My granola turns out different every time. It's so easy to switch up ingredients, so just through in whatever you like. If you want to add dried fruit, bake the granola for 30 minutes at 275 and then throw in the fruit for the last 15 minutes of baking. It is also super easy to double, or triple this recipe, just make sure you use two pans if doubling.


Maple Almond Granola
adapted from USA Weekend
Ingredients
  • 2 cups old-fashioned oats
  • 1/2 cup wheat germ
  • 2 Tbs. dark brown sugar
  • 1/3 c sliced almonds 
  • 1/4 tsp. salt
  • 1/4 cup maple syrup 
  • 3 Tbs vegetable oil 
  • 2 Tbs water 
  • 1/2 tsp vanilla
  • 1 tsp cinnamon
Directions
Place oats on a cookie sheet or in a 9x13 inch pan and toast them for 8-10 minutes at 350 degrees. Reduce heat to 275 degrees.

Mix the oats, wheat germ, sugar and salt as well as any extra ingredients in a large bowl.

In a small saucepan bring syrup, oil, water, vanilla and cinnamon to a simmer over low heat.

Drizzle syrup mixture over oat mixture and stir so combine. Pour mixture into a lightly greased 9x13 inch pan. Use your hands to squeeze the mixture into small clumps. Bake for 45 minutes at 275 degrees, stirring two or three times.

Focaccia

I've been wanting to make focaccia for a while now but there are so many recipes out there that I never know which one to try. I finally just picked one made it and it turned out quite good, crispy and chewy and flavorful. Sadly, the only olive oil I had in the house wasn't the best and that came through in the bread. With a really good olive oil I think this recipe would be great. I also had to replace the rosemary with thyme, I would have preferred the rosemary but hey, go with what you got, right? I want to try some other focaccia recipes now, and see the different forms focaccia can take, but this was a good start.

Chewy, crunchy goodness

The dough lifecycle

Golden brown, yum
 
I cut myself a nice big slice!

Note: This was a very wet dough, I wouldn't even attempt to knead it by hand like the recipe said to. Pull out the Kitchen Aid and let it do all the work!

Focaccia
from Amy's Bread
Ingredients

Biga
  • 200 g/7 oz (¾ c plus 2 Tbs) very warm water (105-115 degrees) 
  • 1/8 tsp active dry yeast 
  • 227 g/8 oz (1½ c plus 2 Tbs) all-purpose flour 
Focaccia
  • 425 g/15 oz (1¾ c plus 2 Tbs) warm water (85-90 degrees) 
  • ½ tsp active dry yeast 
  • 340 g/12 oz (1½ c) Biga 
  • 638 g/22.5 oz (4½ c) bread flour 
  • 42 g/1.48 oz (2 Tbs plus 2 tsp) Milk 
  • 36 g/1.27 oz (2 Tbs plus 2 tsp) Extra virgin olive oil 
  • 13 g/0.45 oz (1 Tbs plus 1 1/4 tsp) Kosher salt 
  • 10 g/ 0.35 oz (2 Tbs plus 1 tsp) Fresh rosemary, about 2½ branches, chopped 
  • Additional olive oil and kosher salt, as needed, for topping 
Directions
For the Biga: in a medium bowl, mix together the warm water and yeast. Add the flour and stir for 1 to 2 minutes, until a smooth batter has formed. The batter will be fairly thick and stretchy, but don't worry, it will improve after rising. Put the biga into the container and cover the container with plastic wrap.

Let it rise at room temperature (75-78 degrees) for 6 to 8 hours, or for 1 hour at room temperature, then place it in the refrigerator for 8 hours or overnight. Remove it from the refrigerator and let it sit at room temperature for 3 to 4 hours before use it should more than double in volume. If you use the starter while it's still cold from the refrigerator, be sure to compensate for the cold temperature by using warm water (85-90 degrees) in your dough.Use the starter while it is still bubbling up, but before it starts to deflate.

For the Foaccaia: Place the warm water and yeast in a large bowl, stir with a fork and allow to stand for about 3 minutes. Add the biga to the yeast mixture and mix with your fingers for 1 to 2 minutes to break it up. The mixture should look milky and foamy. Add the flour and mix it together When the dough becomes a shaggy mass, move to a very lightly floured surface and knead until it becomes smooth and somewhat elastic, about 5 minutes. Place the dough back into the mixing bowl, cover with oiled plastic, and let rest for 20 minutes.

After the rest add the milk, oil, and salt to the dough in the mixing bowl and knead until it is all incorporated.

Move the dough to a lightly floured work surface and knead until it is very smooth, silky and elastic, 7 to 10 minutes.

Put the dough in a lightly oiled bowl, turn it to coat with oil, and cover it tightly with oiled plastic wrap. Let the dough rise at room temperature (75 to 77 degrees) for 1 hour.

Turn the dough while it is still in the mixing bowl. Gently deflate the dough in the middle of the bowl, then fold the left side over the middle and the right side over the middle. Fold the dough in half, and then turn it over so the seam is underneath. Let it rise again for 1 to 1½ hours, until nearly doubled in volume.

When the dough has risen, loosen it from the bowl and gently pour it onto the center of the oiled baking sheet. Pat it gently with your fingertips to stretch it evenly out to the edges of the pan. Be careful not to tear the dough. If the dough resists stretching, let it rest for 2 to 5 minutes, until it becomes supple enough to stretch again, then continue to press it out to the edges of the pan. (If the dough is dry, you may have to repeat the resting/stretching procedure several times.) Brush the top of the dough lightly with olive oil, cover with lightly oiled plastic wrap, and let rise for 1 to 2 hours, until the dough has doubled and fills the pan (a finger pressed into the dough will leave an indentation).

Brush and dot the surface of the dough gently with olive oil, dimple it in several spots with your fingertips to prevent air pockets from developing underneath, and sprinkle the surface lightly with kosher salt. Sprinkle with chopped rosemary all the way to the edges.

Bake for 15 minutes, then reduce the oven temperature to 350 degrees and bake for 15 to 20 minutes longer, until golden brown and custy but still very soft inside.

Remove the focaccia from the oven and immediately brush it lightly with olive oil. Cool in the pan 10 minutes, then carefully slide it onto a cooling rack. Remove the parchment (to prevent steam from softening the bottom crust) and let cool. Serve warm or at room temperature, cut into squares.
 

Olive Oil Tart Crust

I eat a lot of eggs. Not only are they cheap, but they are delicious and healthy, a great triad! I eat a lot of scrambled eggs and egg sandwiches, both of which I love, however, sometimes I just want to try something new. The last time I was home from school I decided to "borrow" my mom's tart pan. Since she bought it last summer at my urging, and has never used it herself, I didn't feel too bad about it. I've been wanting to make quiche, and now I finally have the pan to do it with.

Now, I love a good buttery tart crust, flaky and delicious, but sometimes I just don't want to deal with the hassle of making one, so when I saw this recipe on Chocolate and Zucchini it sounded perfect for a quick quiche dinner. This dough came together in just minutes, and because it doesn't used chilled butter there was no need to ensure that it stayed cold. I just had to roll it out, put in in the pan, chill it for 30 minutes or so, and then pop it in the oven.

After the crust was baked, I just threw a bunch of stuff on top of it, it doesn't really matter what, I just used what I had in the fridge (sausage, spinach, cheese, onion etc). You can use whatever filling you want, that's what I love about eggs, they are so versatile. Finally I covered it all with a mixture of eggs and milk. Just pop it  in the oven for about 25 minutes and you have yourself a delicious dinner. Give it a try!

 The blank canvas

 One picture prior, just after rolling it out

Yummy fillings: thyme, onions, sausage, spinach, cheese (Parmesan and Pecorino)

Baked to perfection

Slice and eat


Recipe
From Chocolate and Zucchini 
Ingredients
  • 250 grams (8.8 ounces) light whole wheat flour, or a 50/50 mix of all-purpose and whole wheat flour
  • 1 teaspoon fine sea salt 
  • 60 ml (1/4 cup) olive oil (or oil of your choice)
  • 120 ml (1/2 cup) cold water 
  • 1 teaspoon dried herbs (optional)

Makes enough to line a 28- to 30-cm (11- to 12-inch) tart pan.

Combine the flour, salt, and herbs (if using) in a medium mixing bowl. Add the oil and mix it in with a fork. Add the water, mix with the fork until it is absorbed, then knead lightly until the dough comes together into a ball.

Turn the dough out on a lightly floured work surface. Sprinkle a little flour on the ball of dough and on the rolling pin, and roll the dough out into a circle large enough to fit your tart pan. The trick is to do this in quick, assertive gestures  to avoid overworking the dough.

Transfer the dough carefully into a lightly greased tart pan and line it neatly. Trim the excess dough, and place the pan in the fridge for 30 minutes to rest.

Blind bake the crust for 15 minutes at 400 degrees.


Quiche Filling

  • 1 c milk
  • 3 eggs
  • Salt
  • Pepper
  • Choice of fillings

Place choice of filling in pie crust. Whisk together milk, eggs, salt and pepper. Pour mixture into crust, over filling. Bake for 25 minutes at 400 degrees. Eat warm or at room temperature.


A French Toast Breakfast for Mother's Day

Last week for Mother's Day, Lara and I did what we usually do for Mother's Day and bought my mom some new plants for her yard. This year we bought her some heritage raspberry bushes she had been wanting. I can't wait to try some home grown raspberries, just imagine the possibilities! But we also wanted to do something else extra special this year, so our thoughts went to the kitchen (of course!). We decided to surprise her with a delicious breakfast on Saturday morning. Lara got the idea after seeing Martha Stewart's ideas on the Today Show for a Mother's Day breakfast in bed. But, since we wanted to go for a run, and my mom wanted to go to the YMCA in the morning, breakfast in the bed was out. However, mom going to the Y in the morning was the perfect opportunity to prepare one of her favorite breakfasts to surprise her with when she came home. The dish: French Toast!

We made the French toast extra special with fresh strawberries and bananas and a mascarpone cream filling. We also went out to the best (in my opinion) bakery in Grand Rapids, Nantucket Baking Company, and bought the most delicious loaf of brioche, because when making French toast why not go all the way and buy the richest, most buttery and tender loaf of bread you can find?! This bread did not disappoint, it made the best French toast I have ever had. It's a good thing I don't live any closer to the bakery or I would probably gain 50 pounds!

Try this French toast, it will not disappoint. Even if all you have is squishy Wonder bread it will be delicious. But if you feel like splurging on something a little extra special, go to your favorite bakery and buy the richest bread you can find, you won't regret it.


All I can say is Yum!!


The brioche, I love the shape


The bread and custard, 
ready to dip

A little cream makes everything better

Lara and the griddle, getting excited to eat!

Nice and toasty

Almost done

Adding the cream between the slices

and finishing off with fruit


Mom, all ready to eat

I think she likes it!

Digging in

I couldn't resist another picture, it was too good

Finishing with coffee on a nice and full stomach

Happy...

Very happy :)
Love you mom!!!


Note: For the cream filling, I have no idea of how much of anything we threw together. I know there was mascarpone cheese, plain yogurt and powdered sugar, probably a pinch of salt and some vanilla. It really doesn't matter as long as it tastes good. Cream cheese would be just as good for the filling, I just got lucky and there was some mascarpone in the fridge, a very uncommon phenomenon. We just put the filling between two slices of the toast, I wanted to cut slits in the bread and fill it that way but it didn't work with this bread, but no worries, that didn't negatively affect the taste in any way.

French Toast
from The Complete America's Test Kitchen TV Show Cookbook
Note: For best results, choose a good challah or a firm sandwich bread. To prevent the butter from clumping during mixing, warm the milk in a microwave or small saucepan until warm to the touch (about 80 degrees). The French toast can be cooked all at once on an electric griddle, but may take an extra 2 to 3 minutes per side. Set the griddle temperature to 350 degrees and use the entire amount of butter for cooking. Serve with warm maple syrup.

Ingredients
  • 8 large slices high quality white sandwich bread or challah 
  • 1 1/2 c whole milk, warmed 
  • 3 large egg yolks 
  • 3 Tbs light brown sugar 
  • 1/2 tsp ground cinnamon 
  • 2 Tbs butter, melted, plus 2 Tbs for cooking 
  • 1/4 tsp table salt 
  • 1 Tbs vanilla extract 
Directions
Adjust an oven rack to the middle position and heat the oven to 300 degrees. Place the bread on a wire rack set over a rimmed baking sheet. Bake the bread until almost dry throughout (the center should remain slightly moist), about 16 minutes, flipping the slices halfway through cooking. Remove the bread from the rack and let cool 5 minutes. Return the baking sheet with the wire rack to the oven and reduce the temperature to 200 degrees.

Whisk the milk, egg yolks, sugar, cinnamon, 2 tablespoons melted butter, salt and vanilla in a large bowl until well blended. Transfer the mixture to a 13 by 9-inch baking pan.

Soak the bread in the milk mixture until saturated but not falling apart, 20 seconds per side. Using a firm slotted spatula, pick up a bread slice and allow the excess milk mixture to drip off; repeat with remaining slices. Place the soaked bread on another baking sheet or platter.

Heat 1/2 tablespoon butter in a 12-inch skillet over medium-low heat. When the foaming subsides, use a slotted spatula to transfer 2 slices of the soaked bread to the skillet and cook until golden brown, 3 to 4 minutes. Flip and continue to cook until the second side is golden brown, 3 to 4 minutes longer. (If the toast is cooking too quickly, reduce the temperature slightly.) Transfer to the baking sheet in the oven. Wipe out the skillet with paper towels. Repeat cooking with remaining bread, 2 pieces at a time, adding 1/2 tablespoon of butter for each batch. Serve warm.  

Mint Juleps for the Kentucky Derby

I love horses, always have, always will. So for me, the first Saturday in May is always exciting. I've been watching the Kentucky Derby every year for almost as long as I can remember and amazingly I can't remember ever missing one, at least not recently. I was even able to visit Churchill Downs when I was in middle school, it was great, even my dad liked it and he doesn't care about horses at all. I'm holding out hope for a Triple Crown winner someday, hopefully sooner rather than later.

Usually it's just Lara and I in front of the TV for a few hours to watch the 2 minute race, but this year I was feeling a little more festive. I decided that I needed to try making mint juleps, the drink of the Kentucky Derby. Since I know nothing about bourbon other than I don't like it, I invited my grandparents over for pizza and derby watching, and also asked if they'd bring the bourbon since they have a little more knowledge of the stuff. It turned out to be a very fun afternoon, a nice way to relax after spreading wood chips all morning. My grandma even showed up with a festive hat, very in the spirit of things, I loved it!

To make the mint juleps, I went out and bought a spearmint plant and whipped up a batch of simple syrup. I took a few leaves of mint in each glass, crushed them a little with a spoon, and then covered them with a ton of crushed ice. I then poured one ounce of bourbon over the ice followed by one ounce of simple syrup. Stir it up a little and serve. I was surprised because I really enjoyed the drink. Pouring sugar water over whiskey makes it quite drinkable!

The key players; mint and bourbon
(my grandpa says this is good bourbon, I liked it, but what do I know)


My spearmint plant

Crushing the mint leaves

Ready to drink, traditionally this is served in a sterling silver cup, 
seeing as I'm a grad student, a glass will have to do

Enjoying our drinks, love the hat Grammy!

Note: I don't know how authentic this recipe is, but it's what I did. My inspiration was a segment I saw on the Today show. I liked it. 

Recipe
  • 1 c water
  • 1 c sugar
  • mint
  • bourbon
  • crushed ice (lots!)

To make simple syrup, put water and sugar in a small saucepan and heat, simmering until all the sugar dissolves (about 5 minutes). Cool the syrup in the fridge until cold. 

Place mint leaves in glass, crush a few times with a spoon. Cover the mint with lots of crushed ice. Add one ounce each of bourbon and simple syrup. Give it a stir. Garnish with a mint sprig. Drink and enjoy.

Lighter Chicken Parmesan

My mom would make her version of Chicken Parmesan occasionally when I was growing up. Although I've always liked the idea of this dish, I never cared for how she prepared it. My dad however loves it so it makes an appearance once in a while. I've always wanted to make a different version of the dish, and this recipe sounded promising, so I made it for my dad, Lara and myself last Sunday.

While this is not a traditional Chicken Parmesan, I thought it turned out quite tasty, and would definitely make it again. This recipe was not difficult to prepare, but it did take some time, which is fine with me. There are quite a few steps. I think it would be a good recipe to make for a larger group since it made quite a bit, and it would also be easy to double.

The breaded chicken alone turned out delicious, I plan on making it into baked chicken fingers soon. It was crunchy and flavorful, not soggy and bland like other baked chicken fingers recipes. A little ketchup on the side for dipping is all it would need.

A delicious, festive Italian dish; red white and green!

Full of crunch and topped with cheese

Don't worry, the recipe makes plenty more than this

Note: This is supposed to be a healthy recipe, and it is, but the three ounces of cheese called for in the recipe is just not enough in my opinion. I about doubled that amount, and more wouldn't be a bad thing. I would say, just eye ball the cheese, put on as much as you want. I also didn't have any fresh basil (very sad, I can't wait until summer, when my garden will be bursting with basil!) so I used Italian parsley instead, just as pretty but not quite as tasty. So if you don't have the basil, don't sweat it.

Lighter Chicken Parmesan
from The Complete America's Test Kitchen TV Show Cookbook
**If you are tight on time, you can substitute 2 cups of your favorite plain tomato sauce for the Simple Tomato Sauce. To make slicing the chicken easier, freeze it for 15 minutes.
Ingredients

  • 1 1/2 c panko (Japanese-style bread crumbs) 
  • 1 Tbs olive oil 
  • 1 oz Parmesan cheese, grated (about 1/2 a cup), plus extra for serving 
  • 1/2 c flour 
  • 1 1/2 tsp garlic powder 
  • Table salt 
  • Ground black pepper 
  • 3 egg whites 
  • 1 Tbs water 
  • 3 (7 to 8 oz) boneless, skinless chicken breasts 
  • 1 recipe simple tomato sauce (recipe follows) 
  • 3 oz mozzarella cheese, shredded 
  • 1 Tbs minced fresh basil leaves 

Directions
Adjust an oven rack to the middle position and heat the oven to 475 degrees. Combine the bread crumbs and oil in a 12-inch skillet and toast over medium heat, stirring often, until golden, about 10 minutes. Spread the bread crumbs in a shallow dish and cool slightly; when cool, stir in the Parmesan.

In a second shallow dish, combine the flour, garlic powder, 1 tablespoon salt, and 1/2 teaspoon pepper together. In a third shallow dish, whisk the egg whites and water together.

Line a rimmed baking sheet with foil, place a wire rack on top, and spray the rack with vegetable oil spray. Pat the chicken dry with paper towels, then season with salt and pepper. Lightly dredge the cutlets in the flour, shaking off the excess, then dip into the egg whites, and finally coat with the bread crumbs, Press on the bread crumbs to make sure they adhere. Lay the chicken on the wire rack.

Spray the tops of the chicken with vegetable oil spray. Bake until the meat is no longer pink in the center and feels firm when pressed with a finger, about 15 minutes.

Remove the chicken from the oven. Spoon 2 tablespoons of the sauce onto the center of each cutlet and top the sauce with 2 tablespoons of the mozzarella. Return the chicken to the oven and continue to bake until the cheese has melted, about 5 minutes. Sprinkle with the basil and serve, passing the remaining sauce and Parmesan separately.

Simple Tomato Sauce
from The Complete America's Test Kitchen TV Show Cookbook
Ingredients

  • 1 (28 oz) can diced tomatoes 
  • 4 medium garlic cloves, minced or pressed through a garlic press (about 4 tsp) 
  • 1 Tbs tomato paste 
  • 1 tsp olive oil 
  • 1/8 tsp red pepper flakes 
  • 1 Tbs minced fresh basil leaves 
  • Table salt 
  • Ground black pepper 

Directions
Pulse the tomatoes in a food processor until mostly smooth, about ten 1-second pulses; set aside. Cook the garlic, tomato paste, oil, and pepper flakes in a medium saucepan over medium heat until the tomato paste begins to brown, about 2 minutes. Stir in the pureed tomatoes and cook until the sauce is thickened and measures 2 cups, about 20 minutes. Off the heat, stir in the basil and season with salt and pepper to taste. Cover and set aside until needed.

Chocolate Chip Scones

Breakfast is probably my favorite meal of the day. First of all because I am a morning person and like waking up to have a delicious breakfast. Secondly, because I love the fact that it's perfectly acceptable to eat dessert for breakfast. I'll admit that I do this more often than I probably should. Cinnamon Rolls, muffins, coffee cake, pancakes, waffles, you get the picture. There are days I eat a hearty, savory breakfast of eggs and toast or something similar, but given a choice, I'll pick the sweet every time.

Scones are one of these sweets that I absolutely love. They are quick and easy to make (no yeast here) and there are endless flavor possibilities. Of course, savory scones are possible, but I've never made these, mine always seem to come out filled with chocolate! I would someday like to try a cheese and onion scone, or one with bacon or sausage, but not today is not that day.

This scone recipe came from King Arthur Flour's website. It's just a basic scone recipe that you can customize how you see fit. They turned out perfectly with a good balance of slightly crispy crust and a chewy interior, while the chocolate chips added that kick of sweetness that I love. All you need to add is a glass of ice cold milk and you have a pretty perfect breakfast.

Golden deliciousness, studded with bittersweet chocolate


Throw all of the dry ingredients together, 
(make sure that butter's cold) 
Add the chocolate chips

Wet ingredients in a separate bowl

Combine

Mix into deliciousness

Shape into two cute rounds

Cut each round into six nice triangles

Bake!

Eat!!!

Note: I added a teaspoon or two of espresso powder, a delicious combination with the chocolate chips. It gives a slight mocha flavor to the scones, very tasty!


Chocolate Chip Scones
from King Arthur Flour
Ingredients

Dough
  • 2 3/4 cups All-Purpose Flour 
  • 1/3 cup sugar 
  • 3/4 teaspoon salt 
  • 1 tablespoon baking powder 
  • 1/2 cup cold butter 
  • 1 cup to 2 cups chopped dried fruit, chocolate or other flavored chips, nuts, or a combination, optional 
  • 2 large eggs 
  • 2 teaspoons vanilla extract or the flavoring of your choice 
  • 1/2 cup to 2/3 cup half and half or milk 
Topping
  • 2 teaspoons milk 
  • 2 tablespoons sparkling white sugar or cinnamon sugar, optional 
Directions
In a large mixing bowl, whisk together the flour, sugar, salt, and baking powder. Work in the butter just until the mixture is unevenly crumbly; it's OK for some larger chunks of butter to remain unincorporated. Stir in the fruit, chips and/or nuts, if you're using them.

In a separate mixing bowl, whisk together the eggs, vanilla or other flavor, and half and half or milk.

Add the liquid ingredients to the dry ingredients and stir until all is moistened and holds together.

Line a baking sheet with parchment; if you don't have parchment, just use it without greasing it. Sprinkle a bit of flour atop the parchment or pan.

Scrape the dough onto the floured parchment or pan, and divide it in half. Round each half into a 5" circle (if you haven't incorporated any add-ins); or a 6" circle (if you've added fruit, nuts, etc.). The circles should be about 3/4" thick.

Brush each circle with milk, and sprinkle with coarse white sparkling sugar or cinnamon sugar, if desired. Using a knife or bench knife that you've run under cold water, slice each circle into 6 wedges. Carefully pull the wedges away from the center to separate them just a bit; there should be about 1/2" space between them, at their outer edges.

For best texture and highest rise, place the pan of scones in the freezer for 30 minutes, uncovered. While the scones are chilling, preheat the oven to 425°F.

Bake the scones for 20 to 25 minutes, or until they're golden brown. When you pull one away from the others, it should look baked all the say through; the edge shouldn't look wet or unbaked.

Remove the scones from the oven, and cool briefly on the pan. Serve warm. When they're completely cool, wrap in plastic and store at room temperature for up to several days.
  

Lime Cornmeal Cookies

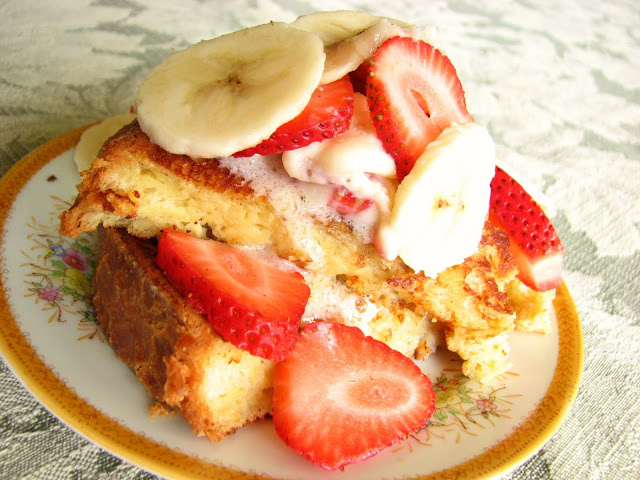
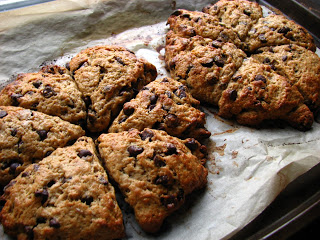
A few years ago I received the cookbook The Sweeter Side of Amy's Bread for my birthday. I had checked this cookbook out of the library and just fell in love with it. The pictures are beautiful, the descriptions of each recipe make my mouth water and the stories about the bakery, its customers, employees and food are so fun to read. This book makes me desperately want to go to New York City and visit Amy's Bread. Someday I will.

From the day I got this book, Lara has wanted to make these lime cornmeal cookies but we never got around to it. First we didn't have the course cornmeal needed for the recipe, then we never had limes. Even though these are not difficult ingredients to buy, we just never got around to it. However, this week Lara finally made them. She made sure to buy a couple limes when at the grocery store and then whipped up this recipe, and boy and I ever glad she did.

These cookies were delicious! They were quite different for a cookie, but so tasty. The course cornmeal absolutely made them, it added a delicious crunch to each bite that elevated these cookies to a whole new level. On their own, the cookies were not overly sweet, but they had a delightful punch of lime flavor, not overpowering but nice and tangy. With the lime juice glaze on the top to add a touch of sweetness, these cookies were the perfect combination of sour and sweet, tangy and sugary. These would be perfect in the summer after a southwester themed meal, nice and light and packed with flavor and crunch. I'll definitely be making these again!

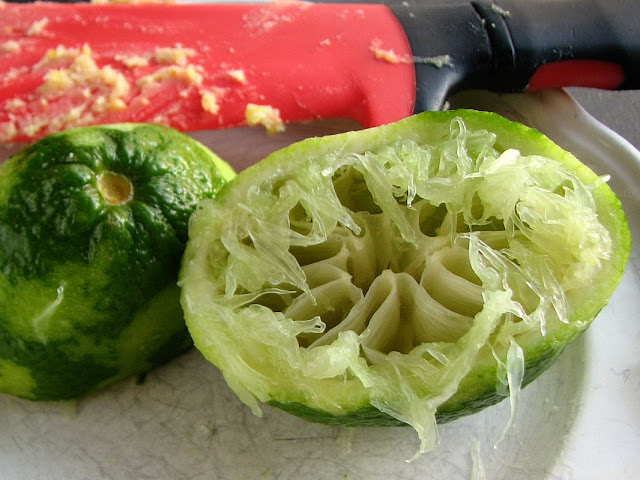
Read on to see what wonderful things this lime gave its life for

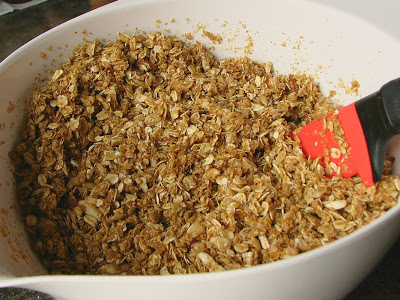
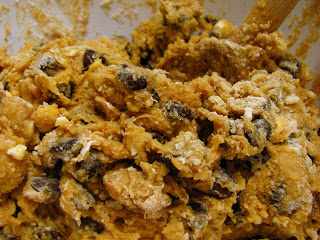
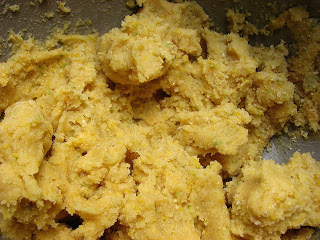
 The dough, if you look very closely
you can see specks of green lime zest, yummy!

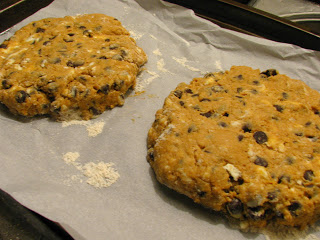
 Form dough into balls, it you're a perfectionist 
like me, use a scale

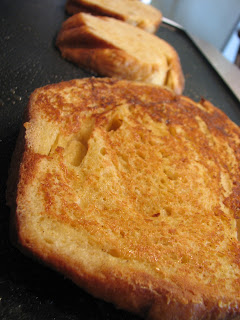
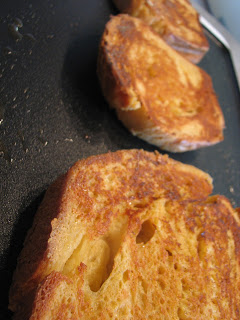
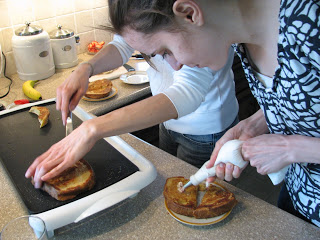
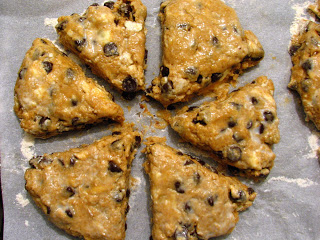
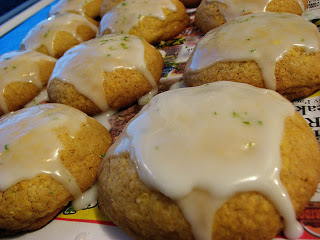
Bake, and frost with lime juice glaze, 
so simple and so delicious


Note: We made our cookies around 50 g, not the 90 g called for in the recipe, and they were plenty big. 90 g cookies would be delicious, but huge! We also added some lime zest to the glaze for a fun look.


Lime Cornmeal Cookies
from The Sweeter Side of Amy's Bread
Ingredients

  • 1 1/2 c All purpose flour
  • 1 c Coarse cornmeal
  • 7/8 c Bread flour
  • 1 3/4 tsp Kosher salt
  • 7/8 tsp Baking soda
  • 1 1/4 c Sugar
  • 1 c + 1 Tbs Butter, slightly softened
  • 1 1/2 tsp Lime zest, finely minced
  • 2 eggs
  • 2 egg yolks
  • 1 7/8 c Powdered sugar
  • 3 Tbs Lime juice, strained

Directions
Position one rack in the top third of the oven, one rack in the bottom third of the oven, and preheat the oven to 350 degrees. Line the cookie sheets with parchment paper.

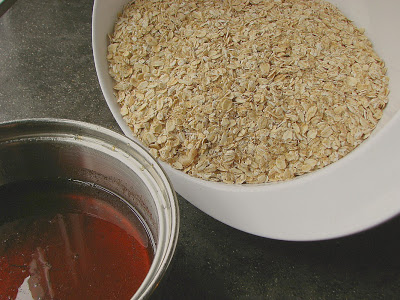
In a bowl, add the all-purpose flour, cornmeal, bread flour, salt and baking soda and whisk together.

In another bowl, using an electric mixer with a paddle attachment, cream the sugar, butter and lime zest together on medium speed for 2 minutes, or until light and fluffy, scraping the sides and bottom of the bowl frequently. Gradually add the eggs and egg yolks, mixing until every thing is well combined.

With the mixer on medium-low speed, add the dry ingredients in stages. Mix only until everything is well combined, scraping the sides and bottom of the bowl frequently. There should not be any pockets of dry flour left in the dough.

Using a large soup spoon, a metal ice cream scoop, or your clean hands moistened with water, scoop out big balls of dough, placing 6 balls on each cookie sheet. Each ball of dough should weight approximately 90g/3.2oz. If you don't have a scale use a scant 1/2 c to estimate the size. The dough balls should be about 2 1/4 inches in diameter. This dough will be soft, so don't flatten the dough balls at all before baking. Bake the cookies for about 18 minutes, rotating the cookies sheets halfway through the baking time. The cookies should be lightly browned on the edges and baked all the way into the center. They should be soft, but be careful not to underbake them or the centers will collapse and be doughy.

Cool the cookies on the sheets for 5 minutes, then move them to a rack and cool completely before glazing.

Whisk together the confectioner's sugar and the lime juice to make a loose glaze. Use a 2 inch pastry brush to frost the top of each cookie, leaving an unfrosted 1/4 inch border around the edge. Let the glaze dry completely before storing the cookies in an airtight container.