The Best Burger Buns and A Chicken Pesto Sandwich
I love hamburgers. In the summer I eat a lot of burgers, especially when tomatoes start ripening in the garden. A homemade hamburger with freshly ground beef, grilled to rare perfection and topped with a homegrown tomato is one of the best summer meals ever. What could possible make this delicious meal any better? Why, homemade hamburger buns of course!
Now I realize that it is not August, and tomatoes are not yet in season, however, that does not mean you can't make homemade buns and fill them with other delicious yummys (yummies?). So that's exactly what I did.
These buns were fabulous, and while I can't wait to sandwich a juicy, grilled hamburger between the two halves, they weren't too shabby surrounding marinated chicken breast with pesto and provolone. I may never go back to store bought buns again.


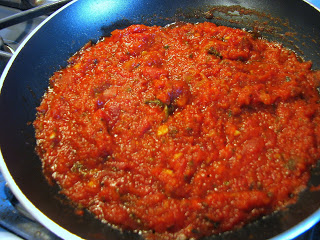
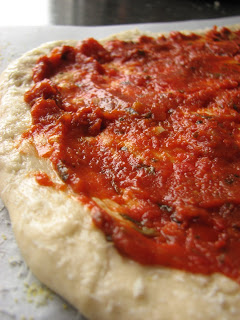
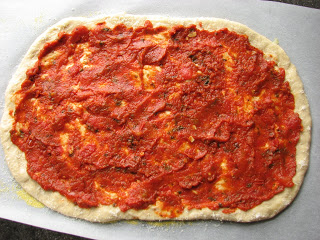
If you were wondering, I put mayo on the cut buns and grilled them, then I spread more mayo on the top of the bun, slathered pesto on top of the chicken, topped this with the provolone and placed all of the sandwiches in the oven for a few minutes to get nice and warm and let the cheese melt. When they came out, I put even a little more mayo (if you couldn't tell, I love mayo) on the top of the bun, topped the chicken with the tomato slices and sandwiched everything together.
I thought these sandwiches were delicious; the chicken was juicy and flavorful (it helps to use really thin pieces of chicken), the buns were fresh and all the ingredients worked well together. My dad had one comment, he thought they could use a little mustard, and he may have been right, or not. But that's what I love about sandwiches, they are so versatile, you can do whatever you want and it doesn't matter. If you don't like it this time, try something different the next time!
This was the whole meal we had when my parents came over a few Sundays ago, nothing gourmet, but absolutely fresh and delicious.

Beautiful Burger Buns
from King Arthur Flour
Ingredients
Cover the dough, and let it rise for 1 to 2 hours, or until it's nearly doubled in bulk.
Gently deflate the dough, and divide it into 8 pieces. Shape each piece into a round ball; flatten to about 3" across. Place the buns on a lightly greased or parchment-lined baking sheet, cover, and let rise for about an hour, until noticeably puffy.
Brush the buns with about half of the melted butter.
Bake the buns in a preheated 375°F oven for 15 to 18 minutes, until golden. Remove them from the oven, and brush with the remaining melted butter. This will give the buns a satiny, buttery crust.
Cool the buns on a rack.
Yield: 8 large buns.
Now I realize that it is not August, and tomatoes are not yet in season, however, that does not mean you can't make homemade buns and fill them with other delicious yummys (yummies?). So that's exactly what I did.
These buns were fabulous, and while I can't wait to sandwich a juicy, grilled hamburger between the two halves, they weren't too shabby surrounding marinated chicken breast with pesto and provolone. I may never go back to store bought buns again.
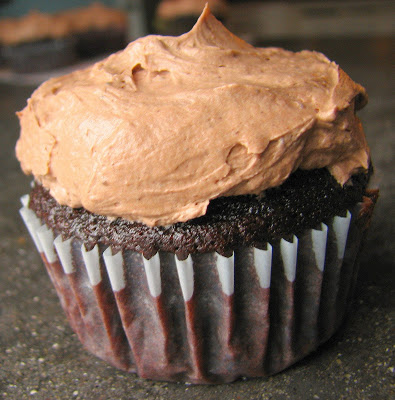
Golden and delicious, beautiful burger buns
A few steps in the process
Take a fresh bun...
add marinated, grilled chicken...
and a few tomato slices...
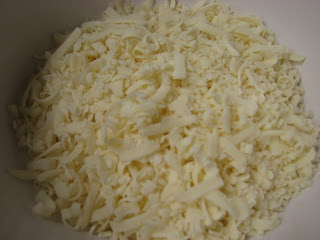
and some provolone (the cheese missed out on the photo op)
Put it all together and you have a delicious chicken pesto sandwich!
Not the greatest photo, but you get the idea, believe me, it was delicious
If you were wondering, I put mayo on the cut buns and grilled them, then I spread more mayo on the top of the bun, slathered pesto on top of the chicken, topped this with the provolone and placed all of the sandwiches in the oven for a few minutes to get nice and warm and let the cheese melt. When they came out, I put even a little more mayo (if you couldn't tell, I love mayo) on the top of the bun, topped the chicken with the tomato slices and sandwiched everything together.
I thought these sandwiches were delicious; the chicken was juicy and flavorful (it helps to use really thin pieces of chicken), the buns were fresh and all the ingredients worked well together. My dad had one comment, he thought they could use a little mustard, and he may have been right, or not. But that's what I love about sandwiches, they are so versatile, you can do whatever you want and it doesn't matter. If you don't like it this time, try something different the next time!
This was the whole meal we had when my parents came over a few Sundays ago, nothing gourmet, but absolutely fresh and delicious.
The Whole Meal
Beautiful Burger Buns
from King Arthur Flour
Ingredients
- 3/4 to 1 cup lukewarm water
- 2 tablespoons butter
- 1 large egg
- 3 1/2 cups All-Purpose Flour
- 1/4 cup sugar
- 1 1/4 teaspoons salt
- 1 tablespoon instant yeast
- 3 tablespoons melted butter
Cover the dough, and let it rise for 1 to 2 hours, or until it's nearly doubled in bulk.
Gently deflate the dough, and divide it into 8 pieces. Shape each piece into a round ball; flatten to about 3" across. Place the buns on a lightly greased or parchment-lined baking sheet, cover, and let rise for about an hour, until noticeably puffy.
Brush the buns with about half of the melted butter.
Bake the buns in a preheated 375°F oven for 15 to 18 minutes, until golden. Remove them from the oven, and brush with the remaining melted butter. This will give the buns a satiny, buttery crust.
Cool the buns on a rack.
Yield: 8 large buns.