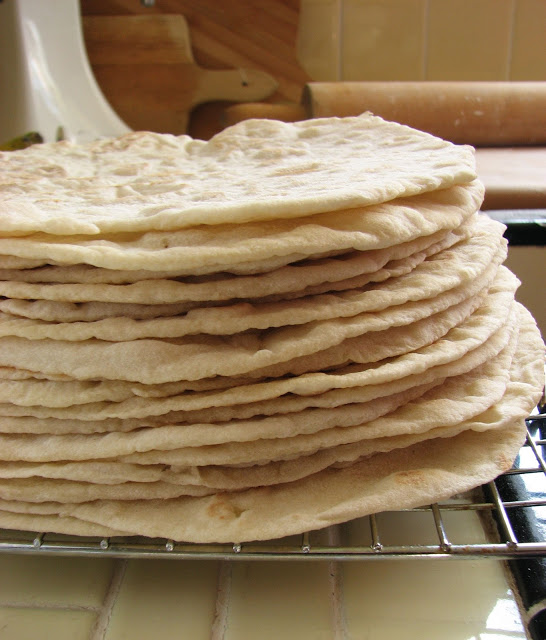
Soft Flour Tortillas

I have now past the point of no return. I have finally found the perfect homemade tortilla recipe, I will never buy tortillas from the grocery store again. For the past year or two I have been wanting to be able to find a good tortilla recipe. Have you ever looked at the ingredient list on a package of flour tortillas? If not, let me warn you now, it's not a pretty sight. Knowing that fantastically fresh and delicious tortillas can be made with just 5 ingredients (one of which is water), it disturbs me when I see the list of 20+ ingredients on the packages at the store, most of which I can hardly pronounce. This recipe makes it possible to never again pick up one of those packages of chemicals again. 

Ever since I found this recipe a few months ago, I've probably made it at least once, if not twice a week, ever since. It is just so good and easy. There are so many things you can fill tortillas will; some of my favorite ideas are eggs and cheese, sweet potato black bean, hummus and veggies, not to mention the basic seasoned ground beef with cheese, sour cream and salsa. I really think you can put anything at all in a tortilla, and it seems to always taste good! So grab your rolling pin and get to work, be creative, and have some fun! 

Soft Flour Tortilla

From 

King Arthur Flour

Ingredients

  • 2 1/2 cups All-Purpose Flour, plus additional as needed
  • 1 teaspoon baking powder
  • 1/2 teaspoon salt
  • 1/4 cup lard (traditional); or butter, shortening, or vegetable oil
  • 7/8 to 1 cup hot tap water (about 110°F to 120°F)

Directions

To make the dough: In a medium-sized bowl, whisk together the flour, baking powder, and salt. Add the lard (or butter, shortening or oil). Use your fingers or a pastry blender to work the fat into the flour until it disappears (I used vegetable oil which didn't completely disappear, but left small lumps of fat; this didn't seem to have any effect on the finished product so don't worry). Coating most of the flour with fat inhibits gluten formation, making the tortillas easier to roll out.

Pour in the lesser amount of hot water, and stir briskly with a fork or whisk to bring the dough together into a shaggy mass. Stir in additional water as needed to bring the dough together.

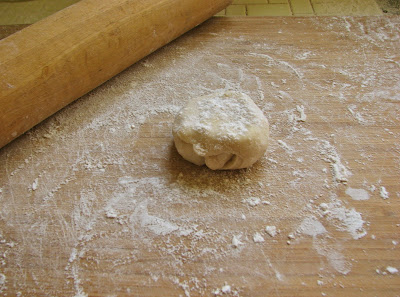
Turn the dough out onto a lightly floured counter and knead briefly, just until the dough forms a ball. If the dough is very sticky, gradually add a bit more flour.

Divide the dough into 8 pieces. Round the pieces into balls, flatten slightly, and allow them to rest, covered, for about 30 minutes. If you wish, coat each ball lightly in oil before covering; this ensures the dough doesn't dry out.

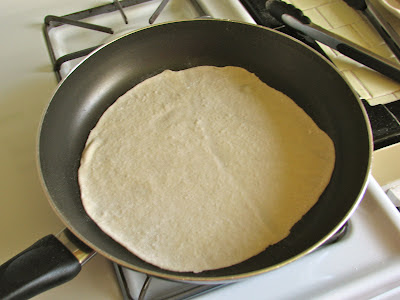
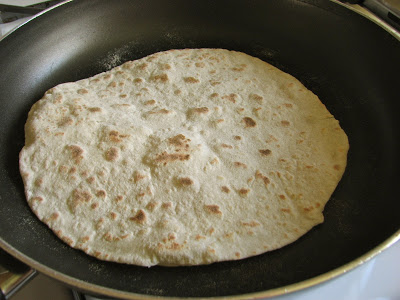
While the dough rests, preheat an ungreased cast iron griddle or skillet over medium high heat, about 400°F.

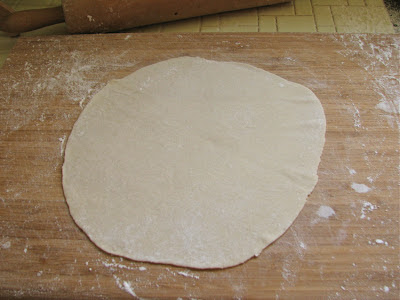
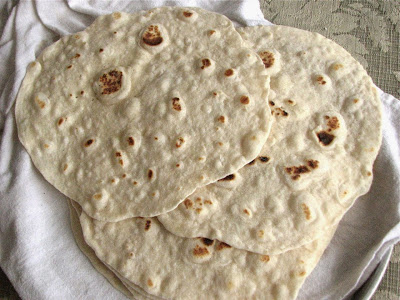
Working with one piece of dough at a time, roll into a round about 8" in diameter. Keep the remaining dough covered while you work. Fry the tortilla in the ungreased pan for about 30 seconds on each side. Wrap the tortilla in a clean cloth when it comes off the griddle, to keep it pliable. Repeat with the remaining dough balls.

Soft Wrap Bread

Sandwiches are near the top of my list of favorite things to eat. I could eat one at every meal and never get tired of them because the possibilities are endless. There are so many different kinds of breads, meats, cheeses, spreads, toppings etc., you never have to eat the same sandwich twice! I love a sandwich built with some freshly baked bread as the base, but sometimes all I want is a thin, soft sheet of flatbread to roll up my sandwich within, that is where this wrap bread comes in.

Over the years I've used a lot of flour tortillas to make wraps for lunch, and although they are okay, they have never been exactly what I wanted. They are usually kind of dry and stale and just don't have that much flavor. I tried making my own once, but the recipe I used just didn't impress me. When I found this recipe though, I was hopeful that it was what I was looking for. Boy was it ever. These wrap breads are the most delicious thing since, well, sliced bread! They are soft, tender and absolutely delicious. I have yet to be disappointed when these wonderful wraps are the base for my sandwich.

The recipe for this soft wrap bread is a little odd, it starts with pouring boiling water over top of flour and letting it sit for about 30 minutes. King Arthur Flour says that this process basically "cooks" the starch in the flour, making the flatbread easy to roll out, and removes any "starchy" taste in the finished bread. Whatever it is doing chemically, I like it. The bread is wonderful to roll out and the flavor in the finished product is super yummy.

After this initial starch cooking, the dough is put together like most breads I've made. However, the dough you are left with after the kneading is finished is very odd. The texture is very different from most doughs. It may not seem quite right, I was kind of doubtful the first time I made it, but have no fear, it will all work out in the end. After letting the dough sit for an hour (it didn't really rise much for me), all that is left is to cut it up, roll it out, and dry fry it in a skillet. The recipe tells you to roll out each piece of dough into a 7-8 inch circle, but I decided I wanted mine a little bigger and thinner (more like a tortilla) and didn't seem to have any problem with the finished product.

Frying up each piece of dough can take a little bit of time, but trust me, it is so worth it. This wrap bread is on its way to becoming a staple in my house. I don't think I'll ever buy a tortilla again!

 Shaped dough, read to fry

 Make sure you have lots of flour

 Start rolling

 Keep going!

 Perfect, ready to cook

 Into the fairly hot pan

 When it starts to brown, flip it over

 Stack them up as you go

(I made a double batch this time)

Fill them up and dinner is served!

Soft Wrap Bread
Adapted From King Arthur Flour
Ingredients

  • 3 1/4-3 1/2 cups unbleached all-purpose flour
  • 1 1/4 cups boiling water
  • 1 1/4 teaspoons salt
  • 2 tablespoons (7/8 ounce) vegetable oil
  • 1 teaspoon instant yeast*

*This recipe works best with instant yeast because it dissolves during the kneading process, so you don't have to knead liquid into the dough. If you really prefer to use active dry yeast, use only 1 cup boiling water for the initial dough, dissolve the yeast in 1/4 cup warm water, and add this mixture to the dough along with the remaining flour mixture. It'll be somewhat "slippery" at first, but will knead in and eventually become smooth.

Directions
Making the Dough: Place 2 cups of the flour into a bowl or the bucket of a bread machine. Pour the boiling water over the flour, and stir till smooth. Cover the bowl or bucket and set the mixture aside for 30 minutes.

In a separate bowl, whisk together the remaining flour with the salt, oil and yeast. Add this to the cooled flour/water mixture, stir, then knead for several minutes (by hand, mixer or bread machine) to form a soft dough. The dough should form a ball, but will remain somewhat sticky. Add additional flour only if necessary; if kneading by hand, keep your hands and work surface lightly oiled. Let the dough rise, covered, for 1 hour.

Shaping: Divide the dough into 8 or 10 pieces, cover, and let rest for 15 to 30 minutes. Roll each piece into a 7- to 8-inch circle, and dry-fry them (fry without oil) over medium heat for about 1 minute per side, until they're puffed and flecked with brown spots. Adjust the heat if they seem to be cooking either too quickly, or too slowly; cooking too quickly means they may be raw in the center, while too slowly will dry them out. Transfer the cooked breads to a wire rack, stacking them to keep them soft. Serve immediately, or cool slightly before storing in a plastic bag. Yield: 8 breads.