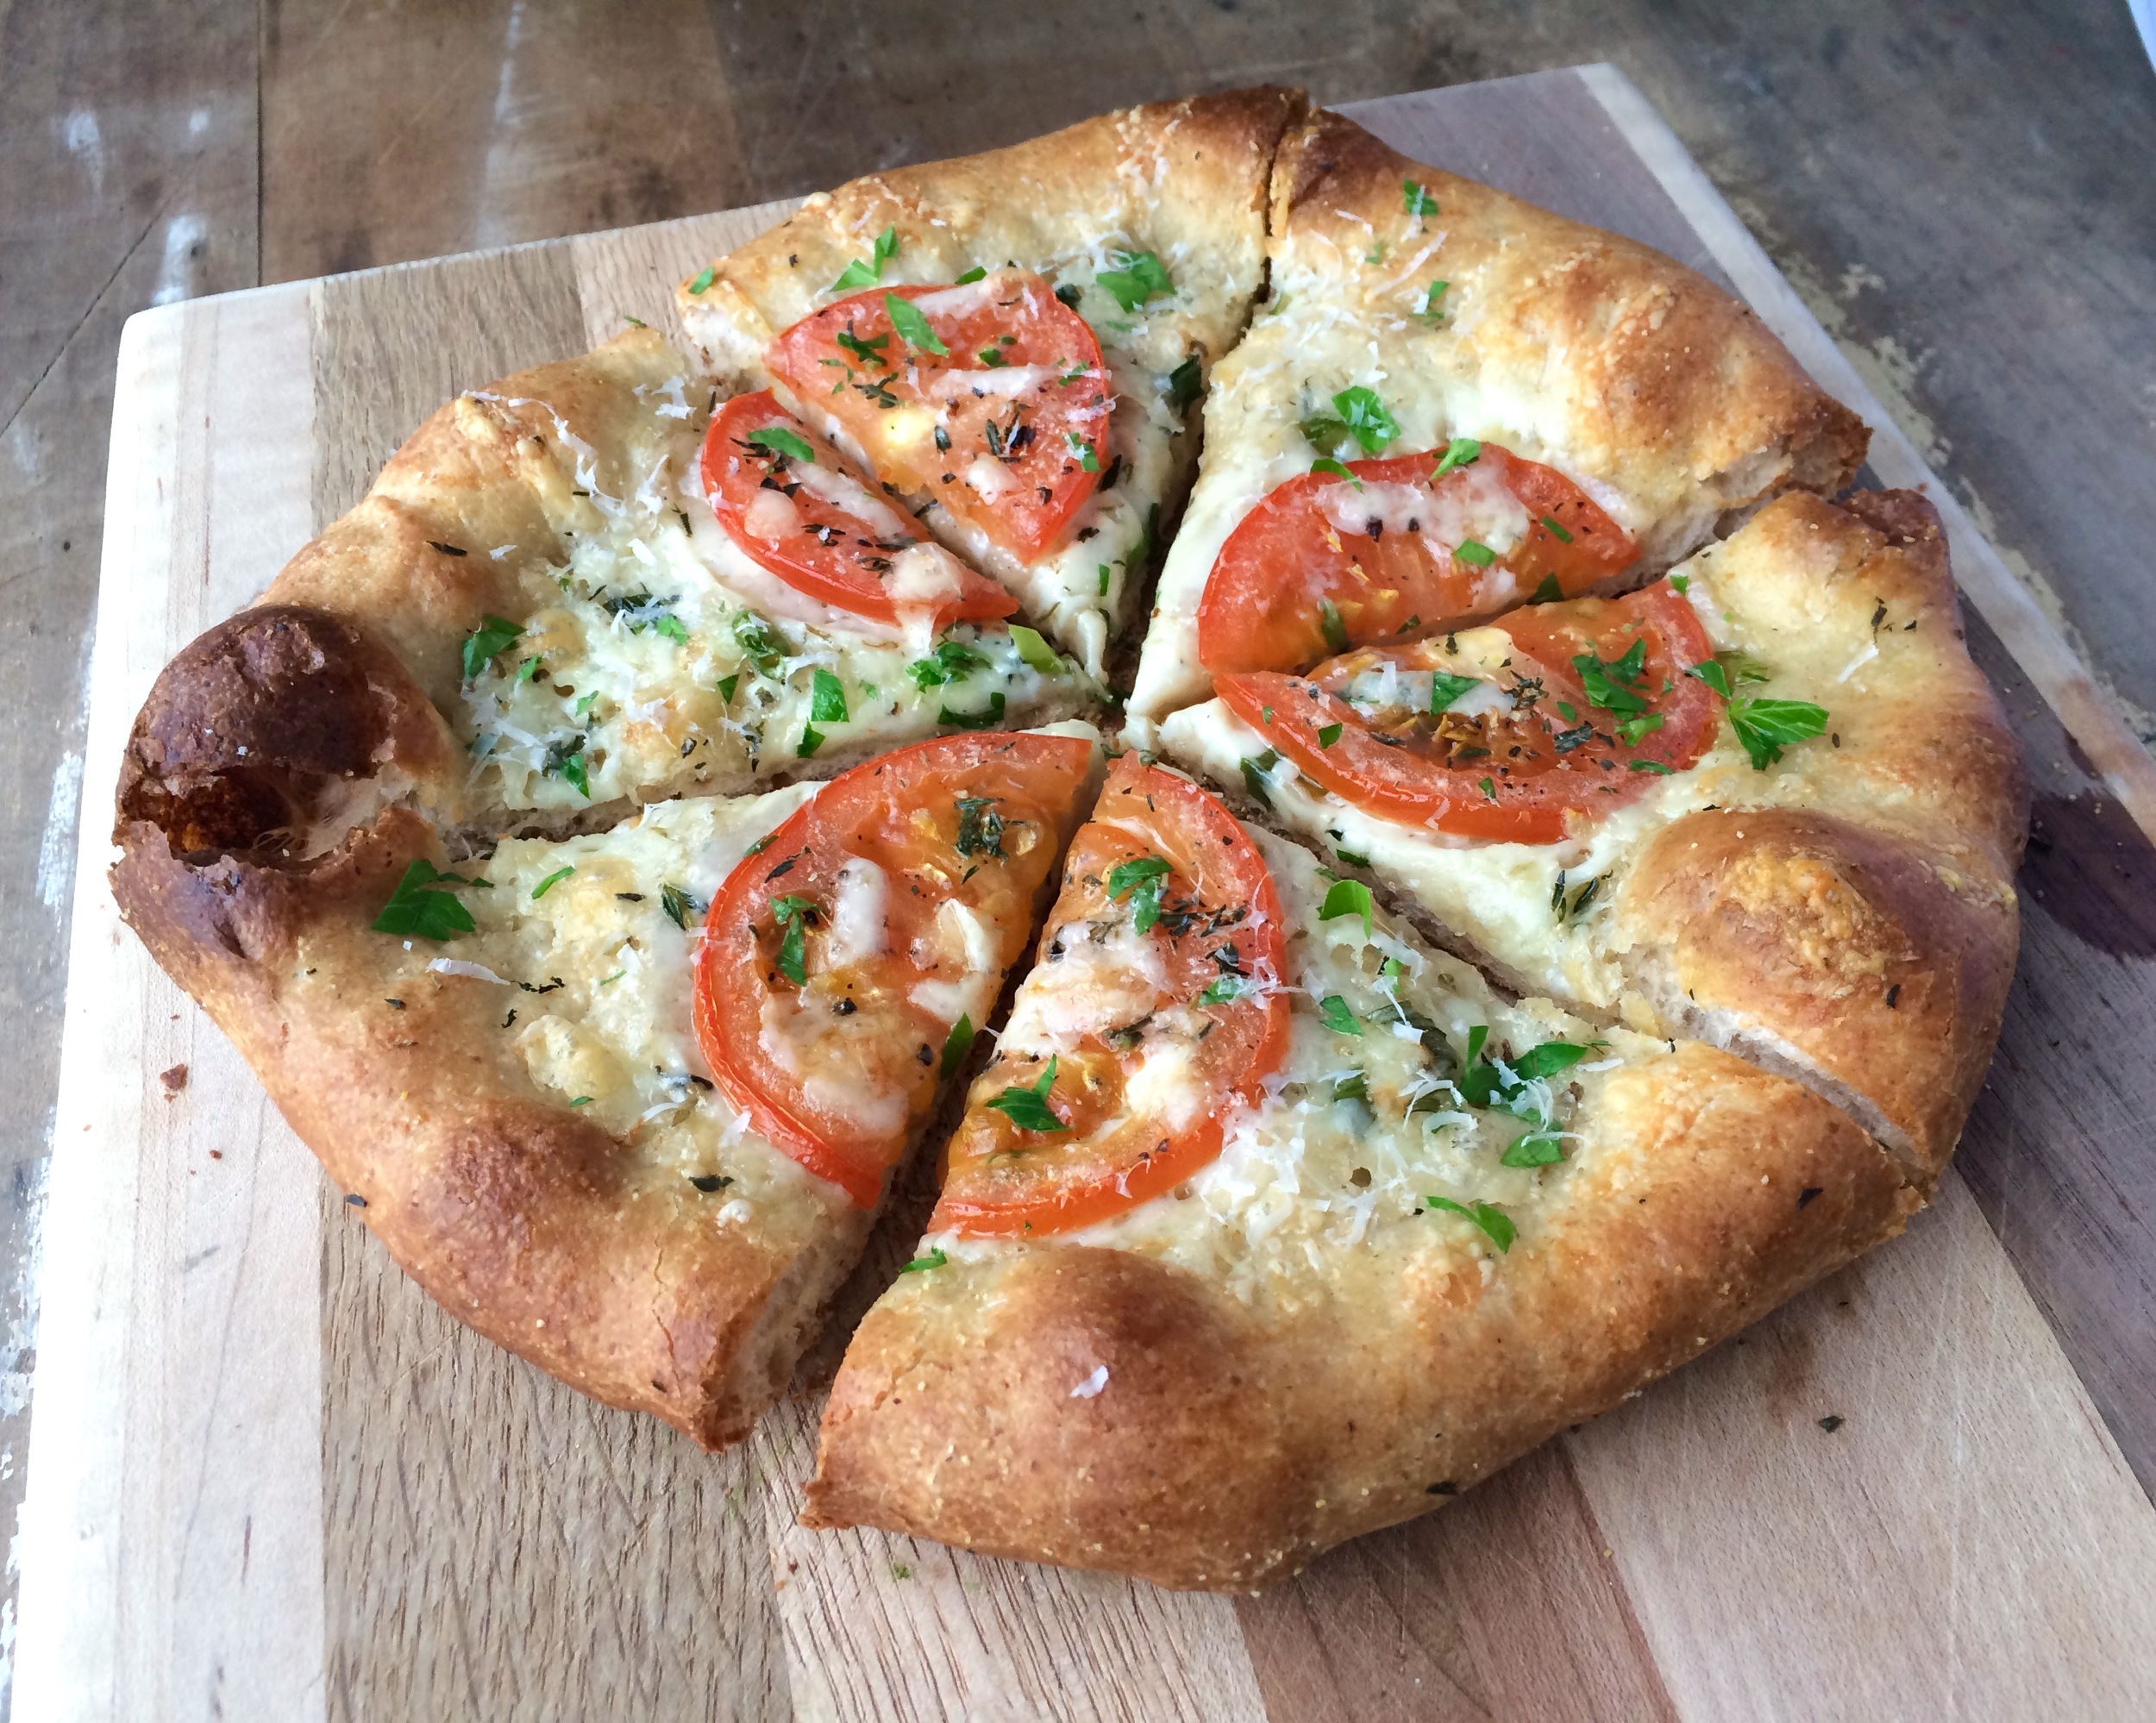
Tomato and Asiago Pizza
August is almost gone, can you believe it? I sure can't. This summer just FLEW by! One of my favorite parts about August is how amazing the farmers market is this time of year. Tomatoes, peaches, melon, corn, squash, peppers and the first of the apples, wow is it glorious. I have been eating good!
There's almost nothing better than a simple, homemade pizza to showcase some of that summer bounty. This pizza only needed a couple ingredients to help it shine. Start with a good crust, add some garlicky oil, top with a couple handfuls of whole milk mozzarella mixed with a bit of asiago, top with a couple slices of one of those juicy, sweet and tender August tomatoes and sprinkled with thyme. A quick trip to the oven and you're ready to go. Serve with a bit of fresh parley and Parmesan cheese and you are set for dinner.
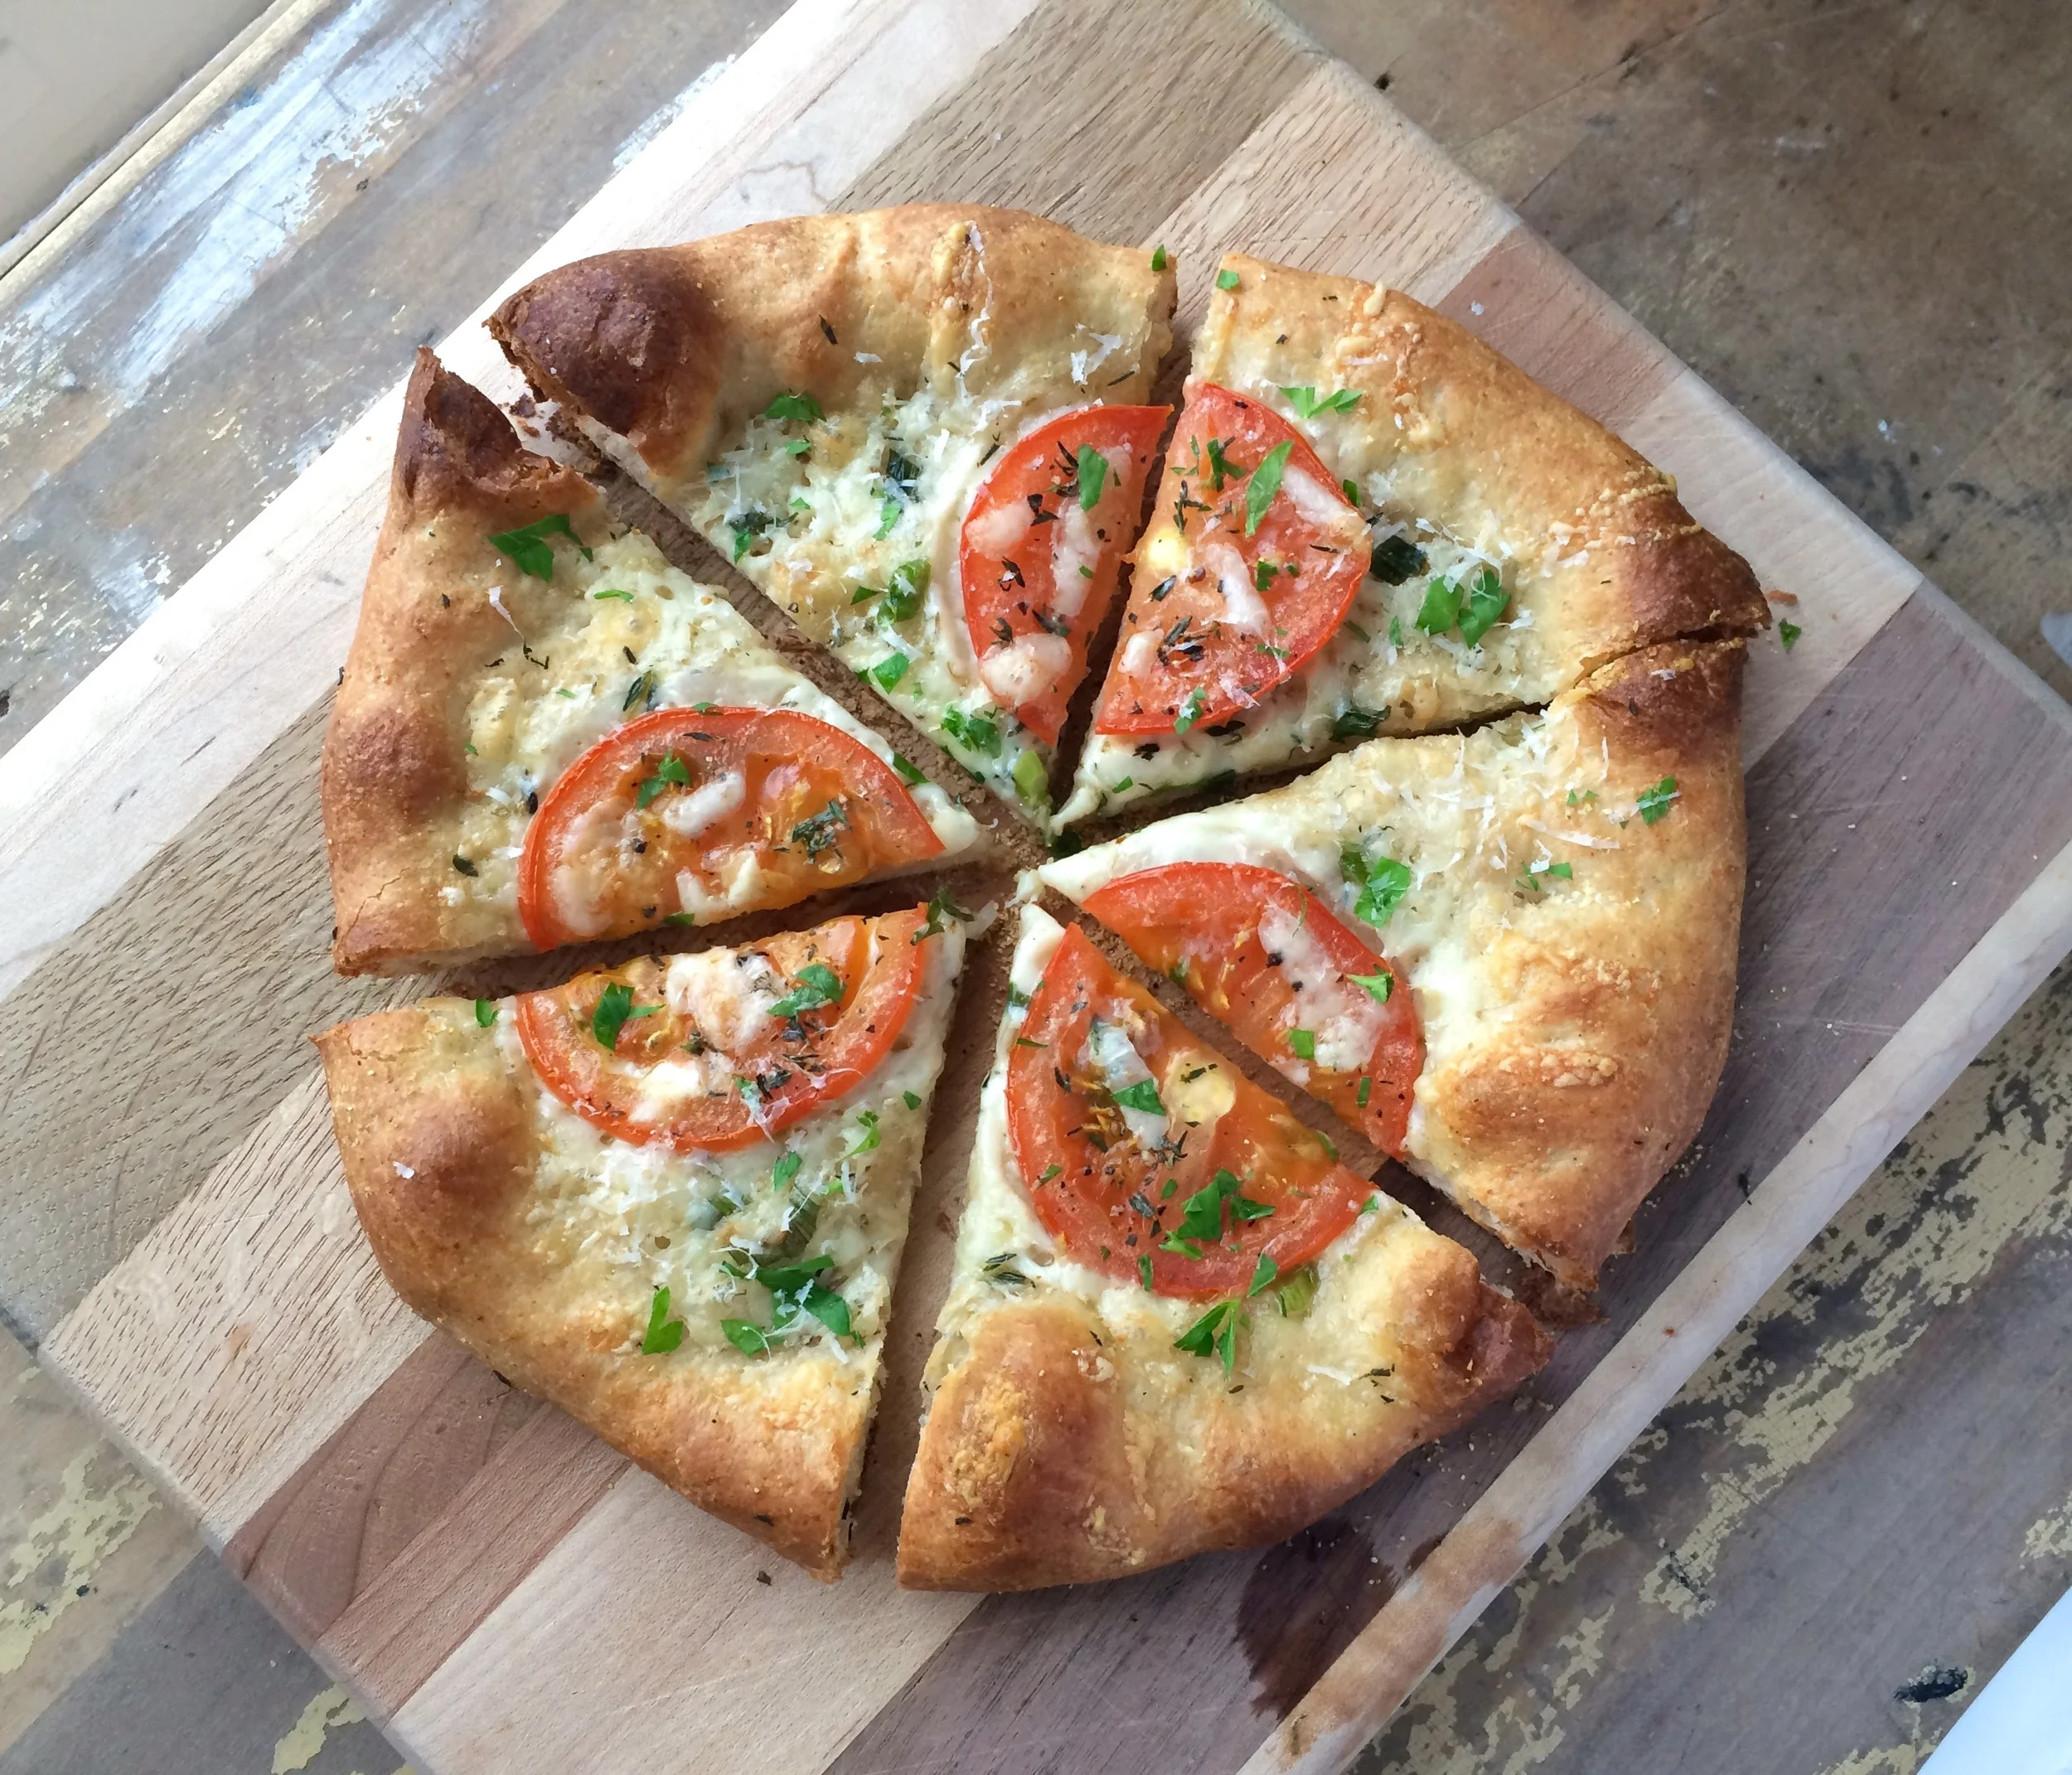
You could kind of consider this a spin on the traditional Margarita pizza, just switching up the cheese a bit and using a different herb, so not really a Margarita pizza at all! But in the same spirit in my opinion! Whatever you all it, it's delicious!


Tomato and Asiago Pizza
- 1/4 of the perfect pizza dough recipe
- 1/4 cup olive oil
- 2 garlic cloves, thinly sliced
- 1/2 tomato, sliced thin
- Asiago cheese, shredded
- Parmesan cheese, grated
- Fresh Thyme
- Fresh parsley, for garnish
Directions
Heat a small frying pan over medium to low heat. Add the oil and allow it to heat up for 30 seconds, then add the sliced garlic. Fry the garlic in the oil until it is just starting to turn golden, watching it closely to ensure that it does not burn. Remove pan from heat and set aside to cool.
Prepare pizza dough. Brush shaped dough liberally with the garlic oil, you may not need it all, save the leftover oil to use later on. Sprinkle the oiled dough with a few tablespoons of parmesan cheese. Then top with asiago cheese, spreading almost to the very edge. Lay tomato slices on top of the cheeses. Sprinkle the whole thing with minced fresh thyme and some salt and pepper. Slide pizza off peel and onto your heated stone or baking sheet. Bake until the crust is golden and and cheese is bubbling and just beginning to brown, 6-10 minutes depending on your oven.