Almond Bear Claws

Starting a couple of years ago, my mom, my sister and I began a wonderful weekend tradition. Almost every Saturday morning without fail, we have been leaving our house bright and early and driving into Grand Rapids to eat pastries and drink hot coffee at our favorite bakery. It is the highlight of my week, giving me something to look forward to at the end of some long, tiring weeks. This is our time to chat, talk about our week, what's been going on, and to just unwind and enjoy some of my favorite things. 

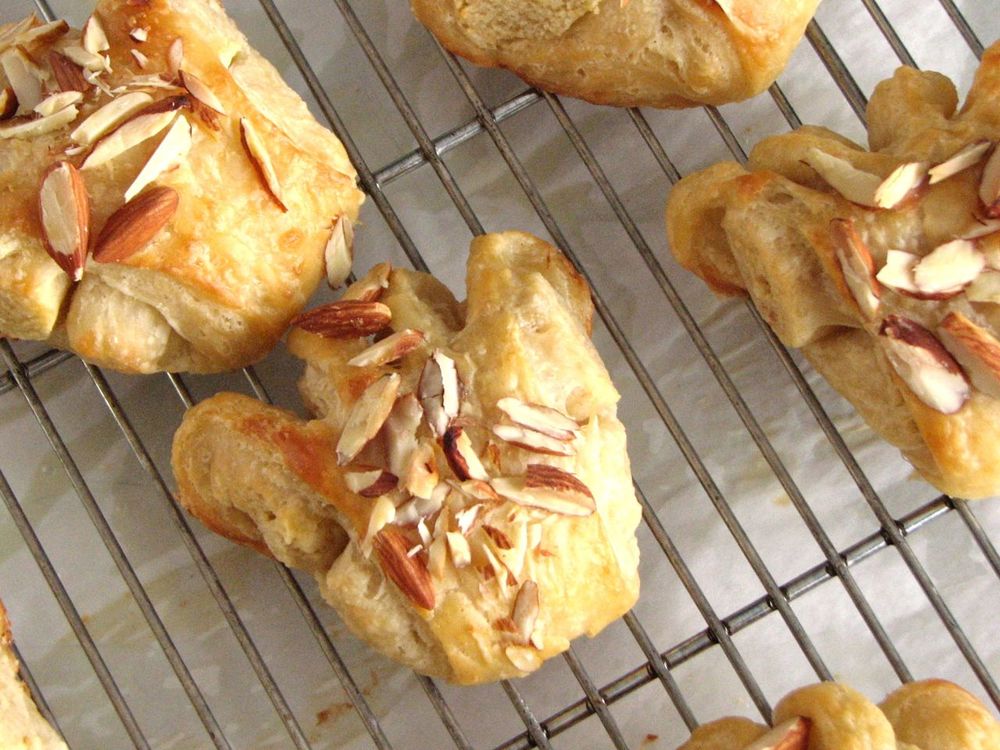
While I love all pastries and other baked goods, and could order anything at the bakery and be happy with my choice, I have gotten stuck ordering the same thing week after week because it is just so good. Almost every single Saturday I order myself a nice big vanilla almond bear claw. I've had bear claws at other bakeries, but these are the absolute best I've ever had. They are big, buttery and generously packed full of a wonderful almond filling. Over the past year, I've been trying to figure out just what exactly this filling is made of. I even contacted someone at the bakery to see if they could help me at all, and while they of course wouldn't tell me what the filling is made of, they gave me a few hints that helped guide me in my search. 

Then just a few weeks ago I found it. A recipe popped up online that sounded like what I was looking for so I dove in and gave it a shot. The verdict? It was exactly what I was hoping for. To me it tastes almost exactly like the filling from the bakery. My bear claws turned out beautifully and absolutely delicious. It is so satisfying to have solved the puzzle. Even if the recipe is not exactly the same as the bakery's, it tastes right to me and that's all that matters. 

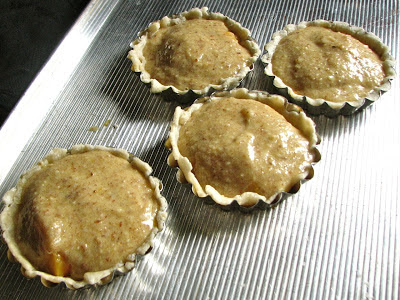
This is definitely not a quick recipe, and I won't be making these bear claws every week, but it is always nice to know that I can if I want to. You need to make a laminated dough to start, the recipe I was using called for danish dough, but I had some croissant dough in the freezer that I used instead and it worked out just fine. Then there is the filling which mainly involves a lot of cake scraps. Since I don't make cakes constantly and have cake scraps just lying around, this meant I just baked up a plain butter cake and then crumbled it up to use in the filling. It worked out great, but does involve another step. 

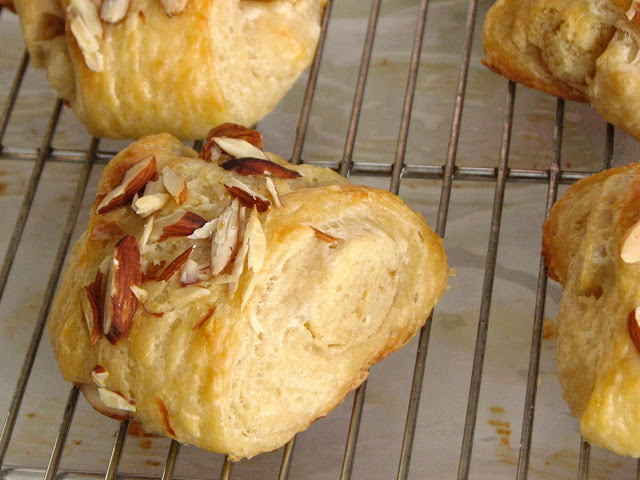
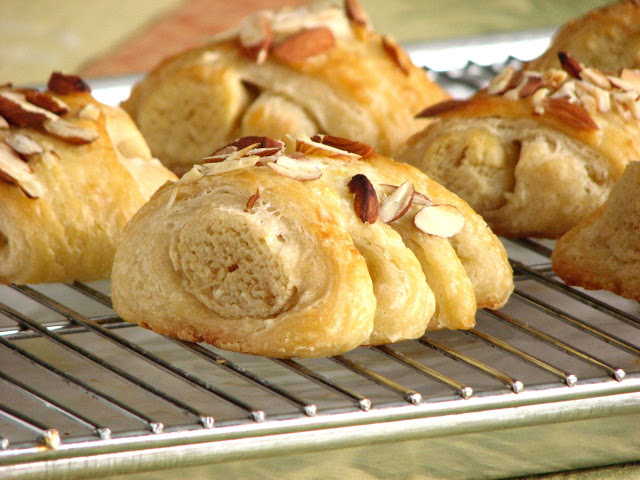
Once you have all of this set it is really not too difficult to assemble. Roll your dough out, fill it, and cut it how you would like. I ended up making smaller bear claws (cub claws I guess we could say) because I don't need a ginormous pastry every morning, but you can really do whatever you want. However you go about doing it I can guarantee it will be delicious! 

Almond Bear Claws
Adapted from The Village Baker's Wife by Gayle C. Ortiz, Joe Ortiz, and Louisa Beers
Ingredients

  • 1/2 recipe Danish dough (or croissant dough, that's what I had, so that's what I used!)
  • Bear claw filling, at room temperature
  • 1 large egg
  • 2 tablespoons milk
  • 1 1/2 cups sliced almonds
  • Powdered sugar or simple glaze for drizzling, if desired

Directions
Lightly flour your work surface. Roll your dough into a long rectangle that is 5 1/2 -6 inches wide and however long it needs to be so that the dough is about 1/4 inch thick. Form the filling into a long log about 1 inch in diameter and place it along the top third of the rectangle of dough making a continuous strip of filling that runs the length of the dough. 

Fold the top third of the dough over the filling, then fold the filled section over the last third so that the seam is in the center underneath the folded dough. 

With the heal of your hand, flatten one long side of the folded up piece of dough. Cut each log into pieces, mine were each about 2 1/2 inches long, the original recipe suggested 5 1/4 inch pieces, so really however big you want them to be. 

Make cuts along each flattened side of dough about 3/4 inch into the dough and about 1/2 inch apart. 

In a small bowl, whisk together the egg and milk to make an egg glaze. With a pastry brush, coat each pastry with the egg glaze and sprinkle with the almonds, pressing down slightly to make them stick. Transfer the pastries to a parchment lined baking sheet, leaving enough room between them so that they can rise. Taking each end of the pastry in your hands, bend into a horseshoe shape by bringing the ends toward one other. 

Let the pastries rest at room temperature for about 1 1/2 hours until double in size and feel like a marshmallow when pressed gently with a finger. Preheat the oven to 350 degrees about 30 minutes prior to baking. 

Bake the pasties for about 20 minutes, or until golden brown on the top and the bottom. When pastries are completely cool drizzle with a simple powdered sugar and water glaze if desired, or dust generously with powdered sugar.

Bear Claw Filling
From The Village Baker's Wife by Gayle C. Ortiz, Joe Ortiz, and Louisa Beers
Ingredients

  • 8 cups (1 1/2 pounds) lightly packed cake scraps (see note)
  • 1 1/2 teaspoons almond extract
  • 1/4 - 3/4 cup water
  • 1/2 egg, lightly beaten
  • 2 tablespoons (1 oz) butter, melted and cooled

Directions
Combine all of the ingredients in the bowl of a stand mixer fitted with the paddle attachment. Mix on low until smooth and combined. The filling should be soft, but firm enough to hold its shape. 

Note: If you, like me, don't have 8 cups of cake scraps lying around, a quick yellow cake is easy enough to whip together. I made this Plain and Simple Golden Cake from King Arthur Flour and it gave me almost the 1 1/2 pounds of cake crumbs needed. I supplemented the rest with a few leftover sugar cookies and mini cupcakes from Christmas that were in my freezer, but you could probably get by with just using this cake. 

Rhubarb Almond Crumb Cake

I have a weakness for anything cake. Cake is one of my absolute favorite things. All flavors, all occasions, breakfast, lunch, or dinner. It amazes me how many people tell me they don't like cake (traditional frosted birthday/wedding cake that is.) When people tell me this, I just assume they never have had good cake. It's true, a bad cake is just bad. Unfortunately, the majority of the cake most people eat is just plain, bad cake. But moving on, I am in the other camp on cake. I love it. I am especially a sucker for a good breakfast cake. They are so simple, easy and delicious.

In my opinion, breakfast cake is the perfect way to start a day. I found this rhubarb almond cake online a few months ago and have been wanting to make it ever since. It was the picture that got me, a tall, golden cake with a crunchy, crumbly topping. I love anything with streusel. Sometimes it can be dangerous to fall in love with a picture of a recipe, when your doesn't quite live up to the expectations you had visually. That's what happened with this cake. It didn't come out as tall as I was hoping, and the streusel topping kind of sunk, and melted into the cake. I usually like it better when streusel is almost a separate layer, all alone of top.

So I was unhappy with the look of this cake when I took it out of the oven. But have no fear, all of that changed when I finally dug in. This cake was light, yet substantial, with a wonderful tartness from the rhubarb. I cut up my rhubarb pretty small because I don't like chunks, and it kind of disappeared into the cake leaving behind the perfect amount of sourness to blend with the sweetness of the cake. And the disappointing streusel actually turned into a crunchy and sweet topping that was a perfect complement to the soft cake beneath it. This recipe taught me to not judge a cake by its cover. A plain looking cake can mask an absolutely delicious treat. The more I ate this cake the more I fell in love with it. Good thing there is plenty of rhubarb in the freezer...

Rhubarb Almond Crumb Cake
Slightly adapted from Food 52
Ingredients 
THE CRUMB

  • 2 tablespoons flour

  • 2 tablespoons slivered almonds

  • 2 tablespoons rolled oats

  • 1/4 cup brown sugar

  • 1/4 teaspoon salt

  • 2 tablespoons unsalted butter

THE CAKE

  • Butter for greasing the pan

  • 2 large eggs

  • 1 1/4 cup granulated sugar

  • 1/2 teaspoon salt

  • 1 teaspoon almond extract

  • 6 tablespoons unsalted butter, melted

  • 1 1/4 cup white whole wheat flour (or all-purpose)

  • 1 1/2 cup rhubarb, cut into 1/2-inch pieces

Directions
Heat the oven to 350°F. Butter the bottom and sides of an 8-inch, deep, fluted tart pan or an 8-inch round cake pan.

For the crumb, combine the dry ingredients in a small bowl. Using a fork or your fingers, gently work in the butter until pea-sized lumps are formed.

Combine the eggs, sugar, salt, and almond extract in a large bowl. Beat on high until the mixture triples in volume, about five minutes. Fold in the melted butter, flour, and rhubarb. Evenly spread the thick batter into the prepared pan. Sprinkle the crumb topping evenly over the top.

Bake for 45 to 50 minutes, until the topping is deeply golden and a toothpick inserted into the center comes out clean. Remove the cake from the pan when it’s completely cool.

Almond Peach Tartlets

After making my Tomato Tart last week I had a good chunk of tart dough leftover. Not wanting to waste any of this buttery goodness I pressed the pieces I had left into a few mini tart pans and threw them in the freezer. This week I had a few peaches sitting on the counter just crying out to be used. What to do? Then, what do you know, the King Arthur Flour Baker's Companion magazine showed up in the mail with a recipe for an almond tart. Out of all of this inspiration these peach tartlets appeared. It was the perfect solution to a very wonderful problem!

I took the recipe for the almond tarts and added some delicious peaches. I love the combination of almond and peach so I knew this was going to be good. I spread the peaches on the chilled crust and then topped with the filling. It worked out quite well, but when I try it again I would try to remember to save a few peach slices to lay on top of the filling too. This would make the finished product look even better I think. But they were still delicious as they were. This is a great versatile tart that I can think will be the perfect starting point for many other delicious tarts this summer!

Almond Peach Tartlets

Adapted From 

King Arthur Flour

Ingredients

Filling

  • 1/4 cup (4 tablespoons) soft butter
  • 1/4 teaspoon salt
  • 1 cup sugar
  • 2 tablespoons Flour
  • 1 teaspoon almond extract
  • 1 teaspoon vanilla extract
  • 3 large eggs
  • 1 1/4 cups almond flour or finely ground sliced or slivered almonds
  • 3-4 peaches, cut into slices

Glaze

  • 1 cup glazing sugar or confectioners' sugar
  • 2 tablespoons milk

Directions

You'll need to start with 6 mini tart pans filled with your favorite tart/pie dough. I used some leftover  Pate brisee, but whatever you like will work. (Here's the easy press in press in crust that King Arthur Flour suggests)

To make the filling: Beat together the butter, salt, sugar, flour, and extracts. Beat in the eggs, then add the almond flour, stirring just to combine.

Lay sliced peaches onto the well chilled crust. Spread the filling over the peaches.

Bake the tarts for 18 to 24 minutes, until their tops are lightly browned. Remove from the oven, and cool in the pans.

To make the glaze: Stir together the sugar and milk until smooth.

Spread the glaze over the cooled tarts. Top with some whipped cream or a scoop of ice cream if desired.

Yield: 6 mini tarts.