Tomato and Asiago Pizza

August is almost gone, can you believe it? I sure can't. This summer just FLEW by! One of my favorite parts about August is how amazing the farmers market is this time of year. Tomatoes, peaches, melon, corn, squash, peppers and the first of the apples, wow is it glorious. I have been eating good! 

There's almost nothing better than a simple, homemade pizza to showcase some of that summer bounty. This pizza only needed a couple ingredients to help it shine. Start with a good crust, add some garlicky oil, top with a couple handfuls of whole milk mozzarella mixed with a bit of asiago, top with a couple slices of one of those juicy, sweet and tender August tomatoes and sprinkled with thyme. A quick trip to the oven and you're ready to go. Serve with a bit of fresh parley and Parmesan cheese and you are set for dinner.

You could kind of consider this a spin on the traditional Margarita pizza, just switching up the cheese a bit and using a different herb, so not really a Margarita pizza at all! But in the same spirit in my opinion! Whatever you all it, it's delicious!


Tomato and Asiago Pizza

  • 1/4 of the perfect pizza dough recipe
  • 1/4 cup olive oil
  • 2 garlic cloves, thinly sliced
  • 1/2 tomato, sliced thin
  • Asiago cheese, shredded
  • Parmesan cheese, grated
  • Fresh Thyme
  • Fresh parsley, for garnish

Directions
Heat a small frying pan over medium to low heat. Add the oil and allow it to heat up for 30 seconds, then add the sliced garlic. Fry the garlic in the oil until it is just starting to turn golden, watching it closely to ensure that it does not burn. Remove pan from heat and set aside to cool. 

Prepare pizza dough. Brush shaped dough liberally with the garlic oil, you may not need it all, save the leftover oil to use later on. Sprinkle the oiled dough with a few tablespoons of parmesan cheese. Then top with asiago cheese, spreading almost to the very edge. Lay tomato slices on top of the cheeses. Sprinkle the whole thing with minced fresh thyme and some salt and pepper. Slide pizza off peel and onto your heated stone or baking sheet. Bake until the crust is golden and and cheese is bubbling and just beginning to brown, 6-10 minutes depending on your oven. 

Baked Lentil Falafel

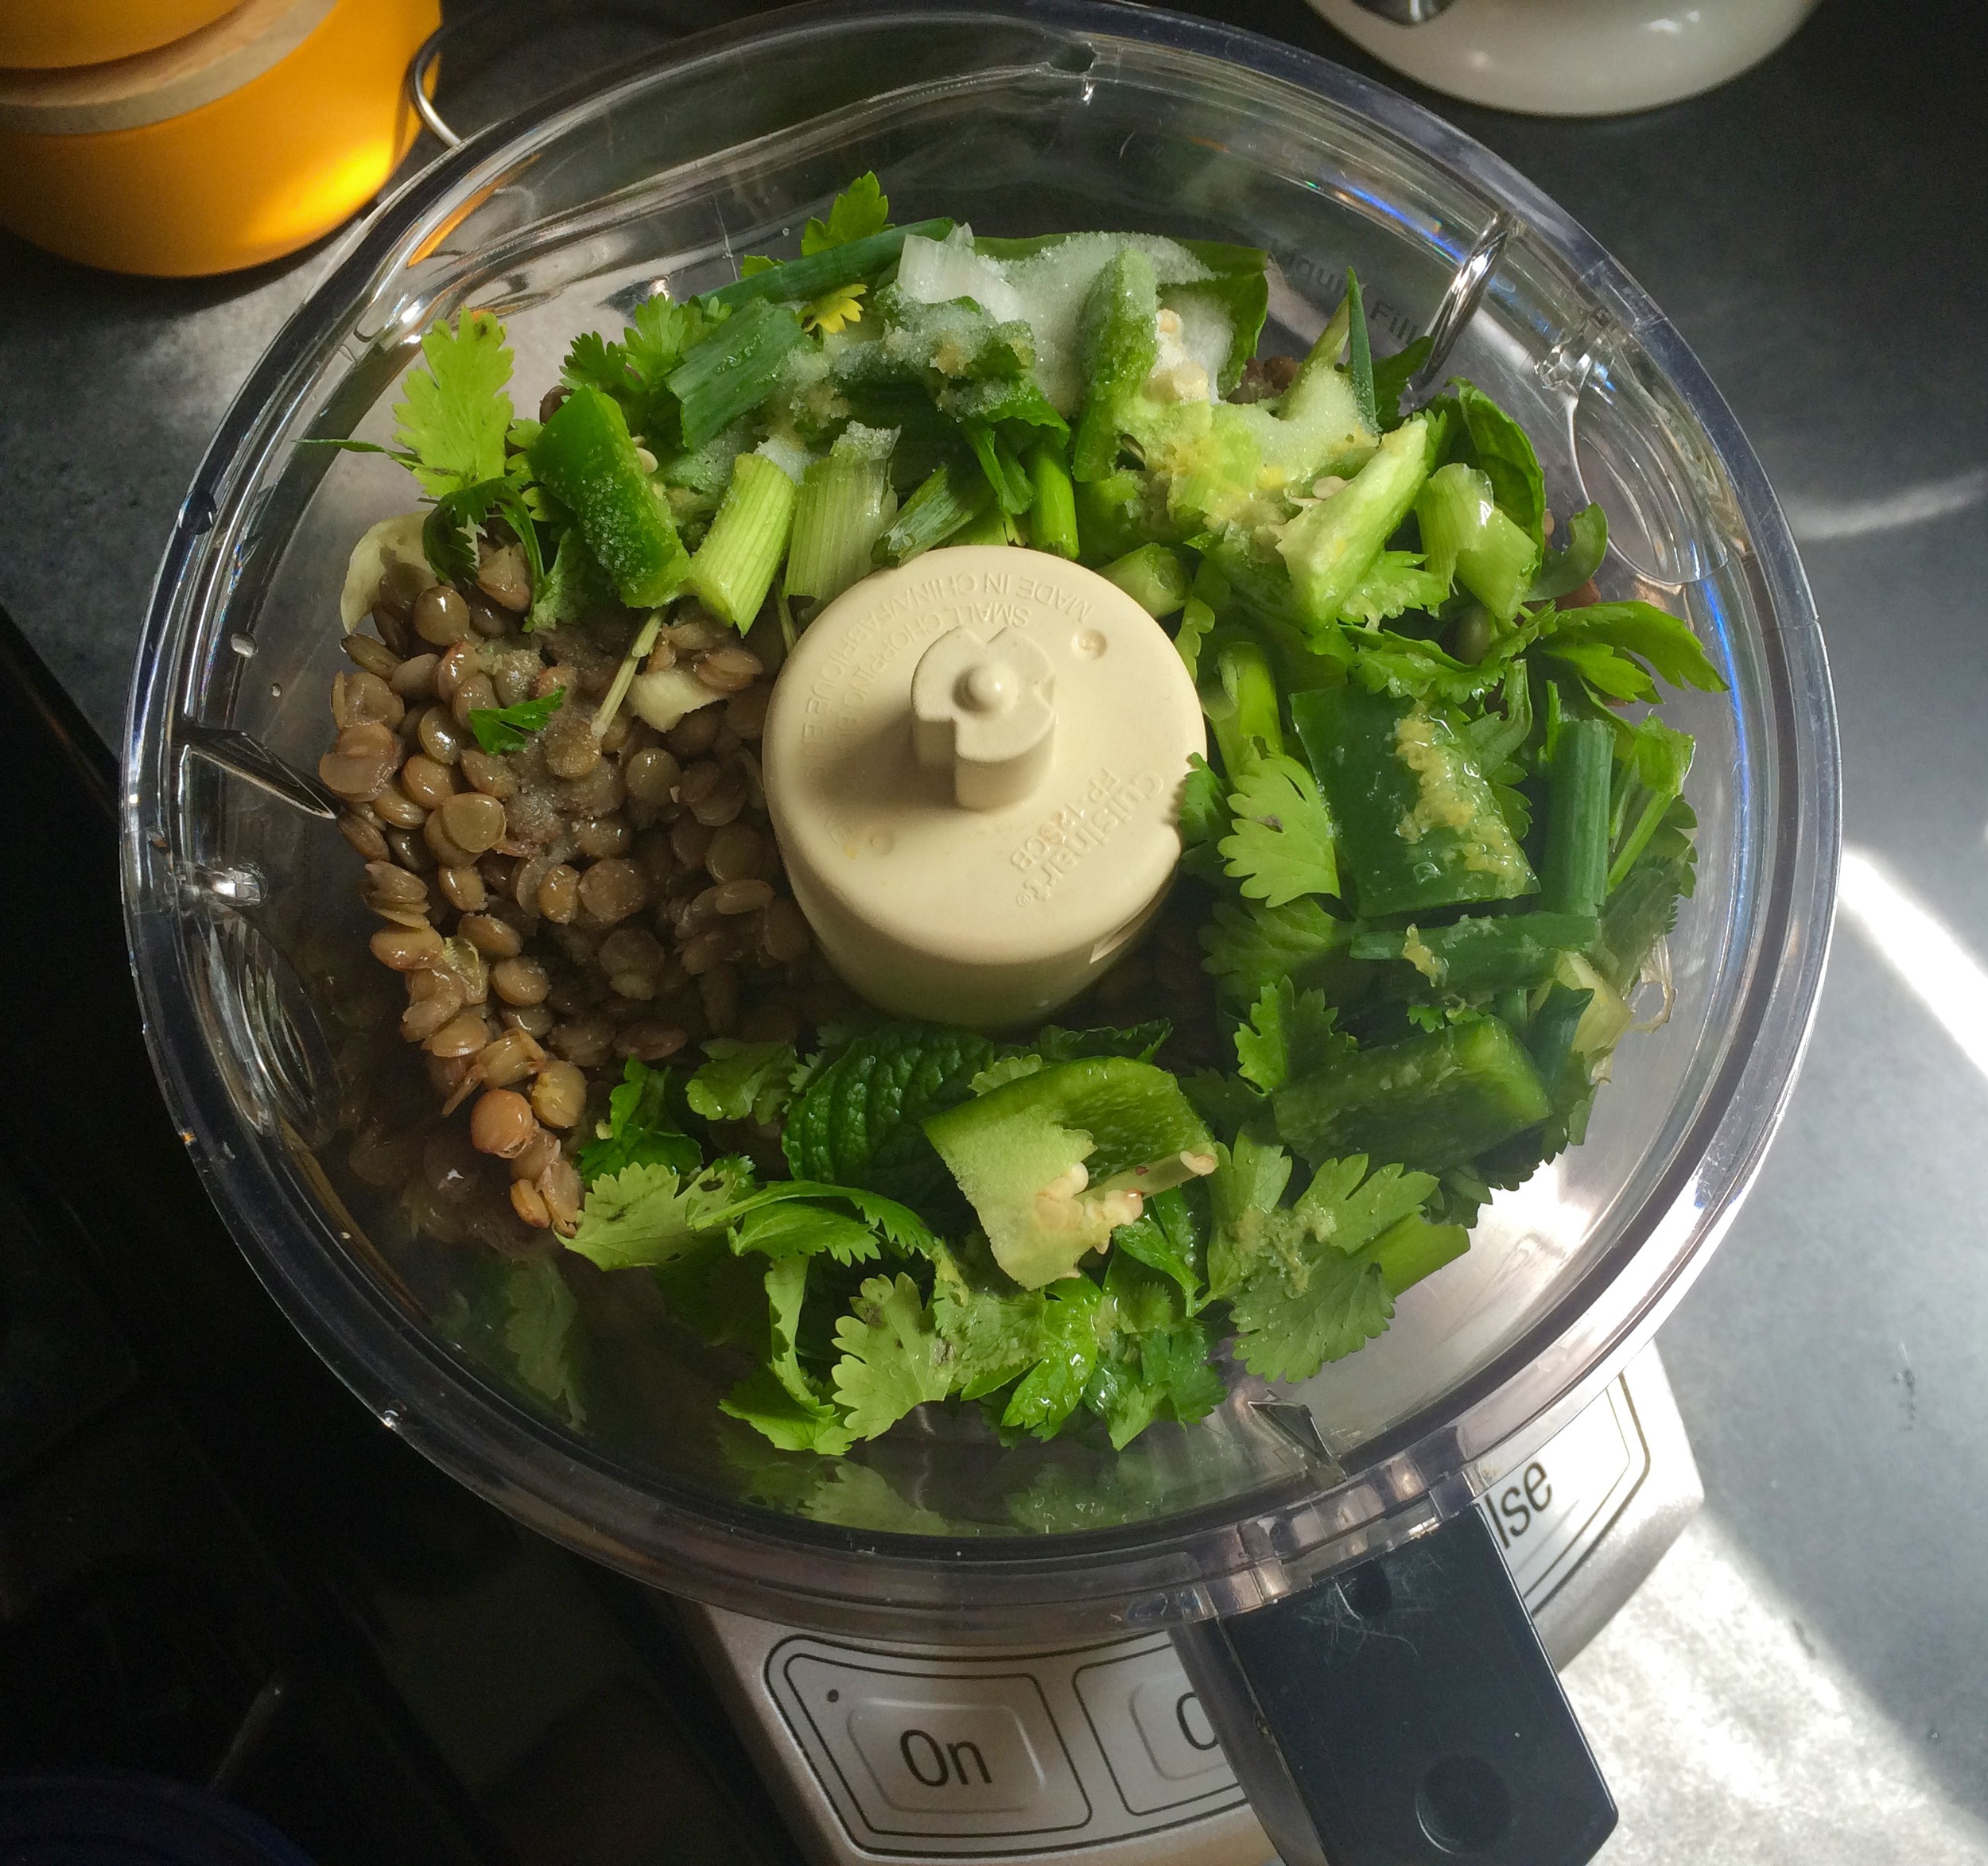
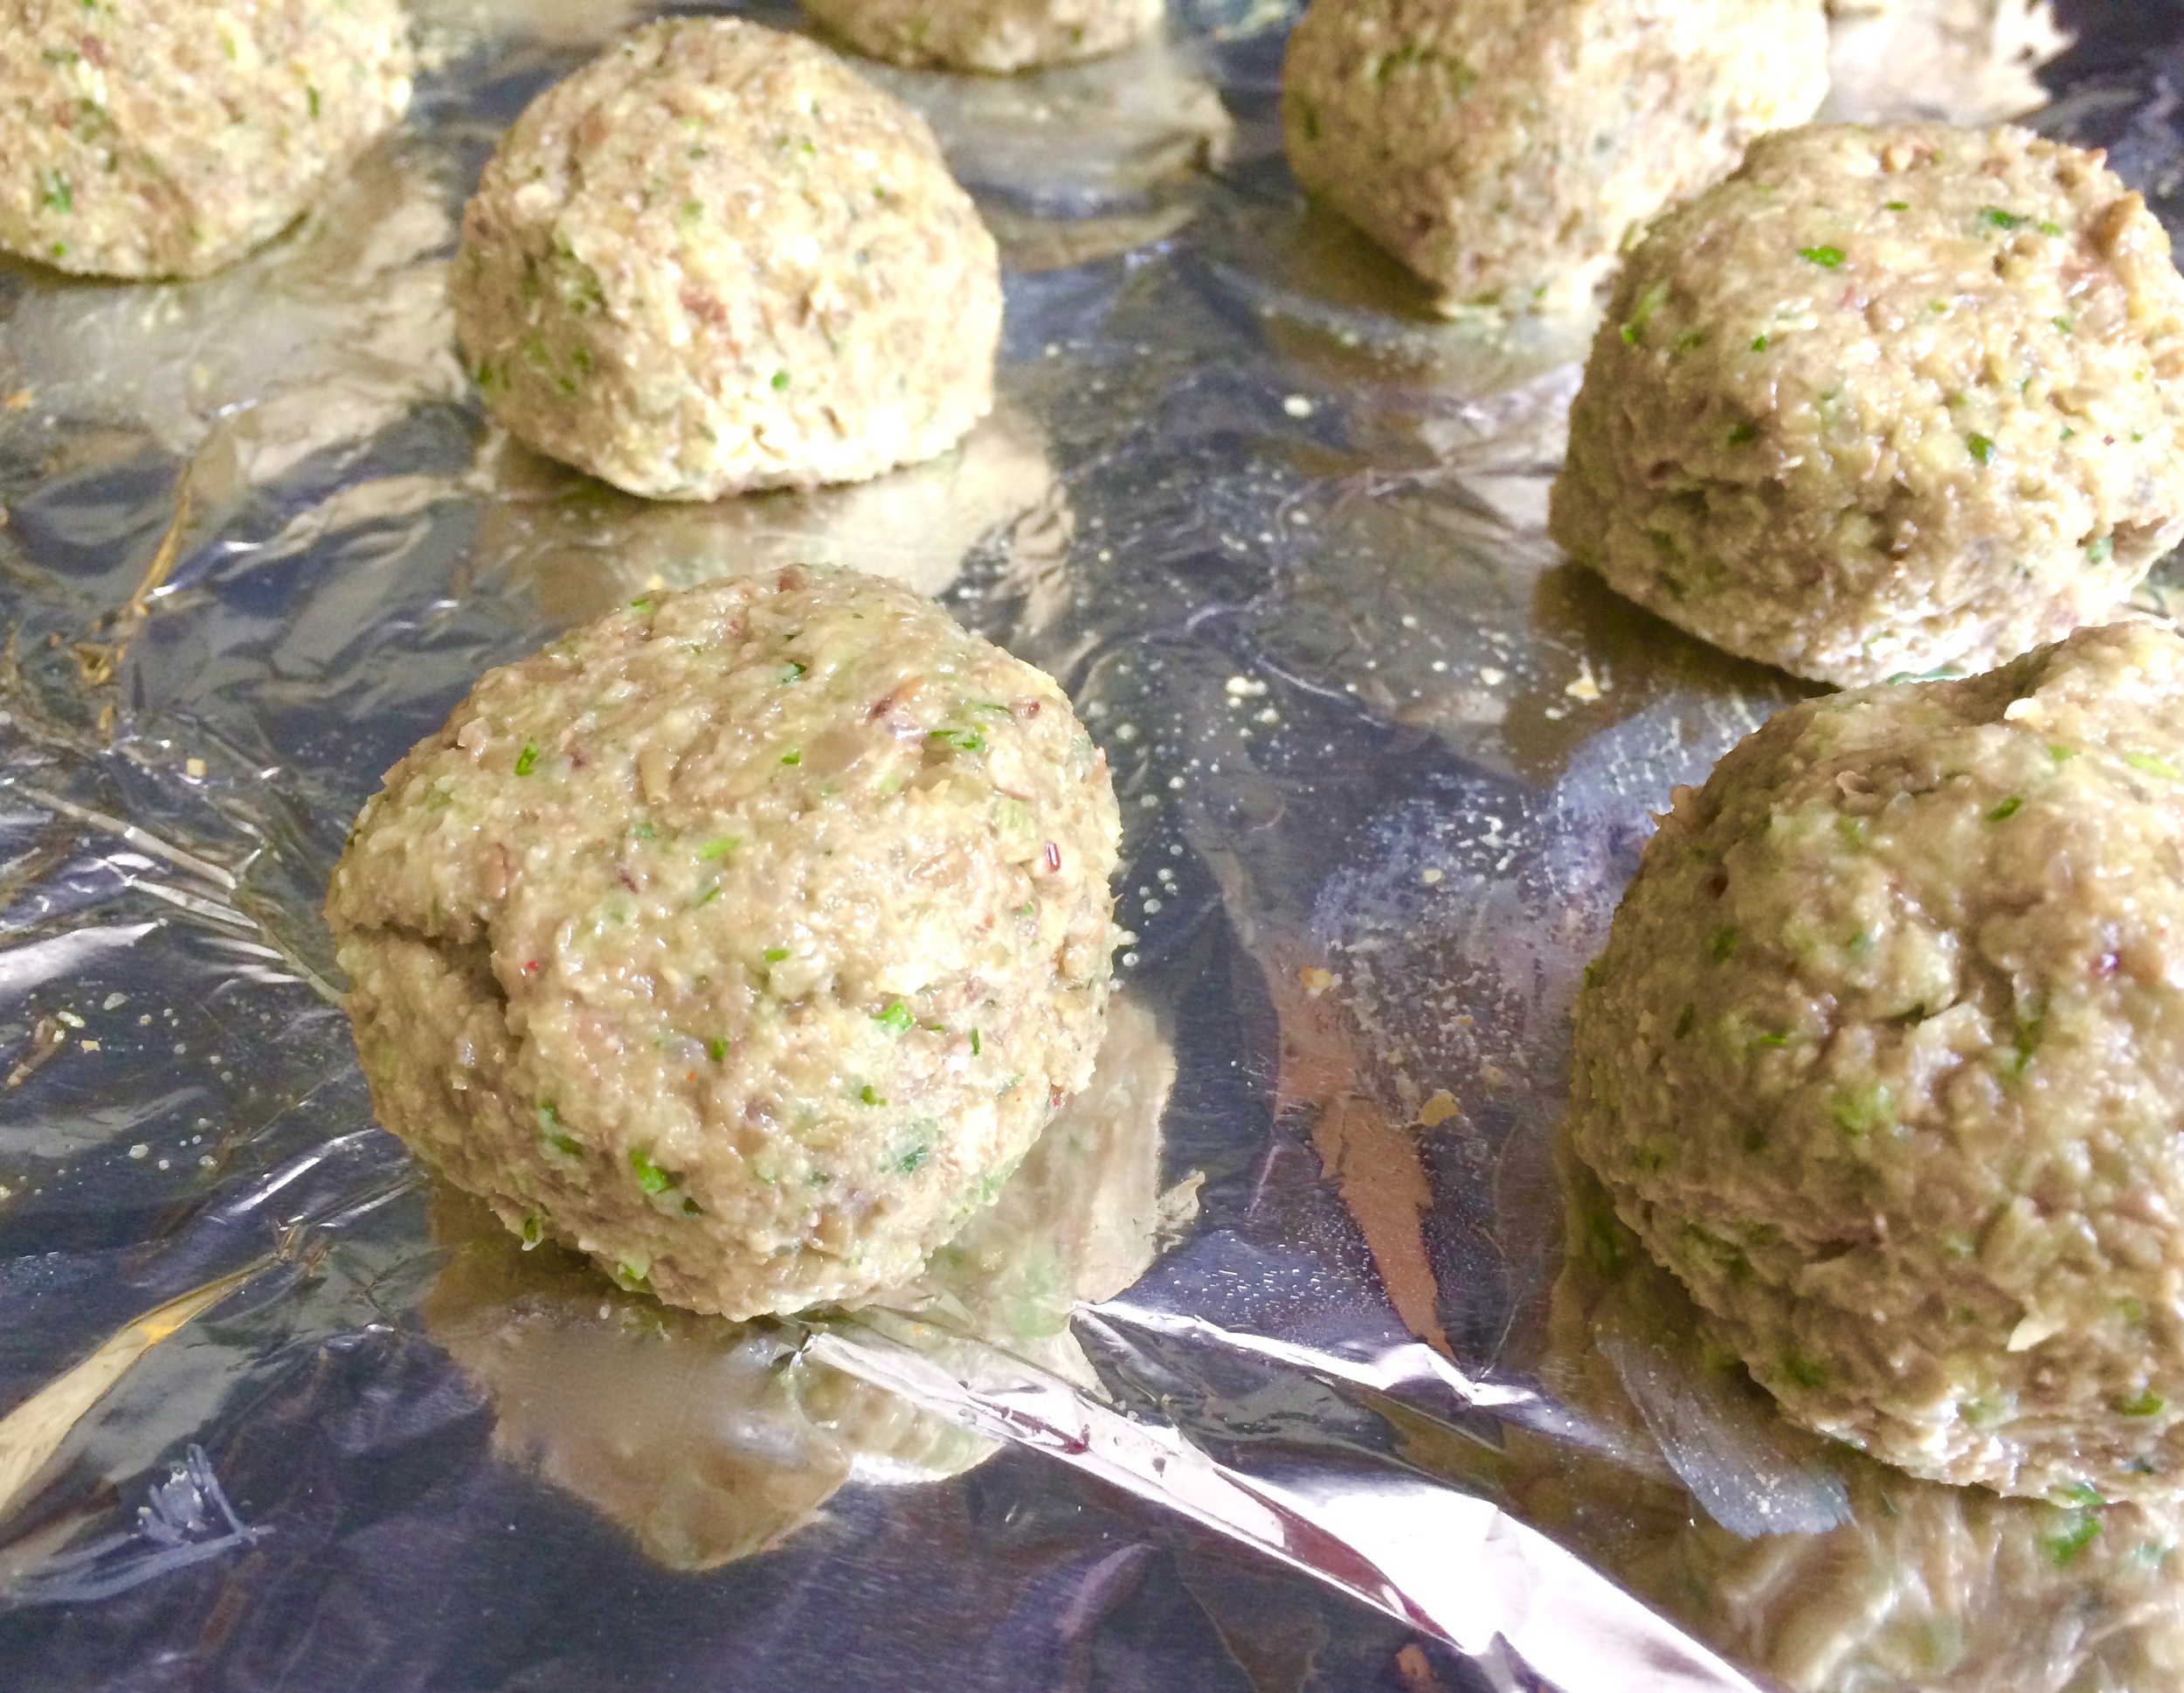
Quick. Easy. Healthy. Delicious. Those are all words I like to hear, especially when it comes to prepping meals for a busy week at work. These baked lentil falafel fit the bill perfectly. Now, I know, since they're baked, not fried, and made out of lentils, not chickpeas or fava beans, they really aren't falafel. But humor me here. It's the easiest way to describe these little patties. They have a little heat from a jalapeno, some spice with the cumin and coriander, and freshness from the herbs.  Throw it all in the food processor,  and process away! Shape, bake, eat, repeat. It's that easy! 

The original recipe for these little bites was just 5 or so ingredients long. A great base recipe from which you can improvise to your hearts content. I added a few extra flavorings because I couldn't help myself, but you can keep it simple if you like. I used my favorite seasonings of cumin and coriander, along with cilantro, parsley and mint. Probably my favorite combination of flavors, but try adding your own favorite spices and see what happens. I ate mine the first day on a chickpea flour wrap with garlicky kale and tahini. Yum! But I've also made sandwiches, topped salads, and dipped these little guys into yogurt for a quick snack. Go ahead, try something new!


Baked Lentil Falafel
Adapted from Pinch of Yum
Ingredients

  • 2 cups (320-340 grams) cooked lentils*
  • 1 cup cilantro
  • 1 cup parsley
  • 1/4 cup fresh mint (optional)
  • half a jalapeño, leave the ribs and seeds if you like it spicy
  • 1 green onion, coarsely chopped
  • 1-1½ tablespoons olive oil
  • 1-2 cloves garlic
  • a squeeze of lemon juice
  • 1 teaspoon salt
  • 1/2 teaspoon cumin
  • 1/4 teaspoon coriander
  • 1-2 tablespoons whole wheat flour

Directions
Preheat the oven to 350 degrees. Pulse all ingredients except flour in a food processor until combined. Stir in the flour - just one tablespoon at a time, until it's just dry enough to handle. Form into 10 or so patties and place on a parchment lined baking sheet. Bake for 20 minutes. Remove sheet from the oven and carefully flip each patty over. Return to oven for another 10 minutes. Remove from oven and let cool slightly. Use however you would like; in salads, sandwiches, wraps, bowls, etc. They also freeze great, so you can whip up a batch and keep on hand for  a quick meal any time. 

*I was using up the rest of the lentils I had in the pantry. The dry weight was 140 grams which ended up being 340 grams cooked. When I weighed out 2 cups it was 320 grams, but I only had an additional 20 grams of lentils so I just threw them in too! So it doesn't need to be exact. 

Black Bean Burgers

I still have one more post to put up with pictures from my trip to Europe, but first a little detour back into recipe-land. Since it is Memorial Day weekend and the unofficial start of summer I thought a burger recipe was fitting. While it's not a real burger, this still a great meal idea to keep in your back pocket for days when meat is not on the menu. I saw this recipe recently while watching an episode of America's Test Kitchen online and I knew I had to make it soon. 

I really like a good veggie/bean burger and so was very happy to see that this recipe was actually quite simple and used ingredients that I almost always have on hand.  So often it seems that veggie burgers have a million ingredients, several of which I don't usually keep at home so I was happy about this.  All I had to do was soak a pot of beans and make a quick stop to the store to pick up some cilantro and I was all set to whip up a batch of these delicious and versatile black bean burgers. If you're looking for a simple recipe to cure that (veggie) burger craving give this one a try. It's sure to be a winner, it certainly was in my house. 

These burgers have good flavor and a good texture. They did not turn out "mushy" like so many veggie burgers, but were nice and firm and held together well. I also made a little chipotle yogurt sauce using canned chipotles in adobo mixed with a little Greek yogurt. You can always use mayo instead of the yogurt, that is what they did on the show. I topped the burgers with this sauce and a few slices of avocado and it was delicious. I think a  nice slice of cheddar cheese would also be wonderful. 

These burgers are great to make ahead for a quick meal when you don't have a lot of time to cook. Full of spices and aromatics, the prep work is done so you don't need to spend time chopping and adding flavor on a busy night. Just grab a pre-made patty and you're set. Great as a burger, but also in a wrap, on a tortilla, broken into chunks and mixed with a little yogurt or sour cream as a black bean version of chicken salad, or used to top a pizza. These little guys are versatile and delicious, if you've never made a black bean burger before, this is the place to start. 


Black Bean Burgers
Adapted from America's Test Kitchen
Ingredients

  • 1 can black beans, or 4 1/2 ounces dried black beans boiled until tender (about 1 1/2 cups total, cooked)
  • 1 egg
  • 1 tablespoon flour
  • 2 scallions, sliced thinly
  • 1 1/2 tablespoons cilantro, chopped finely
  • 1 clove garlic, minced
  • 1/2 tsp cumin
  • 1/4 tsp coriander
  • 1/8 teaspoon cayenne (optional)
  • 1/8 teaspoon salt
  • 1/8 teaspoon pepper
  • 3 tablespoons bread crumbs
  • 1 tablespoon coarse cornmeal
  • Cheese, avocado, sprouts for topping (optional)

Directions
Line a baking sheet with a couple of layers of paper towels. Drain and rinse black beans lay in an even layer on the paper towels. Set aside to dry for 15 minutes. 

Meanwhile, in a medium sized bowl, whisk the egg. Add the flour and whisk until no more lumps are visible.  Add the scallions, cilantro, garlic, cumin, coriander, cayenne, salt and pepper and whisk to combine. Set aside. 

Place the bread crumbs, cornmeal, and beans in a food processor. Pulse 5-6 times until a coarse mixture forms. It should be fairly dry. Add the bean mixture to the bowl with the egg mixture. Stir to combine everything evenly. It will be fairly wet. 

Place bean mixture in the fridge for at least 1 hour, up to 24 hours, to firm up. When ready to form patties, shape mixture into 4 uniform size round patties of even thickness. 

Heat a large frying pan over medium to medium-high heat. Add a tablespoon or two of olive oil. Place the patties in the frying pan and cook on one side until golden brown, 6-8 minutes. Flip patties with a spatula and cook on second side for another 6-8 minutes or until well browned. Remove from pan. Serve with your favorite toppings. 

Rosemary Lemon Roast Chicken

It may be Mother's Day today, but this year my family celebrated mom last week. Mom decided that she wanted to head to Indiana with a friend to spend time at Conner Prairie, a living history museum where people recreate what life was like in Indiana in the 19th century. My mom is a big Civil War reenacter,  and loves all of these kind of things so this is her favorite kind of weekend, and her top choice for where to spend her Mother's Day this year. Her friend's daughter works at Conner Prairie so they are going to dress up in the historically accurate clothes and have a blast. Hope you're having a wonderful Mother's Day weekend mom!

Even though mom was not going to be home on Mother's day this year I still wanted to make her a special meal, as a thank you for being such a great mom. So instead of celebrating today, we got together last weekend for a Mother's Day meal starring this Rosemary Lemon Chicken. It's a simple recipe, but so full of flavor that everyone loved it. I can't think of much else that goes so well with chicken as lemon and rosemary do. The whole thing can be prepped the night before so all you have to do the day you want to make it is stick it in the oven. If you're craving some delicious chicken, but want to make life easy for yourself, this is the recipe you want to make. 

I was inspired to make this recipe after coming back from Paris. One morning there I was walking down the street and passed a butcher who had a big rotisserie outside his shop with a dozen chickens slowly turning on spits. Below the chickens was a big pile of red potatoes, soaking in the juices of the chickens that were dripping down as they roasted. It looked and smelled amazing and I knew I wanted to recreate it at home. Since I don't have a rotisserie, a good roasted chicken was going to have to do instead. Roasting the chicken over a bed of red-skinned potatoes allowed the chicken juices to permeate and flavor the potatoes as everything cooked. While this prevents the potatoes from getting crispy and brown, it does make them flavorful and creamy. 

I love rosemary with my chicken and potatoes, so I threw a lot of chopped rosemary in this dish as well as some chopped fresh thyme because I had some in the fridge, but you can always use whichever herbs you like best, it doesn't have to be rosemary. Don't skip the lemon however. It permeates the chicken and potatoes, brightening everything with its tart acidity. The perfect pairing with the earthy rosemary. This one is definitely a crowd-pleaser. Impress your guests this weekend with this simply amazing roast chicken. 


Happy Mother's Day to the best mother around!!


Rosemary Lemon Roast Chicken
Adapted from The Cafe Sucre Farine
Ingredients

  • 2 whole chickens, cut into pieces, bone-in, skin-on
  • 2-3 tablespoon chopped fresh rosemary
  • 1 tablespoon chopped fresh thyme
  • 6 cloves garlic, finely minced
  • 5 teaspoons kosher salt
  • 1 teaspoon freshly ground black pepper
  • Zest of 1 large lemon
  • 2 tablespoon fresh lemon juice (do not use bottled lemon juice, it must be freshly squeezed)
  • 4 tablespoons extra virgin olive oil
  • 2 1/2 pounds of small red skin potatoes, cut into quarters
  • 2-3 tablespoons extra virgin olive oil
  • 1-2 teaspoon kosher salt
  • 1 teaspoon freshly ground black pepper
  • 1 lemon sliced in ⅛-inch slices

Directions
The night before you plan on roasting the chicken, or early on the day of, mix the rosemary, thyme, garlic, 5 teaspoons salt, pepper, lemon zest, lemon juice and olive oil together in a small bowl. 

Place the chicken pieces in a large bowl. Pour the oil-herb mixture onto the chicken and use your hands to mix the chicken and the oil mixture together, rubbing it into the chicken and under the skin, coating everything evenly. Cover bowl and place in the fridge at least 4 hours, preferably overnight. 

The next day, preheat the oven to 450 degrees. Lightly grease one or two sheet pans with oil. Combine potatoes, olive oil, the 1-2 teaspoons salt, and the pepper in a medium-size bowl. Toss to coat. Turn potatoes out onto prepared sheet pans in an even layer. Place in oven and roast for 15 minutes.

Remove pans from oven and add the chicken breasts to the pans, skin side up in between the potatoes. Tuck lemons around chicken and potatoes. Roast for about 30-45 minutes longer, or until the breasts reach 160˚F in the thickest part. (If breasts vary greatly in size, you may need to remove the smaller ones 5 minutes before the larger ones.) My chicken took about 38 minutes. 

Remove from oven and cover chicken loosely with foil. Allow to rest for 5 minutes before serving.

Serves 8-10

Chicken Pesto Pizza

I was at the library last week, one of my favorite places in the world, and picked up a pretty looking pizza cookbook, Truly, Madly Pizza by Suzanne Lenzer. As you may or may not know, making pizza at home is one of my all-time favorite dinners. It is always delicious, and if the dough is already made it's actually a really quick and easy dinner. So it makes sense then that I love looking at pizza cookbooks, but usually I just flip through them for inspiration. Something about this particular book however intrigued me. Her dough sounded a little different, and used a different method than any of my previous recipes and my interest was peaked; I decided to take the book home and get a closer look. As soon as I got home I delved a little deeper into the book and very quickly was in the kitchen whipping up her pizza dough recipe. 

The verdict? I have made two pizzas now, not a large sample size I realize, but both of them turned out pretty amazing. I don't know if I can say for sure that this dough is extra good, or I just got lucky and turned out a couple of fabulous pizzas, but what I can say is that I plan on making another batch of dough ASAP so I can find out!! Until then, enjoy this simple, but always fantastic recipe for chicken pesto pizza. 

I only managed to snap one, that's right one single picture, of this awesome pizza, but it was too pretty, and the finished pizza too delicious, not to share. Hopefully I'll have some other pizzas to share very soon...!

Chicken Pesto Pizza
From Delectably Mine
Ingredients

  • Perfect pizza dough (recipe below), or your own favorite pizza dough
  • Leftover chicken, dark meat preferred, cut into bite sized chunks
  • 2-3 tablespoons pesto (homemade if you have it) 
  • 3-4 ounces fresh mozzarella
  • Olive oil
  • Salt

Directions
The morning you are planning to make pizza, take dough out of the freezer and put it in the fridge to slowly thaw. When you are ready to make dinner, place a pizza stone or a baking sheet in the oven and preheat to 550 degrees, or as hot as it will go (unfortunately my oven only goes to 500 degrees) and let it preheat for at least 30-45 minutes, a hour is better if you have time.  

Twenty to thirty minutes before shaping the pizza, pull the dough out of the fridge and let come to room temperature while you prepare the toppings. 

When ready, working with the dough in your hands, gently begin to stretch the dough into a circular shape, pressing your fist into the center of the dough and pulling at the edges with your other hand. With both hands, stretch the dough, being careful not to tear it. Working in a circular motion, pull the thicker edges of the dough outward, letting gravity help you. Continue to stretch the dough until it's relatively even thickness (the edges will be thicker - that's okay) and you have the size you want. 

Dust pizza peel generously with cornmeal and carefully lay the shaped pizza crust onto the peel (alternately you can use parchment paper and slide the whole thing, parchment and all, right onto the stone or baking sheet). Top the pizza with the pesto, followed by fresh mozzarella and then the chicken. Sprinkle with a little kosher salt if desired and brush the crust with olive oil. Slide pizza off peel and onto your heated stone or baking sheet. Bake until the crust is golden and and cheese is bubbling and just beginning to brown, 6-10 minutes. 

Slide pizza off stone and onto a cutting board or plate. Let rest a few minutes (if you can) before cutting. 

Perfect Pizza Dough
From Truly, Madly Pizza by Suzanne Lenzer
Ingredients

  • 390 grams bread flour (about 2.75 cups)
  • 1/4 ounce active dry yeast (about 2.5 teaspoons)
  • 2 teaspoons sea salt
  • 1/4 cup extra virgin olive oil (about 40 grams)
  • 1 cup warm water
  • 2-3 tablespoons cornmeal

Directions
Put the flour, yeast and salt in a food processor fitted with the metal S-balde and turn the machine on. With the machine running, pour the oil through the feed tube, then add the water in a slow, steady stream. By adding the water slowly, you can watch the dough come together and you'll get a sense of whether you should add more or whether it's too wet - it should look pliable and smooth after a minute or so of processing (the more water you can add and still be able to handle the dough without it sticking to you hands, the better it will be). Continue to process for 2 to 3 minutes (the dough should form a rough ball and ride around in the processor). The finished dough should be soft, slightly sticky and elastic. If too dry, add a bit more water; if too wet, a tablespoon or so more flour.

Lay a 12-inch-long piece of plastic wrap on a clean work surface. Work the dough into a rectangle on the plastic, about 8 inches long and 6 inches wide. Press your fingers into the top of the dough all over, making indentations as though it were a focaccia. Fold the left third of the dough over (as you would a letter) and repeat the indentations. Fold the right third over and make the indentations again. Cover the folded dough with plastic wrap and let rise for 20 minutes.
Cut the dough in half, form each piece into a neat ball, wrap tightly in plastic wrap and transfer to the freezer. The morning before you want to make pizza, transfer the dough to the refrigerator to thaw.

Note: You can use the dough right away, but you'll find the texture of the crust will be a bit breadier and the flavor less complex (but still very tasty). 


Chipotle Quinoa Sweet Potato Tacos with Roasted Cranberry Salsa

This dinner idea combines some of my all-time favorite ingredients into one fabulous dish. Quinoa, sweet potatoes, and black beans come together with a few spices, some tomatoes, and spicy chipotles. It's a super healthy dish, just look at those ingredients! All this piled onto a warm corn tortilla and topped with a tart and sweet cranberry salsa and a creamy avocado makes a fantastic meat-free dinner option that I don't know who could dislike. 

This is a great option to make ahead and eat throughout the week for a quick dinner or lunch. It's the type of meal that only gets better with time (to a point of course!). You could also throw the taco filling on top of some brown rice or hearty greens, or throw it in a pita or flour tortilla for a different take on dinner if you don't like eating the exact same thing night after night. 

There are a few different steps in this recipe, and while none of them are at all difficult, they do take just a little bit of prep-work. Cooking the quinoa, prepping the sweet potato, cooking the black beans and making the salsa can all be done ahead though which would streamline the process later on. Also, go ahead an grab a can of black beans if you don't have the time or the inclination to cook up some dried beans.

Whatever you do, don't skip the salsa! It is the perfect tart complement to the spicy tacos, something different than the traditional tomato salsa. Take a few extra minutes and whip it together. The original recipe for the salsa called for pomegranate arils to be thrown in after the cranberries are done roasting. While I am sure this is delicious, and would have liked to try it, pomegranate season must be over. There was not one to be seen at the grocery store when I was shopping. All I could find was a tiny little jar of arils for something like $5 which just isn't worth it my book! So if you can find them for a reasonable price I'd say go for it, but even without the salsa is still perfectly delicious. 

 
PicMonkey Collage.png


Chipotle Quinoa Sweet Potato Tacos
Adapted from Half Baked Harvest
Ingredients

  • 1-2 tablespoons olive oil
  • 1/2 a small onion
  • 1 clove garlic, minced
  • 1 large sweet potato, chopped
  • salt and pepper
  • 1 1/2 - 2 cups cooked quinoa
  • 1 can diced fire-roasted tomatoes
  • 2 teaspoons chili powder
  • 2 canned chipotle chilies, minced
  • 1 tablespoon adobo sauce (from the chipotle can)
  • 1 teaspoon smoked paprika
  • 1 teaspoon cumin
  • 1 teaspoon brown sugar
  • 1 teaspoon cayenne
  • 1  - 1 1/2 cups cooked black beans
  • 1 lime, juiced
  • 1 small bunch cilantro, chopped
  • Corn tortillas, warmed
  • Diced avocado, for topping
  • Shredded sharp cheddar cheese, for topping

Directions
Heat the olive oil over a large skillet set over medium heat. Add the onions and a pinch of salt and let the onions cook for 5-10 minutes, until beginning to soften. Add the sweet potatoes and toss to coat. Add a little water to the skillet and let cook until the sweet potatoes are fork tender, but not mushy, stirring once or twice, about 15 minutes, adding more water if needed.

Once the sweet potatoes are fork tender, add the garlic and saute 30 seconds. Add the spices and let cook until fragrant, making sure they don't burn. Stir everything together well and then increase the heat to medium-high (adding more oil if needed) and add the quinoa. Let the quinoa cook and get crispy for about 5 minutes, trying not to stir too much.

Next, add 3/4 cup water, tomatoes, the chili powder, chipotle chilies, adobo sauce, smoked paprika, cumin, brown sugar and cayenne, stir to thoroughly combine and bring the mixture to a boil. Cook for 5-10 minutes or until the water has evaporated and the chili is at your desired consistency. If it starts to get too dry you can add more water.

Remove from the heat and stir in the black beans, 1/4 cup chopped cilantro and the lime juice. Taste and season with salt and pepper if desired. Serve with tortillas, avocado, cheddar cheese and roasted cranberry salsa (recipe follows).

Roasted Cranberry Salsa
Adapted from Half Baked Harvest
Ingredients

  • 12 ounces fresh or frozen cranberries
  • 1/4 cup brown sugar
  • 1 canned chipotle chili, chopped
  • 1 lime, zested + juiced
  • 1 clove garlic, minced 
  • 1 jalapeño, chopped, seeds removed if desired for less spicy salsa
  • Pomegranate arils (optional)
  • salt and pepper, to taste

Directions
Preheat oven to 450 degrees and line a baking sheet with aluminum foil. Place the cranberries, brown sugar, chipotle chili, lime zest and juice, garlic, jalapeño and a pinch of salt and pepper in a large bowl. Use your hands or a large spoon to toss everything together until evenly mixed. Transfer to baking sheet. Place in the oven and roast until the cranberries burst and release their juices, 15-20 minutes. Remove from the oven and and let cool. Add in the pomegranate arils if using and taste and season with more salt and pepper if desired. Set aside and keep at room temperature. Can be made in advance, store in the refrigerator until needed. 

The Ultimate Winter Couscous and Homemade Harissa

While my photos of this wonderful winter couscous are not the best, don't let that stop you from giving this recipe a try. It's January, so by the time this meal finished cooking all my natural lighting was gone. But that didn't stop me from taking a few quick pics so I could at least remember how delicious this recipe was. It comes from one of my newest cookbooks, Plenty, by Yotum Ottolenghi. I've been a Ottolenghi fan for a couple of years now ever since I picked up his cookbook Jerusalem on a whim one day at the library and have been hooked ever since (I've definitely got a case of the creeping Ottolenghis). Every recipe of his that I have tried so far has been just so good, and this recipe was no exception. 

I don't know exactly what it was about this dish that hooked me, but I was flipping through the cookbook just a few days ago and stopped on this page, deciding then and there that I was going to make it. It looked and sounded like a perfect meal for a cold winter evening. It is healthy and hearty and full of fun new ingredients and ideas that I haven't really tried all the much before. Definitely a keeper, and something I would make over and over again. 

This recipe also gave me the chance to finally try making my own harissa, a hot chili pepper paste, which I've been wanting to do for a while now. It is delicious and I highly recommend grabbing a few peppers and making your own, but if you don't feel like it I have seen several jars of harissa at the grocery store. I've never tried any of them so I can't say how good they are but they do exist. 

The list of ingredients for this ultimate couscous does look a little long, that's pretty typical of a lot of Ottolenghi's recipes, but a lot of the ingredients are spices which, if you already have many of them on hand, means you won't have to buy quite as many ingredients. The main players here are some delicious winter vegetables that you cook up really easily in the oven along with some chickpeas and dried apricots. The whole thing is then served over buttery saffron coucous and topped with fresh cilantro. So. Good. 

This was my first time buying saffron. I have never wanted to spend that much money on a pinch of a spice before, but this time I just did it. No, saffron is not cheap, but yes, it did add such a wonderful flavor to the couscous that you just won't get without it. Can you still make this recipe without saffron? Sure, but it will be missing a little something. But don't let that stop you if you want to give this recipe a shot, it will still be delicious! 

Despite the long list of ingredients and instructions, this recipe is actually quite easy. Yes, chopping and prepping the vegetables takes a bit of time, once it's all prepped everything is very simple and a lot of it is hands off. If you prep the vegetables and harissa ahead of time and mix up the spices it actually shouldn't take that long at all. So if you're looking to try something new this winter, new combinations of vegetables and flavors, look no further, this is your recipe. 

All prepped and ready to go!

Homemade Harissa

The Ultimate Winter Couscous
From Plenty by Yotam Ottolenghi
Ingredients

  • 2 medium carrots, peeled and cut into 3/4 inch chunks
  • 2 medium parsnips, peeled and cut into 3/4 inch chunks
  • 8 shallots, peeled 
  • 2 cinnamon sticks 
  • 4 star anise
  • 3 bay leaves
  • 5 tbsp olive oil
  • ½ tsp ground ginger
  • ¼ tsp ground turmeric
  • ¼ tsp hot paprika
  • ¼ tsp chilli flakes
  • 2 1/2 cups (10 oz) pumpkin or butternut squash, peeled and cubed
  • 1/2 cup (75g) dried apricots, roughly chopped
  • 1 cup (200 grams) chickpeas (canned or freshly cooked)
  • 1 1/2 cup chickpea cooking liquid and/or water
  • 1 cup (170 grams) couscous
  • large pinch of saffron threads 
  • 1 cup boiling vegetable stock
  • 3 tablespoons (20 grams) butter, broken into pieces
  • 2 tablespoons (25 grams) harissa 
  • 1 ounce preserved lemon, finely chopped
  • 2  cups cilantro leaves

Directions
Preheat the oven to 375 degrees. Place the carrots, parsnips and shallots in a large ovenproof dish. Add the cinnamon sticks, star anise, bay leaves, 4 tablespoons of the oil, ¾ teaspoon salt and all the other spices and mix well. Place in the oven and cook for 15 minutes. 

Add the pumpkin/squash, stir and return to the oven. Continue cooking for about 35 minutes, by which time the vegetables should have softened while retaining a bite. Now add the dried apricots and the chickpeas with their cooking liquid and/or water. Return to the oven and cook for a further 10 minutes, or until hot.

About 15 minutes before the vegetables are ready, put the couscous in a large heatproof bowl with the remaining 1 tablespoon olive oil, the saffron and ½ teaspoon salt. Pour the boiling stock over the couscous. Cover the bowl with cling film and leave for about 10 minutes. Then add the butter and fluff up the couscous with a fork until the butter melts in. Cover again and leave somewhere warm. 

To serve, spoon couscous into a deep plate or bowl. Stir the harissa and preserved lemon into the vegetables; taste and add salt if needed. Spoon the vegetables onto the center of the couscous. Finish with plenty of cilantro leaves.

Harissa
Adapted from Plenty by Yotam Ottolenghi
Ingredients

  • 1 red pepper 
  • 1/4 tsp coriander seeds or 1/8 teaspoon ground coriander
  • 1/4 tsp cumin seeds or 1/8 teaspoon ground cumin
  • 1/4 tsp caraway seeds
  • 1/2 tbsp olive oil 
  • 1 small red onion, roughly chopped 
  • 3 garlic cloves, roughly chopped 
  • 2 medium-hot fresh red chillies, seeded and roughly chopped 
  • 1/2 tbsp tomato paste 
  • 2 tbsp lemon juice 
  • 2 to 3 tsp coarse sea salt

Directions
Put the red pepper on a very hot grill or under the broiler until blackened (15-20 minutes), turning as needed to blacken all sides. Transfer to a bowl, cover with plastic wrap, leave to cool. When cool, peel and discard the skin and seeds. Set aside.

Place a dry frying pan on a low heat and lightly dry toast the coriander, cumin and caraway seeds for two minutes. Transfer to a mortar and grind to a powder. (Skip this step if you only have ground spices.) 

Heat the oil in a frying pan and fry the onion, garlic and chillies over medium heat until dark and smoky - six to eight minutes. Cool slightly, then tip into a blender or food processor. 

 Add the remaining harissa ingredients, including the grilled pepper and ground spices, and blitz together to make a paste. Set aside until you are ready to use it.

Lemon Herb Baked Tofu

I love experimenting with new foods and trying out new things in the kitchen all the time. That's what keeps things interesting and fun. Up until recently, tofu was something I wanted to try (I think I'd had it once, or maybe twice, before), but since I'd hardly ever used it in the past, I just never got around to picking up a package. Finally, I forced myself to buy a pound of it at the store and find something to do with it. 

To start, I wanted to do something simple, and something with which I could really taste the tofu, and get an idea of what its texture was like. I started with some extra firm tofu because it sounded the most versatile to me. After browsing through pages of recipes I settled on baked tofu with a simple lemon herb marinade, I figured this would give me the freedom to use the tofu in many different applications. The verdict? I liked it. Very easy to make and many options once it's done cooking; as a snack, on top of pasta, in a stir fry, on a sandwich, you get the idea. We'll see where this goes in the future, but FYI, I just finished off another package yesterday...

I've always heard that tofu takes on the flavors of whatever you cook it with, and that was certainly true in this case. The dominant flavors in this recipe were the lemon and the soy sauce. I could sense an underlying flavor from the tofu itself, but for the most part the marinade is what really came through.

There are some many different options for marinades floating around online, so if lemon herb isn't up your ally, there are many other combinations to try. But the bake instructions should be pretty much the same. All together a very easy recipe that leaves you with plenty of options in the end. It might be worth a try, if you've never picked up a package of tofu before, I highly recommend at least trying it once. You never know what you're missing until you try!

Lemon Herb Tofu
Adapted from The Gentlemanly Tomato
Ingredients

  • 1 cake firm tofu (about 16 oz)
  • 1/4 cup lemon juice
  • 3 Tbsp soy sauce
  • 2 Tbsp olive oil
  • A couple sprigs each of thyme and rosemary
  • 1/4 tsp black pepper
  • 2-3 garlic cloves, minced

Directions
Press tofu between a couple sheets of paper towel topped with a heavy pan for about 30 minutes. Discard paper towels and cut tofu into bite sized pieces. 

While tofu is being pressed, whisk together all marinade ingredients in a glass dish. Add the pressed tofu and gently mix to cover everything with the marinade. Place in the refrigerator for at least 30-60 minutes. 

Line a baking sheet with foil. Transfer the tofu and any remaining marinade onto the baking sheet. Bake at 400 degrees for approximately 60 minutes, stirring every 20 minutes. 

Simple Quinoa and Cheddar Polenta with Kale
From Delectably Mine
Ingredients

  • 3/4 cup (6 ounces) water
  • Pinch salt
  • 3 tablespoons (27 grams) cornmeal
  • 1/2 cup cooked quinoa
  • 1-2 handfuls kale, ripped or cut into bite sized pieces
  • 1/2 teaspoon butter
  • 1/2 ounce cheddar cheese, broken into pieces
  • Lemon herb tofu (recipe above)

Directions
Put the water and salt in a small skillet and heat until boiling. Once boiling, slowly pour in the cornmeal while continuously whisking. Turn the heat back on low and cook until starting to get thick, whisking frequently.

Once the cornmeal mixture starts to thicken up, add in the quinoa and torn up pieces of kale and whisk together. If the mixture becomes too thick, add some more water as needed. 

Once everything is mixed together, add in the butter and cheddar cheese, whisking until melted and completely incorporated into the mixture. 

Top polenta with lemon herb tofu and enjoy!