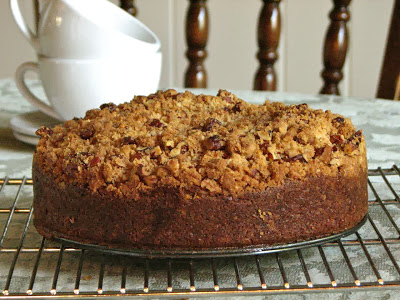
Lighter Carrot Cake

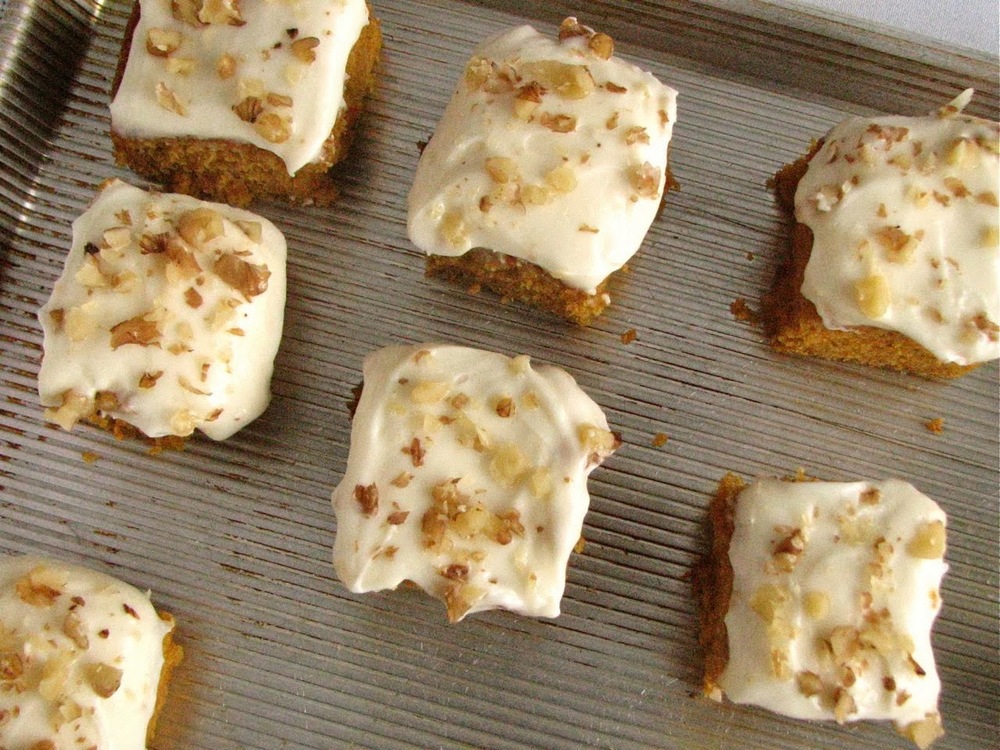
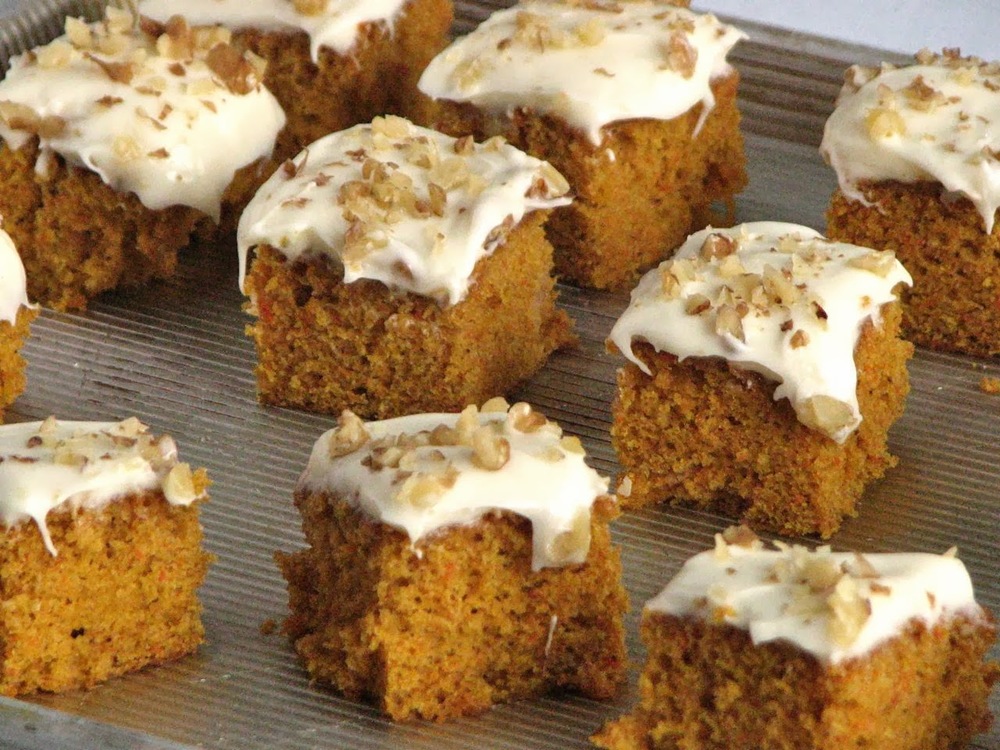
I know Thanksgiving has come and gone, but I have one last recipe to share. This year on Thanksgiving I just felt like baking a carrot cake. I'm not really sure why, but it just sounded good to me. I've never made one before, and it definitley isn't on the top of my list of favorite cakes, but that doesn't at all mean I don't love a good carrot cake, I just like a lot of other cakes a little more! But this year a simple one layer carrot cake with cream cheese frosting and walnuts was calling my name.

I did some searching for a good recipe and ended up going with America's Test Kitchen recipe for lighter carrot cake. Since I don't have a go-to carrot cake recipe yet I figured why not just go with the slightly healthier version since I probably wouldn't notice the difference anyway. And I didn't. There was nothing about this cake that would have made me think that it was trying to be a 'lighter'. It was still delicious, moist and flavorful, slightly spiced and covered with a rich cream cheese frosting. Sprinkled with some toasted, chopped walnuts and cut into bite sized pieces, it was the perfect snack for Thanksgiving night, or any other night of the year!

Even though I did go with the lighter carrot cake, I had to go with the not-so-light cream cheese frosting, the lighter frosting just wasn't going to do it for me. It turned out delicious, as all cream cheese frostings do, you really can't go wrong with cream cheese and butter. I finished the cake off with some chopped, roasted walnuts, the perfect finish.

And with that it really couldn't be much easier. With oil instead of butter, and no need to layer the cake with the frosting it really is a quick and delicious cake. I will keep this one in my repertoire for years to come.

Lighter Carrot Cake

From America's Test Kitchen

Ingredients

  • 2 1/2 cups (12 1/2 ounces) all purpose flour
  • 1 1/4 teaspoon baking powder
  • 1 teaspoon baking soda
  • 1 1/4 teaspoon ground cinnamon
  • 1/2 teaspoon ground nutmeg
  • 1/2 teaspoon salt
  • 1/8 teaspoon ground cloves
  • 3 eggs, room temperature
  • 1 cup (7 ounces) brown sugar
  • 1 cup (7 ounces) granulated sugar
  • 1/2 cup vegetable oil
  • 1 pound carrots (about 6 medium), peeled and grated (about 3 cups)
  • Cream cheese frosting (recipe follows)

Directions

Heat oven to 350 degrees. Grease a 13x9 inch cake pan, then line the bottom with parchment paper. Whisk the flour, baking powder, baking soda, cinnamon, nugget, salt and cloves together in a medium bowl.

Beat the eggs, brown sugar, and granulated sugar together in a large bowl with and electric mixer on medium speed until the mixture turns thick and creamy, 1 to 3 minutes. Reduce the mixer speed to low and slowly beat in the oil until thoroughly combined and emulsified, 30 to 60 seconds.

Sift half the flour mixture over the batter and gently whisk in by hand. Repeat with the remaining flour mixture and continue to whisk the batter gently until most of the lumps are gone - do not overmix. Using a rubber spatula, gently stir in the carrots.

Pour the batter into the prepared pan and smooth the top. Bake until a toothpick inserted into the center of the cake comes out with a few moist crumbs attached, 35 to 40 minutes, rotating the pan halfway through the baking time.

Cool the cake completely in the pan, about 2 hours. Run a knife around the edge of the cake and flip the cake out onto a wire rack. Peel off the parchment paper then flip the cake right side up onto a serving platter. Spread the cream cheese frosting evenly over the top and sides of the cake and serve.

Cream Cheese Frosting

Ingredients

  • 2 (8-ounce) packages cream cheese (or neufchâtel), softened
  • 10 tablespoons butter, softened
  • 2 tablespoons sour cream
  • 1 1/2 teaspoons vanilla extract
  • 1/4 teaspoon table salt
  • 2 cups (8 ounces) powdered sugar

Directions

Beat the cream cheese, butter, sour cream, vanilla and salt together in a large bowl with an electric mixer on medium-high speed until smooth, 2 to 4 minutes.

Reduce the mixer speed to medium-low slowly add the powdered sugar and beat until smooth, 4 to 6 minutes. Increase the mixer speed to medium-high and beat until the frosting is light and fluffy, 4 to 6 minutes.

First Birthday Cupcakes

A couple of weeks ago, my nephew celebrated his first birthday. I can't believe he is a year old already! It went so fast, he is growing up right in front of my eyes. Since I was always the youngest on both sides of my family, I'm not used to having a little person around to watch grow and change. It is amazing to see his development progress from week to week. 

Of course I was ready and hoping I would be able to make him some kind of cake for his birthday, so when my sister-in-law asked if I could make a couple dozen cupcakes for his birthday party I was super excited and raring to go. She requested a batch of chocolate cupcakes with green frosting and a batch of chocolate chip cookie dough cupcakes with blue frosting. I had such a fun time with these, and think they turned out really well, it was a great way to celebrate this special birthday. 

For the party I went with two

cupcake recipes I've made many times already and know will always be great. The always popular chocolate chip cookie dough cupcakes which I changed up this time by coloring the frosting blue. I wasn't quite sure how they would look since they wouldn't be quite as cookie dough-ish with blue frosting on top, but I needn't have worried, they turned out beautifully, and tasted great too! 

The second choice were these ultimate chocolate cupcakes for which I skipped the ganache filling this time (mostly because I didn't have any cream, and didn't feel like going to the store) and they still turned out wonderfully. I made a swiss buttercream to finish them off which I colored bright green. The dark chocolate cupcakes contrasted beautifully with the bright frosting which I topped of with some little round candies. 

My sister in law finished off the cupcakes with these super cute little flags. My mouth was watering the whole party, it can be so difficult to wait for dessert!

The birthday boy got the first cupcake. At first I think he was a little unsure as to what he was supposed to do. It was his first party after all.  

He figured it out in the end though, what a cutie! Happy birthday little guy!

Classic Apple Pie

I haven't always been a big pie fan. In fact, it's only been in the last year that I've really changed my tune and started to really like pies, a lot! (Don't worry cake, you will forever be my first love.) I was never a big fan of soft, warm fruit, and while it is still not on my top 10, when it's encased in a flaky and buttery crust, generously sprinkled with sugar, and baked until golden perfection it's difficult for me not to like. Since I've jumped on the pie band wagon I decided it was time that my Thanksgiving dinner included an apple pie, it just seemed right. No doubts here; this pie was tall and handsome, but more importantly the taste was spot on, the perfect blend of sweet and buttery, tender apples and flaky crust. A wonderful start to my holiday season.

First ever double crusted pie! I was a little nervous, but knew it would work. It baked up beautifully with no worries. I did cover it with foil about halfway through baking because I do not at all like over-baked crusts. I like a light golden brown, not dark and hard. The perfect ending for my delicious Thanksgiving meal.

Classic Apple Pie
Crust adapted from Martha Stewart
Pie Adapted from Williams Sonoma
Ingredients
Crust

  • 2 1/2 cups all-purpose flour
  • 1 teaspoon salt
  • 1 tablespoon sugar
  • 2 sticks (1 cup) unsalted butter, very cold
  • 1/4 to 1/2 cup ice water

Pie

  • 5 pounds apples, or about 14 apples (I used Northern Spy)
  • 1/2 cup brown sugar
  • 1/4 cup white sugar
  • 1/2 teaspoon ground cinnamon
  • 1/4 teaspoon salt
  • 1/4 teaspoon freshly grated nutmeg
  • 4 teaspoons cornstarch
  • 1 tablespoon fresh lemon juice

Directions
For the crust: using a cheese grater, grate the butter into a bowl and place in the freezer for a few minutes to freeze. In a large bowl mix together flour, salt and sugar. Add the frozen butter and quickly mix together. Add in the ice water a little bit at a time just until the dough comes together in a ball. Add as little water as needed, it's okay if the dough is a little shaggy. Split the dough into two pieces and shape into a disc. Wrap each disc in plastic wrap and place in fridge for at least 2 hours.

On a lightly floured work surface, roll out half of the dough into a 12-inch round about 1/8 inch thick. Transfer the dough to a 9-inch deep-dish pie dish and gently press the dough into the bottom and sides of the dish. Trim the edges and refrigerate for 30 minutes.

Roll out the remaining dough disk into a 12-inch round about 1/8 inch thick.  Refrigerate for 30 minutes.

Meanwhile, make the filling: In a large Dutch oven, stir together the apples, brown sugar, granulated sugar, cinnamon, salt, nutmeg and cornstarch. Set over medium heat, cover and cook, stirring occasionally, until the apples are just tender but not mushy, about 20 minutes. Uncover and cook until the liquid has thickened and become glossy, 5 to 7 minutes more. Remove from the heat, stir in the lemon juice and let cool to room temperature, about 30 minutes.

Position a rack in the lower third of an oven, place a baking sheet on the rack and preheat the oven to 400°F.

Transfer the apple filling to the pie shell, and gently invert the top over the pie. Trim the edges flush with the rim of the dish and press the top and bottom crusts together to seal. Brush the entire top crust with egg wash and sprinkle with the granulated sugar. Cut a couple of slits in the dough to allow steam to escape.

Place the pie dish on the preheated baking sheet. Bake at 400 degrees for 20 minutes, then reduce the temperature to 350 degrees and continue baking until the crust is crisp and golden brown, about 40 minutes more, covering the edges with aluminum foil if they become too dark. Transfer the pie to a wire rack and let cool for at least 1 1/2 hours before serving.

Rosemary Onion Focaccia

The idea of focaccia always sounds so appealing to me, a flatbread rich with olive oil and topped with any number of delicious things. It's really like a pizza in disguise, dressed a little differently so you can eat several slices without feeling too guilty. In the past however, I've attempted to make focaccia a couple of different times and have never been very successful at it. It's always been, well, just okay. But I want more than okay, I know it can be so much more than that. With this recipe I've found my stride, I have found a focaccia that is well beyond okay. This bread was soft and light, tender and rich, topped with just a few simple accompaniments. It really was what I've been looking for. I can't wait to play around with different toppings and flavors. With this focaccia as a base I know they will all be great!

This recipe was very simple, and pretty quick as yeasted bread goes. Knead everything together and let it rise for about an hour. I was in a little bit of a hurry and only let it rise for about 45 minutes and it didn't seem to matter at all. Then all you have to do is press it into your pan and let it sit for only about 20 minutes. While it's resting you can get your toppings together. I went simple this time with some thinly sliced onion, rosemary, a sprinkling of pecorino and some sea salt, but there are so many options when it comes to focaccia, you can really do whatever you want. After the 20 minutes rest, just top it off and stick it in the oven. In another 20 minutes you'll have a beautiful golden brown round of rich, savory bread. You really can't go wrong.

Rosemary Onion Focaccia

Adapted From 

Food and Wine

Ingredients

  • 1 1/4 cup all purpose flour
  • 1 1/2 tsp instant yeast
  • 1/2 teaspoon kosher salt
  • 1/2 cup warm water
  • 1/2 teaspoon honey
  • 1/4 cup extra virgin olive oil, divided
  • Thinly sliced sweet onion
  • Roughly chopped rosemary
  • Grated pecorino or parmesan cheese
  • Sea salt

Directions

In the bowl of a stand mixer fitted with the dough hook, combine the flour, yeast and salt. Add the water, honey and 2 tablespoons of the olive oil. Knead the dough on medium speed until smooth and supple, 5-6 minutes. Place the dough in a well oiled bowl, cover with plastic wrap and let rest for about 1 hour. 

Transfer the dough to a well oiled 9-inch cake pan, pressing it down to fit and dimpling it all over with your fingers. Drizzle the dough with 1 tablespoon of olive oil and let rise until puffed, about 20 minutes. Sprinkle the dough to taste with the thinly sliced onion, rosemary, cheese and salt. Drizzle the remaining 1 tablespoon of olive oil over the focaccia. Bake for 18-20 minutes at 450 degrees until golden brown. Transfer to wire rack to cool. 

Oatmeal Chocolate Fudge Bars

Last week my dad asked me if I'd be willing to bake him something for his Bible study on Sunday night. Of course I said yes, any excuse to bake something, especially something I might not normally make for myself. I looked at some recipes I had set aside and settled on these oatmeal fudge bars. A sweet and buttery bar full of oats and covered in a layer of rich and smooth chocolate fudge. They sounded heavenly. They sounded so rich and made such a big batch that I knew this was something I wouldn't' just make for myself on a whim, so this was the perfect opportunity. I never actually asked what everyone at the Bible study thought, but I know what I thought: they are rich and delicious!

These bars were really easy to make, and use pretty basic ingredients. The only ingredient that maybe might be a little more unique is the sweetened condensed milk, but I almost always have at least one can in the pantry. Other then that, you're probably all set! Throw it together and then into the oven. These bars also freeze very well, and they actually taste really good straight from the freezer. They don't get super hard so it's easy enough to eat. But however you store them, they are pretty delicious!

Oatmeal Chocolate Fudge Bars

From: 

The Hub of Our Home

Ingredients

  • 1 Cup Salted Butter, softened
  • 2 Cups Brown Sugar
  • 2 Eggs
  • 2 Teaspoons Vanilla Extract
  • 2 and 1/2 Cups Flour
  • 3 Cups Old Fashioned Rolled Oats
  • 1 Teaspoon Baking Soda
  • 1/2 Teaspoon Salt
  • 1/2 Teaspoon Ground Cinnamon

Fudge Layer:

  • 14 Ounces Canned Sweetened Condensed Milk
  • 2 Cups Semi Sweet Chocolate Chips
  • 2 Tablespoons Salted Butter
  • 1 Teaspoon Vanilla Extract

Directions

In a small mixing bowl whisk together the flour, baking soda, salt, and cinnamon, set aside. In the bowl of your mixer beat the butter and sugar together until light and fluffy(about 2 minutes). Add the eggs one at a time beating for one minute after each egg. Beat in the vanilla. Add the dry ingredients. Mix just until combined. Stir in the oats. 

Set aside 1&1/2 to 2 cups of the mixture. Spread the remaining oatmeal mixture evenly in a greased 9x13 pan. Set aside and prepare the fudge layer. 

 In a medium saucepan add the sweetened condensed milk, chocolate chips, and butter. Heat over low heat, stirring continually, just until the chocolate is melted and the ingredients are combined. Be sure to watch the chocolate carefully. 

 Pour the warm fudge mixture into the 9x13 pan over top the oatmeal layer. Drop small bits of the reserved oatmeal mixture evenly over the fudge layer. Don't try to spread it. Dropping it creates an open lacy pattern allowing the fudge to show through. Bake in a preheated 350 degree oven for 25-30 minutes or until the top is golden brown and the chocolate layer is dull and starting to come away from the sides of the pan. 

 Cool on the counter for 2 hours and then refrigerate for 1 more hour before cutting. Store in an airtight container. 

Olive Oil Cornmeal Cake

This cake actually made its appearance a couple of months ago, but I kind of forgot about it. Not because it wasn't memorable, but because I forgot I took any picture of it. I'm happy to share it today because it brings back some wonderful memories of the end of summer, spending time with friends, and eating outdoors on a beautiful late summer night. This simple cake is an elegant ending to any meal. The flavors of the olive oil and the wine really shine through, but in a subtle and wonderful way. They add such a unique flavor that, combined with the slightly gritty texture of the cornmeal, perfectly finish off a relaxing evening. 

I really enjoyed the wine in this cake, but I'd like to also try it with the orange juice. I didn't end up using the orange zest when I made it, but if I ever make it with orange juice instead of the wine I would definitely add the zest. I also wondered if buttermilk would work instead of the wine or orange juice, just as something different. I might give that a shot some time. But then again, I liked the wine so much, I might not try anything else!

Olive Oil Cornmeal Cake
From Martha Stewart
Ingredients

  • 1/2 cup olive oil
  • 2 eggs
  • 1 cup sugar, plus 1/3 cup for topping
  • 1/2 cup dry white wine (or orange juice)
  • 1 1/4 cup flour
  • 1/2 cup cornmeal
  • 2 teaspoons baking powder
  • 1 teaspoon salt
  • Finely grated zest of 1 orange (optional)

Directions

Preheat oven to 375 degrees. Brush bottom and sides of an 8-inch round cake pan with oil; line bottom with a round of wax or parchment paper, and brush paper with oil.

In a large bowl, whisk together oil, eggs, 1 cup sugar, and wine until smooth. Add flour, cornmeal, baking powder, salt, and orange zest; whisk gently to combine.

Pour batter into prepared pan; sprinkle top evenly with remaining 1/3 cup sugar (topping will be thick). Bake until cake begins to pull away from sides of pan and a tester inserted in center comes out clean, 35 to 40 minutes.

Cool in pan 20 minutes. Run a knife around edge of cake; invert cake gently onto a plate, and remove parchment paper. Reinvert cake onto a rack to cool completely. Serve with orange segments, if desired.

Pumpkin Coffee Cake with Brown Sugar Pecan Streusel

Pumpkin season is here again for the year, and I'm loving it! Fall baking is my absolute favorite, especially fall baking with pumpkin. I really do love all things pumpkin, as long as they're not over spiced. It's a pet peeve of mine when people tell me they don't like pumpkin, because it is so too spicy for them. I like to tell them that pumpkin actually has no spices, it's just a squash, they just don't like what is often put with the pumpkin. I think it's very hard to dislike pumpkin on it's own, it doesn't have much flavor, especially when baked into something sweet and buttery and delicious. Something like this absolutely fantastic coffee cake. Trust me, this one is a keeper.

A moist, delicate pumpkin cake topped with a hearty amount of brown sugar and pecan streusel, and finished with a simple icing. This is one of the best new things I've baked recently, I just loved it, and will probably make it again before the fall is over!

Pumpkin Coffee Cake with Brown Sugar Pecan Streusel
From Williams Sonoma
Ingredients:
For the streusel:

  • 1/3 cup all-purpose flour
  • 1/2 cup firmly packed light brown sugar
  • 1 tsp. ground cinnamon
  • Pinch of kosher salt
  • 6 Tbs. (3/4 stick) cold unsalted butter, cut into small chunks
  • 1 cup chopped pecans, lightly toasted (see note below)

For the batter:

  • 1 1/2 cups all-purpose flour
  • 2 tsp. baking powder
  • 1/2 tsp. baking soda
  • 2 tsp. ground cinnamon
  • 1 tsp. ground ginger
  • 1/4 tsp freshly grated nutmeg
  • 1/2 tsp. kosher salt
  • 8 Tbs. (1 stick) unsalted butter
  • 1 cup firmly packed light brown sugar
  • 2 eggs
  • 1/2 cup pumpkin puree
  • 1/2 cup sour cream

For the glaze:

  • 1/2 cup confectioners’ sugar, sifted
  • 1 tsp. whole milk
  • 1 tsp. vanilla extract

Directions:
Preheat an oven to 350°F. Butter and flour a 9-inch springform pan or a 9-inch cake pan with 3-inch sides.

To make the streusel, in a bowl, combine the flour, brown sugar, cinnamon and salt. Toss in the butter and, using 2 table knives or a pastry cutter, cut it into the dry ingredients until the mixture looks like coarse crumbs. Alternatively, whir the ingredients in a food processor. Stir in the pecans. Set aside.

To make the batter, in a bowl, sift together the flour, baking powder, baking soda, cinnamon, ginger, nutmeg and salt. In the bowl of an electric mixer fitted with the flat beater, beat together the butter and brown sugar on medium-high speed until well combined. Beat in the eggs, one at a time, scraping down the sides of the bowl with a rubber spatula. Add the pumpkin puree and sour cream and mix with the spatula. Stir in the flour mixture. The batter will be quite thick.

Spread half of the batter in the prepared pan. Sprinkle half of the streusel over the batter. Dollop the remaining batter over the streusel and spread the thick batter as best you can. Top with the remaining streusel. Bake until a toothpick inserted into the center of the cake comes out clean, about 50 minutes. Transfer the pan to a wire rack and let cool for about 15 minutes. Remove the sides from the pan and slide the cake onto the rack.

To make the glaze, in a small bowl, whisk together the confectioners’ sugar, milk and vanilla. Drizzle over the top of the cake. Cut into thick wedges and serve. Makes one 9-inch coffee cake

Baker’s note: To toast pecans, preheat an oven to 325°F. Spread the nuts out on a rimmed baking sheet and bake, stirring often, until fragrant and lightly toasted, about 10 minutes.

Chickpea Pot Pie

I found this recipe last fall and the idea stuck with me for a while until I couldn't resist any longer. A potpie with chickpeas instead of chicken intrigued me. Since I love chickpeas I know it just had to be a great idea. I've played around with the recipe just a little bit, tweaking it for my tastes, and while I may make a couple more minor alterations in the future, I had to share this recipe now because I think it's so yummy! Chickpeas, sweet potatoes, onions, carrots and peas, all mixed together in a slightly thickened stock and covered with a healthy layer of cornbread. It's a modern day pot pie, and that's just how I like it.

The only thing I might do differently in the future for this recipe is increase the filling. It's such a good filling, and with the amount of cornbread that's on top, I found myself wanting more. Other than that I don't think I'd change a thing. The filling is so colorful and delicious, and the cornbread is an amazing idea for a topping. So much easier than pie dough! This is a recipe I'll be coming back to again and again.

Chickpea Potpie with Cornbread Crust
Adapted from Eats Well With Others
Ingredients
Veggie Base

  • 2 cups chopped sweet potatoes

  • 1/2 cup chopped carrots

  • 1 tbsp olive oil

  • 1 medium onion, chopped

  • 2 cloves garlic, minced

  • 1/4 white wine

  • 1/4 cup AP flour

  • 2 cups vegetable broth

  • 2 cups cooked chickpeas

  • 3/4 cup frozen baby peas

  • 1 tsp kosher salt

  • cracked pepper

  • dash of Sriracha

Topping

  • 3/4 cup cornmeal

  • 3/4 cup AP flour

  • 1 tbsp baking powder

  • 1 1/2 tbsp sugar

  • 1/2 tsp salt

  • 3/4 cup milk

  • 2 tbsp vegetable oil

  • 1 large egg yolk, slightly beaten

Directions
Boil the potatoes and carrots until tender but not soft and set aside, or alternately, toss with olive oil, salt and pepper and roast at 400° until tender, 20-25 minutes. 

Spray a 2-quart casserole with cooking spray. Preheat oven to 400° if you aren't already using it for the carrots and potatoes. 

For the filling, heat a large saucepan until hot. Add the oil and onions. Saute onions until they are soft, about 5 minutes. Add the garlic and sauté for about 30 seconds more. Add the wine and cook until it has mostly evaporated. Sprinkle in the 1/4 cup flour and cook for about 1 minute, until no longer raw. Slowly pour in the vegetable stock whisking well with a wire whisk. Still using the whisk, cook the mixture over medium heat until thickened and bubbly, about 2 to 3 minutes. Add the chickpeas, peas, cooked potatoes and carrots, salt, pepper to taste, and Sriracha. Cook on medium heat until the mixture is heated through, about 2 to 3 minutes. turn into the prepared casserole dish, spreading evenly. 

For the crust, in a bowl combine the cornmeal, 3/4 cup flour, baking powder, sugar, and salt. In a small bowl, combine the milk, oil and egg yolk. Add to the dry ingredients and mix until uniform but a bit lumpy. Spoon the batter evenly over the filling. It might not look like a lot, but it will poof up nicely while cooking and cover all the filling.

Bake until the top is golden brown, about 22 to 25 minutes. Let cool 5-10 minutes before digging in.