Simple Buttermilk Cornbread

Yesterday was an absolutely amazing day here in west Michigan, almost 60 degrees and sunny in January - what?? Crazy, but simply wonderful! It felt like late spring which I am a big fan of. I took a walk with a light jacket and sunglasses and loved every minute of it! However, this is definitely NOT normal for late January and today it's back to reality. Wet, cloudy and cold. Sigh. 

One of my favorite parts of winter are all the stews and soups and braises that are the perfect thing for cold, damp days such as today. I think my favorite of all is a thick and jammy chili with ground beef and beans, peppers and spices and lots of tomato. Mmmm. I don't like my chili thin and soupy, I want it nice and thick, sweet and spicy and covered in melted cheddar cheese! And what is chili without cornbread? Sad is what it is. There is no question in my book that when chili is on the menu, cornbread is going in the oven.

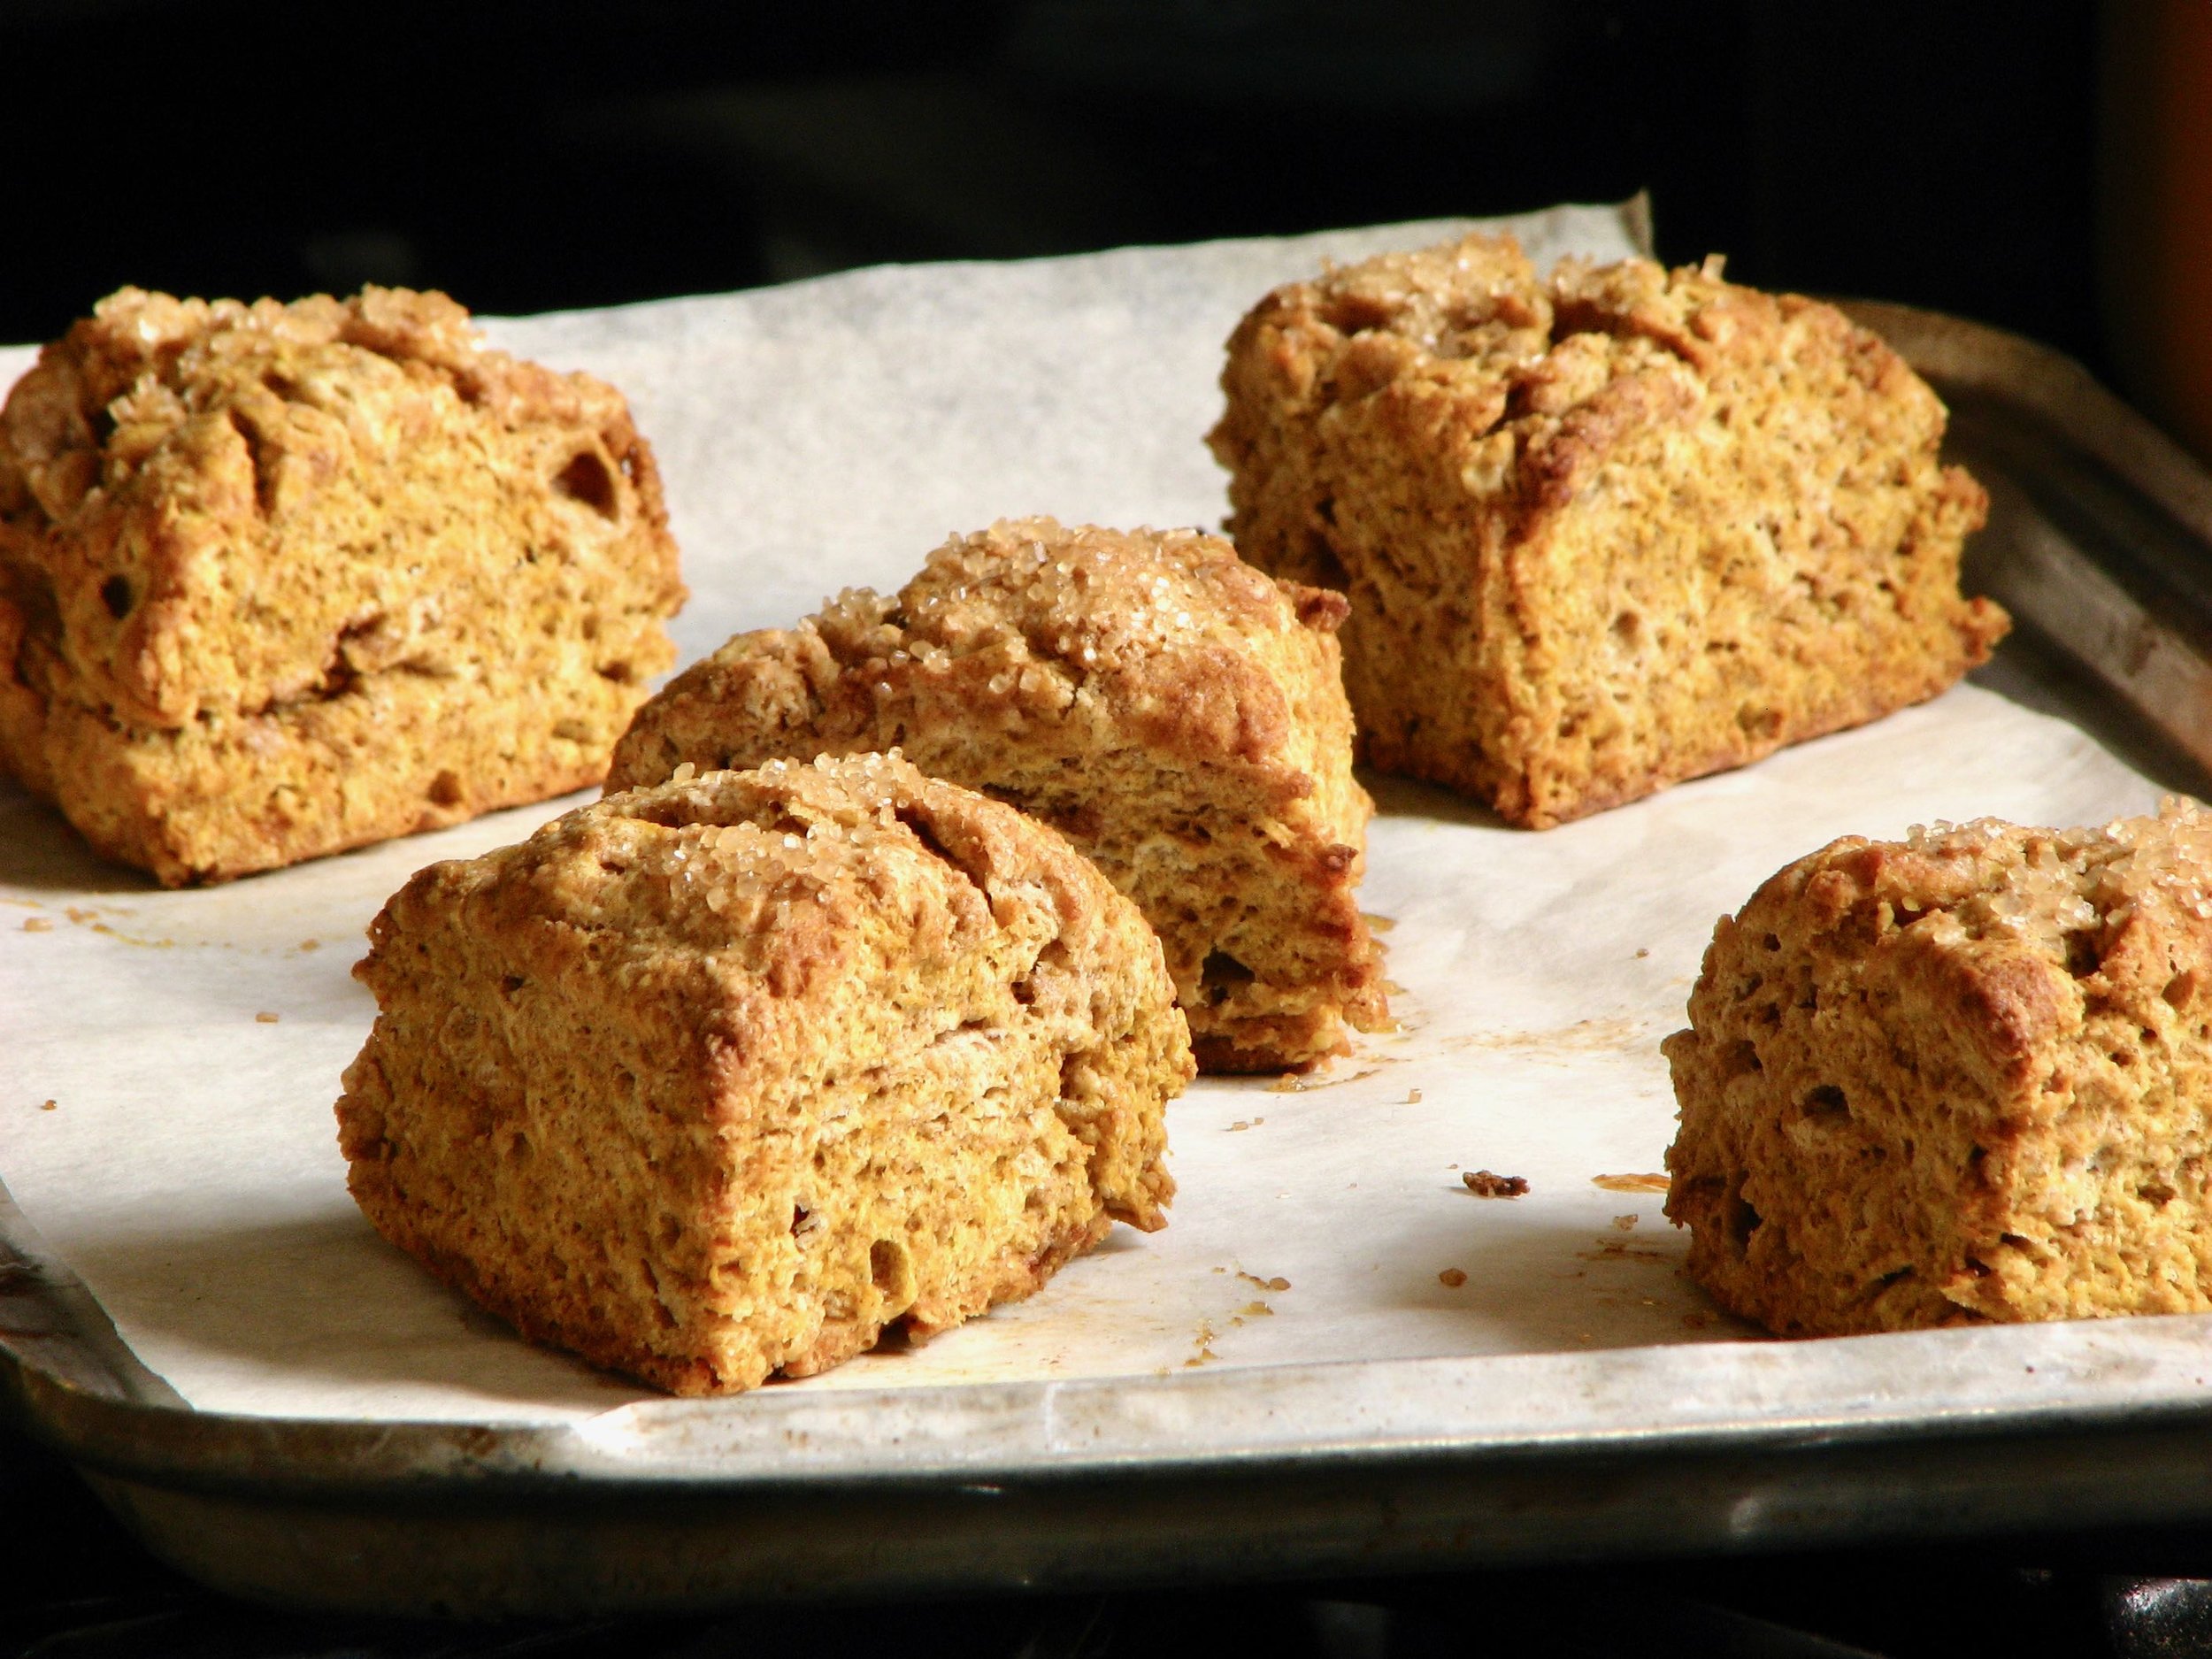
I have several cornbread recipes on this site already and I love them all. Recently however I was looking for a very simple cornbread recipe that wasn't quite as rich and sweet as most of these other recipes. Just a good, basic cornbread that was full of corn flavor and more rustic than some. More on the "Southern cornbread" side of things. This recipe that I adapted from Bon Appetit was perfect. A little richness from the buttermilk and egg with a little bit of butter, and just a hint of sweetness from one tablespoon of brown sugar. This is a chili lover's cornbread for sure. 

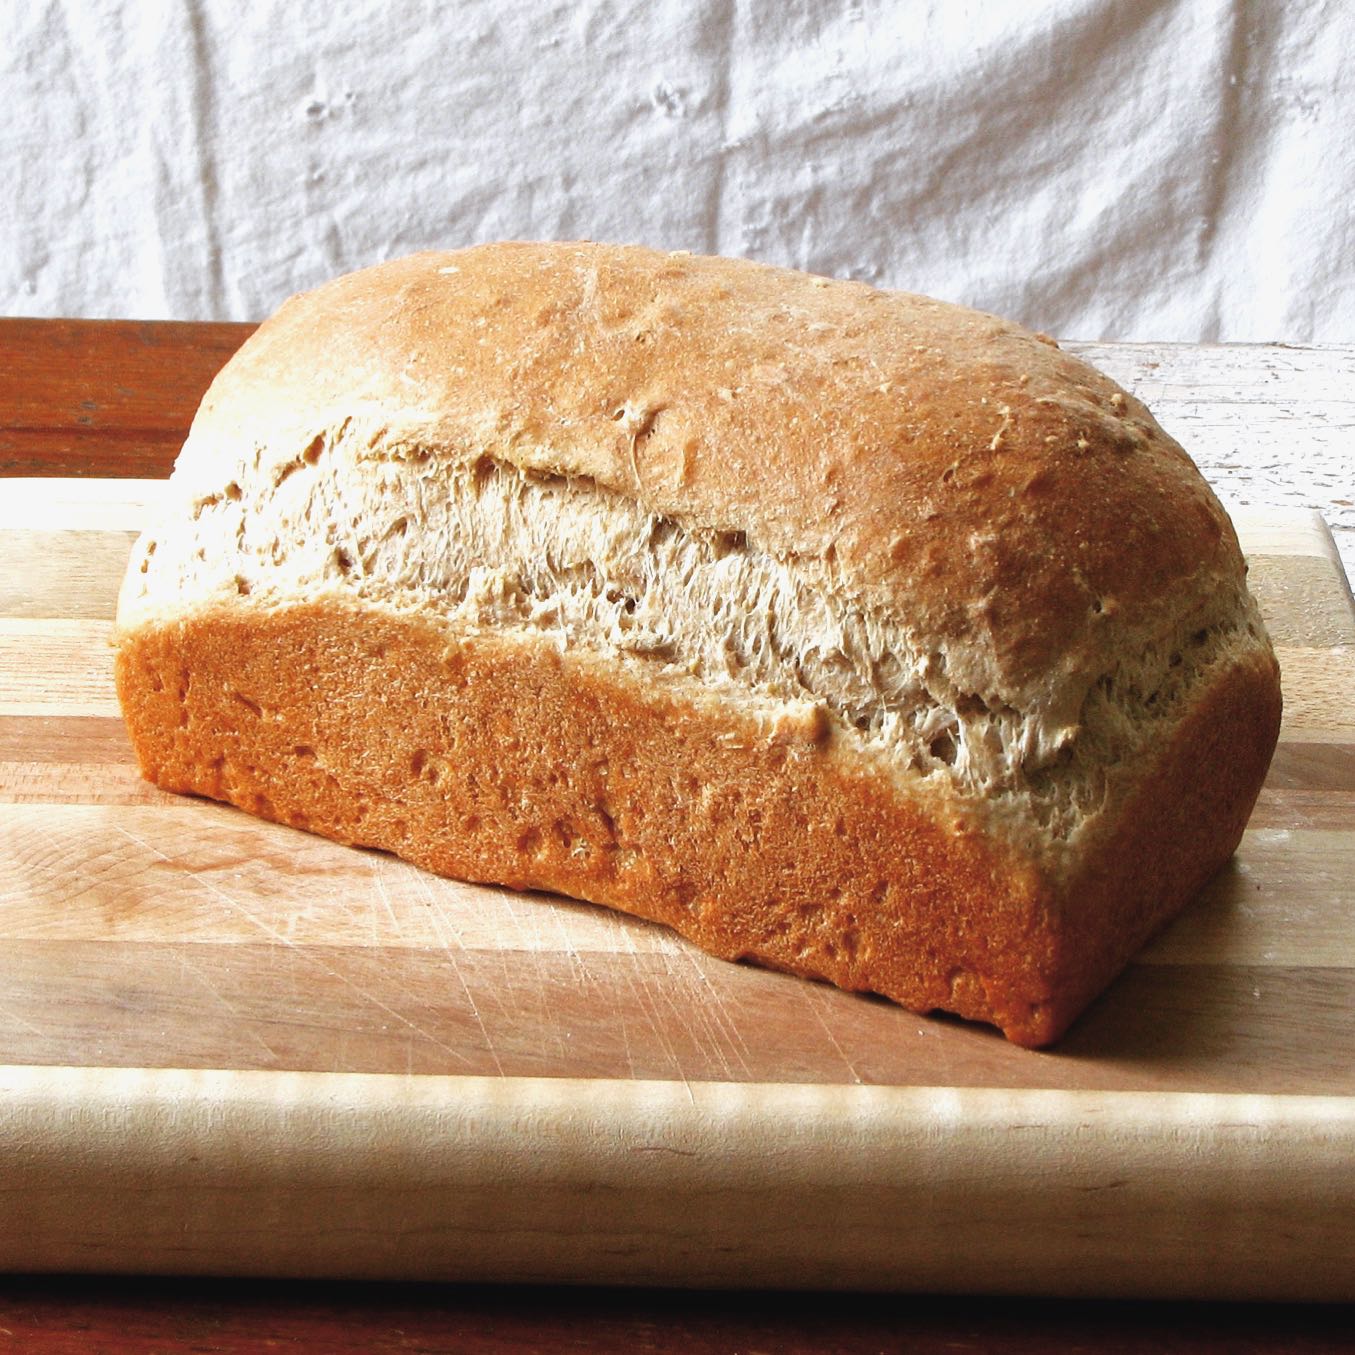
I adapted the original recipe to fit a 6-inch cake pan. This is the perfect size for me when I'm baking for myself, but if you want to use a standard pan check out the original recipe. I used locally ground coarse cornmeal in my bread which is sweet and slightly crunchy and delicious. I highly recommend seeking out some good quality cornmeal, it's worth the effort. Now head into the kitchen and get that chili started, you have cornbread to make!


Simple Buttermilk Cornbread
Adapted from Bon Appetit
Ingredients

  • 1 1/2 tablespoons unsalted butter, melted and cooled
  • 2/3 cup (80 grams) all-purpose flour
  • 2/3 cup (105 grams) stone-ground cornmeal
  • 1 tablespoons (12 grams) brown sugar
  • 1 1/2 teaspoons baking powder
  • 1/2 teaspoon kosher salt
  • 3/8 teaspoon baking soda
  • 1 large egg, beaten 
  • 3/4 cup buttermilk

Directions
Preheat oven to 350°. Butter 6-inch round pan. Whisk flour, cornmeal, sugar, baking powder, salt, and baking soda in a large bowl. Whisk together egg, and buttermilk in a medium bowl. Whisk egg mixture into dry ingredients until just combined (batter will be slightly lumpy). Mix in butter.

Scrape batter into baking dish and bake cornbread until a tester inserted into the center comes out clean, 25–30 minutes.

Sourdough English Muffins

Growing up I loved Thomas' English Muffins. Who can resist those nooks and crannies - so good! I loved spread butter on a hot, freshly toasted muffin and watch it melt into little pools of goodness. More recently I decided that it was time for me to create my own version, a better version; fresher, cleaner ingredients, more flavor. You get the idea. I wanted to make a sourdough version so I could use my sourdough starter, and to add even more flavor. After a couple attempts I think I've nailed it. These sourdough English muffins are amazing; super soft and delicious. No, they don't have quite as many nooks and crannies as the Thomas', but honestly I don't miss them. These are just too good, fresh, soft, light and airy. Perfect for a breakfast sandwich topped with eggs, meat and cheese, or a little simpler with just a good pat of butter, some peanut butter, or some nice melty cheese. I'm never going back to the store-bought version again.

These little muffins are really simple to make, but they do take a little time with the shaping of the individual buns, the rising, the grilling and the final baking. I don't have enough griddle space to grill them all at once so it takes a couple batches. Trust me, it's worth the time. You can make these guys as big or small as you want. I like my English muffins nice and thick so that's how I shape them, but you can also shape them a little thinner and wider in diameter depending on your preference and what you want to do with them. This recipe does not use English muffin rings. I didn't have any, so I looked for a recipe for a thicker dough so that I didn't have to go buy a new tool. I'm guessing that with a wetter dough, and the help of these rings you would probably have more luck creating those yummy nooks and crannies, but honestly I don't even care. These will work just perfectly for me!


Sourdough English Muffins
Adapted from King Arthur Flour
Ingredients

  • 1 tablespoon (12 grams) brown sugar
  • 3/4 cup (6 ounces) warm water
  • 1/4 cup (2 ounces) whole milk
  • 1 1/4 teaspoons instant yeast
  • 1/2 cup (120 grams) sourdough starter, fed or unfed; fed will give a more vigorous rise
  • 2 1/2 cups (300 grams) all purpose flour
  • 1 cup (120 grams) whole wheat flour
  • 2 tablespoons butter
  • 1 1/2 teaspoons salt
  • 1/8 teaspoon citric acid, optional; for enhanced sour flavor
  • Cornmeal, for coating

Directions
Combine all of the dough ingredients, except the cornmeal, in a large bowl. Mix and knead — by hand, electric mixer, or bread machine — to form a smooth dough. The dough should be soft and elastic, but not particularly sticky; add additional flour if necessary.

Place the dough in a lightly greased bowl, cover, and set it aside to rise for about 1 1/2 hours, until it's noticeably puffy. Alternatively, for most pronounced sour flavor, cover the bowl, and immediately place it in the refrigerator (without rising first). Let the dough chill for 24 hours; this will develop its flavor.

Gently deflate the dough, turn it out onto a lightly floured work surface, cover it, and let it sit for a few minutes, to relax the gluten. Divide the dough into 12 equal sized pieces. Shape each piece into a round ball, then flatten each ball into a 2 inch round. 

Place the rounds, evenly spaced, onto cornmeal- or semolina-sprinkled baking sheets. Sprinkle them with additional cornmeal or semolina, cover with plastic wrap, and let them rise until light and puffy, about 45 to 60 minutes. If the dough has been refrigerated overnight, the rise time will closer to 2 hours.

Carefully transfer the rounds (as many as a time that will fit without crowding) right-side up to a large electric griddle preheated to 350°F, or to an un-greased frying pan that has been preheated over medium-low heat.

Cook the muffins for about 6-8 minutes on each side. The edges may feel a bit soft. Transfer the muffins to a baking sheet and place in a preheated 350 degree oven for about 8-10 minutes to finish cooking through. 

Yield: 12 English muffins.

Coconut Cocoa Nib Bites

If you're looking for a quick and healthy snack, look no further. There are so many recipes out there for snack bites or energy balls or whatever you want to call them. These coconut cocoa nib bites are just one iteration, and a tasty one at that! I love the sweetness from the dates mixed with the bitter funk of the cocoa nibs and the chew from the coconut. Everything goes into the food processor and processed until it all comes together. Then just shape into balls and store in the fridge or freezer. Pop one out when you need a little snack. Sweet and hearty and something you can feel good about eating!

As with most recipes like this, these bites are endlessly versatile. You can use your favorite mix ins and flavorings. No almonds? Try peanuts. No dates? I think prunes would work quite well! No cocoa nibs, try some finely chopped chocolate.  Whatever sounds good to you can probably end up working out wonderfully!


Coconut Cocoa Nib Bites
Adapted from OH, Babycakes
Ingredients

  • 3 ounces coconut
  • 1/2 cup (2 1/4 ounces) raw almonds
  • Pinch salt
  • 8 medjool dates or 15-18 deglet noor dates (approximately 4 ounces)
  • 3 tablespoons water
  • 2-4 tablespoons (1/2 ounce) cocoa nibs
  • 3/4 ounce sunflower seeds

Directions
In a food processor fitted with the S blade, blend the coconut, almonds, and salt into a fine meal. Add the dates and pulse for 30-45 seconds. Add the water; pulse until combined. 

Transfer the mixture to a small mixing bowl, stir in the sunflower seeds and cacao nibs. Form the mixture into small, bite sized balls. Freeze for 30 minutes on a cookie sheet, then transfer to an air tight container or bag and store in the freezer.

Christmas Cookies 2016

Although they were a little late this year, I made sure to decorate my yearly batch of Christmas cookies. I whipped these together with my sister, and we went with a couple simple designs that would be simple to create; some cute little snowmen, and some festive gloves. I wanted to do mittens, but we didn't have a mitten cookie cutter, just a glove, so that's the route we went. Decorating Christmas cookies has become one of my favorite Christmas traditions so I was glad that we were able to find the time to do it again this year!


I had a great time the rest of my Christmas; going to the IMAX with my whole family to see Star Wars on the
big screen was tons of fun. 


And our family Christmas party is one of my favorite times of the year. We've made it a tradition to have homemade pizza for our get together. It's fun, casual and delicious. We've done personal pizzas in the past, but this year I just made two big pizzas that we all shared. They turned out delicious!


Try out this delicious homemade French onion dip from How Sweet Eats


Merry Christmas and a blessed New Year to everyone out there! I hope your Christmas season was as wonderful as mine!

Sun-Dried Tomato and Pesto Frittata

Merry Christmas to all!! I'm writing this from the hospital where I'm working the weekend. Yay. ;) I wanted to pick something yummy to share on this Christmas while I had a few minutes. I figured this frittata would be just the thing. It's full of pretty Christmas colors from the green of the pesto, to the red of the tomatoes. This visually festive frittata is be the perfect thing for your Christmas brunch!

For to us a child is born, to us a son is given,
and the government will be on his shoulders.
And he will be called Wonderful Counselor,
Mighty God, Everlasting Father, Prince of Peace.

Isaiah 9:6

Frittatas such as this are perfect for make ahead breakfasts, either on a sandwich, or just eaten on their own. You can eat them cold, warm or room temperature. You can also freeze them pretty well too. They tend to get just a bit watery when they thaw, but overall a nice option!


Sun-dried Tomato and Pesto Frittata
I
ngredients

  • 6 eggs
  • 1/4 cup whole milk
  • 1/4 teaspoon Kosher salt
  • Black pepper
  • 1-2 tablespoons basil pesto
  • 8-10 sun-dried tomatoes, chopped roughly
  • Mozzarella or ricotta cheese

Directions
Preheat the oven to 375 degrees. Line a square 9x9-inch baking dish (or 10x7-inch rectangular baking dish which is what I used) with parchment paper and lightly spray with oil. Set aside. 

Whisk together the eggs, milk, salt and pepper. Transfer to prepared baking dish. Evenly spoon the pesto over the eggs. Sprinkle the chopped tomatoes and the cheese over the eggs evenly. 

Transfer baking dish to oven and bake for 20-25 minutes, until just set in the center. Can eat hot, warm, or room temperature. 

Afternoon Sandwich Bread

I've been quite busy over the last couple of weeks, I'm on my OB rotation right now which has been really good, but doesn't leave me a lot of free time. This means I don't get to spend as much time as I usually like to in the kitchen, making dinner and prepping lunch for the next day. For weeks such as these it's good to have a few things on hand that make it easy to throw together a delicious meal in a short time. Recently I've been really into making sandwiches for dinner. I  still have some leftover Thanksgiving turkey in the freezer (yes I do!), and some really good cheese hanging out in the fridge. Add a few additional condiments a few slices of good, homemade bread and dinner is served. 

This has been my go-to bread for the past few weeks. I've made 3 or 4 loaves recently and have been loving it. It's soft, tender and delicious. It's also really quick to make. There are times when I love spending 2 or 3 days make a complext loaf of bread with a long, slow rise. But often I don't have the time to spend doing that. This bread is super fast, yet still really really good. I can start making it around noon, and be pulling freshly baked bread out of the oven by 5! On a tight schedule, that is the way to do it!

The first time I made a version of this bread I made it pretty much as originally written, adding in a bit of whole wheat flour because that's how I roll. It turned out great. The next time however, I had some sourdough starter that needed to be used so I adjusted the recipe to include some of this starter. My sourdough version was also wonderful, and helped me use up my starter - a win-win situation! 


Afternoon Sandwich Bread
Adapted from Alexandra Cooks
Ingredients

  • 180 grams all purpose flour
  • 140 grams whole wheat flour
  • 1 1/4 teaspoons instant yeast
  • 1 1/2 teaspoons salt
  • 110 grams warm water
  • 56 grams milk
  • 1 tablespoon (21 grams) honey
  • 1 tablespoon butter or olive oil
  • 120 grams sourdough starter
  • 2-4 tablespoons mixed nuts/seeds/grains (optional): for this loaf I used a mix of coarse cornmeal, sunflower seeds, steel cut oats, and buckwheat groats, but use whatever you have on hand, poppy seeds, sesame seeds, millet, quinoa, etc. 

Directions
In the bowl of your stand mixer mix together the flours, yeast and salt. Add the water, milk, honey olive oil or butter, and starter.  

Using the dough hook, knead the dough until it begins pulling away from the sides of the bowl and clings to the hook, 6-8 minutes total.  Near the end of kneading, add in the mixed nuts/seeds/grains and continue kneading until evenly incorporated. 

Place the dough in a greased bowl, turn it over to coat all sides, and cover the bowl. Let it rise in a draft-free place until doubled, 1 to 2 hours. Turn the dough out onto the counter and shape into a loaf. Place dough in well-greased 8 1/2″ x 4 1/2″ loaf pans. Let rise until the dough domes an inch above the rim of the pan, another hour or so.

After the dough has been rising for 30 minutes, preheat the oven to 350°F. When the loaves are sufficiently risen, bake for 30 to 35 minutes, or until nicely browned. Remove from the oven and tip the bread out of the pan. Place on a rack to cool completely before slicing.

Thanksgiving 2016

Thanksgiving is over once again. It's now December and as I sit and type this the snow is falling outside, beautiful yet I'm not ready. I don't want to have to think about scraping my ice off of my windshield in the early morning, or trudging through piles of snow. But today I'm going to look back, not ahead. Back to last week Thursday. Thanksgiving 2016. This year I was even more thankful to be able to celebrate the day with my family because of my crazy work schedule. I was in the middle of an (almost) 28 day stretch of work, so when I found out that I actually did get Thanksgiving day off I was incredibly excited! That one day was very much needed. 

It was a pretty quiet holiday this year; just my immediate family went over to my Grandparents place for the big meal, only 9 of us. Since I didn't know in advance exactly how many people would be there, I went big an ordered a large turkey just in case. Well, it was quite a bit bigger than we needed, but that was okay. Plenty of leftovers is not a bad problem. 


I brought a wine from my favorite wine shop to Thanksgiving this year. It was recommended by one of the store employees and I enjoyed it quite a bit! A Spanish wine, Bodegas Juan Gil 2013 100th anniversary bottle. A commemorative  bottle blended and bottled to mark the 100th anniversary of the founding of the Juan Gil winery. A blend of 50% Mourvedre, 25% Cabernet Sauvignon, and 25% Syrah. Grandpa approved! 


The week following Thanksgiving brought my family and me something, or should I say someone, else to be thankful for. My sister-in-law gave birth to her and my brother's second child, a little girl they names Piper. She's beautiful and perfect. I'm already in love. I can't wait to get to know her in the months and years to come! 


Classic Pumpkin Scones

So, I know I posted a pumpkin scone recipe just a few weeks ago, but I couldn't resist posting another one. Since it's almost the end of November (which I consider the unofficial pumpkin-baked-good month) I had to share this recipe before the month is over. I've made quite a few different pumpkin scone recipes in the past which have all been good, but when I made this one last week I knew I had the winner! I think this is probably the best one of the bunch. It's a classic scone, buttery and tender, with the addition of a little pumpkin and scented with warming autumn spices. I was planning on adding some chocolate or nuts to the dough, but I realized when they were all cut and on the baking sheet that I had forgotten to add anything at all. But I needn't have feared, they turned out amazingly! Everything I wish for in a scone. Whether you keep theses scones plain, or add your favorite mix-ins, you won't be disappointed, I promise! 

Yum!! So tender and delicious! These scones did not turn out tough like some pumpkin scones do. I think it's key to work the butter evenly into the dough, not leaving the pieces too big so the butter just melts out. And also be very careful not to add too much liquid. I've made this mistake in the past and it leads to a tough finished product. You want just enough of the liquid to pull it all together, and not any more. I usually don't add all the liquid right away at the beginning, instead adding it a little bit at a time until all the dough is moistened and just sticks together. Stop at this point and start shaping. This will help that end product be a real winner! Some chocolate, walnuts, pecans, or cranberries would all be fabulous. Or just keep them plain and simple, and enjoy those warm and buttery spices.


Classic Pumpkin Scones
Adapted from Vanilla and Bean
Ingredients

  • 1/2 stick butter
  • 1 cup (120 grams) all purpose flour
  • 1 tablespoon cornstarch
  • 2 tablespoons brown sugar
  • 1/4 teaspoon cinnamon
  • 1/8 teaspoon cardamom
  • 1/8 teaspoon ginger
  • 1/8 teaspoon allspice
  • 1/2 teaspoon baking powder
  • 1/4 teaspoon baking soda
  • 1/8 teaspoon salt
  • 2-4 tablespoons half-and-half
  • 1/4 cup (60 grams) pumpkin
  • 1 teaspoon vanilla

Directions
Line a sheet pan with parchment paper. Cut the cold butter into 1/4" cubes and place in the freezer while prepping the other ingredients.

Sift the flour, corn starch, brown sugar, spices, baking powder, baking soda, and salt into a large mixing bowl.

Add the cold butter to the sifted ingredients. Use a pastry cutter to cut in the butter into the pastry until evenly incorporated. The butter should be small, about pea sized, evenly coated, and distributed in the flour.

In a separate bowl, mix 2 tablespoons of the half and half, pumpkin puree and vanilla and pour into the flour mixture. Gently stir the mixture until the flour is just moistened. The dough will be shaggy and seem dry. Add more half and half very slowly as needed for the dough to just hold together. Do not add too much liquid or the scones will turn out flat and tough, you want to add just enough so that the dough barely holds together. 

Dump the contents out of the bowl onto a flour dusted work surface and shape into a circle approximately 3/4-1 inch thick, depending on your preference. Cut the circle into 4-6 wedges. Place scones on the parchment lined sheet pan, cover and place in the fridge for 20 minutes. (At this point, the scones can be held in the fridge overnight for a quick bake in the morning. Just make sure they are wrapped tightly).

Preheat oven to 425F while the scones are resting in the fridge.

Before baking, sprinkle the coarse sugar evenly over the top of each scone if desired, using a little water to help it stick if needed. Bake for 18-20 minutes or until golden. Enjoy warm or at room temperature.