Warm Brown Rice, Sweet Potato and Roasted Cabbage Salad with Tahini Yogurt Dressing

This is one of those meals that I wasn't really planning on being anything extra special or turning out as well as it did. That is one of the things I love so much about cooking, coming up with new combinations that surprise me with how good they are. Taking a couple of ingredients that I have never really put together and creating a whole new dish out of them that just works, at least for me anyways!

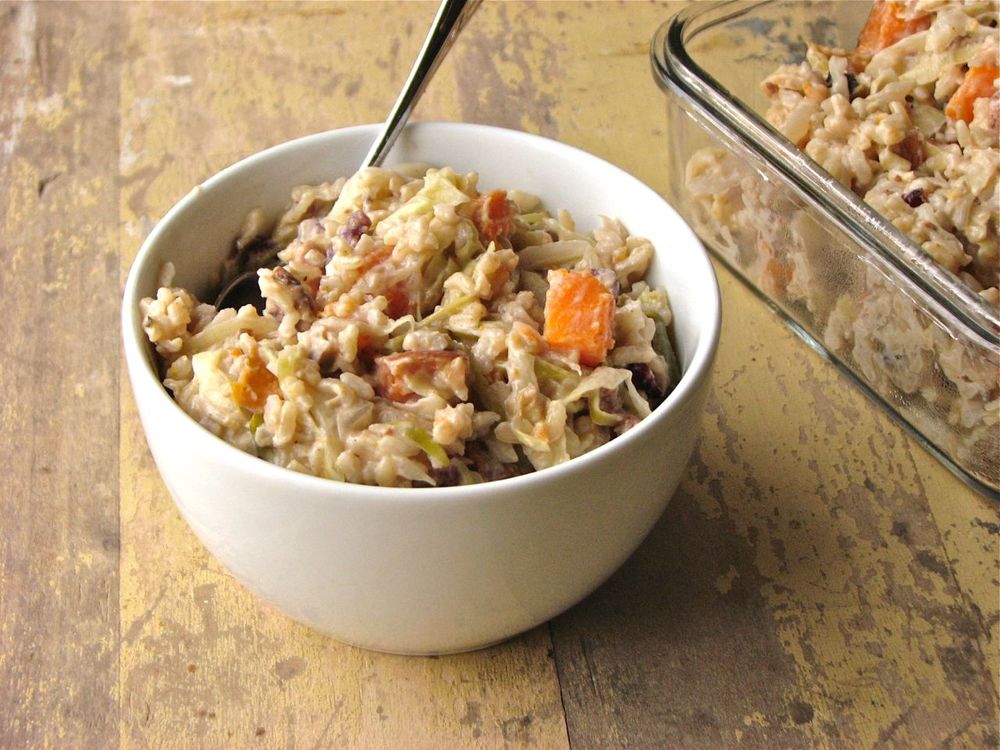
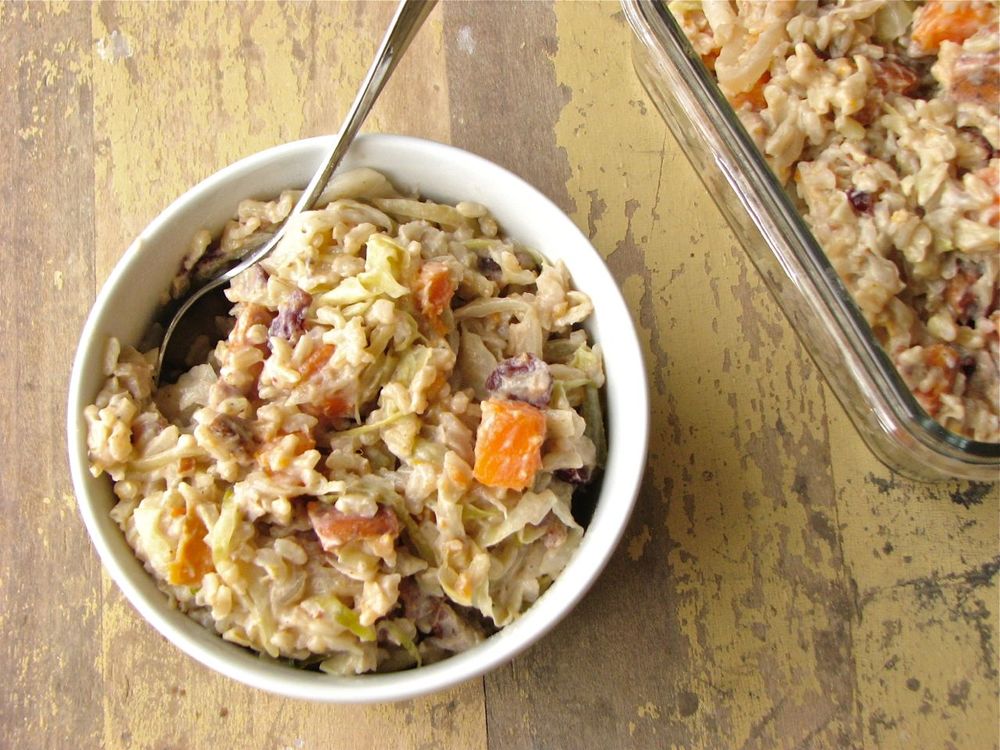
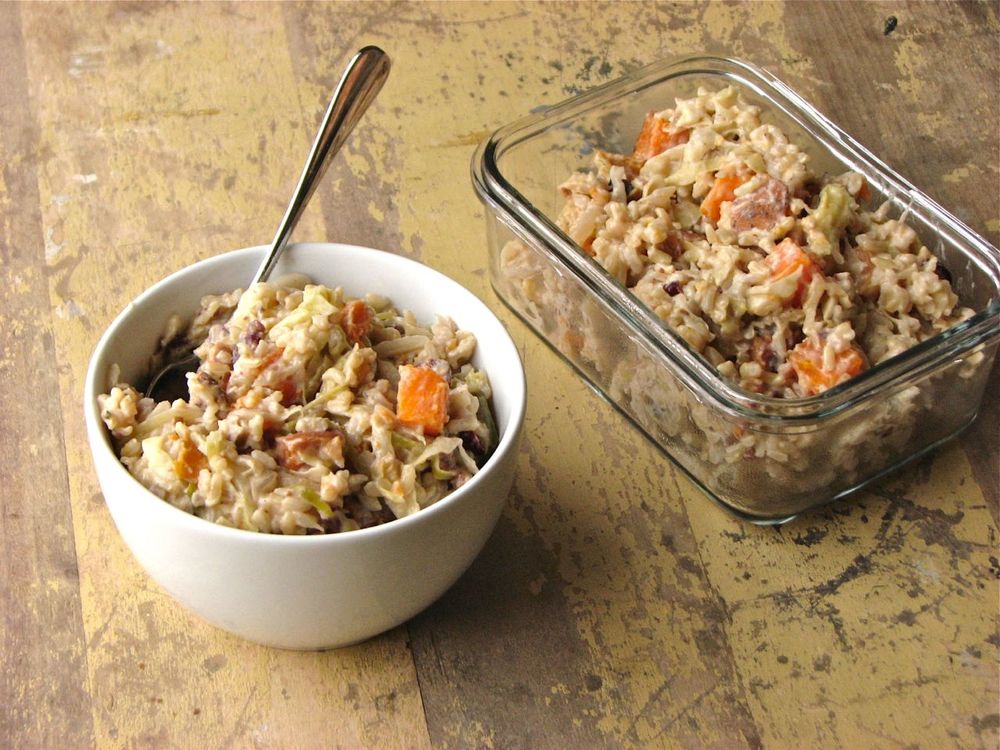
The other night I just happened to have a few leftovers and random ingredients hanging out in my fridge and thought I better use them up or freeze them before they went bad. I had a general idea about what I was going to do with them, but it sort of evolved as I went along and turned into this wonderfully warm and filling salad, perfect on a rainy and chilly spring night. Sweet and creamy baked sweet potato combined with chewy brown rice, and roasted cabbage, topped with pecans for nuttiness and some dried cranberries for sweetness. A quick dressing of tahini and yogurt finishes the whole thing off and brings it all together. 

I decided to use zaatar for flavoring this salad. I've really been liking zaatar recently. If you don't know what zaatar is, it is a really nice mixture of dried herbs (dried thyme mostly I think), sesame seeds and sumac that is used in the Middle East. If you haven't tried it before I highly recommend it. But this is not a recipe that is set in stone so if you don't have any zaatar go ahead and use something else, you're favorite herbs or spices, whatever you have on hand. I also thought this would be good with a Mexican twist, using chili powder and cumin and throwing in some fresh cilantro, yum! Switching out different dried fruits and different nuts would also be be fun to play with. Cooking is just a great way to let your imagination go wild, so go ahead and have some fun!

Warm Brown Rice, Sweet Potato and Roasted Cabbage Salad with Tahini Yogurt Dressing

Ingredients 

  • 1 medium sweet potato
  • 1/4 head cabbage, sliced thin
  • 1/2 medium onion, sliced thin
  • 1-2 cloves garlic, minced
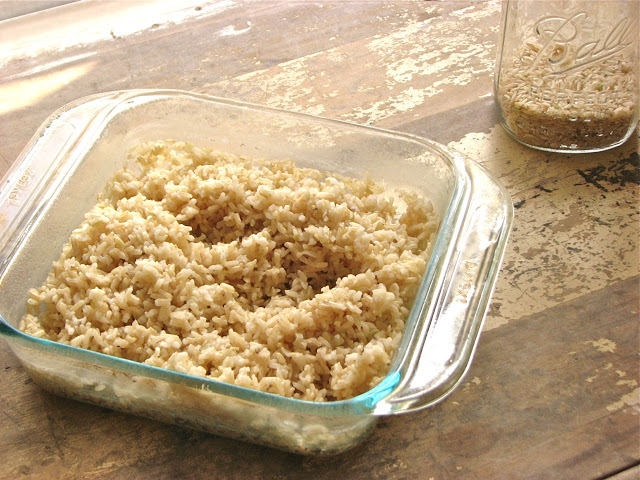
  • 1/2 cup brown rice (or 1-1 1/2 cups cooked brown rice)
  • 2 tablespoons Zaatar spice mix
  • Cayenne pepper, to taste
  • Plain yogurt
  • Tahini

Directions

Heat oven to 375 degrees. Place sweet potato on a baking sheet and baked until tender, 1 hour to 1 hour 15 minutes, depending on the size of the sweet potato. Set aside until cool enough to handle. 

Thinly slice the cabbage. toss with a little olive oil and some salt. Place on a baking sheet and broil until starting to wilt and char, stirring occasionally to evenly cook. This can take anywhere from 10-30 minutes depending on how charred you like your cabbage, and how hot your oven gets. 

While cooking the potato and cabbage, sauté sliced onions in a pan over medium to low heat until very soft and tender. When onions are caramelized to your liking, add the garlic and cook until fragrant. 

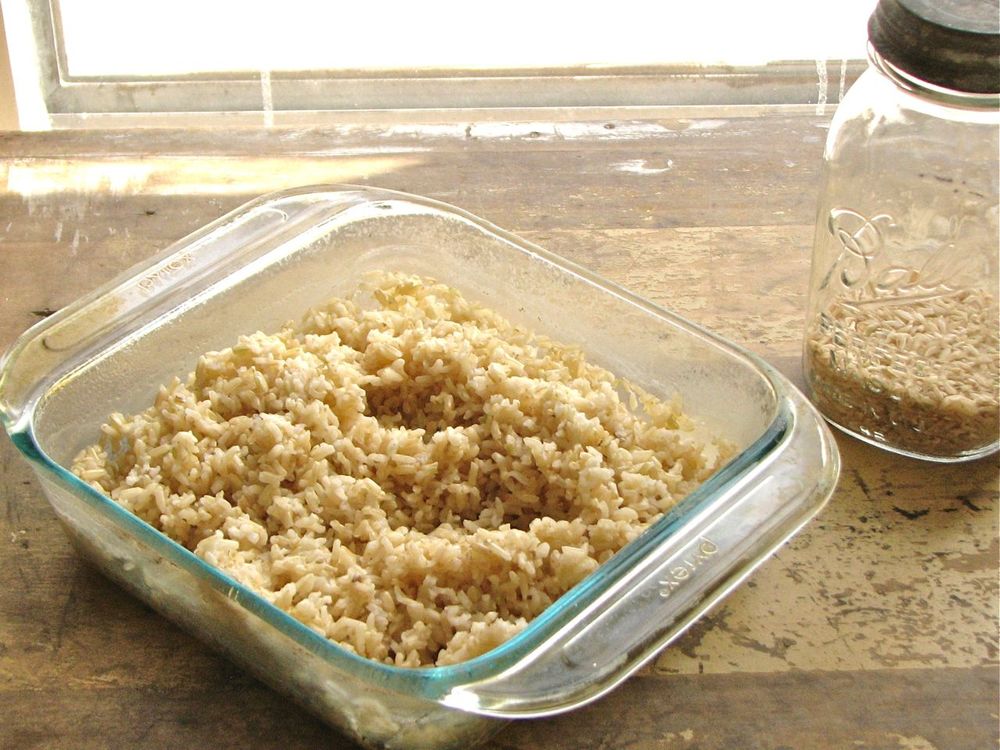
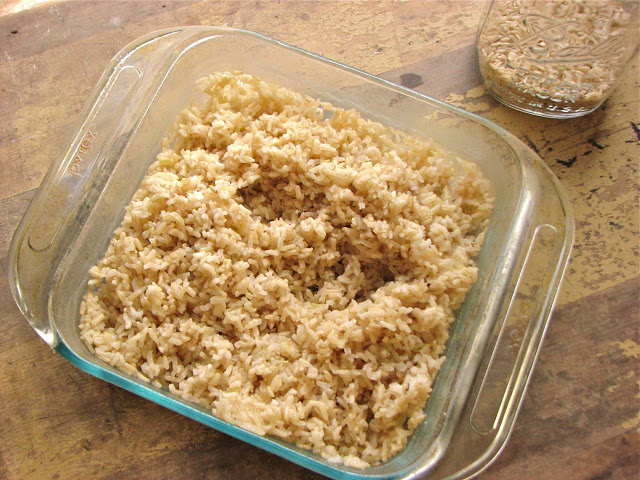
Cook the brown rice according to package instructions. Or even better, if you have some leftover rice use that in instead. Add the cabbage and brown rice to the onions and garlic mixture. 

Cut the cooled sweet potato into bite sized chunks. Add to the sauté pan along with the zaatar and cayenne. Give the whole thing a nice stir, adding some water to the pan if needed. Drizzle tahini over the whole mixture to taste and add a couple spoonfuls of yogurt. Stir again to combine well. Taste and season with salt if needed. 

Spoon salad into bowls and top with pecans and dried cranberries. 

S'mores Cupcakes

April 1 is a special day in my family. We get to celebrate not just one, but two birthdays! My cousin Bailey and my grandpa get to share their special day with each other. In honor of their birthday's, Bailey invited us all over for a "112th birthday party" this past Sunday. Since my favorite part about birthday celebrations is the cake, I offered to make some cupcakes to bring along. In my opinion you cannot have a birthday party without cake, it just isn't right. 

For this occasion I had a few more restraints than normal. Dairy products don't agree well with Bailey so the only cake options I had were dairy free ones. This can be a challenge for me; I am partial to good old butter cakes piled high with sweet and fluffy buttercream, neither of which were an option for this party. I toyed around with a couple of different ideas before having that aha moment. Early on I had decided that a chocolate cupcake made with cocoa powder would work really well for the base. Cocoa is dairy free, and although I know you can find dairy free chocolate out there, I just wasn't going to get around to buying any in time. 

What was really stumping me was the frosting. I am not a fan of using butter substitutes, I just don't think they taste good. Even the really nice brands without trans fats and all that other junk don't taste like butter. I like butter, and there really is no replacement in my book. I toyed with the idea of using coconut cream but I'm not a huge coconut fan and I'd never tried it before so didn't know how it would work. Then I came across a recipe for marshmallow frosting, basically just a meringue, and it all came together. Marshmallow frosting on a chocolate cake, only one thing is missing.... graham crackers! Who can resist a good old s'more, especially in cupcake form? The perfect dairy free cupcake to celebrate a couple of extra special people. 

This cupcake recipe is a cinch to make, all you need is one bowl and you are good to go. The recipe said it would make 1 dozen, but I always like to make a few mini cupcakes too as testers and it worked out great. I managed to get 1 dozen regular cupcakes and 6 minis.

As for the frosting; I'd never made marshmallow frosting before, but I have made marshmallows, and it was pretty much the same thing, just without the gelatin. Pretty easy to whip together, but incredibly sticky! I thought the combination of the dark chocolate cake with the sweet and light marshmallow frosting was a winner; the two complemented each other so well. I finished the whole thing off with some homemade graham crackers (dairy free of course) and some graham cracker crumbs. 

All I have left to say is: Happy Birthday Bailey and Grandpa! Have a wonderful day!

S'mores Cupcakes

Adapted from 

King Arthur Flour

Ingredients

Cake

  • 1 cup (7 ounces) sugar
  • 1 cups (4 1/2 ounces) All-Purpose Flour
  • 1 tablespoon cornstarch
  • 3/8 cup (1 1/8 ounces) Dutch-process cocoa
  • 1 teaspoons baking powder
  • 1/4 teaspoon baking soda
  • 1/2 teaspoon salt
  • 2 large eggs
  • 3/8 cup (2 5/8 ounces) vegetable oil
  • 1 teaspoons vanilla extract
  • 1/2 cup plus 2 tablespoons (5 ounces) coffee

Frosting

  • 2 large egg whites
  • 1 cup sugar
  • 1/4 teaspoon cream of tartar (I actually didn't have any and it worked fine without, cream of tarter just helps stabilize the egg whites, but you can go without if you have to)
  • 1/3 cup water
  • 1/8 teaspoon salt
  • 1 teaspoon vanilla extract

Directions

Preheat the oven to 350°F. Line cupcake or muffin pans with papers.

Prepare the cake batter. Whisk together the sugar, flour, cornstarch, cocoa, baking powder, baking soda and salt. Add the eggs, oil, and vanilla, beating until smooth. Gradually add the coffee, beating until smooth. 

Divide the batter evenly among the cupcake cups; you'll pour a scant 1/4 cup batter (about 58g) into each cup. Bake the cupcakes for about 20-22 minutes, until a cake tester or toothpick inserted into the center of one of the cakes in the middle of the pan comes out clean. Remove the cupcakes from the oven. In about 5 minutes, or as soon as you can handle them, remove them from the pan, and place them on a rack to cool.

When the cupcakes are cool, make the frosting. Place the 2 egg whites in a large mixing bowl or the bowl of your stand mixer. Beat until the egg whites are foamy and thick; they should mound in the bowl, without holding a peak. Set them aside while you prepare the sugar syrup.

Combine the sugar, cream of tartar, water, and salt in a saucepan. Bring to a boil, stirring frequently; the sugar should be dissolved. If the sugar hasn't dissolved, cook and stir a bit more, until it has. Once the sugar has dissolved, boil the syrup, undisturbed, for 2 minutes, or until the syrup registers 240°F on a candy thermometer or instant-read thermometer.

Begin to beat the egg whites, and immediately pour the boiling sugar syrup into the egg whites in a slow stream, beating all the while. As you beat, the mixture will thicken. Once all the syrup is added, stir in the vanilla, and continue to beat until the frosting is thick and will hold a peak.

Spoon the hot frosting atop the cooled cupcakes, swirling it decoratively.

Decorate while the frosting is still warm with graham crackers crumbs. You can also toast the edges of the frosting with a kitchen blow torch, or how I did it, using the flame on your gas stove. Just watch your fingers!

Yield: 1 dozen cupcakes + 6 mini cupcakes

Oatmeal Cookie Bars

Last week I looked in the freezer and realized that I had almost no cookies or bars or anything else to eat for my bedtime snack! Moving into a new place can really throw off your baking schedule. I wanted something easy to quickly remedy this dire situation. Since I have a huge bag of oats floating around in my kitchen, I thought a simple oat bar of some kind would be nice. And while there are tons of oat bar recipes that call for peanut butter, I decided against a PB oat bar, looking instead for something even more basic; simply butter, oats, sugar and some chocolate of course. 

These bars fit the bill perfectly. Nothing fancy, nothing difficult, exactly what I was looking for. They come together in about a minute, really couldn't be easier. If you're looking for a little something to satisfy your sweet tooth but don't want to get into anything fancy or complicated these bars are for you. My first baking endeavor in new apartment was most definitely a success!

I cut my pan into small, bite-sized bars, perfect for a quick little snack, just the size I like before heading to bed each night. You of course can cut them however big you want, whatever your situation calls for. Since I didn't have tons of chocolate chips, I cut back on the amount of chocolate that I added to these bars in order to save some of my precious chocolate for something else later. But they would be even more decadent and delicious chocked full of chocolate. You can always add some nuts too if you like that sort of thing. I think walnuts would be especially delicious in this recipe, a perfect complement to the chewy oats and the sweet chocolate, this recipe is easy to really make your own. 

Oatmeal Cookie Bars

Adapted from 

Half Baked Harvest

Ingredients

  • 1 1/4 cup (4.25 ounces) old fashioned oats
  • 1 cup (5 ounces) all purpose flour
  • 1/3 cup (2.5 ounces) brown sugar
  • 1/2 teaspoon baking soda
  • 1/4 teaspoon salt
  • 1 tablespoon of ground coffee, optional
  • 1/2 cup (1 stick) butter, melted
  • 1 egg, lightly beaten
  • 1 teaspoon vanilla
  • Chocolate chips, up to 4 ounces (about 3/4 cup), I only used 1 ounce

Directions

Preheat oven to 350 degrees. Spray an 8x8 inch baking dish with cooking spray, or line with parchment paper. Set aside. 

In a small bowl, whisk together the oats, flour, sugar, soda, salt and coffee if using. Add the melted butter, egg and vanilla and mix until almost combined. Add in the chocolate chips, reserving a few to sprinkle over the top if desired. 

Transfer dough to prepared baking dish. Spread evenly with fingers. Sprinkle with reserved chocolate chips if desired, pressing them down gently. Bake in preheated oven for 20-22 minutes, don't overbake, it's okay if they are slightly underdone. Let cool in pan before cutting into bars. 

Approximate Calorie Count:

If cut into 16 medium sized bars: 143 calories each

If cut into 25 small bars: 92 calories each

Foolproof Oven-Baked Brown Rice

This may not look like a very exciting recipe to some people, but honestly it's one of my favorites. Over the last couple of years I have grown to absolutely love brown rice. It is extremely healthy, it's super versatile and I think it's absolutely delicious. If you've ever looked up directions on how to make brown rice, you may have noticed that there are so many different methods. Each with it's own ratio of water to rice. Now I'm sure most of them will turn out a fine batch of brown rice, I personally am not too picky as long as it's cooked through. However, once I found this recipe I never turned back. Not only does it turn out a perfect pan of brown rice every time, it also makes a really nice big batch so I can have it on hand all week long. This is the only recipe I ever use so I wanted to share it in case anyone else is looking for a foolproof method of cooking brown rice. Well look no further, this is it. 

My favorite part of this recipe is the fact that it's baked in the oven, not cooked on the stovetop. This means I throw it in the oven and can completely forget about it for the next hour. It does take the whole hour to cook, so if you need something at the last minute, this isn't going to work. But you only need to think ahead a little bit and you can have fresh, perfectly cooked brown rice on the table for dinner. 

The actual hands on time in this recipe is so minimal making it super easy and quick to throw together. You can get the rest of your meal ready while it cooks, or get a couple of chores done, whatever. I also make this rice ahead a lot so that it will be ready for me when I need it. Sprinkled with a little water for moisture and zapped in the microwave for a couple of seconds and it's pretty much as good as new! If you couldn't already tell, I highly recommend adding this simple recipe to your repertoire. I can guarantee that you'll use it over and over again.  

Foolproof Oven-Baked Brown Rice

Adapted from 

A Veggie Venture

, originally from Cook's Illustrated

Ingredients

  • 1 1/2 cups long-, medium- or short-grain brown rice
  • 2 1/3 cups water
  • 2 teaspoons unsalted butter or vegetable oil (optional)
  • 1/2 teaspoon salt

Directions

Preheat oven to 375 degrees. Spread rice in 8-inch square baking dish or similar size casserole dish with lid. Add salt and give it a quick mix. 

Bring water and butter or oil to boil; once boiling, immediately pour water over rice. Alternatively, bring a kettle to boil. Once boiling, measure out 2 1/3 cup and pour over rice. Cover baking dish tightly with a layer of aluminum foil or place lid on top of casserole dish and place in oven. Bake rice 1 hour, until tender.

Remove baking dish from oven and uncover. Fluff rice with dinner fork, then recover dish and let rice stand 5 minutes. Uncover and let rice stand 5 minutes longer; serve. 

Almond Bear Claws

Starting a couple of years ago, my mom, my sister and I began a wonderful weekend tradition. Almost every Saturday morning without fail, we have been leaving our house bright and early and driving into Grand Rapids to eat pastries and drink hot coffee at our favorite bakery. It is the highlight of my week, giving me something to look forward to at the end of some long, tiring weeks. This is our time to chat, talk about our week, what's been going on, and to just unwind and enjoy some of my favorite things. 

While I love all pastries and other baked goods, and could order anything at the bakery and be happy with my choice, I have gotten stuck ordering the same thing week after week because it is just so good. Almost every single Saturday I order myself a nice big vanilla almond bear claw. I've had bear claws at other bakeries, but these are the absolute best I've ever had. They are big, buttery and generously packed full of a wonderful almond filling. Over the past year, I've been trying to figure out just what exactly this filling is made of. I even contacted someone at the bakery to see if they could help me at all, and while they of course wouldn't tell me what the filling is made of, they gave me a few hints that helped guide me in my search. 

Then just a few weeks ago I found it. A recipe popped up online that sounded like what I was looking for so I dove in and gave it a shot. The verdict? It was exactly what I was hoping for. To me it tastes almost exactly like the filling from the bakery. My bear claws turned out beautifully and absolutely delicious. It is so satisfying to have solved the puzzle. Even if the recipe is not exactly the same as the bakery's, it tastes right to me and that's all that matters. 

This is definitely not a quick recipe, and I won't be making these bear claws every week, but it is always nice to know that I can if I want to. You need to make a laminated dough to start, the recipe I was using called for danish dough, but I had some croissant dough in the freezer that I used instead and it worked out just fine. Then there is the filling which mainly involves a lot of cake scraps. Since I don't make cakes constantly and have cake scraps just lying around, this meant I just baked up a plain butter cake and then crumbled it up to use in the filling. It worked out great, but does involve another step. 

Once you have all of this set it is really not too difficult to assemble. Roll your dough out, fill it, and cut it how you would like. I ended up making smaller bear claws (cub claws I guess we could say) because I don't need a ginormous pastry every morning, but you can really do whatever you want. However you go about doing it I can guarantee it will be delicious! 

Almond Bear Claws
Adapted from The Village Baker's Wife by Gayle C. Ortiz, Joe Ortiz, and Louisa Beers
Ingredients

  • 1/2 recipe Danish dough (or croissant dough, that's what I had, so that's what I used!)
  • Bear claw filling, at room temperature
  • 1 large egg
  • 2 tablespoons milk
  • 1 1/2 cups sliced almonds
  • Powdered sugar or simple glaze for drizzling, if desired

Directions
Lightly flour your work surface. Roll your dough into a long rectangle that is 5 1/2 -6 inches wide and however long it needs to be so that the dough is about 1/4 inch thick. Form the filling into a long log about 1 inch in diameter and place it along the top third of the rectangle of dough making a continuous strip of filling that runs the length of the dough. 

Fold the top third of the dough over the filling, then fold the filled section over the last third so that the seam is in the center underneath the folded dough. 

With the heal of your hand, flatten one long side of the folded up piece of dough. Cut each log into pieces, mine were each about 2 1/2 inches long, the original recipe suggested 5 1/4 inch pieces, so really however big you want them to be. 

Make cuts along each flattened side of dough about 3/4 inch into the dough and about 1/2 inch apart. 

In a small bowl, whisk together the egg and milk to make an egg glaze. With a pastry brush, coat each pastry with the egg glaze and sprinkle with the almonds, pressing down slightly to make them stick. Transfer the pastries to a parchment lined baking sheet, leaving enough room between them so that they can rise. Taking each end of the pastry in your hands, bend into a horseshoe shape by bringing the ends toward one other. 

Let the pastries rest at room temperature for about 1 1/2 hours until double in size and feel like a marshmallow when pressed gently with a finger. Preheat the oven to 350 degrees about 30 minutes prior to baking. 

Bake the pasties for about 20 minutes, or until golden brown on the top and the bottom. When pastries are completely cool drizzle with a simple powdered sugar and water glaze if desired, or dust generously with powdered sugar.

Bear Claw Filling
From The Village Baker's Wife by Gayle C. Ortiz, Joe Ortiz, and Louisa Beers
Ingredients

  • 8 cups (1 1/2 pounds) lightly packed cake scraps (see note)
  • 1 1/2 teaspoons almond extract
  • 1/4 - 3/4 cup water
  • 1/2 egg, lightly beaten
  • 2 tablespoons (1 oz) butter, melted and cooled

Directions
Combine all of the ingredients in the bowl of a stand mixer fitted with the paddle attachment. Mix on low until smooth and combined. The filling should be soft, but firm enough to hold its shape. 

Note: If you, like me, don't have 8 cups of cake scraps lying around, a quick yellow cake is easy enough to whip together. I made this Plain and Simple Golden Cake from King Arthur Flour and it gave me almost the 1 1/2 pounds of cake crumbs needed. I supplemented the rest with a few leftover sugar cookies and mini cupcakes from Christmas that were in my freezer, but you could probably get by with just using this cake. 

Cinnamon Sugar Apple Muffins

Over the past year or so I have been doing more and more baking with fruit. Since I absolutely love fruit this really is a no-brainer. Any kind of fruit will do, I'm not picky. Due to the overwhelming number of banana bread/muffin/cake recipes out there I definitely end up using bananas most often. It doesn't hurt that they are cheap and freeze beautifully. But there are many other fruits that bake up well in recipes too. 

Today I'm sharing a simple yet wonderful cinnamon apple muffin recipe. The cinnamon apple combo is a pretty classic pairing, and it's easy to see why. The warming spiciness of cinnamon mixed with sweet and tart apples is a match made in heaven. I don't always like large chunks of apple in my baked goods, so instead of chopping it into pieces, I decided to grate it so it kind of melts into the batter and distributes evenly while still contributing it's apple-y sweetness. Add a little more spiciness with some nutmeg and allspice, and top the whole thing with a sweet buttery topping and you have a breakfast to be proud of. 

The original recipe called for coconut oil, so if that's your thing go for it, but I just used plain old vegetable oil. Next time I might even try melted butter, because why not? A blend of whole wheat and white flour gives the muffins a nice heartiness. I think some toasted walnuts of pecans would be a wonderful addition to these muffins as well. I guess I'll just have to make these again soon, what a problem to have!

Cinnamon Sugar Apple Muffins

Adapted from

Pinch of Yum

Ingredients

For the muffins:

  • 1 apple, grated
  • 1/4 cup vegetable oil
  • 1 cup milk
  • 2 teaspoons cider vinegar
  • ⅓ cup brown sugar
  • 1 large egg
  • 1 teaspoon vanilla
  • 1 cup all purpose flour
  • 1½ cups whole wheat flour
  • 1 teaspoon baking soda
  • 1 teaspoon baking powder 
  • ½ teaspoon salt
  • 1 teaspoon cinnamon
  • 1/4 teaspoon allspice
  • 1/4 teaspoon nutmeg

For the topping:

  • 2 tablespoons butter
  • 3 tablespoons white sugar
  • ½ teaspoon cinnamon

Instructions

To prep ingredients:  Add the vinegar to the milk and let it sit for a few minutes to let it curdle (or you can use real buttermilk instead). 

For the muffins: Preheat the oven to 350 degrees. In a large bowl, whisk the oil, milk with vinegar, brown sugar, egg, and vanilla until smooth. Add the flours, baking soda, baking powder, salt, cinnamon, nutmeg and allspice. Stir until just combined. Fold in the apples. Scoop the mixture into a greased or lined muffin tin.

For the topping: Melt the butter for the topping. Add the sugar and cinnamon; spoon over the tops of the muffins. You only need a little bit to get the crunchy top effect, but if you love those crunchy cinnamon sugar tops, I'd suggest making twice or three times as much topping as what's listed here.

Bake the muffins for 15-16 minutes, more or less by a few minutes depending on size. The muffins should be golden brown with big round tops that spring back when you press them.

Chana Dal Lentil Soup

I woke this morning and checked the old temperature gauge (aka my phone) to discover it was a balmy -6° Fahrenheit, not the windchill, the actual temperature (the windchill was a lovely -20°). In these kinds of conditions I crave something warm and hearty, simple yet filling and flavorful. This recipe was the first time I've tried chana dal. I spent some time researching exactly what chana dal is, and to be honest I'm still a little confused as to whether it is split lentils or split chickpeas or something else. Whatever the case, it is some kind of dried pulse or legume. If anyone has a good explanation of what dal is please let me know, I'd love a good definition. 

Regardless of what exactly dal is, this recipe is simple and filling. Dal cooked with tomatoes, onions and various spices. and finished with cilantro and a squeeze of fresh lemon juice. It doesn't get much easier than this, and it is so healthy. If you are looking for something hearty and warming this winter that's a little different than the norm, give this recipe a try. A thick slice of hearty bread on the side to mop up all the extra juice is the only other thing you need to finish off this delicious meal. 

All this recipe really requires of you is a little time. Chop a few vegetables, throw them into a pan with the lentils and a few spices and let it all cook away for an hour or two. When it's finished cooking you just need to add a few garnishes for freshness and a little more flavor. Then plate up and dig in. There is also so much room for innovation and creativity in this dish. Add some extra veggies, some different spices, another herb, whatever you like. In the end, I don't think you will be disappointed. 

Chana Dal Lentil Soup

From 

The Spice Spoon

Ingredients

  • 2 tbsp corn or any other neutral oil
  • ½ small onion sliced thinly
  • 3 small tomatoes, blanched, skins removed and diced
  • 1 tsp tomato paste (optional)
  • ¼ tsp turmeric powder (haldi)
  • 1 tsp salt (or more, to taste)
  • ½ tsp red chilli pepper (to taste-or can be omitted altogether if you don’t like spicy soups)
  • 1½ litre of boiling water (approximately 6 cups)
  • 400g chana lentils (approximately 2 cups)
  • 2 1-cm thick slices (a little less than ½-in.) of peeled ginger
  • fresh cilantro (or your favourite herb) for garnishing
  • paprika or sumac for garnishing (optional)
  • olive oil for drizzling
  • lemon wedges

Directions

Note: If you soak the lentils in cold water overnight or for an hour prior to cooking, you can reduce the cooking time from 1½ to 1 hour.

Coat bottom of a large pot with oil and place on medium-low heat. Add sliced onions and cook for 30 minutes; checking every 10 minutes. Cook till onions wilt and turn golden.

Add chopped tomatoes, tomato paste, turmeric, salt and chilli pepper and turn flame to medium-high. Sauté for 2-3 minutes till tomatoes look jammy (i.e., their liquid has reduced).

Add boiling water, lentils and ginger. Reduce heat to low. Stir and cover pot with lid.

Simmer until lentils are tender- test a grain between your thumb and forefinger- about 1½ hour.

Remove and discard the ginger slices.

The proceeding steps are optional; they are for those who want a thicker, soup-like consistency. If you don’t want a soup, but a traditional Pakistani-style Chana Dal, once the lentils are tender, loosen them with a little bit of water till the desired consistency is achieved and taste for salt and red chilli pepper. Serve with fresh, chopped coriander on top.

When lentils have cooled, transfer 1 cup of lentils and process in a blender till smooth and creamy. Loosen with a little bit of water. Pour back into pot. (For those of you who have an immersion blender, you can blend the soup directly in the pot.) Slowly add boiling water to soup till desired consistency is achieved. Taste for salt and red chilli pepper.

Serve with fresh coriander or your favourite herb; a sprinkle of paprika or sumac (optional); a drizzle of very good olive oil and lemon wedges to add tanginess.

American Style Vanilla Biscotti

I've found myself making a lot of biscotti lately. I just can't seem to sit down with a cup of coffee without wanting something small and sweet to snack on and biscotti are the perfect way for me to fix this problem. They are easy to make, usually make a large batch, and can be shaped into whatever size you might want. For the last couple of rounds of biscotti making I've been playing around with different variations on this recipe from King Arthur Flour. They call it American style biscotti because it is not quite as rock hard as some of the traditional Italian biscotti recipes. These cookies bake up crisp and light, crunchy without being teeth shattering. I think they have the perfect balance of crunchy sweetness to go alongside my cup of afternoon coffee. And the great thing about biscotti is they last for several weeks in an airtight container on you counter or in the cupboard. That means not having to worry about running out anytime soon or having them go bad. It is the perfect way to ensure you always have a sweet treat around for snacking on for those moments when you just need a little something to get yourself through the afternoon. 

These cookies are wonderful just straight up and plain, but for this batch I decided to go with a little drizzle of chocolate for a little added visual interests and of course to boost the flavor up just one more notch. This is a great recipe to use as a starting point for any number of wonderful combinations you might want to try. I've made several other batches that might make an appearance on the blog in the future. Really any dried fruit, any type of chocolate, or any nut/seed would make a wonderful add in. You can't go wrong so let your imagination go wild and give this recipe try. 

American Style Vanilla Biscotti

From 

King Arthur Flour

Ingredients

  • 6 tablespoons butter, salted or unsalted
  • 2/3 cup sugar
  • 1/2 teaspoon salt
  • 2 to 3 teaspoons vanilla extract
  • 1/4 teaspoon almond extract
  • 1 1/2 teaspoons baking powder
  • 2 large eggs
  • 2 cups all-purpose flour

Directions

Preheat the oven to 350°F. Lightly grease (or line with parchment) one large (about 18" x 13") baking sheet.

In a medium-sized bowl, beat the butter, sugar, salt, vanilla, almond extract (if you're using it), and baking powder until the mixture is smooth and creamy.

Beat in the eggs; the batter may look slightly curdled. At low speed of your mixer, add the flour, stirring until smooth; the dough will be sticky.

Plop the dough onto the prepared baking sheet. Divide it in half, and shape it into two 9 1/2" x 2" logs, about 3/4" tall. Straighten the logs, and smooth their tops and sides; a wet spatula or wet bowl scraper works well here. Sprinkle with coarse white sparkling sugar, if desired, pressing it in gently.

Bake the dough for 25 minutes. Remove it from the oven.

Using a spray bottle filled with room-temperature water, lightly but thoroughly spritz the logs, making sure to cover the sides as well as the top. Softening the crust just this little bit will make slicing the biscotti much easier. Reduce the oven temperature to 325°F.

Wait 5 minutes, then use a sharp chef's knife or serrated knife to cut the log crosswise into 1/2" to 3/4" slices. Or cut the biscotti on the diagonal, for fewer, longer biscotti. As you're slicing, be sure to cut straight up and down, perpendicular to the pan; if you cut unevenly, biscotti may be thicker at the top than the bottom, and they'll topple over during their second bake.

Set the biscotti on edge on the prepared baking sheet. Return the biscotti to the oven, and bake them for 25 to 30 minutes, until they feel very dry and are beginning to turn golden. They'll still feel a tiny bit moist in the very center, if you break off a piece; but they'll continue to dry out as they cool.

Remove the biscotti from the oven, and transfer them to a rack to cool. Store airtight at room temperature; they'll stay good for weeks.

Yield: 30 to 40 biscotti, depending on size.