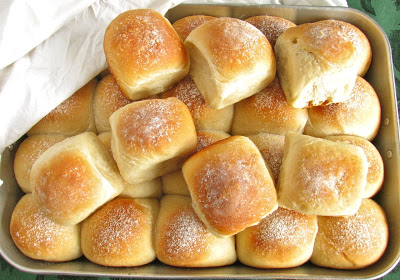
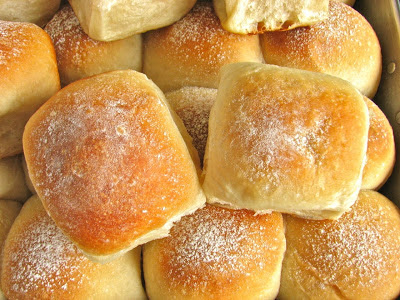
Soft Dinner Rolls

There is almost nothing I love better than a soft, buttery, freshly baked roll. Still slightly warm from the oven, smeared with softened butter, it can't really get any better than this. I've been making these rolls for several years now and they are my absolute favorite. I found the recipe in a memoir by Katherine Darling about her time at The French Culinary Institute. She calls them Mama's Rolls because the recipe came from her mom, obviously. I don't know her or her mom but every time I make these rolls I thank both of them for sharing the recipe.

Throughout the years I've made this recipe into dinner rolls, sandwich rolls, hamburger buns, whatever I need. I just change up the size depending on what I want. The recipe makes quite a big batch, which usually isn't a problem for me. I just stick the leftovers in the freezer to have whenever I need them. However, if you really don't need a huge batch this recipe halves very nicely too, I've done it several times. So whatever you need, these rolls will work beautifully for. Give them a try, I promise you you won't regret it.

Soft Dinner Rolls

Adapted from:

Under the Table: Saucy Tales from Culinary School

by Katherine Darling

Ingredients

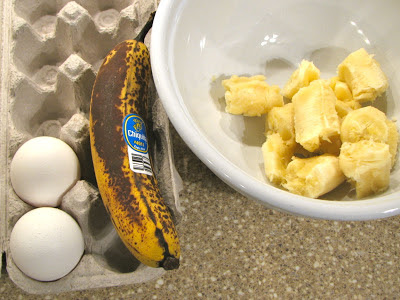
  • 7 to 8 cups (36 1/2 ounces) all purpose flour
  • 1/3 cup (2 1/3 ounces) sugar
  • 1 tablespoon instant yeast
  • 1 tablespoon salt
  • 1/2 cup vegetable oil or 1 stick butter
  • 1/2 cup water
  • 2 cups (about 18 ounces) milk

Directions

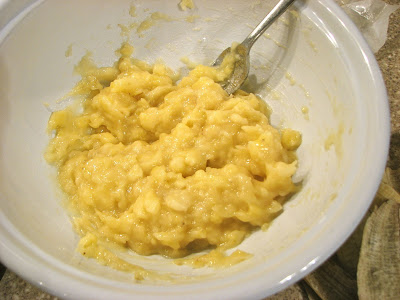
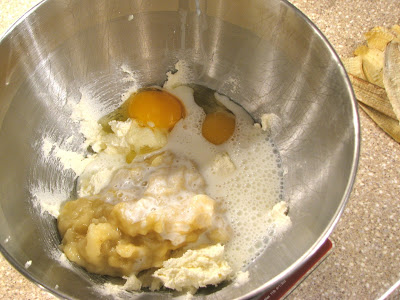
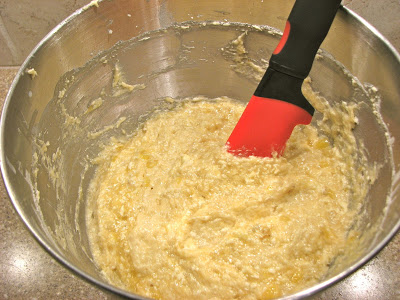
In the bowl of a stand mixer fitted with the dough hook, place the flour, sugar, yeast and salt. Mix briefly to combine. Add the oil or butter, water and milk. Knead dough until a soft, supple dough forms, about 5-6 minutes, it should not be too sticky or too dry and tough. Place the dough in a oiled bowl and let rise until doubled, about an hour and a half. 

Butter a rimmed baking sheet. Cut the dough into 36 equal size pieces. Shape each piece of dough into a smooth ball and place on the baking sheet. When all the rolls are formed, let the dough once again rise until doubled in volume. 

Preheat the oven to 350 degrees. Brush the risen rolls with a little butter if desired and then bake for 25 to 30 minutes. If they begin to get too brown, cover the top with foil. 

California Asian Pasta Salad

A few weeks back, I was searching around for a pasta salad to make. It's not as if it is difficult to find pasta salad recipes, they seem to be everywhere, but it is difficult to find a unique pasta salad recipe. I wanted a recipe that wasn't so summery, wasn't full of fresh vegetables that I just can't get right now. It also seems as though the majority of pasta salads are Italian inspired, which I absolutely love, but this time I felt like something different. After searching around online for a while I found this recipe for a California Asian Pasta Salad from Costa Kitchen. It sounded light, yet substantial and not too summery.  It's full of fresh ingredients and covered in an interesting and delicious sauce. Top it off with some avocado right before serving and you have a hit! I thought it was absolutely delicious, and is one recipe I know I'll make again!

To be honest, while this salad is easy, it did involve a trip to the store for several ingredients I don't usually have on hand, but it was totally worth it. Toasted sesame seeds, green onions, toasted almonds, fresh spinach and plenty of avocado all blended together in a perfect union. Topped with a dressing that includes mango chutney, raspberry vinaigrette, and soy sauce, a little sweet a little salty, yum! You get crunch from the almonds and sesame seeds, and creaminess from avocado, mixed altogether with the fantastic dressing, just thinking about it makes me drool. I give this recipe two thumbs up; try it, you won't be disappointed!

California Asian Pasta Salad

From 

Costa Kitchen

Ingredients

  • 3 Cups Dice Avocado
  • ½ Bunch Chopped Parsley
  • ¼ cup toasted sesame seeds
  • 16 oz package Corkscrew pasta
  • ½ bunch chopped green onions
  • 2 Cups spinach cut in strips
  • 1 cup toasted slivered almonds

Sauce:

  • ½ Cup Soy Sauce
  • ¾ Cup Vegetable Oil
  • ¼ cup mango chutney
  • ½ cup sugar
  • ¾ cup Raspberry Vinaigrette
  • 1/8 teaspoon Cayenne Pepper

Directions

Whisk together sauce ingredients. Set aside.

Cook pasta. Drain and run until cold water to stop the cooking. Once cooled and drained, place pasta into a large salad bowl and add in parsley, toasted sesame seeds, green onions, spinach and toasted almonds. Toss together with sauce. Refrigerate until cold or overnight. Top with avocado right before serving and crack some salt and pepper over the avocado to taste. Enjoy!

Cranberry Bliss Bars

I've never actually bought the cranberry bliss bars from Starbucks, but every single time I see them I want to try them. They are just so pretty, and look so tasty, but I never want to shell out the money to buy a tiny little bar, especially when I can probably make them at home! I've had this recipe for cranberry bliss bars in my recipe folder for quite some time, but it took me forever to get around to making them. The recipe calls for cream cheese, dried cranberries, and white chocolate, and I never seemed to have all three of those at the same time.

Finally, over this past Christmas break I decided I had to do it, so I went out and bought these three ingredients so I would no longer have any excuses not to make these bars. I'm glad I finally did it. I thought these bars were fantastic. The blondie base layer is buttery and chewy, and filled with white chocolate and cranberries. Topped with a white chocolate cream cheese frosting, covered in more cranberries and drizzled with more white chocolate, they are absolutely delicious. I still haven't tried the real thing from Starbucks so I can't compare them, but I really don't feel like I have to!

Like I said, the blondie is delicious, and could probably work as the base for some other bars. I'll have to play around with that a little. They're not difficult at all to throw together, I love anything with melted butter because I can still make it right away, even if I forgot to soften the butter. So if you are craving coffee shop pastries at home, take the initiative and make your own, it's worth it!

Cranberry Bliss Bars

From

Recipe Girl

Ingredients

Blondie Layer:

  • 3/4 cup (1 1/2 sticks) salted butter, cubed
  • 1 1/2 cups packed light brown sugar
  • 2 large eggs
  • 3/4 teaspoon vanilla extract
  • 2 1/4 cups all-purpose flour
  • 1 1/2 teaspoons baking powder
  • 1/4 teaspoon salt
  • 1/8 teaspoon ground cinnamon
  • 1/2 cup dried cranberries
  • 6 ounces white baking chocolate, coarsely chopped

Frosting:

  • 1 package (8 ounces) cream cheese, softened
  • 1 cup powdered sugar, sifted
  • 6 ounces white baking chocolate, melted
  • 1/2 cup dried cranberries, coarsely chopped

Directions

Preheat the oven to 350 degrees. Spray a 9×13-inch baking dish with nonstick spray or line with parchment paper.

Prepare the blondie layer: In a medium bowl, melt butter for one minute in the microwave or until melted; stir in brown sugar. Pour the butter and sugar into a large bowl and let cool to room temperature. Use an electric mixer to beat in the eggs and vanilla. In a separate bowl, whisk together the flour, baking powder, salt and cinnamon; gradually add the dry mixture to the butter mixture. Stir in the cranberries and chopped chocolate (batter will be thick).

Spread the blondie batter into the prepared pan. Bake for 18-21 minutes or until a toothpick inserted near the center comes out clean (do not overbake). Cool completely on a wire rack.

Prepare the frosting: In a large bowl, use an electric mixer to beat the cream cheese and powdered sugar until combined. Gradually add half of the melted white chocolate; beat until blended. Frost brownies. Sprinkle with chopped cranberries. Drizzle with remaining melted white chocolate. Let the frosting set (speed this up by throwing them into the fridge) then cut into bars- square or triangle-shaped. Store in the refrigerator until ready to serve.

Winter Trip to Chicago

Over Christmas break, Lara and I took a short trip to Chicago to visit our cousin Anna, and to just enjoy walking around downtown, do some shopping and of course eat some good food! We were only there for a little over a day, but we did manage to sneak in some tasty treats in that short amount of time.

We arrived in downtown Chicago in the morning, and after some shopping, we were ready to find something for lunch. We found a cute little place called Toni's Patisserie and Café which was perfect. This place was loading with the most fabulous looking pastries, cookies, breads and chocolates. When I saw baguette sandwiches on the menu I knew we had found lunch. We decided to split the Le Breton sandwich, a chewy baguette with ham, salted butter, cornichons and gruyere, delicious!

Since we split lunch, that meant it was okay to get dessert of course! Since this was over Christmas break, something festive seemed like the right thing to eat, so we got the eggnog tart, creamy custard in a cookie crust with chocolate and whipped cream. A beautiful end to this delicious experience.

As we continued our walking around, I was just starting to get a little tired when I saw the sign for Magnolia Bakery. Of course I've heard about Magnolia Bakery numerous times, and even though we weren't in New York City, I decided I needed to check it out and see what all the fuss is about. It was a very cute little shop, with tons of people working behind the counter. I wanted to stay and watch them make the cupcakes. I picked out the gingerbread cupcake with vanilla bean butter cream to try. To be honest I wasn't all that impressed. While I loved the light and creamy buttercream, the actual cake was pretty dry, and not anything all that special. At $3.50 a pop I think I'll stick with my homemade cupcakes when I'm feeling a cupcake craving.

Even though the cupcake wasn't that great, I'm glad I got to stop and see what Magnolia Bakery is all about. I know I didn't visit the original, but at least when I read about it again, I'll have some idea what everyone is talking about.

After a day downtown, Lara and I were ready to head to my cousins place to relax, and of course eat dinner. We ended up at a place called Rocks, which Anna said she'd been wanting to try. It was too dark in there to even try to get a photo so I can't share any pictures of my delicious burger. It was the signature Rocks burger which was a cooked to order 8 ounce patty on a soft pretzel roll with bacon, pepper jack cheese, onion strings, lettuce, tomato and a side of giardiniera and fries of course. I'll admit that I'm a sucker for anything on a pretzel bun and this did not disappoint.

Our final food stop in Chicago was for breakfast before we headed back to Michigan. In my opinion, all a fabulous breakfast needs is a delicious pastry and some good coffee. The Floriole Cafe and Bakery in Lincoln Park delivered just that. I found this cute little place online and knew I had to visit it before leaving. Walking in the door, we found a display case piled high with croissants, calfoutis, scones, galettes, pound cakes, sticky buns, quiche and tartines. I was in heaven.

Since I was feeling like something a little lighter for breakfast, I went with a basic croissant. It was fantastic, buttery and flakey, crisp on the outside, soft and light on the inside. Lara decided on the almond croissant, a twice baked croissant soaked with rum syrup and filled with almond cream. To. Die. For. 

Sitting in the front window, breaking into beautiful pastries and sipping delicious coffee, it was a wonderful way to end the trip. A perfect ending to a fun couple of days.

I would recommend any of the places we went on this trip. In fact, I want to go back right now and do it all over again!

Bakery Style Muffins

When it comes to muffins, there are just muffins, and then there are real muffins. I'm sure you know what I mean, some muffins are short, flat and to be honest, rather ugly, not that this means they don't taste good, but let's be honest, it's more fun to eat something beautiful. Then there are the real deal; tall and handsome muffins with those perfectly domed tops, slightly crispy edges and a dense yet tender crumb that will never be confused with a cupcake. This is the kind of muffin I pine after. It's surprising how difficult it can be to find a recipe for this type of muffin, however, I think I've finally done it. These muffins were gorgeous and delicious, true muffins with the perfectly rounded top, exactly what I've been looking for.

What's interesting about this batter is that it doesn't use any milk or other liquid. The dairy is all yogurt, and a lot of it. This makes the batter super thick, almost like pancake batter, and helps create that beautiful mushroom top that doesn't overflow the muffin tins or flatten out too much. For this go around I made half of the mushrooms just plain, so I could really taste the muffin as is. For the other half, I tried swirling in some homemade strawberry rhubarb jam for a little added sweetness. I topped both with some coarse sugar for a little extra crunch.

The results were simply marvelous. The plain muffins were very nice, simple, slightly sweet and perfect as a basic muffin. The jam swirled version was also quite wonderful, a little extra sweet and sticky, the jam brought the muffin up just a notch. I would definitely do it again. Since the batter was so thick and my jam was really thick, it was difficult to actually swirl in the jam,  it mostly just stayed as a blob, but that was okay, it turned out really well in the end. This recipe comes with several delicious looking variations that I hope to share with you all soon.

Bakery Style Muffins
From Food.com, originally from America's Test Kitchen
Ingredients

  • 3 cups all-purpose flour
  • 1 tablespoon baking powder
  • 1/2 teaspoon baking soda
  • 1/2 teaspoon salt
  • 10 tablespoons butter, softened
  • 1 cup minus 1 tablespoon sugar
  • 2 eggs
  • 1 1/2 cups plain low-fat yogurt

Directions
Adjust oven rack to lower middle position and heat oven to 375 F (or 450 F for mini muffins). Mix flour, baking powder, baking soda and salt in medium bowl; set aside.

Beat butter and sugar with electric mixer on medium-high speed until light and fluffy, about 2 minutes. Add eggs, one at a time, beating well after each addition. Alternating 1/3 at a time, beat in the dry ingredients and yogurt until a smooth, thick batter just forms.

Spray 12-cup muffin tin with cooking spray or coat lightly with butter. Scoop batter evenly into cups. Bake until muffins are golden brown, about 20-25 minutes for the large muffins (and 10-12 minutes for the mini muffins). Set on wire rack to cool slightly, about 5 minutes. Remove muffins from tin and serve warm.

Christmas Cookies 2012

Tis the season for decorating Christmas cookies! I'll admit, I had very little to do with these cookies. My sister Lara has become the cookie decorator. I am just around for moral support, suggestions, and a little help here and there, otherwise it is all her. Every year she gets a little better, and a little fancier with the cookies. This year she got some ideas out of a magazine I got in the mail, and then adapted them to work for her. I think she did a fantastic job, they turned out so beautifully! Our kitchen was taken over by cookie decorating for a few days, but that's okay, I think it was worth it.

Lara used the same recipes that we have both been using for the last couple of years, both for the cookies and for the royal icing. We love them both, and haven't had any problems with either. You can find the recipes

here

.

The whole platter full

 Poinsettias!

Good job Lara, they look great! Check out this post for the recipes!

Twisted Sugar Cookies

I finished my first semester of med school on Thursday. It was a great semester, but I am so glad that I now have three weeks off to do whatever I want! Of course, Christmas baking is at the top of that list. I've already spent many hours in the kitchen, and plan to log plenty more there before the break is over. Because I have so many things I want to bake, it is difficult to decide how to prioritize and what to bake first. This year I started with these twisted sugar cookies. I had seen the recipe last year and printed it off with the hopes of making them this Christmas. I thought that they were so beautiful and wanted to try them for myself. They were a lot of fun to make, and quite tasty to eat too. Although they didn't turn out exactly like the pictures I was looking at (she's had a lot more practice than me!), they still turned out beautifully, making me happy at the beginning of this Christmas baking season!

The dough for this recipe has yeast and sour cream, both of which are a little different. You just throw it all together, cutting cold butter in, and then chill overnight. The next day you laminate the dough while covering it in flavored sugar, and then cut into strips and twist. As the cookies bake they kind of unfold a little revealing the layers created while rolling and folding. I just love all the different layers of dough you can see. The sugar crystallizes on the bottom of the cookies, turning into a kind of carmel, yummy!

For the first half of the dough I did what the recipe said and used vanilla sugar to roll them out in, but for the second half I decided to mix it up a little and added a little almond extract as well. They are both good but I absolutely love almond flavored things, especially at Christmas, and so the almond flavored cookies were my favorite. What a fun cookie to start out the Christmas baking season with!

Lots of rolling out

Cut them up

Twisted and ready to bake

Delicious sugary bottoms!

So pretty and twisty

Twisted Sugar Cookies
From Cook and Be Merry
Ingredients

  • 2 ¼ teaspoons Active Dry Yeast (1 pkg) (NOT Rapid Rise, Pizza Crust or Bread Machine)
  • ¼ cup warm water (100 – 110 degrees F)
  • ½ teaspoon sugar
  • 3 ½ cups all-purpose flour
  • 1 ¼ teaspoon kosher salt
  • 1 cup salted butter (2 sticks), chilled, cut into tablespoon-size pieces
  • 2 large eggs
  • ½ cup sour cream
  • 1 teaspoon vanilla

For sugary topping

  • 1 ½ cups sugar
  • 2 teaspoons vanilla extract
  • 1 teaspoon almond extract (optional)

Directions
Preheat the oven to 375 degrees F. Line 1 cookie sheet with foil. Double pan to bake.

In a warm medium bowl, combine water, yeast and sugar. Proof until frothy, about 10 minutes.

In a separate large bowl, mix together the flour and salt. Cut butter into flour until rice-size with two knives or pastry cutter.

In the medium bowl, mix eggs, sour cream and vanilla into the yeast mixture. Pour the egg mixture into the large bowl with the flour. Stir thoroughly with a fork to make a dough.

Divide the dough into 2 patties, wrap each in plastic, and refrigerate a minimum of 4 hours or overnight. Place patties side by side, not stacked to assure even cooling. My patties were 18.5 oz each.

In a medium bowl, thoroughly mix together the sugar and vanilla until evenly distributed. Cover the bowl with a plate or plastic wrap so the sugar doesn’t dry out.

On a dry surface, place ½ of the vanilla sugar. Place one patty of dough on the vanilla sugar (leaving the other patty in the refrigerator) and roll into a 16 x 8-inch rectangle. Scoop up all the sugar from around the edges and spread evenly over top of dough.

With the long edge toward you, fold both edges toward the center, making 3 equal layers. Turn one quarter around and roll into a 16 x 8-inch rectangle. Scoop up any extra sugar and smooth onto the dough. Do not discard any of the vanilla sugar. Use it all.

Fold and roll into a 16 x 8-inch rectangle 2 more times. The dough should be about 1/4-inch thick.

Trim the edges slightly with a sharp knife to as perfect a rectangle as possible.

With the knife, cut the dough the long way into eight 1-inch wide strips. Cut each 16 x 1-inch strip into 4 equal pieces, each 4 inches long.

Twist half (16) of the 4 x 1-inch strips 2 times, over-twisting to stretch the dough in the middle. Place on an ungreased cookie sheet. Make sure the dough twist lies flat on the sheet. You may need to fan out the layers on the ends somewhat to make sure each is touching the sheet. Press down a little to help it adhere.

Double pan. Bake at 375 degrees F, 15 – 20 minutes or until a rich golden brown. With a spatula, remove from sheet immediately before the caramelized sugar hardens and sticks to the foil. Cool on a rack.

Discard foil on cookie sheet and replace with new foil. Repeat with remaining 16 dough strips.

Start over with the second dough ball and remaining half of sugar

Buttermilk Banana Bread

One of my biggest pet peeves is throwing leftover ingredients away because I don't know what to do with them. This happens to me every once in a while, and it really bugs me. There are a few repeat offenders that I deal with more often than others. Two come to mind right away, cream cheese and buttermilk. Both are ingredients that I absolutely love, but often recipes call for only a small amount of them, so then I'm left with the rest. Since both cream cheese and buttermilk can be used in so many different ways, throwing them away is a shame. A couple weeks ago I made a red velvet cake for a potluck and was left with a half used container of buttermilk that I vowed would not go to waste. I searched through my recipes to find some way to use it. This recipe popped out at me and sounded perfect. I love banana bread, but had never it with buttermilk, it sounded like a winner to me. This recipe turned out very nicely, it was buttery and tender with a slight tang from the buttermilk, a wonderful combination. Never again should I throw away a half used container of buttermilk!

 Creaming the butter and sugar

 Bananas, the star of the show

 Mash up the bananas

 Add the eggs, bananas and buttermilk

Mix!

Golden brown and beautiful

Perfect for breakfast with some butter or peanut butter

Buttermilk Banana Bread
From: Two Peas and Their Pod
Ingredients

  • 1/2 cup unsalted butter, softened
  • 1 cup granulated sugar
  • 2 large eggs
  • 1 cup mashed bananas (3 medium sized bananas)
  • 4 tablespoons buttermilk
  • 1/2 teaspoon vanilla extract
  • 1 3/4 cups all-purpose flour
  • 1 teaspoon baking powder
  • 1/4 teaspoon salt
  • 1/8 teaspoon baking soda

Directions
Grease and flour 1 large loaf pan. Set pans aside.

In the bowl of a stand mixer, cream butter and sugar together. Add eggs, mashed bananas, buttermilk, and vanilla until the batter is well mixed.

Add in the flour, baking powder, salt and soda. Mix until well combined. Divide batter into greased and floured pans and bake at 350 degrees for 50-55 minutes or until a toothpick comes out clean.

Let bread cool on a wire rack for 15 minutes. Loosen the bread with a knife and carefully remove from pan. Finish cooling on rack. Slice and serve once cooled.