Wedding Cupcakes (Part 1)

Last week, my family and I got to celebrate the marriage of my cousin Bailey. It was a gorgeous outdoor wedding with perfect weather, an all around wonderful day. What made this wedding extra exciting for me though was the fact that Lara and I were in charge of making all of the cupcakes for the reception. It all started shortly after Bailey got engaged. She approached us with the idea of making a couple different kinds of cupcakes to serve at the reception. Of course Lara and I jumped at the opportunity. The three of us often get together to do some baking and hang out, so it was fun to be able to bake for her on such a large scale on her special day. In this post and the next I'll share some pictures, thoughts, and ideas about baking cupcakes for a wedding, or any other large group.

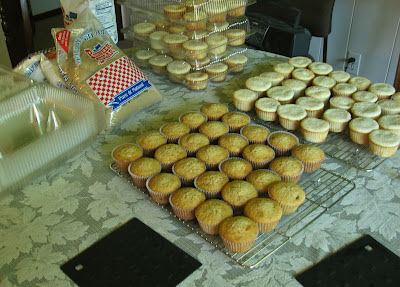
240 of the 274 cupcakes we ended up making, waiting for the big day

Bailey decided that she wanted three different kinds of cupcakes at her wedding. Two of them we had made together previously and had loved, so it was a no brainer to use them for her wedding. In addition she wanted just a plain white cupcake too, something simple and familiar. With that all figured out the cupcake menu was as follows:

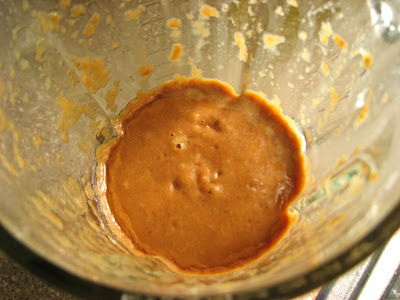
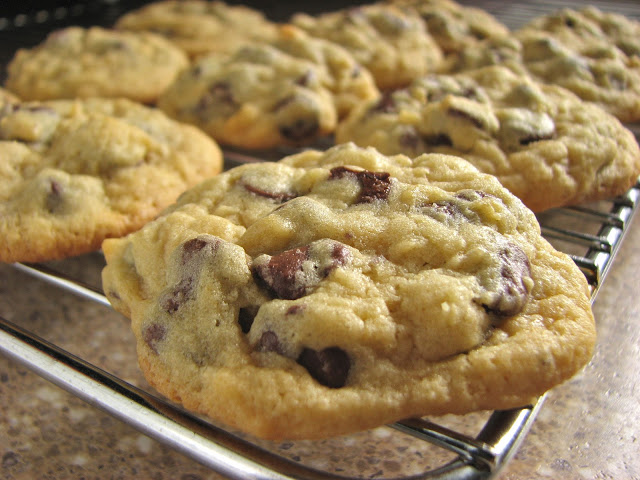
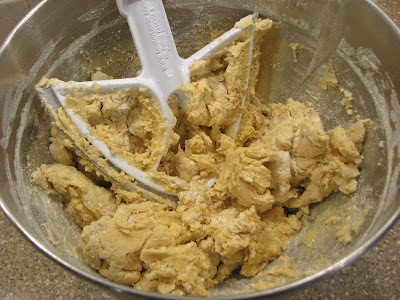
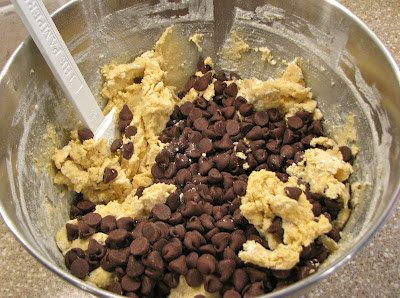
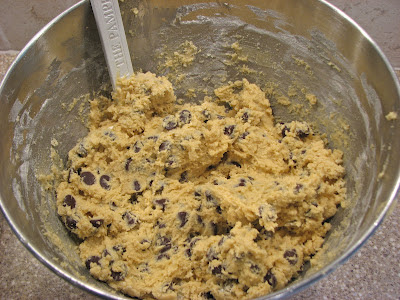
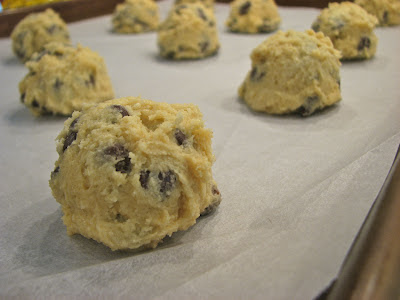
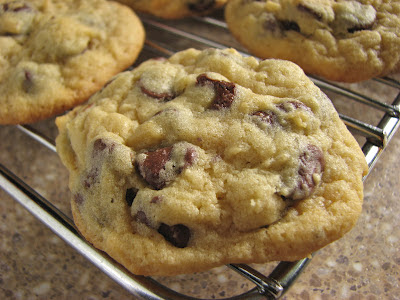
Chocolate Chip Cookie Dough Cupcakes
Cherry Limeade Cupcakes
Classic White Cupcakes

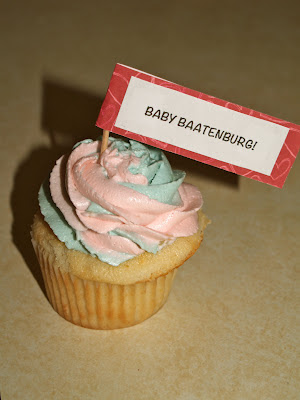
It was a good mix of flavors, a little something for everybody. Bailey's wedding colors were coral and green, so the light pink frosting of the cherry limeade cupcakes and the light green we decided to color the frosting of the white cupcakes were a beautiful and fitting way to finish off the meal.

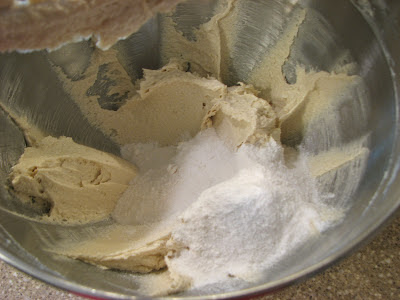
This was by far the most cupcakes I have ever made at one time. Last fall Lara and I made around 120 cupcakes for some friends, but this was over double that. Since the wedding was on Friday afternoon, we decided to bake all of the cupcakes on Thursday, and make the frosting and frost the cupcakes on Friday morning. It was a lot of baking and frosting in two days, but it all went really well. I would definitely do it in two days again if I am able. We thought about making the cupcakes ahead and freezing them, but since we had the time to do it all the day before, we thought that would be the better option. Fresh cake is always the best!

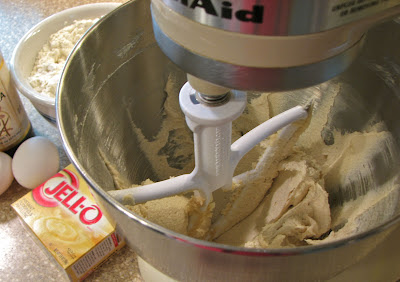
Just getting started, tons of flour, sugar, eggs and butter, not to mention two Kitchen Aids

Another view of all the ingredients, it was good to have plenty of counter space

That's right, 16 pounds of butter, don't worry about it, just accept it!

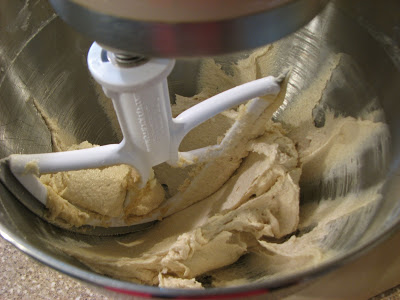
It was very nice to have a pair of mixers, but the best part was having more than one mixing bowl, that saved a ton of time

In the midst of baking

Just keep filling those muffin tins

Part way through the baking, cooling the cakes

Lots of cupcake liners

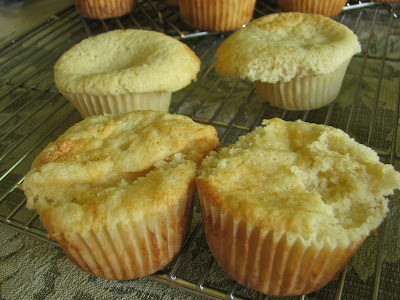
We had a few casualties, but nothing too horrible thank goodness! For the next installment of Wedding Cupcakes, Click Here

Pan-Roasted Carrots

I've never been very good at side dishes. Coming up with the main course is the easy part, but I have a hard time figuring out what to eat with it. I often end up with a salad, green beans or some roasted broccoli, all delicious but not always very inspiring. A few weeks ago, while I was looking for something just a little different to have with dinner, I came across this recipe. It was perfect because I actually had all the ingredients which is amazing. Glazed carrots may not be anything new and amazing, but these were absolutely delicious, the perfect accompaniment to my roasted chicken dinner.

This recipe is fairly straight forward and easy. Cut up the carrots, throw them into a super hot pan to get them nice and caramelized, then just add the rest of the ingredients and cook unit done. Easy as that. A simple recipe that is sure to please. Perfectly cooked carrots, slightly sweetened with a light glaze.

Four beautiful carrots

Peel the carrots 

Start cutting

A bowl of carrots, cut on the bias

Into the pan they go, make sure it's nice and hot

You want them to get dark and caramelized, caramelization = flavor

Finished and glazed, so yummy

Pan-Roasted Carrots
From: America's Test Kitchen, Cooking for Two, 2010
Ingredients

  • 1 tablespoon vegetable oil
  • 4 carrots, peeled and sliced 1/2 inch thick on the bias
  • salt and pepper
  • 1/2 cup chicken broth
  • 1 teaspoon brown sugar
  • 1 small sprig of fresh rosemary

Directions
Heat oil in a 10-inch skillet over medium-high heat until shimmering. Add the carrots, 1/4 teaspoon salt and 1/8 teaspoon pepper, and cook, stirring occasionally, until the carrots are golden brown, 8 to 10 minutes.

Stir in the broth and sugar, then add the rosemary sprig and bring to a simmer. reduce the heat to medium-low, cover and cook, stirring occasionally, until the carrots are tender, 6 to 8 minutes.

Uncover, remove and discard the rosemary sprig, and continue to cook until the liquid evaporates, about 1 minute. Season with salt and pepper to taste and serve.

Baby Announcement Cookies (and Cupcakes!)

Last month, on Mother's Day, my brother and sister-in-law gave my mom the most perfect present, the news that she would soon be a grandma! My mom was ecstatic (of course) and could hardly believe it. After telling us all the news, my sister-in-law asked Lara and I if we would be willing to bake her some goodies to give to her friends and co-workers to tell them the good news. For her friends we made white cupcakes with blue and pink swirled frosting, and for her to bring to work we made decorated sugar cookies. Even with a limited amount of time they turned out great! A cute way to let your friends and loved ones know you are expecting.

I have to be honest and say that I did none of the work on these cookies. Lara baked the cookies and did all of the decorating. I baked the cupcakes that we made which also turned out very cute (but I forgot to get a picture of). The whole thing was a success, and something I would love to do again for someone else. Spreading good news with food sounds like a great idea to me!

You can find the cookie and icing recipes here.

Update: I forgot to take a picture of the cupcakes, but my sister-in-law got a few goods ones and sent them to me. Now I can share them with you! Here they are:

Buttermilk Pancakes with Peanut Butter Glaze

I love it when I plan on making something, and I know it will be delicious, but then when I actually end up making it it just blows me away with how good it is. These pancakes are case in point. I love pretty much all pancakes so when I decided to have pancakes for breakfast, I knew it was going to be good. What I didn't count on was how these thin, tender, creamy pancakes would pair perfectly with some leftover peanut butter sauce I had on hand in the fridge. Just add some sliced banana and mini chocolate chips and voila, breakfast is served!

I was planning on eating these pancakes with a nice drizzle of pure maple syrup which I'm sure would have been delicious, but when I remembered the peanut butter glaze in the fridge I thought that it would be nice poured on top of the pancakes. As I was thinking about this my eyes fell on a pair of perfectly ripe bananas lying on the counter. Bananas and peanut butter anybody? Yes please! So I thinly sliced a banana, laid out the pieces on top of the pancakes, and drizzled it all with the peanut butter glaze. 

It look so yummy, but I knew it was missing just one thing, chocolate! A sprinkle of mini chocolate chips finished the plate off perfectly. It doesn't get much better than this mouth watering trio. Eating this perfect combination of flavors made me feel like I was in a restaurant. This is a breakfast that I won't forget to try again. 

Yum!

Buttermilk Pancakes
From: Tasting Table
Ingredients

  • 2 cups all-purpose flour
  • 2 tablespoons sugar
  • 2 teaspoons baking powder
  • ½ teaspoon baking soda
  • ¼ teaspoon salt
  • 2½ cups buttermilk
  • 2 large eggs
  • 2 tablespoons vegetable or canola oil
  • 1½ tablespoons unsalted butter, divided, plus more for serving

Directions
In a large bowl, whisk together the flour, sugar, baking powder, baking soda and salt.

In a separate bowl, whisk together the buttermilk, eggs and oil. Gradually stir the wet ingredients into the dry.

In a large skillet or griddle, melt the butter over medium-high heat. Working in batches, spoon ¼ cup of the pancake batter into the pan. Cook the pancakes until the edges have begun to brown and air bubbles form on the surface, about 3 minutes. Flip the pancakes and cook until golden, about 1 to 2 minutes more. Serve hot, spread with butter and drizzled with maple syrup or peanut butter glaze. 

Peanut Butter Glaze
From: Lawfully Wedded Wife
Ingredients

  • 1/2 cup milk
  • 1/3 c. peanut butter
  • 1 T. powdered sugar

Directions
Heat the milk in a small saucepan just until bubbling. Whisk in the peanut butter until it melts into the milk completely. Remove from heat. Whisk in the powdered sugar.

The Grand Hotel

Last week I was able to go on a mini vacation with Lara up north to Mackinac Island. It has been a while since I've been up there so it was nice to be back. We both had a glorious time, the weather was perfect and the experience was just wonderful. Our lodging for the night we were there was at the Grand Hotel. The Grand Hotel is a beautiful, historic hotel that was built in the 1880s and claims to have the world's longest porch.

The Grand Hotel, from the ferry

The overnight package that Lara and I got including a night at the hotel, as well as dinner the night we arrived, and breakfast and lunch the next day. The Grand Hotel has a dress code at night; after 6:30 all men must be dressed in a coat and necktie, and all women must wear a dress, skirt and top, or suit. Some people might find this weird and stuffy, but I enjoyed it! It was fun to see everyone dressed up for dinner, no blue jeans in sight.

Dressed up for dinner

One of the best parts of our whole experience at the hotel was the food (of course). They did a superb job with each meal we enjoyed. I couldn't help but take lots of pictures of everything I ate so I could post them here. Our first meal was dinner the night we arrived:

Dinner:
Appetizers:

Goose Liver Pate en Croute, Sauterne Aspic and Fennel Slaw

Smoked Mackinac Trout, Eggplant-Heirloom Tomato Tartare

Soups:

 Chilled Strawberry and Banana Soup, Vanilla Syrup

Grilled Sweet Onion and Truffle Soup, Gruyere Crostini

Salad:

Mackinac Wedge: 
Iceberg lettuce, roasted beets, Crispy Serrano Ham and Blue Cheese Herb-Ranch Dressing

Entrees 

Cornish Game Hen Breast and Leg Confit, Mushroom Ragout, Nueska Bacon Jus

Lava Lake Ranch Lamb Tenderloin Vegetable Bolognese, Red Wine Shallot Sauce

Desserts:

 Warm White Chocolate Bread Pudding Crystallized Ginger Sauce

Strawberry Shortbread Parfait Vanilla Sabayon 

Breakfast:

 My Caramel Peach Cream Cheese Brioche French Toast with Sausage Links

 Lara and her Nutella Crepes with Strawberries and Cured Bacon

We got a yummy bread basket too, and I got mango juice which was delicious

Lunch:

Lunch was an awesome buffet that would have been a lot nicer had we not been seated at the same time as a very large school group. There were kids everywhere, making the lines super long, and the food run out before I could get to it. It was still very delicious, but a little stressful too. 

 A few pictures of the food: Fruit, deviled eggs, oysters, marinated veggies, chilled seafood salad, smoked salmon...

 Lara's first ever oyster!

Second plate: mixed veggies, roasted potatoes, cheese platter rice, and a creamy hot seafood salad

This was probably the favorite at lunch, scallops and shrimp in a cream sauce, absolutely delicious!

 Can't forget dessert! Bread pudding, cannoli, chocolate dipped strawberries...

...tirimisu, cream puff, chocolate cake, to name a few!

The whole experience was just wonderful. If you ever have the chance to go to the Grand Hotel, or just to Mackinac Island, be sure to do it. Cars are not allowed on the island, so make sure you take your bikes along if you can, so you can bike around the island. 

Trying to work off a little of all of the food!

Ladies Slipper

Bleeding Hearts

Beautiful!

Roasted Vegetable Pizza

Just a quick post today, but it has to do with one of my favorite topics, pizza! I've said it before, but I love pizza and I love making homemade pizza. It is fun to try all different toppings and flavors that you might not be able to get at your local pizza place. Recently I've discovered that one of my favorite ways to top a pizza is with delicious roasted vegetables. This particular pizza has red, orange and yellow peppers along with zucchini and onions. If you are thinking that a pizza with just vegetables sounds boring, think again. Roasting them brings out all their natural sweetness; add a sprinkling of red pepper flakes for some heat and you have a delicious combination of sweet and heat. I can't wait to try different combinations of veggies as the growing season gets under way.

For the pizza dough, I used my go-to pizza crust. Just top with a quick tomato sauce, the vegetables, and a sprinkling of cheese and you will be good to go. I just love roasting vegetables! Just toss together whatever veggies you like with enough olive oil to coat, pepper and plenty of salt. Spread them out on a baking sheet that is covered in foil and sprayed with cooking oil, and pop them into a hot oven, 425 or 450 degrees. Keep on eye on them, flipping them over if needed, and roast until charred and tender. The time will vary depending on the vegetable and the size you cut them into.

This really is the best way to eat vegetables in my opinion. If I make too much to fit on the pizza it never lasts long. I just snack on it the whole time I'm putting the pizza together. It is so good I don't even care that I'm not even hungry anymore!

Ready for the oven

Cheesy and sweet

Dig in!

Grilled Steak and Homemade Steak Sauce

It's finally starting to get warm around here. Summer is right around the corner, and I am so ready for it. What says summer better then steaks on the grill? Not much in my book. My dad chose the meal last week Sunday which usually means New York strip, this week was no different. He came home from the meat market with two gorgeous strip steaks. I grilled them up on Sunday afternoon, and made a quick and easy steak sauce to go with them. The only thing else that was needed was a fresh salad and dinner was served. Sometimes simple is the best.

I love sauces on basically everything. I just like having a little something more to top things off. I have made this steak sauce recipe before. It is so easy, and uses ingredients I almost always have in the house. You can whip it together in just a couple of minutes, and it really adds some nice flavor to steaks, or even vegetables, or burgers, or anything else you can think of! The recipe starts with raisins, but don't worry, you can't tell they are in there once you are done. I don't like raisins at all, but once everything is blended together they disappear.

Plump some raisins in warm water

Let them get nice and big

Meanwhile, grab ketchup...

...Worcestershire, dijon and vinegar

Throw everything into a blender, including the raisins

Ready to mix

Blend it all up

Then it's time for the steaks; season with plenty of salt and pepper

And grill them up!

Pretty and pink, they were a little too done for me, (I'm a rare girl!) but I'll adjust the grilling time next time

Grab a salad and spoon on some sauce and you are good to go!

Classic Steak Sauce
From: The Best of America's Test Kitchen, 2011
Ingredients

  • 1/2 cup boiling water
  • 1/3 cup raisins
  • 1/4 cup ketchup
  • 3 tablespoons Worcestershire sauce
  • 2 tablespoons Dijon mustard
  • 2 tablespoons white vinegar
  • salt and pepper

Directions: 
Combine the water and raisins in a bowl and let sit, covered, until the raisins are plump, about 5 minutes. Puree the raisin mixture, ketchup, Worcestershire, mustard and vinegar in a blender until smooth. Season with salt and pepper to taste. 

Super Soft Chocolate Chip Cookies

I have a favorite chocolate chip cookie, recipe, but that doesn't mean I've stopped looking at new recipes. You never know when you'll find something new and amazing. Chocolate chip cookies are one of my all time favorites, who doesn't like them? My mom didn't do tons and tons of baking when I was growing up, but she always made the absolute best chocolate chip cookies. I don't even try to make her recipe anymore, they always taste better when she bakes them. She has her recipe, and I have mine.

When I saw the recipe for these soft and fluffy CC cookies though, I knew I wanted to try them. I usually prefer a super chewy, slightly crispy CC cookie, but there are times when I crave something soft and light. These cookies did the trick. They were so super soft and pillowy, not a bit of crispness, light and airy and delicious. The flavor was very mild and subdued, a gentle cookie. If you are looking for a chocolate chip cookie that just melts in your mouth, look no further.

These cookies are very simple, just a basic chocolate chip cookie. You start by creaming the butter and sugars, throw in the pudding mix, then add the eggs, and finish with the flour mixture. Nothing to it. You can whip a batch together in just a few minutes and have freshly baked cookies in less than half and hour. Just make sure you have some instant pudding in your pantry and you are good to go!

Cream the butter and sugars

Nice and fluffy

Add the pudding mix

Next it's the eggs and vanilla

Creamy!

Time for the flour

Mix until almost completely combined

Add the chocolate chips

Mix it all together

Scoop onto a baking sheet

Ready to eat

Super Soft Chocolate Chip Cookies
Adapted from: Kirbie's Cravings
Ingredients

  • 2 1/3 cups (11.25 ounces) flour
  • 1 teaspoon baking soda
  • 1 teaspoon salt
  • 1 cup (2 sticks) butter
  • 3/4 cup (5.25 ounces) brown sugar
  • 1/4 cup ( 1.75 ounces) granulated sugar
  • 1 3.4-ounce package instant vanilla pudding
  • 2 eggs
  • 1 teaspoon vanilla extract
  • 2 cups chocolate chips

Directions
Preheat oven to 350 degrees F. In a medium bowl, sift together the flour, baking soda and salt, set aside.

In the bowl of a standing mixer, cream together the butter, brown sugar, and white sugar. Beat in the instant pudding mix until blended. Stir in the eggs and vanilla. Add the flour mixture and mix until almost completely incorporated, then add the chocolate chips, folding them in by hand until evenly incorporated. 

Scoop cookie dough onto baking sheet (I used a 1 1/2 tablespoon cookie scoop) and bake in the preheated oven for 10-12 minutes, until the edges just begin to brown. Let the cookies rest on the baking sheet for 5 minutes before transferring to a wire rack to cool.