Simple Vanilla Pudding

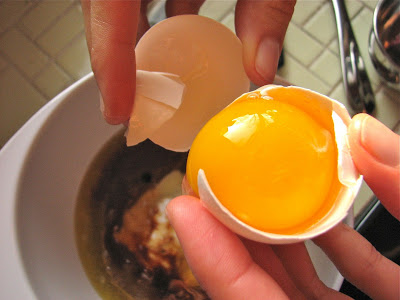
I love sugar, any kind will do, as long as it is sweet, I am happy. I try to keep this love of sweets in check most of the time because it is true, the more sugar you eat, the more sugar you crave, I've found this out the hard way. My strategy for not eating too much sugar throughout the day is to treat myself to a little sweet every night. By sweet I'm not talking a massive dessert, but instead just a little something to satisfy my sweet tooth after dinner and before I go to bed. This can be anything from a chocolate chip cookie, to a piece of dark chocolate, half a banana drizzled with chocolate or a handful of toffee peanuts, really just about anything that makes my mouth happy for the night. The other day while looking in the fridge I noticed a leftover egg yolk staring at me and I decided that it was time to make some pudding.

I've been wanting to make pudding for a while now, but haven't gotten around to doing it. When I saw that forlorn egg yolk in my fridge I quickly googled 'simple pudding recipe' and this one popped up. It was perfect, calling for one egg yolk and just over a cup of milk. Add a little sugar, vanilla and cornstarch and I had the perfect evening snack.

Since I have very little experience with puddings, I really have no idea how this compares with any other pudding out there. It was not very rich since I just used 2% milk and there wasn't much sugar either, but that was perfect for me this time. I wanted something light and simple and that's just what I got. It was a cinch to whip together, and the perfect thing to satisfy my sweet tooth this time.

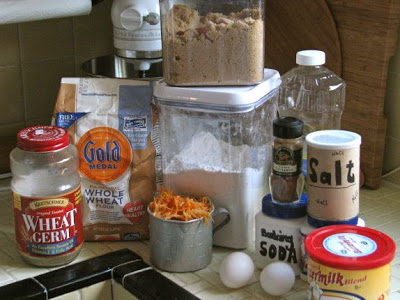
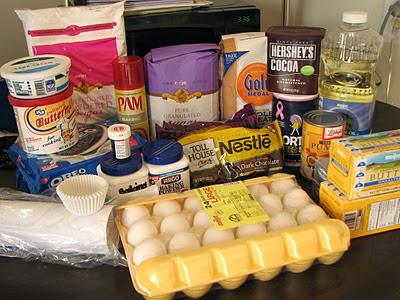
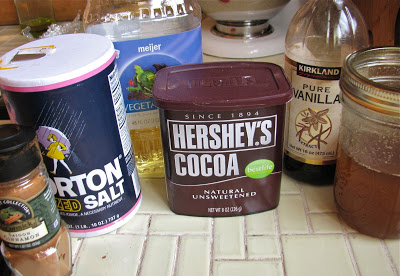
All you need to start: milk, eggs, sugar, 

salt and cornstarch

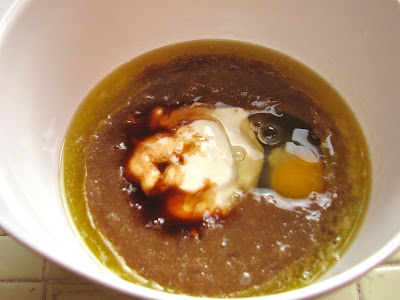
Whisk a little milk with the egg yolk

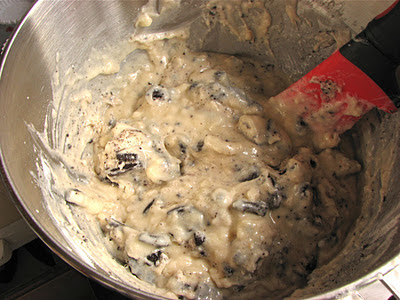
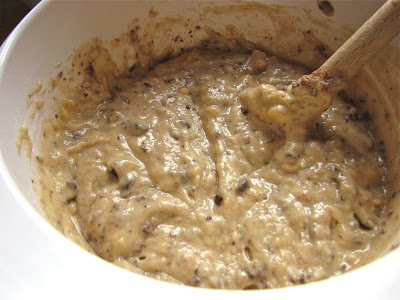
Whisking it all together

Covered and ready to chill for a while in the fridge

Grab a spoon and dig in

Simple Vanilla Pudding
From Heart of Light
Ingredients

  • 1 1/3 cup milk, divided 
  • 1 egg yolk
  • 3 tablespoons sugar
  • 1 tablespoon corn starch
  • 1/8 tsp salt
  • 2 tsp vanilla extract

Directions
Heat 1 cup of milk in a small saucepan.

Meanwhile, whisk together the extra 1/3 cup milk and the egg yolk.

In a heatproof bowl, whisk together the cornstarch, sugar and salt and then add the milk/egg mixture in a slow stream, whisking so clumps don't form.

Slowly pour the hot milk into the mixture, whisking the entire time.

Pour the mixture back into the saucepan and cook for a few minutes, until thick and bubbling.

Stir in the vanilla and eat warm or let it cool and set up in the fridge. 

Spiced Pumpkin Granola

Christmas is probably my favorite time to be in the kitchen. Sitting inside my warm house while the cold wind blows outside, breathing in the intoxicating aromas of whatever is in the oven, blaring the Christmas music and sipping a warm cup of hot chocolate, it all just makes me happy. Reaching into the oven and pulling out a piping hot loaf of bread or a sheet of golden brown sugar cookies makes me smile. I especially love being able to share my love of food with my friends and family. Every year I try to  make something special to give away, spreading the good cheer! Most years I've made an assortment of Christmas cookies, they are my favorite. However this year, with exams and other commitments, I didn't have quite as much time as usual, so I decided to try something different, homemade granola.

Granola is so easy and delicious, you can make a huge batch of it at one time, and it lasts forever. Since it is Christmas, I wanted to make it festive so when I saw this recipe for spiced pumpkin granola I knew it would be perfect. A can of pumpkin and a bunch of warm, festive spices, along with dried cranberries for some Christmas color made this the perfect granola for Christmas.

This may end up being one of my favorite granola recipes. I thought it was absolutely delicious. A slight hint of pumpkin accompanied by cinnamon, ginger, cardamon and nutmeg and a note of sweet from the cranberries, yummy! Because of all the liquid from the pumpkin, this granola did not end up being as crunchy as some of the granolas I've made in the past, but that didn't detract from it one bit, in fact I kind of enjoyed the slightly chewy texture. This one is a winner folks. A fun and festive treat for Christmas.

The dry ingredients ready to go

Heating up the pumpkin mixture

Boxed up and ready to give as the perfect gift

Spiced Pumpkin Granola
Adapted from Healthy Green Kitchen
Ingredients

  • 8 cups old fashion oats 
  • 1 1/2 cup slivered almonds 
  • 3/4 cup wheat germ 
  • 1 tablespoon kosher salt 
  • 2 tablespoons ground cinnamon 
  • 1/2 teaspoon ground ginger 
  • 1/2 teaspoon ground cardamom 
  • 1/2 teaspoon ground nutmeg 
  • 1/4 cup granulated sugar 
  • 1/4 cup brown sugar 
  • 1 can (15 ounces) pumpkin puree 
  • 1/2 cup vegetable oil 
  • 1/4 cup butter, melted 
  • 1/2 cup maple syrup or honey 
  • 1 cup dried cranberries 

Directions
Preheat oven to 300°F. Line two large baking sheets with parchment paper.

In a large bowl, mix together oats, almonds, wheat germ, salt, all of the spices, and the sugars.

In a small saucepan heat together the pumpkin puree, oil, butter and maple syrup or honey until combined.

Pour the liquid mixture into the dry ingredients and mix together with your hands until all of the dry ingredients are evenly coated.

Spread the granola evenly over the two prepared pans and bake for 60-75 minutes, stirring every 10 to 15 minutes until golden brown and dried to your liking. Remove from the oven and stir in the dried cranberries.

Cinnamon Carrot Muffins

I eat a lot of muffins, they are one of my favorite breakfast treats. Muffins are simple and easy to prepare, they don't take long to bake, and they are the perfect package to unwrap and enjoy at breakfast. One thing you do have to be careful about though when making muffins is realizing that some muffins are just cupcakes in disguise. They can be extremely rich and sweet, and if you put some frosting on top no one would know the difference. Personally, I don't have any problem with this and have made many cupcake-like muffins to eat for breakfast. Sometimes however (such as during the holiday season) I feel like making something a little healthier, and that's where these cinnamon carrot muffins come in.

I found this recipe while paging through a Whole Living magazine and decided that I had to try it. Nothing groundbreaking here, it just looked so tasty. I love cinnamon muffins and I also always have carrots in the fridge and knew I could throw this together very quickly . To make these I just pulled out my food processor, grated up the carrots and threw the rest of it together. Twenty minutes later I pulled a dozen golden muffins out of the oven, all the while inhaling the tantalizing aroma of cinnamon which was floating around the kitchen.

Sitting down at the table with a glass of cold milk and a freshly made muffin, my mouth was very happy. These muffins were extremely moist, the carrots definitely did their job well. I was a little worried about the carrots being kind of stringy in the muffins (I've had that with zucchini muffins in the past), so I was pleasantly surprised to discover that the carrot was not at all stingy, it just leant a nice orange color to the muffins. I was happy with these muffins, I like that they are both tasty and healthy, two great reasons to make them again.

 Getting everything together, ready to go

 Grated carrots, easy as pie in a food processor

 The carrots and wet ingredients, 

very appetizing, I know

 Mix in the flour mixture until just incorporated

 Fill your muffin cups

 Ready for the oven

Fresh and warm

 Perfect for breakfast

Grab and go

Cinnamon Carrot Muffins
From Whole Living
Ingredients

  • 3/4 cup all-purpose flour 
  • 1/2 cup whole-wheat flour 
  • 2 tablespoons wheat germ 
  • 1 teaspoon ground cinnamon 
  • 1 teaspoon baking powder 
  • 1/2 teaspoon baking soda 
  • 1/8 teaspoon kosher salt 
  • 1/3 cup vegetable oil 
  • 1/3 cup buttermilk 
  • 2 large eggs 
  • 3/4 cup light brown sugar 
  • 2 cups finely grated carrots (4-5 carrots) 

Directions
Whisk together flours, wheat germ, cinnamon, baking powder, baking soda, and salt in a bowl. Whisk remaining ingredients in a separate bowl. Fold dry ingredients into wet and mix until just combined.

Spoon batter into cups. Bake at 350 degrees until a toothpick inserted in the center of a muffin comes out clean, about 22 minutes. Cool in pan for 15 minutes, then transfer to a wire rack to cool slightly before serving.

Cupcakes Galore

A few weeks ago, some friends from church held a fundraiser to help them cover the costs of adoption. They put on a soup supper with delicious homemade soups, salad, fresh bread and other yummy goodies. A couple of us decided that we wanted to get in on the action, and so we decided to bake cupcakes to give away at the dinner for a donation. Both Lara and I were very excited about the prospect of baking a bunch of cupcakes, one of my favorite things to do! We decided on 4 different types of cupcakes and one batch of muffins, for something a little different.

I wasn't quite sure how much work it would be to make 120 cupcakes/muffins, but it turned out to be not that bad at all. We baked 4 dozen cupcakes a week before and froze them until we needed them. The rest we made the day before and the day of the fundraiser. Although I absolutely love frosting ( it's my favorite part of eating cake) I admit that I don't enjoy making it. It's messy and sticky and can take a while if I want a really nice buttercream. In order to make things easier on, I called up a local bakery and asked them if they sold frosting; thankfully they did. I ended up buying 2 pounds of white buttercream from the bakery, which almost perfectly covered 4 dozen cupcakes. For the other 4 dozen, I made a couple batches of cream cheese frosting.

Buying some of the frosting was a real lifesaver, it meant I didn't have to take the time to make it, and I couldn't have made a batch of buttercream any better than the bakery, it was absolutely delicious, light and fluffy and full of sweet buttery flavor. I highly recommend doing the same thing if you just don't have the time to do it yourself.

I had such a fun time baking and decorating these cupcakes. I would definitely do something like this again. It was a nice practice round in case I ever get asked to do it again. Now I have some experience.

A table full of ingredients, before I began

Trying to stay organized

The first batch, classic yellow cupcakes

Turned out great!

On to the chocolate

Separating Oreos for the bottom of the Oreo cupcakes

Oreos make everything better!

#4: Red Velvet

Last but not least, chocolate chip muffins

The fun part, frosting!

All finished, a kitchen full of cupcakes

For the fundraiser, I can't take credit for this awesome sign, it all goes to Angie

We had tons of cupcakes

Pretty and edible

Mmmmm....

A few more shots

One thing I learned, if making cupcakes for kids, put sprinkles on them, they love them!

All of the cupcakes turned out deliciously and were a  big hit. I'll make them again and hopefully be able to do an individual post on each. Until then, here's where I got the cupcake recipes (I've had the muffin recipe for a while and don't remember where it came from, I'll post it soon!).  

Chocolate Granola

If you open up my cupboards you are always going to find some granola. I go through tons of yogurt every week (homemade, it's all I eat anymore) and I love to have crunchy and sweet baked oats around to top it off.  I admit that I love Nature Valley granola bars and very often that is what I have, I think they are absolutely delicious. If anyone out there has a copycat recipe I would be thrilled to try it. I would love to make something that even slightly resembles those granola bars. However, I also really enjoy making my own granola. There are about a gazillion recipes out there. I really love my current go to granola recipe, but this new recipe caught my eye for one reason - chocolate!

It's a pretty basic granola recipe: oats, honey, nuts, flavorings and some type of fat. This recipe also has the lovely addition of some cocoa powder. It was a cinch to make, although the cocoa powder makes it a little difficult to tell how done the granola is. I really enjoyed the finished product, however it wasn't quite as chocolaty as I would have liked it. I realize that it doesn't have any real chocolate in it, just cocoa, but I was hoping for a little more chocolate flavor. But despite that slight disappointment this was still a tasty granola, perfect for topping my yogurt for breakfast. 

Grab your ingredients

Chop up some nuts

Mix together the nuts, oats, and wheat germ

Put everything else in a saucepan on the stove

Mix together the wet and dry ingredients and 

bake it off

Ready to go!

The options are endless...

Chocolate Granola
From Sugarhero
Ingredients

  • 1/3 cup vegetable oil 
  • 1 cup honey 
  • 1-1/2 tbsp vanilla extract 
  • 1 tbps cinnamon 
  • 1/2 tsp salt 
  • 1/2 cup best-quality cocoa powder 
  • 4-1/2 cups oats 
  • 1 cup wheat germ 
  • 1 cup chopped, toasted nuts of your choice 
  • 1 cup dried cranberries or sour cherries (optional) 

Directions
Preheat your oven to 300 degrees Fahrenheit, and cover two baking sheets with foil. Spray the foil with nonstick cooking spray.

In a large bowl, combine the oats, wheat germ and chopped, toasted nuts. Toss briefly to combine.

In a medium saucepan, combine the vegetable oil, honey, vanilla, cinnamon, salt, and cocoa powder. Heat this mixture, stirring, over medium heat, until you have a smooth, flowing liquid without any cocoa lumps.

Carefully pour the hot cocoa syrup over the oats in the bowl. Stir until the oats are completely coated with the chocolate. Divide the granola evenly between the two baking sheets, and spread it out into a thin, even layer on each sheet.

Bake the granola in the 300 degree oven for about 45 minutes. Gently stir every 10-15 minutes, and rotate the trays between racks and front to back to make sure the granola doesn’t burn in spots. Once it's out of the oven, let it cool undisturbed. Once it's cool add the dry fruit if using. Enjoy on top of your favorite yogurt!

Banana Chocolate Chip Breakfast Cake

Banana bread is an amazing invention. Whoever discovered that over ripe bananas could be mashed up and added to a quick bread batter is my hero. I am a huge banana fan, and go through at least half a dozen bananas a week. They are cheap, healthy and delicious. However, it can be a guessing game at the grocery store when confronted with a mountain of bananas at varying stages of ripeness; how quickly will the green bananas ripen, will I want a banana tomorrow, or in two days or tonight? I've become quite good at picking out the right number of bananas at the correct ripeness in order to have a good supply for at least a couple days. But there are still the times when I don't quite calculate correctly. The wonderful thing about bananas is that this is okay. In fact, sometimes it is preferable.

Banana bread is one of the most wonderful things to bake. It's quick, easy and delicious, and it can also be healthy at times. My personal favorite banana bread recipe is for Banana Oat Bread. However, a few months ago I was looking for something a little different. I wanted to bake something that reminded me of going out for breakfast at a coffee shop (one of my favorite things to do). They always seem to have some type of breakfast cake or bread that is easy to pick up and eat out of hand, something not too heavy and not overly sweet. I wanted to make something like that. So when I found this recipe online I knew I had to try it. I'm glad I did because it fit the bill perfectly.

This cake is super moist and light. It has that kind of spongy texture that always seems to accompany bread that is made with yogurt. The bananas add their characteristic subtle flavor and moisture which is enhanced by the addition of mini chocolate chips. The whole thing just works together so well. Now I can just brew up some coffee, close my eyes and take a bite, fooling myself into thinking that I'm at the coffee shop when I haven't even left my own kitchen.

My banana puree, an immersion blender does

a wonderful job

You need an egg and an egg white, save the

beautiful yolk for some scrambled eggs 

All the wet ingredients ready 

to be mixed

The wet, the dry and the chocolate

Mmmm, the best part

Stir it all together until just combined, 

be sure to not over mix

Pour into your greased pan

Baked

Chocolate and banana goodness!

Cut it up and enjoy for breakfast with a cup 

of coffee or hot chocolate

Banana Breakfast Cake
From David Lebovitz
Ingredients

  • 1½ cups (210 g) flour 
  • 1 teaspoon baking powder 
  • ½ teaspoon baking soda 
  • ½ teaspoon salt 
  • 1 teaspoon ground cinnamon 
  • 1 teaspoon espresso powder (optional)
  • ¾ cup (150 g) sugar 
  • 2 tablespoons (55 g) melted butter 
  • 1 large egg white 
  • 1 large egg
  • 1 cup banana puree, made from about 2 very ripe medium-sized bananas 
  • ½ cup sour cream (I used Greek yogurt, 130 g)
  • ½ teaspoon vanilla extract 
  • 1/3 cup (60 g) mini chocolate chips 

Directions
Sift together in a medium bowl the flour, baking powder, baking soda, salt, cinnamon and espresso powder, if using. Mix in the sugar.

In a large bowl, mix together the butter, egg white, egg, banana puree, sour cream, and vanilla.

Make a well in the center of the flour mixture and stir in the wet ingredients with a spatula until almost mixed. Add in the chocolate chips or cocoa nibs and stir until just combined, but don’t overstir: stop when any traces of flour disappear.

Scrape the mixture into a prepared 9-inch square pan and bake for 35-38 minutes at 350 degrees, or until the center feels lightly-springy and just done. Cool on a baking rack.

Honey Yeast Rolls

If there is one thing I just cannot seem to resist, it's good bread. Putting a bread basket in front of me is very dangerous. The type of bread is irrelevant, as long as it is fresh and delicious. Since I love bread so much, (and really who doesn't?) I'm always searching for good recipes. One of my favorite ways to get my bread fix is by baking up some soft, squishy dinner rolls. I love the lightness and the sweetness of a simple, pillowy roll.

I printed this recipe several years ago when I first made it, but it has been a while and I didn't really remember what it was like. I decided that it was time to give it another go this past week, and I am so glad that I did. It's an easy recipe, and it makes a nice amount of simple dinner rolls. There is an optional honey butter glaze that I tried out and really loved. They are nice and sweet, which is how I like my rolls, and very soft. Adding the glaze turned them almost into dessert, it is delicious. If you don't want your rolls to be quite as sweet, just omit it. But if you're looking for a great dinner roll for your Thanksgiving dinner, give these a try. They would also be fabulous the next day for a nice turkey sandwich made with leftovers!

Mix up all the ingredients and do some kneading

Place the dough in a bowl and let rise for a 

few hours

Two hours later; risen and ready to go

Turn out onto a floured board

Knead a few times and then let rest

for a few minutes

Cut it up into pieces, I did 16, but you could

do 10-12 depending on how big

you want them

Place in a greased dish and let rise

(mine didn't all fit in one pan, 

maybe a 9x13 would work?)

Nice and poofy

Brush on the butter honey glaze if 

desired

And bake until golden brown

Honey Yeast Rolls
From: A Cookie a Day
Ingredients
Rolls

  • 2 1/4 teaspoons instant yeast 
  • 1 cup warm water 
  • 4 cups bread flour 
  • 1/4 cup honey 
  • 3 tablespoons oil 
  • 1 1/4 teaspoon salt 
  • 1 egg, lightly beaten 

Glaze(optional)

  • 1 tablespoons butter 
  • 1 tablespoons honey 

Directions
In the bowl of a stand mixer combine the yeast and warm water. Stir in the honey, egg and oil. Add 3 cups of the flour and the salt and mix until the dough comes together in a sticky mass.

Knead for about 8 minutes while working in the remaining cup of flour until the dough is smooth and elastic, tacky but not too sticky. Do not add too much flour, you want the dough to be soft and supple so the rolls turn out nice and tender instead of dense and tough.

Form the dough into a ball and transfer it to a lightly oiled bowl. Cover the bowl with a damp kitchen towel and let the dough rise until it doubles in bulk, about 2 hours.

Turn the dough out onto a lightly floured surface and knead for about 30 seconds. Cover the dough and let it rest for 10 minutes.

Divide the dough into 10-12 equal pieces (or however many you want, I did 16). Shape each piece into a ball and place in a lightly oiled pan or baking sheet. Cover and let rise for about 20 minutes.

Mix together the honey and butter. Brush the mixture on top of the rolls and bake at 400 degrees for 13-15 minutes, until golden brown.

Southwestern Stuffed Spaghetti Squash

Spaghetti squash is a great thing. It's fun to eat, it's tasty, it's healthy and it is extremely versatile. Since it is not very flavorful on its own, you can pretty much do anything you want with it. You can make it sweet or savory, whatever you feel like. I've done the typical 'spaghetti' by adding a nice tomato sauce and pretending the squash is actually noodles and I've also added butter, brown sugar and cinnamon and eaten my squash for dessert. Recently I've been looking for something new and different to do with my spaghetti squash though. When I saw this southwestern version I knew I had to try it.

This dish combines the cooked spaghetti squash with onions, peppers, corn, beans, cilantro, cheese and lots of cumin and chile powder. The result was a slightly spicy, nicely seasoned light and healthy main dish. And making boats from the squash shell makes a fun presentation (I wasn't thinking and accidentally cut the ends off my squash so the 'boats' were a little unstable, but still fun). You get a lot of food out of one spaghetti squash this way, I got four servings out of the one recipe, and the recipe only uses half the squash so you can play around with the rest of it for fun. The leftovers reheated quite well the next day, they were a quick and delicious lunch. This is one to make again in the future.

Grab a nice spaghetti squash and get it cooking

The rest of the players

All chopped up

Fresh cilantro adds so much to a dish

Start cooking those peppers and onions

Add the spices and then 

throw in the corn, beans and cilantro

Mix it all up

Scrape the flesh out of the squash

Add the squash to the veggie mixture and 

then pile it all in the squash boats, 

don't forget to top with cheese

Place it all under the broiler for a few minutes until the cheese in nice and melty, then eat!

Southwestern Stuffed Spaghetti Squash
From Bev Cooks
Ingredients

  • 1 spaghetti squash 
  • 2 Tbs. extra-virgin olive oil 
  • 1/2 red onion, chopped 
  • 3 garlic cloves, minced 
  • 1 jalapeno pepper, minced (leave seeds in for more heat) 
  • 1 red bell pepper, chopped 
  • 1 Tbs. ground cumin 
  • 1 Tbs. Mexican oregano (if you have it, I don't and so I just used my regular oregano) 
  • 1 Tbs. chili powder 
  • 1 can black beans (drained and rinsed) or about 1 cup dried beans, cooked 
  • 1 cup frozen corn, thawed 
  • coarse salt and freshly ground pepper1/2 cup freshly torn cilantro, plus more for garnish 
  • 1 lime 
  • 1 cup grated cheddar cheese 

Directions
Start by cooking the spaghetti squash. You can either by roast it on a baking sheet for 50 minutes at 375 degrees or if you're in a hurry, just poke some holes in it with a fork and stick in the microwave for 12-15 minutes, turning every few minutes. Let cool another 30 minutes, then cut in half. Spoon out the seeds, then using a fork, scrape up the flesh.

Heat oil in a medium skillet. Add the onion, garlic, jalapeno pepper and red bell pepper. Saute 2 minutes. Add cumin, Mexican oregano, chili powder and a good pinch of salt and pepper. Saute another minute. Add the beans, corn and cilantro. Stir to combine. Squeeze in the lime juice and give one last stir.

Add in half the squash to the bean mixture and stir to combine. Taste and season accordingly.

Stuff each squash half with the mixture and top with grated cheese. Stick it under the broiler until the cheese melts and gets all brown and bubbly.