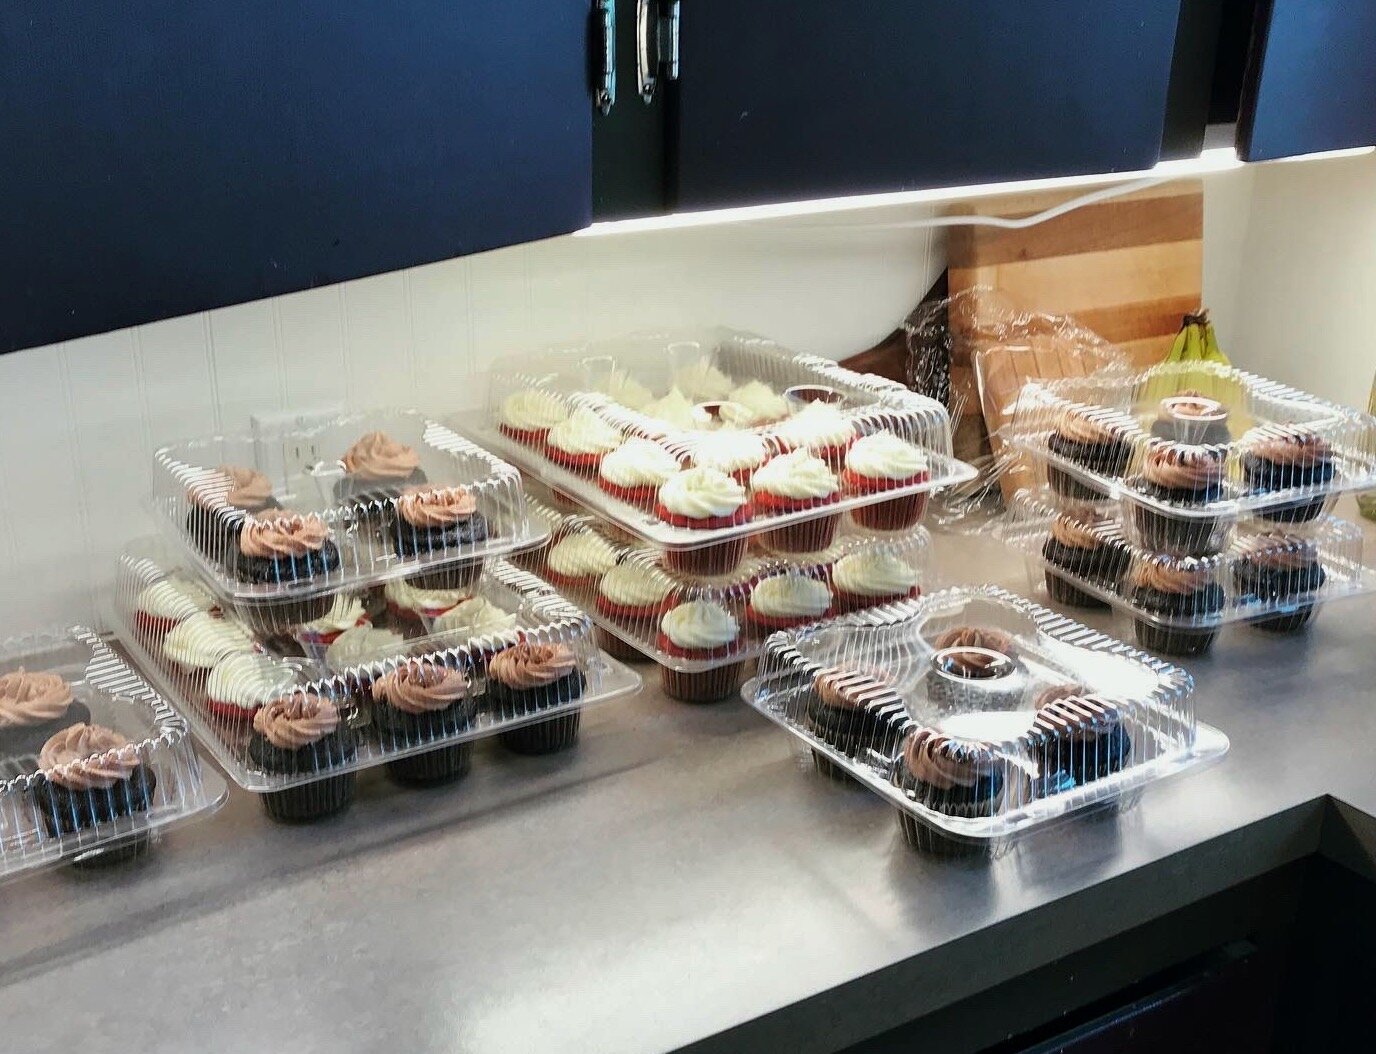
White Cake Testing

IMG_0219.jpeg

A friend of mine recently got engaged and she has asked if Lara and I would make a cake for her wedding! We’ve done a few weddings together in the past (cupcakes, cake pops and a small cake for the bride and groom to cut) and are excited to get to do it again!

Although we don’t have the details finalized, it will most likely be a white cake base so I decided that I needed to test out a few white cakes prior to this since I don’t really have a go-to white cake.

After some online searching and research I decided to start by testing 3 separate recipes to see what my thoughts were, and go from there, either testing a few more recipes or making a decision based on the three initial tests.

The Competition:

The three cakes we ended up testing were:

  1. White Mountain Layer Cake from Bravetart by Stella Parks

  2. Classic White Cake from The Perfect Cake by America’s Test Kitchen

  3. Martha Stewart’s White Cake from Martha Stewart’s Baking Handbook

I first made the White Mountain Cake and the ATK white cake on the same day. About a week later I got around to making Martha Stewart’s. I scaled down all the recipes because I didn’t really need 3 full cakes in my house all at once! I know that scaling back can sometimes be tricky, and recipes don’t always do as well when you make them smaller but I went for it anyway. (They all baked up ok, but the ATK cake did end up being the smallest amount of batter volume-wise, and of the three it was my least favorite and it is possible that my alteration of the recipe had something to do with it.)

I wanted to try the White Mountain Cake because it sounded interesting because she calls for coconut oil and butter, and describes the cake as:


Rich and velvety to the point of creaminess, heady with vanilla, and almost as fluffy as angel food cake. The secret is virgin coconut oil, which amplifies the aroma of butter and vanilla while creaming up lighter (and whiter) than butter alone.


This description sounded amazing so I had to try it.

I went for the ATK cake because I’ve had good success with many of their recipes and this one seemed straightforward and a good standard white cake.

Finally Martha' Stewart. I had actually made the Martha Stewart recipe before, as cupcakes for my cousins wedding! But I had never made it into a layer cake, and it’s been years since I have made it so I couldn’t remember what it was like exactly, but I do remember thinking it made some lovely cupcakes. I didn’t really want to make this one because of the three, it’s the one recipe that calls for beating the egg whites separate and folding them into the batter. I try to avoid this step in any recipe if I can, but sometimes it can’t be helped.

The Results:

White Mountain Cake

America’s Test Kitchen

Martha Stewart

IMG_6743.jpeg

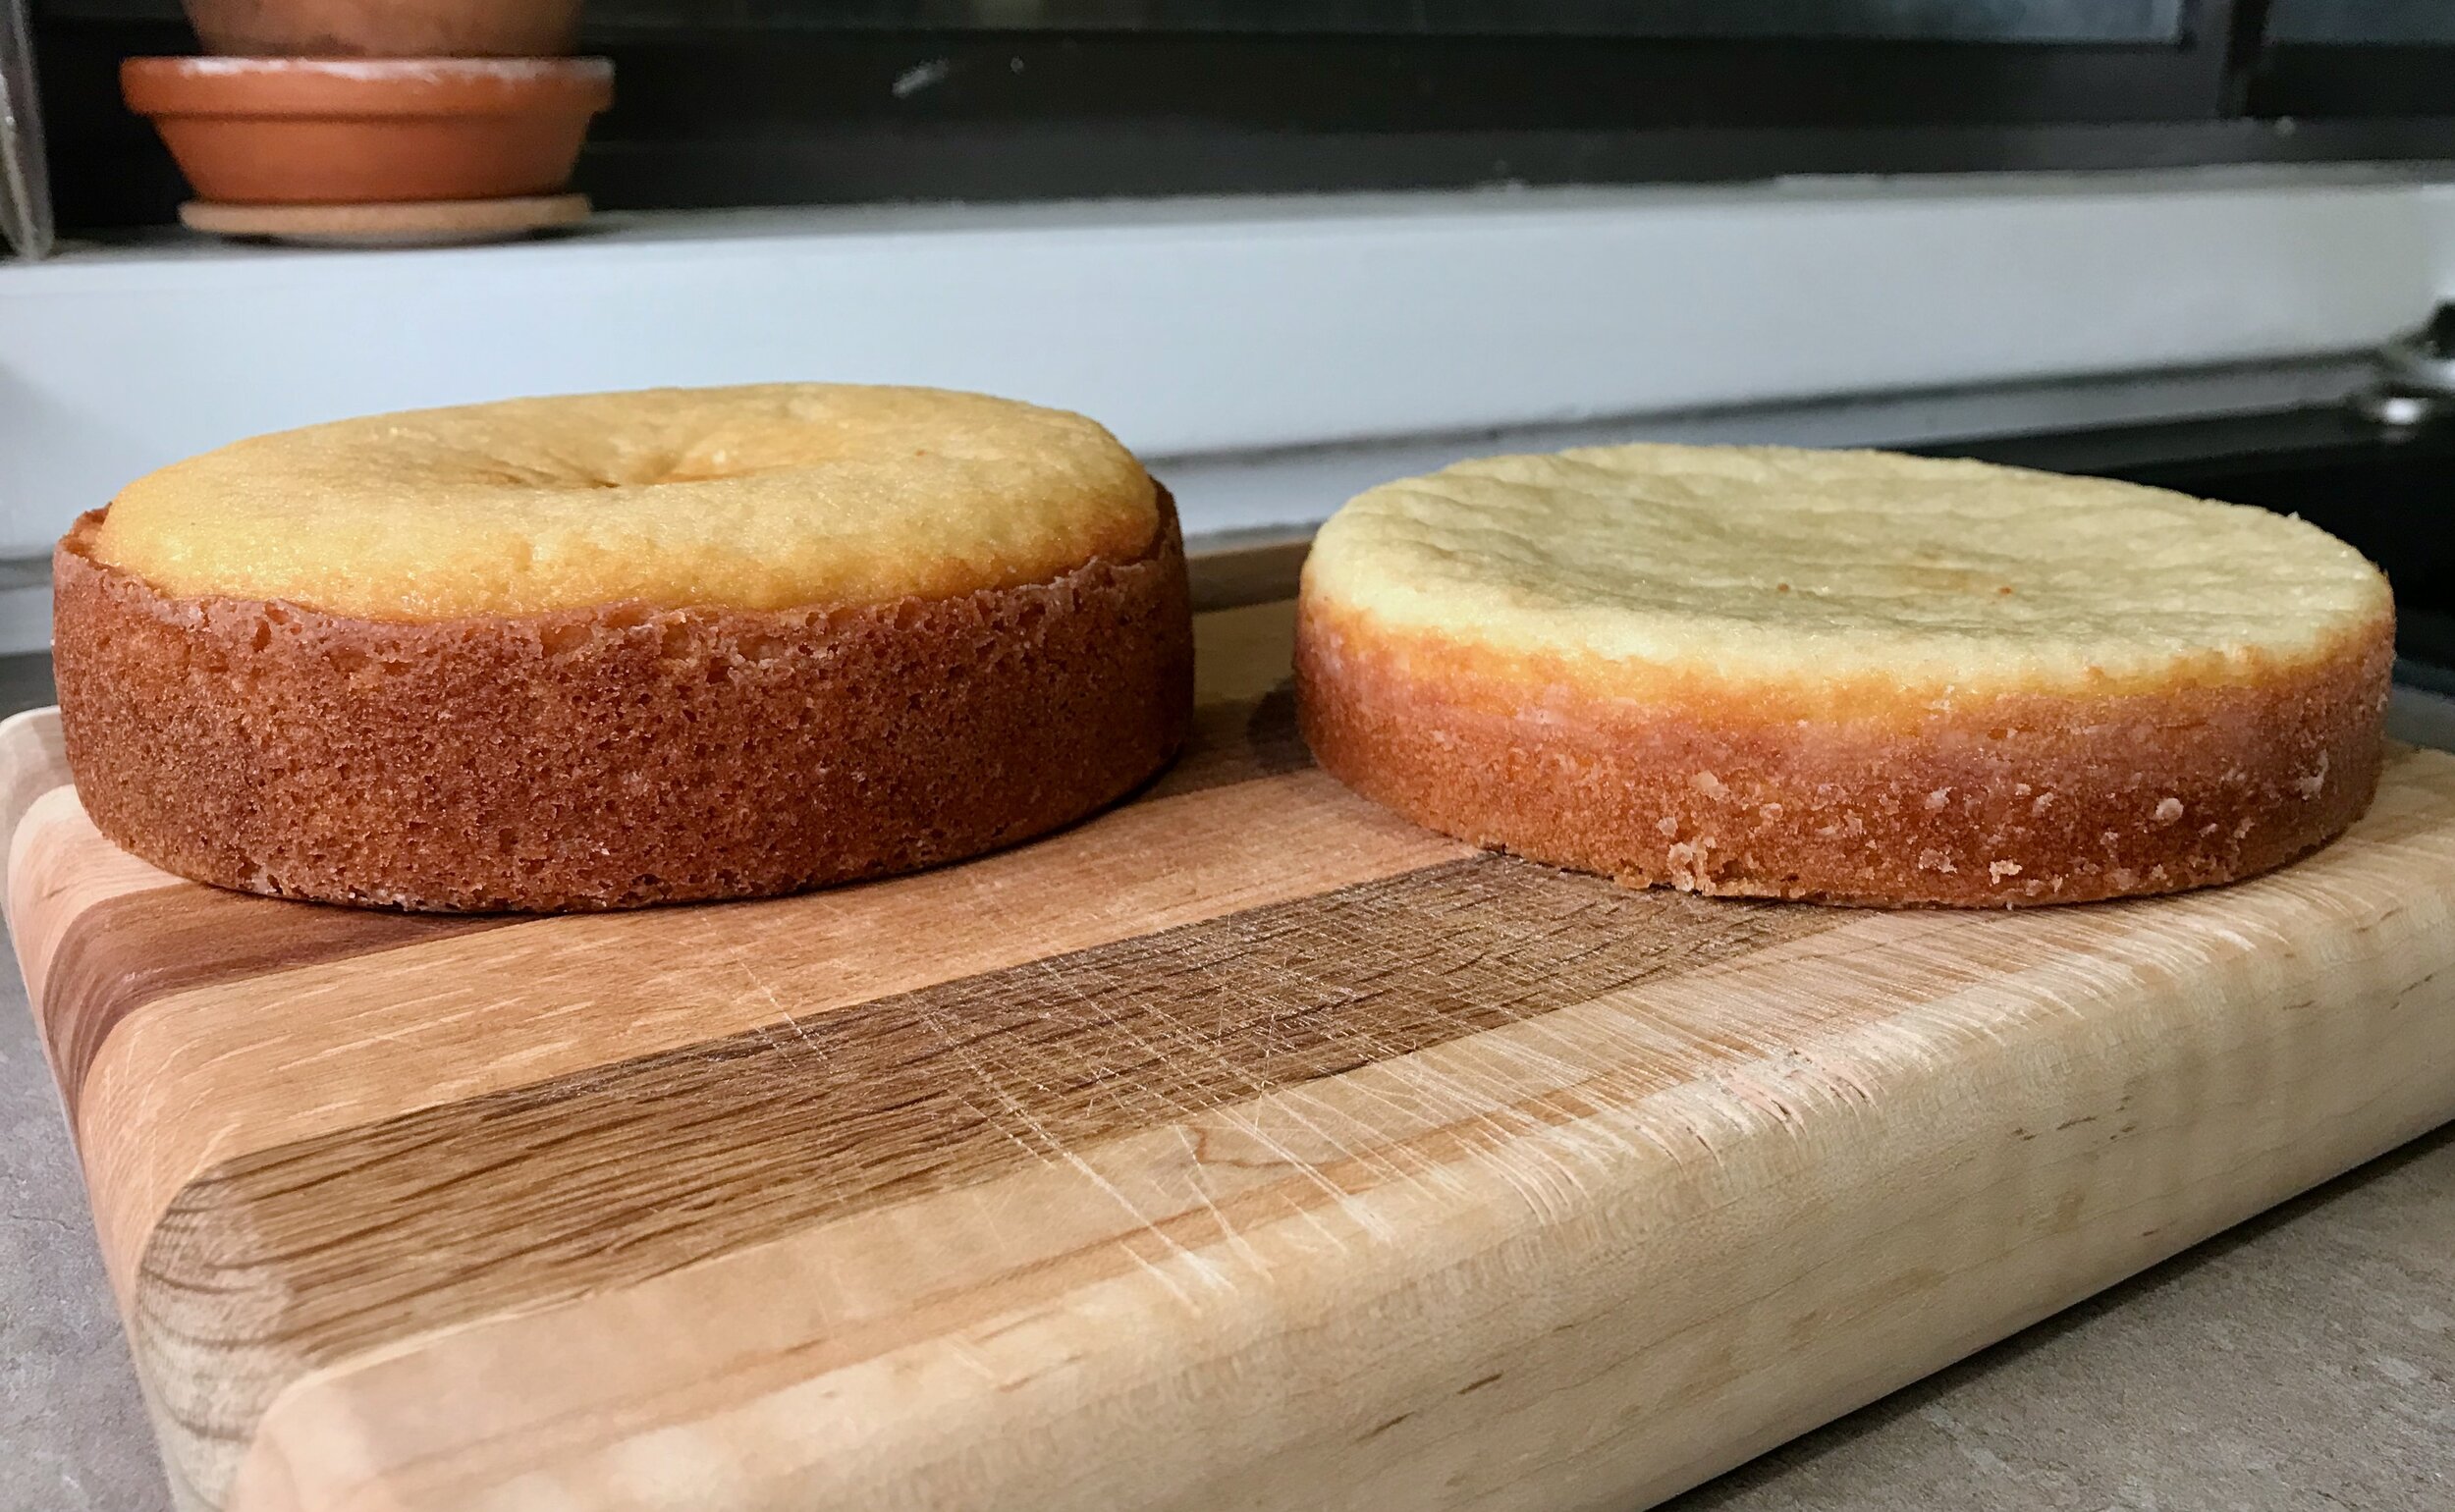
Here is the White Mountain Cake on the left with the ATK cake on the right

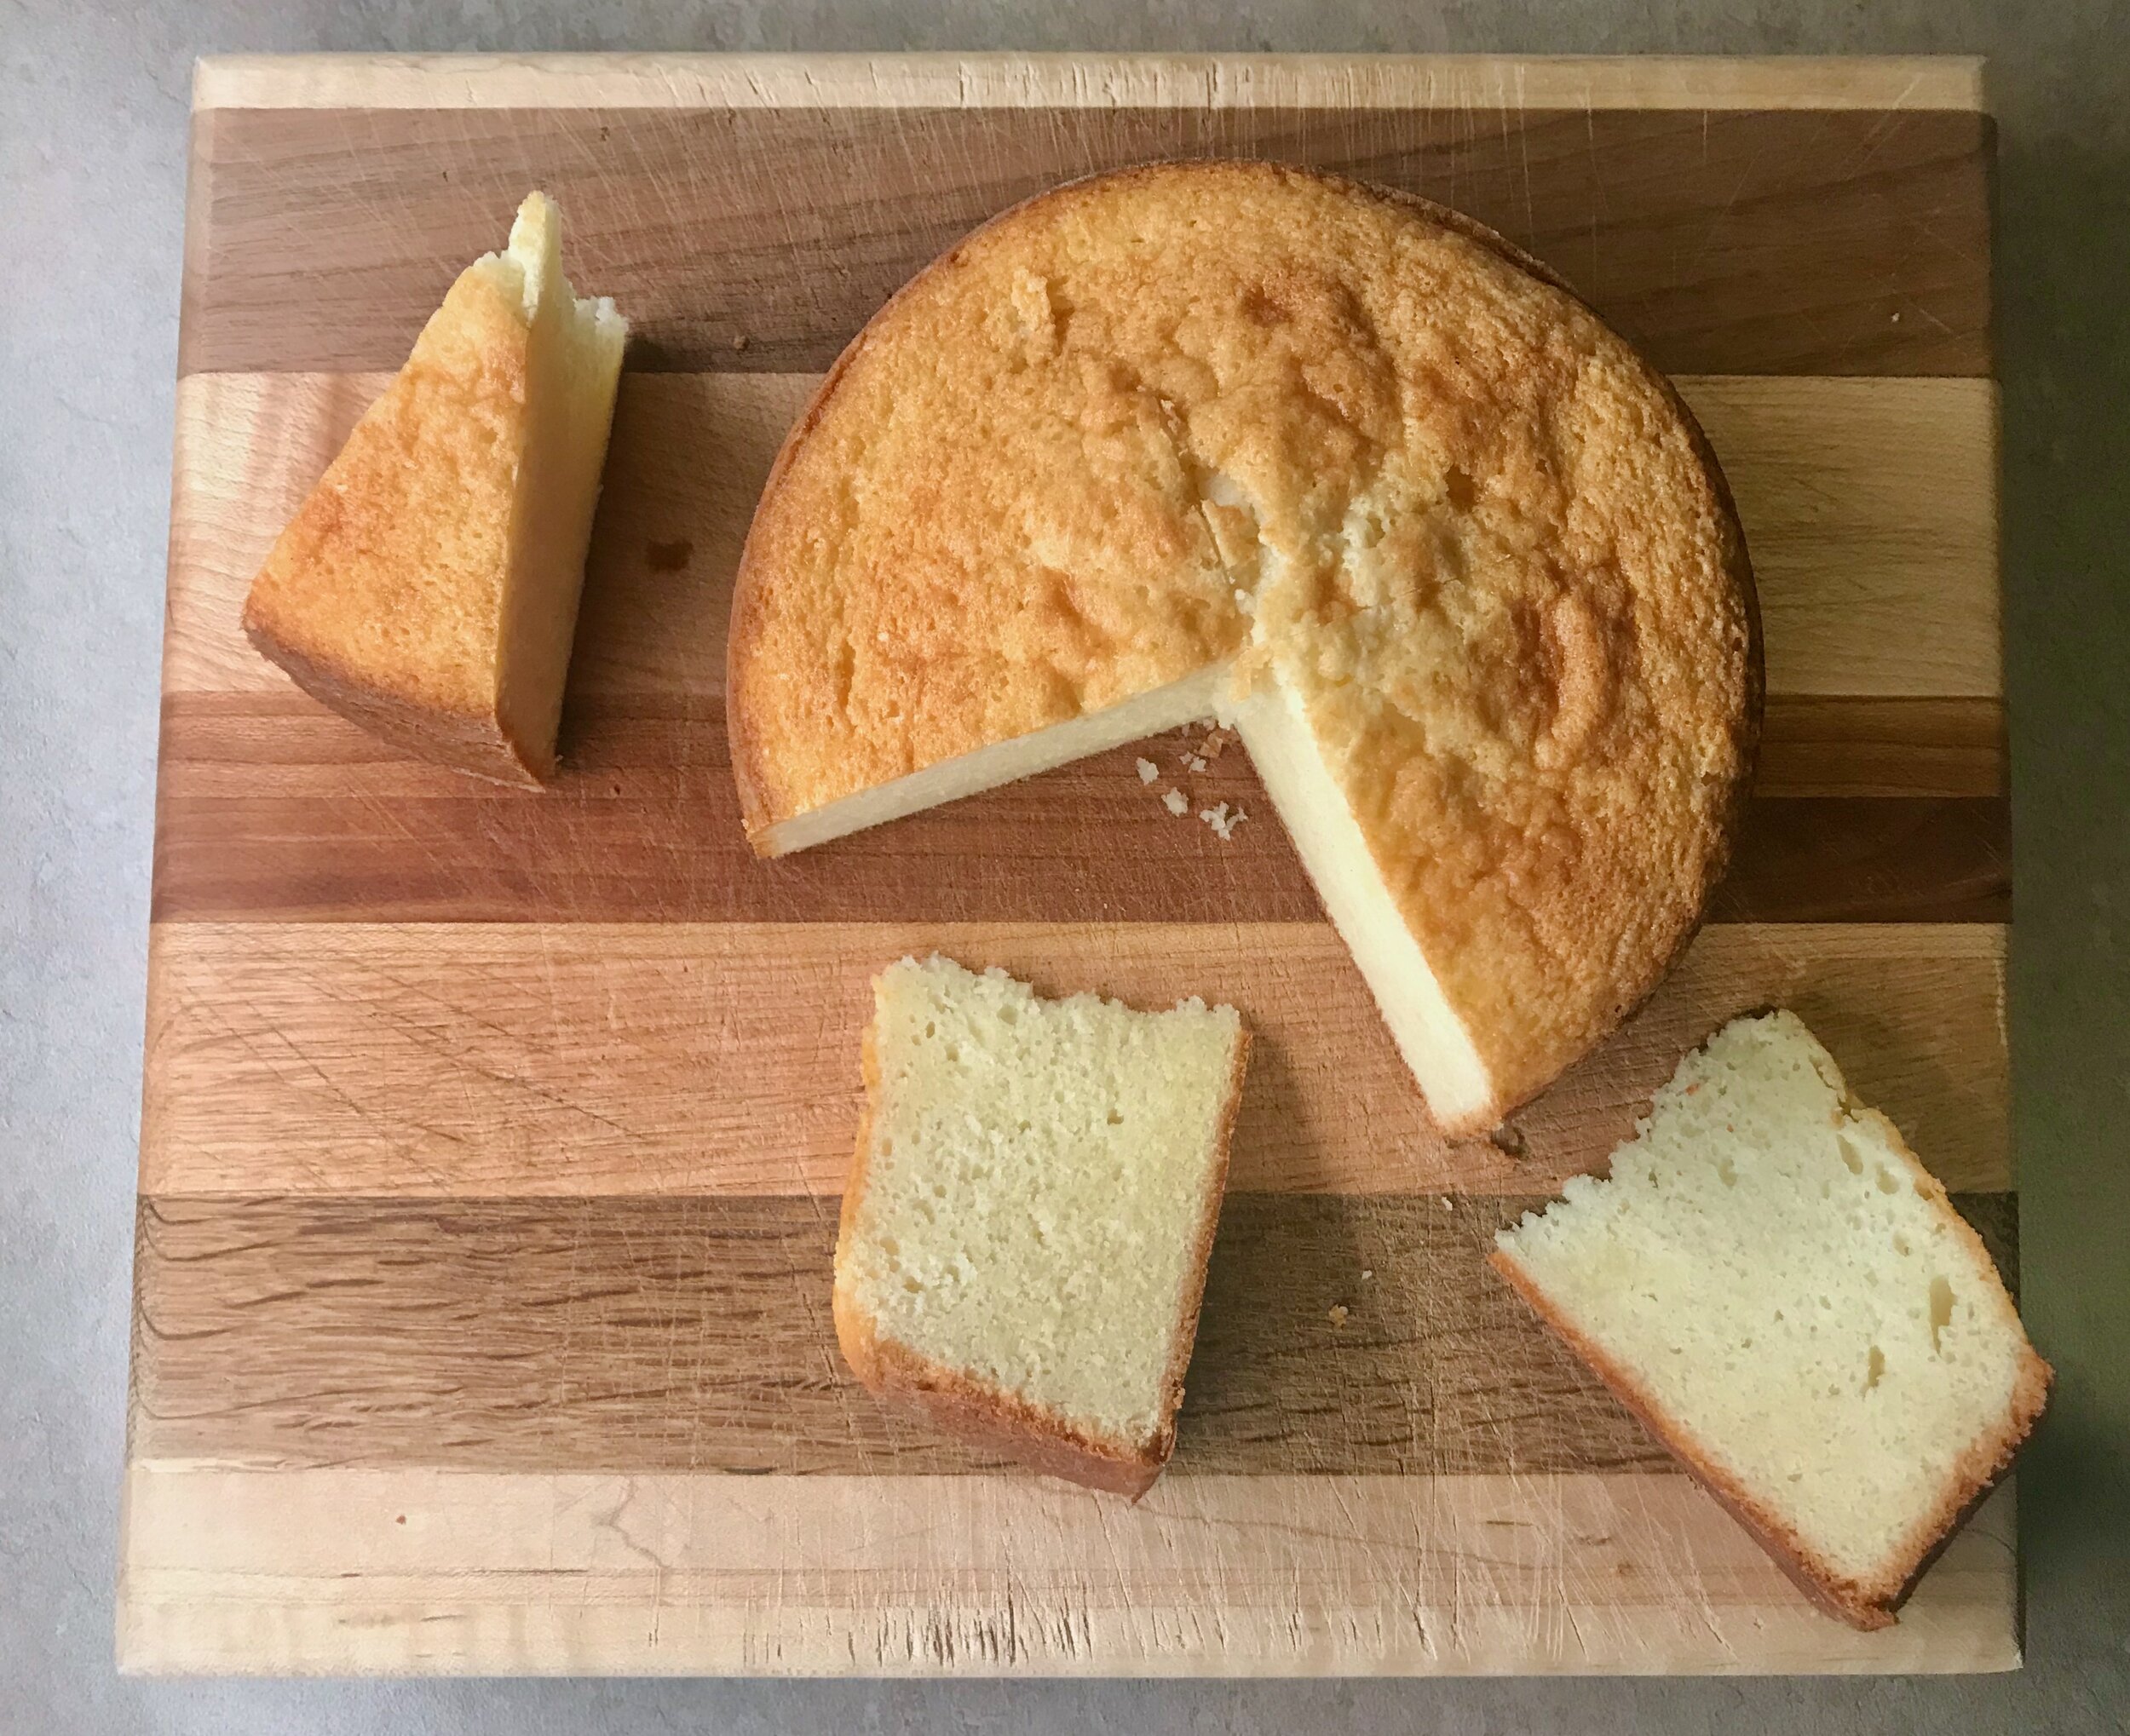
White Mountain Cake on the top, ATK on the bottom

IMG_6891.jpeg
IMG_6904.jpeg

This is Martha Stewart’s White Cake

Conclusion:

There was a clear winner and loser in this cake testing competition. Lara and I agreed right away. Martha Stewart was the clear favorite. The White Mountain Layer Cake was a very close second, but it was not quite as light as Martha’s cake, and not quite as rich. The Martha Stewart cake baked up beautifully with a nice tight crumb and was airy and super light, yet very rich and buttery tasting. In my opinion the perfect wedding cake base.

The White Mountain Layer Cake was fantastic, but just slightly denser in texture and mouthfeel. It is a great recipe that I am sure to make again, but it didn’t seem quite right for a wedding cake. I loved the little hint of almond from the almond extract. And while I couldn’t taste the coconut oil in this (so if you’re worried about that, don’t be), there was a slightly different flavor that was very nice.

The ATK cake was super not impressive and not really all that good to be honest. The flavor was the most uninteresting, just flat and boring, and the texture wasn’t very nice. It was kind of gummy and a bit courser than the other two cakes. All in all I didn’t care for it at all. I do have to say, as I already mentioned above, when I scaled this recipe down it did end up being the smallest volume of batter and it is possible that if I made the original recipe as written it would have turned out better. However, with two other wonderful options I don’t feel the need to test it again.

The Recipes:

Note: the original recipes are listed below with my scaled down ingredient lists in italics

Martha Stewart’s White Cake
From Martha Stewart’s Baking Handbook
Ingredients

  • 3 cups cake flour | 1 cup, 120 grams

  • 2 teaspoons baking powder | 2/3 teaspoon

  • 1 teaspoon salt | 1/3 teaspoon

  • 3 sticks butter, at room temperature | 1 stick, 8 tablespoons

  • 2 1/4 cups sugar, divided | 3/4 cup, 150 grams

  • 1/2 teaspoon vanilla extract | 1/4 teaspoon

  • 1 cup milk | 1/3 cup, 2 2/3 ounces

  • 8 large egg whites | 2 2/3 egg whites, 93 grams

Directions
Preheat the oven to 350 degrees. Butter two 9-by-2 inch round cake pans and line the bottoms with parchment paper. Dust with flour, tapping out the excess. Set aside.

In the bowl of an electric mixer fitted with the paddle attachment, beat the butter and 2 cups of sugar until light and fluffy, 3 to 4 minutes, scraping down the sides of the bowl as needed. Beat in the vanilla. With mixer on low speed, add flour mixture in three parts, alternating with the milk and beginning and ending with the flour; beat until just combined. Transfer mixture to a large bowl; set aside.

In the clean bowl of an electric mixer fitted with the whisk attachment, beat egg whites on low speed until foamy. With mixer running, gradually add remaining 1/4 cup sugar; beat on high until stiff, flossy peaks form, about 4 minutes. Do not overbeat. Gently fold a third of the egg-white mixture into the butter-flour mixture until combined. Gently fold in the remaining whites.

Divide batter evenly between prepared pans and smooth with an offset spatula. Bake, rotating pans halfway through, until cakes are golden brown and a cake tester inserted in the centers comes out with just a few moist crumbs. 30 to 35 minutes. Transfer pans to a wire rack to cool 20 minutes. Invert cakes onto rack; peel off parchment. Reinvert cakes and let them cool completely, top sides up.

———————————————————————————————————————————————————————————————

White Mountain Layer Cake
From Bravetart by Stella Parks
Ingredients

  • 4 cups (16 oz) bleached cake flour | 4 ounces

  • 2 sticks butter | 1/2 stick

  • 2/3 cup (4 oz) virgin coconut oil, solid but creamy | 1 ounce

  • 2 1/4 cups (16 oz) sugar | 4 ounces

  • 2 1/2 teaspoons baking powder | 5/8 teaspoon

  • 1 teaspoon baking soda | 1/4 teaspoon

  • 3/4 teaspoon Diamond Crystal kosher salt (half as much if iodized) | 3/16 teaspoon

  • 1 cup (8 1/2 oz) egg whites, from about 8 eggs | 2 1/8 ounces

  • 2 tablespoons vanilla extract | 1 1/2 teaspoons

  • 1 teaspoon almond extract | 1/4 teaspoon

  • 2 cups (16 oz) cultured low-fat buttermilk | 1/2 cup (4 ounces)

Directions
Preheat oven to 325 degrees F. Line three 8-by-3-inch aluminum cake pans with parchment and grease with pan spray.

Combine butter, coconut oil, sugar, baking powder, baking soda and salt in the bowl of a stand mixer fitted with the paddle attachment. Mix on low speed to moisten, then increase to medium and cream until fluffy and light, about 5 minutes, pausing to scrap the bowl and beater halfway through. With the mixer running, add the egg white one at a time, follow by vanilla and almond extracts.

Reduce speed to low and sprinkle in one-third of the flour, followed by one-third of the buttermilk. Alternate between the two, allowing each addition to be roughly incorporated before adding the next. Once smooth, fold with a flexible spatula to ensure it’s well mixed from the bottom up. Divide among the prepared caked pans, about 22 ounces each.

Bake until the cakes are firm but pale, browned only around the very edges, about 40 minutes (My small cake took about 35.5 minutes at 350 degrees —> I did accidentally bake at the incorrect temperature but it didn’t seem to do any harm!). A toothpick inserted into the center will emerge with a few crumbs still attached, and your fingertip will leave a slight indentation in the puffy crust.

Cool until no trace of warmth remains, about 90 minutes. Loosen the cakes from their pans with a knife. Invert onto a wire rack, peel off the parchment, and re-invert.

———————————————————————————————————————————————————————————————

Classic White Layer Cake
From The Perfect Cake by America’s Test Kitchen
Ingredients

  • 1 cup whole milk | 1/4 cup

  • 6 large egg whites | 1.5 egg whites

  • 1 teaspoon vanilla extract | 1/4 teaspoon

  • 2 1/4 cups (9 ounces) cake flour | 2.25 ounces

  • 1 3/4 cups (12 1/4 ounces) sugar | 3 ounces

  • 4 teaspoons baking powder | 1 teaspoon

  • 1 teaspoon salt | 1/4 teaspoon

  • 12 tablespoons butter, cut into 12 pieces and softened | 3 tablespoons

Directions
Adjust oven rack to middle position and heat oven to 350 degrees. Grease two 9-inch round cake pans, line with parchment paper, grease parchment, and flour pans. Whisk milk, egg whites, and vanilla together in a bowl.

Using stand mixer fitted with paddle, mix flour, sugar, baking powder, and salt on low speed until combined. Add butter, 1 piece at a time, and mix until only pea-size pieces remain, about 1 minute. Add all but 1/2 cup milk mixture, increase speed to medium-high, and beat until light and fluffy, about 1 minute. Reduce speed to medium-low, add remaining 1/2 cup milk mixture, and beat until incorporated, about 30 seconds. Give batter a final stir by hand.

Divide batter evenly between prepared pans and smooth tops with a rubber spatula. Gently tap pans on counter to settle batter. Bake until toothpick inserted in center comes out with few crumbs attached, 23 to 25 minutes, switching and rotating pans halfway through baking. Let cakes cool in pans on wire rack for 10 minutes. Remove cakes from pans, discarding parchment, and let cool completely on rack, about 2 hours.

Simple Carrot Cake

IMG_7149.jpeg

A weird Easter this year. No church to go to (although thankfully live streaming is going well - but it’s just NOT the same as being in community with your fellow believers) and no family to get together with. It’s just been such a strange few weeks, and more to come. Lara and I wanted to at least do something festive to celebrate the most exciting day for Christians around the world. We decided to make something a little special for lunch, and finish it off with some cake!

Lara found a carrot cake recipe that seemed perfect so she got up early this morning to bake it. I also got up early to make my favorite yogurt galette dough to have ready for lunch. After some quiet time in the kitchen we took an Easter morning walk. We had wanted it to be a sunrise walk, but it was way to cloudy. Still a beautiful morning full of bird sounds. The heaven’s were sure declaring the glory of God!

IMG_7089.jpeg
IMG_7092.jpeg

We then live-streamed church followed by lunch of a beautiful leek and bacon galette with pecorino which was just lovely. Since the weather is going to get crummy again starting tonight we then went off on a nice afternoon walk at Millenium Park. Grey and cool, but beautiful in it’s own way.

IMG_7099.jpeg

When we got home it was coffee time! Which also meant cake time! The carrot cake was a definite winner, and perfect with a hot cup of coffee! The cake itself is not that sweet, but it was perfectly cooked, moist and tender with a hint of cinnamon. While it would be a nice cake to eat plain, or with some powdered sugar or a simple glaze, cream cheese frosting is definitely the way to really jazz it up! The cake recipe also had an accompanying frosting, but since I had some cream cheese frosting in the freezer (from my work Christmas party cupcakes) I just used that.

IMG_7137.jpeg
IMG_7152.jpeg
IMG_7157.jpeg
IMG_7169.jpeg

Lara halved the original recipe (I have the halved recipe written out below, see the link for the original full recipe) and baked it in a 9-inch round cake pan. It baked for 36 minutes which seemed perfect. It was cooked through yet not dry at all. I wouldn’t be opposed to adding some walnuts to the batter itself, but whatever you prefer. This is definitely a winner of a recipe. Simple enough to not be intimidating, but special enough to feel celebratory. Highly recommended.

———————————————————————————————————————————————————————————————

Simple Carrot Cake
From The Kitchn
Ingredients
For the Cake

  • 1 (120 grams) cups all-purpose flour (or a mix of all purpose and whole wheat flours)

  • 1 teaspoon ground cinnamon

  • 1 teaspoon baking powder

  • 1/2 teaspoon baking soda

  • 1/2 teaspoon salt

  • 2 large eggs, at room temperature

  • 1/2 teaspoon vanilla extract

  • 1/2 cup (100 grams) granulated sugar

  • 3/8 cup (75 grams) canola oil

  • 2 cups grated carrot

For the frosting:

  • 4 ounces cream cheese, at room temperature

  • 2 tablespoons unsalted butter, at room temperature

  • 1 1/2 cups powdered sugar

  • 1/2 teaspoon vanilla extract

  • Pinch salt

Directions
Make the cakeArrange a rack in the middle of the oven and heat to 350°F. Coat an 8-inch cake pan with cooking spray; set aside.

Place the flour, cinnamon, baking powder, baking soda, and salt in a medium bowl and whisk to combine. Place the eggs and vanilla in a medium bowl and whisk to combine; set both bowls aside.

Place the sugar and oil in a the bowl of a stand mixer fitted with the paddle attachment. (Alternatively, use an electric hand mixer or whisk and large bowl.) With the mixer on low (or by hand), beat 1/3 of the flour into the sugar mixture. Beat in 1/3 of the egg mixture. Continue adding the flour and eggs in alternating additions. Stop mixing when the last of the flour is just barely incorporated. Add the carrots and fold them in by hand with a rubber spatula, working slowly and gently until the carrots are distributed and no more dry flour remains.

Pour the batter into the baking dish and gently tap the dish a few times against the counter to work out the air bubbles. Bake for 34-38 minutes, rotating halfway through, until the cake is slightly puffed in the middle and browned on the edges, and a toothpick inserted in the middle should come out clean.

Place the cake on a wire rack and let cool completely before frosting.

Make the frostingPlace the cream cheese and butter in the bowl of a stand mixer fitted with the paddle attachment. (Alternatively, use an electric hand mixer and large bowl.) Beat on medium speed until combined. Gradually beat in the powdered sugar, vanilla, and salt until the frosting starts to come together into lumps. Increase the speed to high and continue to beat until fluffy and creamy, scraping down the sides of the bowl as needed. Dollop the frosting over the cake and spread into an even layer.

German Apple Cake (Apfelkuchen)

IMG_6652.jpeg
IMG_6641.jpeg

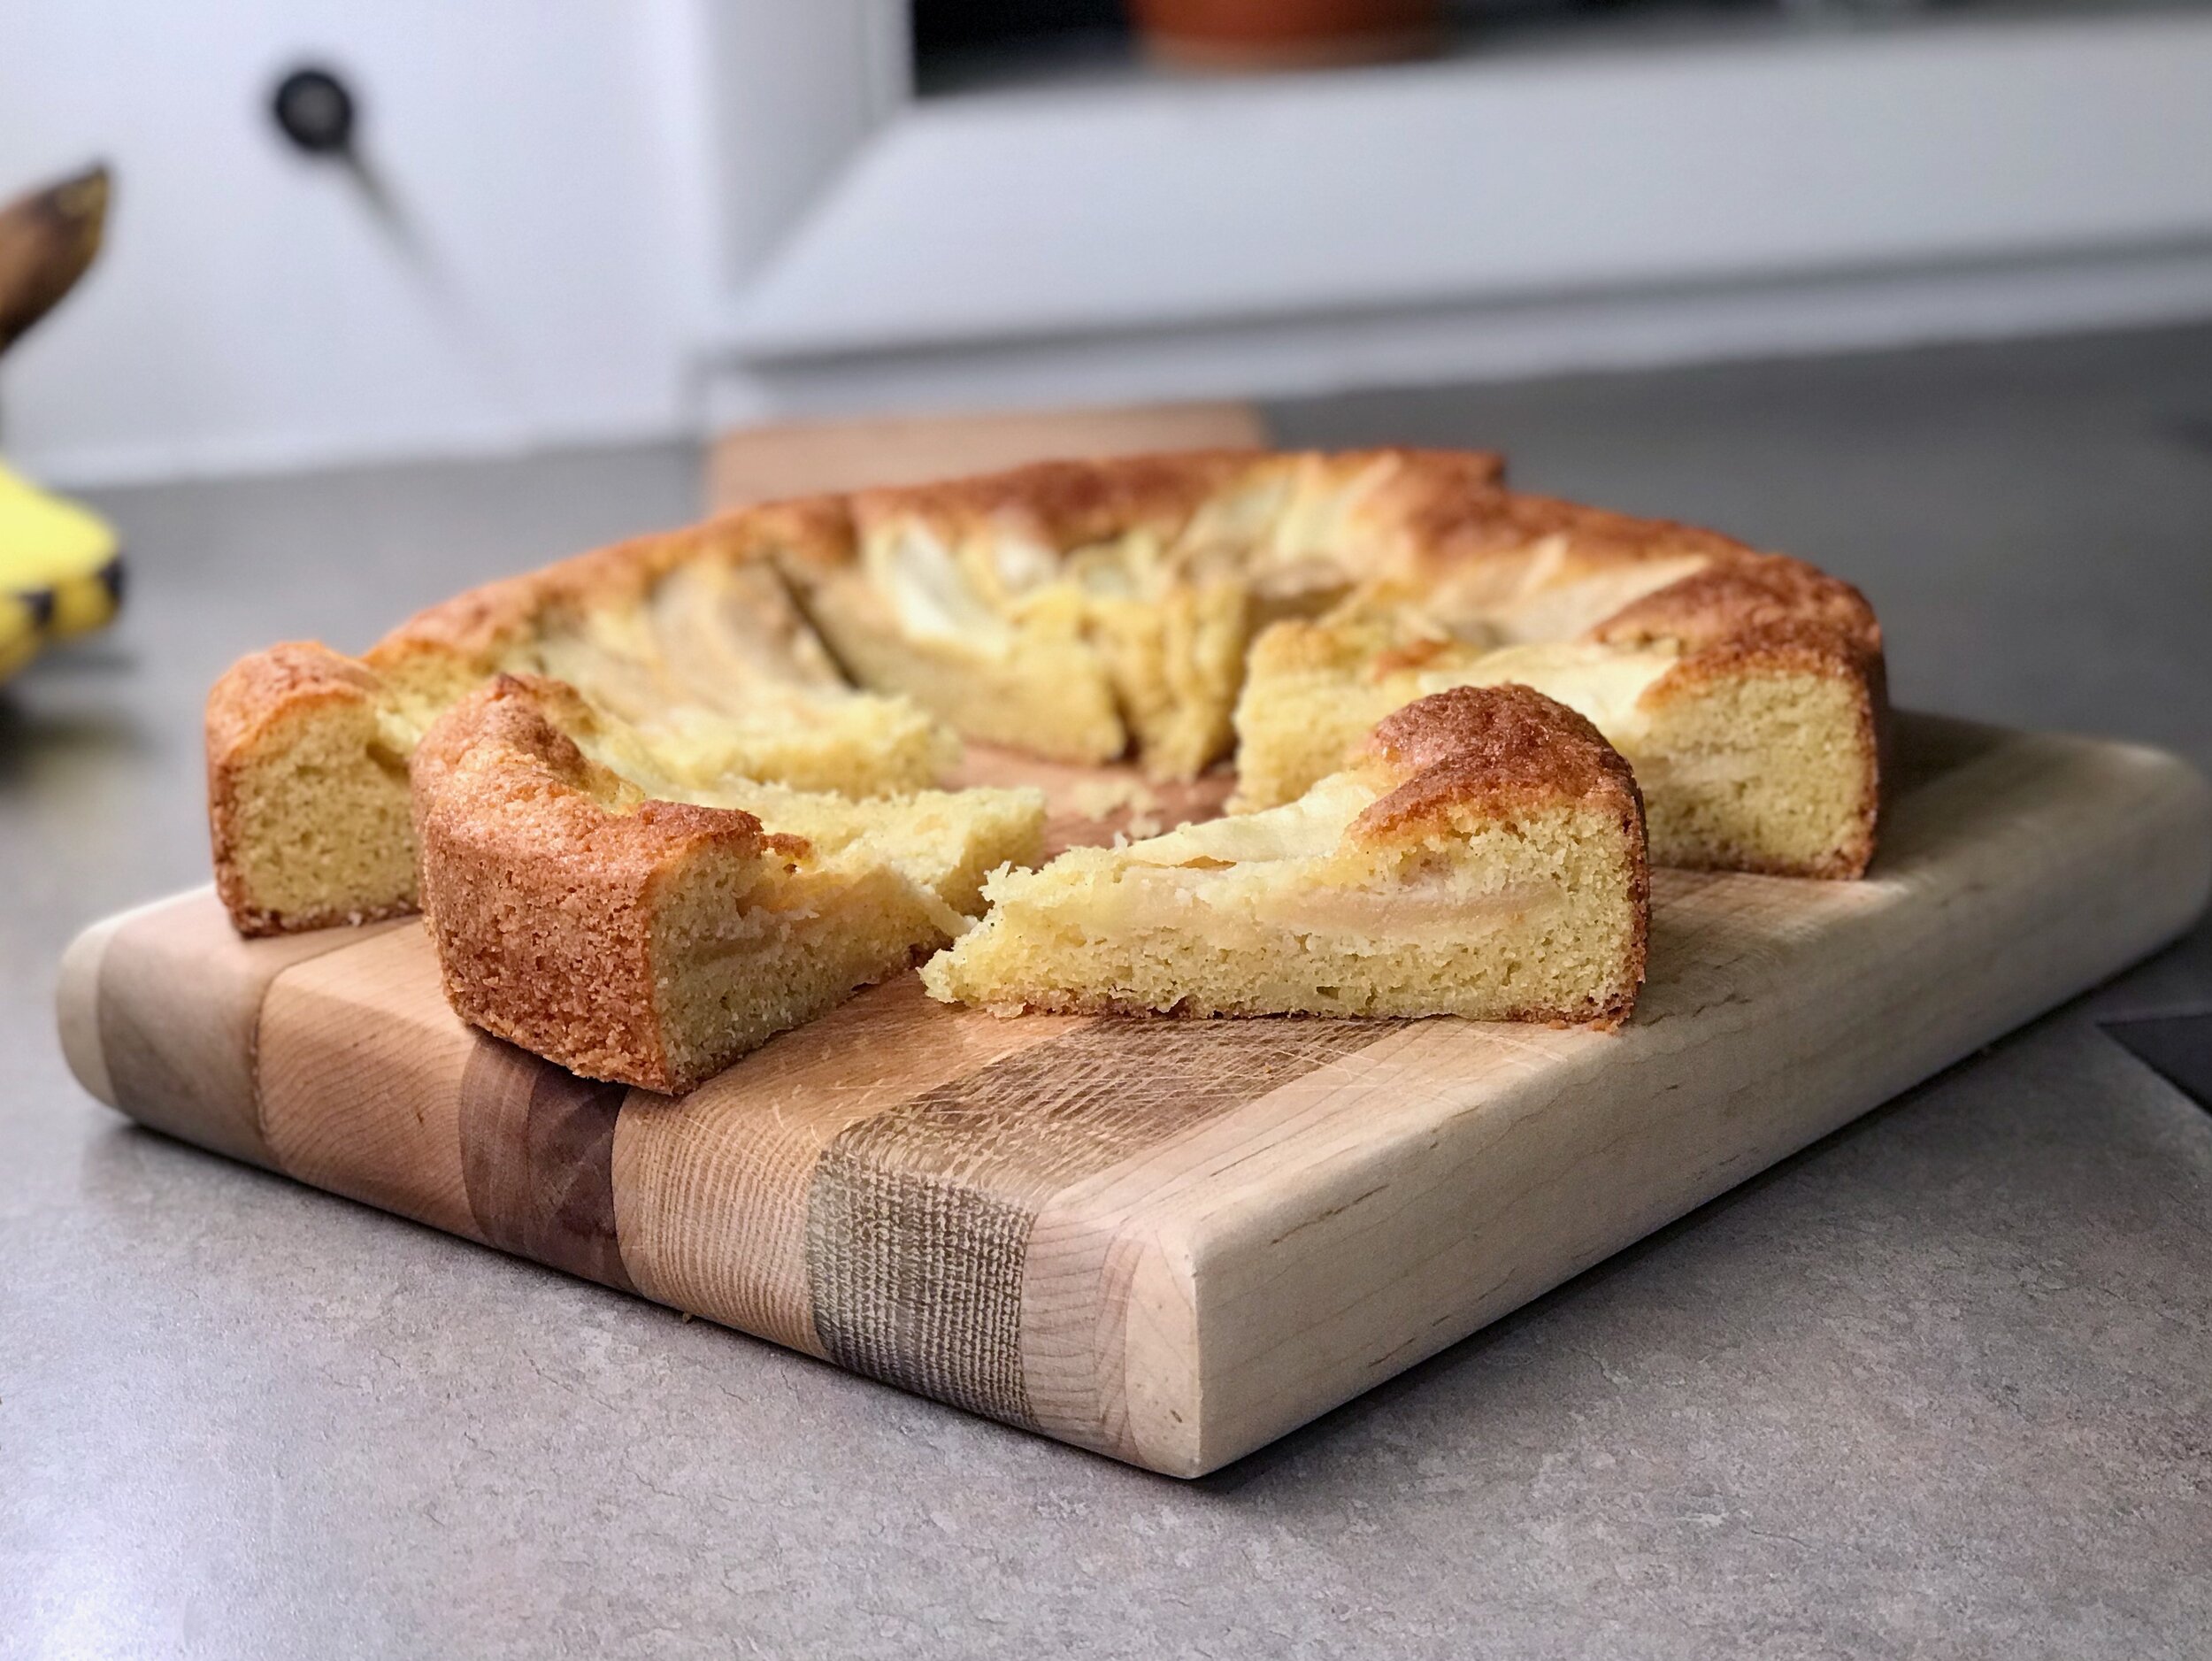
I had the itch to bake something this week. I had two sad looking apples sitting on the counter, and a package of almond paste in the freezer, leftover from Christmas, so when I found this recipe I knew it was meant to be! This is a beautifully simple cake and turned out exactly as I had hoped. The almond flavor really shines through and the almond pastes gives the crumb a little “stickiness” that I enjoy. Topped with thinly sliced apples, the combination couldn’t be more delicious, or beautiful. Highly recommended.

German Apple Cake (Apfelkuchen)
From 177 Milk Street
Ingredients

IMG_6662.jpeg
  • 1 cup (130 grams) all purpose flour [I used 110 grams all purpose and 20 grams whole wheat]

  • 1 1/2 teaspoons baking powder

  • 1 cup (214 grams) granulated sugar, plus 2 tablespoons for sprinkling [I cut back to 3/4 cup, 160 grams]

  • 4 ounces almond paste, broken into small pieces

  • 1/2 teaspoon kosher salt

  • 1 stick (8 tablespoons) butter, room temperature

  • 3 large eggs, room temperature

  • 2 teaspoons vanilla extract

  • 2 small granny smith apples, about 12 ounces total, peeled and cored and halved lengthwise [I used the apples I had, I think one was a red delicious and one was a golden delicious]

Directions
Preheat the oven to 375 degrees. Line a 9-inch springform pan parchment paper and spray with cooking spray, then dust with flour; tap out the excess and set aside. In a small bowl, whisk together the flour and baking powder.

In a stand mixer with the paddle attachment, mix the 1 cup of sugar, the almond paste and salt on low until the paste has broken into crumbly bits, 2 to 3 minutes. Add the butter and mix until combined, about 30 seconds. Increase to medium-high and beat until the mixture is pale and fluffy, about 3 minutes, scraping the bowl as needed. Reduce to medium, then, one at a time, add the eggs, beating for about 20 seconds after each addition.

Scrape down the bowl, then add the vanilla and continue mixing on medium until well-combined, about 2 minutes. Reduce to low, add the flour mixture and mix just until the batter is evenly moistened, about 10 seconds; it will be thick. Using the spatula, scrape the bottom and sides of the bowl and give the batter a few folds to ensure no pockets of butter or flour remain. Transfer to the prepared pan and spread in an even layer, smoothing the surface.

Slice each apple half lengthwise into ⅛-inch-thick half circles; do not separate the slices. With your hand, gently press down on each half to fan the slices. Divide the fanned apples into 8 equal portions without undoing the fanned effect. Slide a thin spatula or butter knife under the apples, then slide the slices off the spatula near the outer edge of the cake with the slices fanning outward from the center. One at a time, position another 6 sets of slices on the cake, creating an evenly spaced spoke pattern. Place the last set of apple slices in the center. Sprinkle the remaining 2 tablespoons sugar evenly over the top.

Bake until the edges of the cake are deep golden brown and a toothpick inserted at the center comes out clean, 50 to 60 minutes. Cool in the pan on a wire rack for 30 minutes. Run a paring knife around the inside of the pan to loosen, then remove the pan sides. Serve warm or at room temperature; dust with powdered sugar just before serving.

Christmas Party Cupcakes

IMG_6018.jpeg
IMG_2992.jpeg

The Christmas party for my work was postponed until January. We’re going through a big EMR switch, and that, combined with everyone’s busy holidays led to a January party. Fine by me! I volunteered to make cupcakes for dessert after some of my coworkers mentioned that they would price out cupcakes from some local bakeries to buy for dessert. I figured I could just do it, especially since my day off is Thursday and the party was Friday. I figured I could make a few dozen the day before and we’d be set.

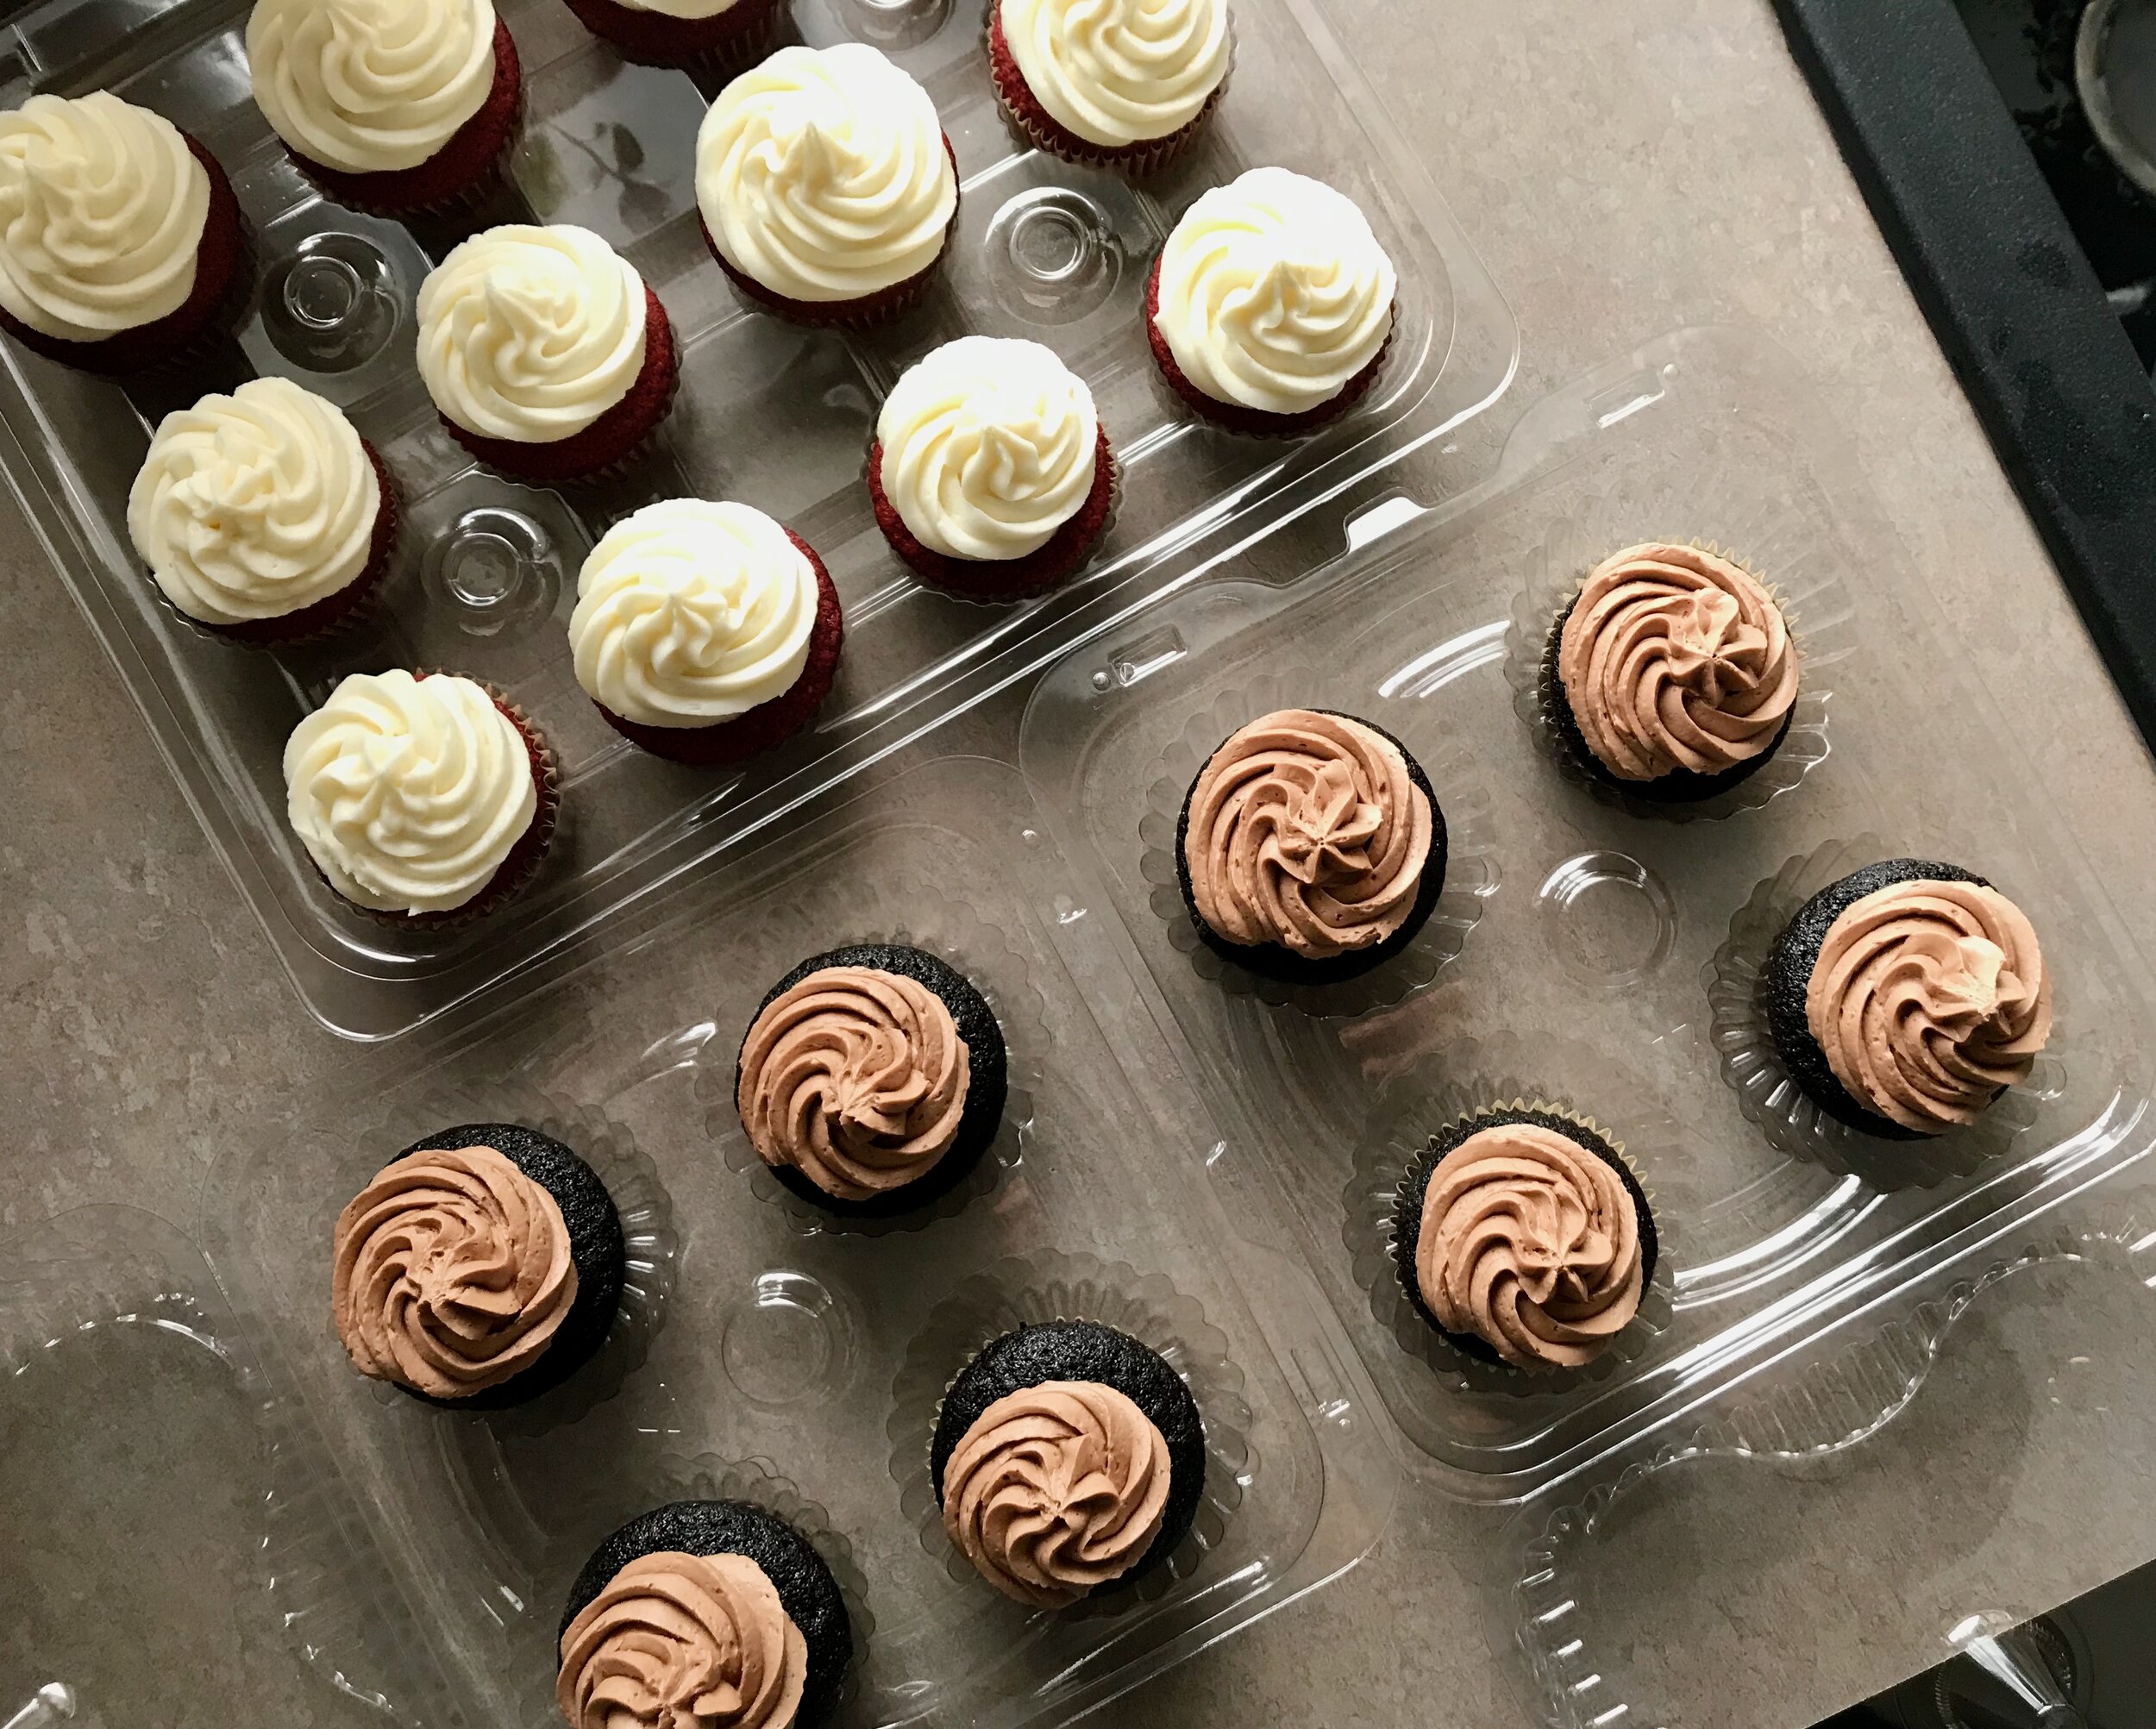
I made two types of cupcakes, red velvet and a dark chocolate with chocolate frosting. I’d made the dark chocolate ones before (the original recipe is for a dark chocolate cupcake with a ganache center which I have done and it is amazing, but I made it simpler this time and omitted the filling and they are still delicious!) but I’d never made a red velvet cupcakes, although I have made a red velvet cake multiple times so not too different.

IMG_6015.jpeg

Both turned out really well. I ended up making a double batch of each recipe. I think I made the red velvet a little smaller than they were supposed to be because I ended up getting 30 cupcakes and a mini loaf cake (just for fun!). The chocolate cupcakes made a perfect two dozen.

I made the cream cheese frosting a few days in advance and it was just fine, I didn’t even need to re-whip it. With that being made ahead of time, it took me about 5 hours from start to finish to make these all. That was with a quick 20 or so minute break for lunch.

Overall, two nice recipes, perfect for a celebration with friends and co-workers! I love being able to share my joy of food, baking and cake with others!

While both recipes were good, I would say that the chocolate cupcakes were pretty amazing (even without the ganache filling), and the red velvet were average. The red velvet had nice flavor, but I wasn’t blown away by the final result. Perfectly acceptable, but nothing beyond that. The recipe also had quite a few steps including whipping the eggs whites separate. While I would happily make and eat these cupcakes again, I would be more likely to look for a different recipe next time (this review does not apply to the frosting, which was so good! But cream cheese frosting generally is!).

—————————————————————————————-

IMG_1651.jpeg

Cupcakes 
From America's Test Kitchen (and see previous blog post as well)
Makes 12 cupcakes
Ingredients
Ganache Filling
[I omitted this time, but highly recommend]

IMG_6159.jpeg
  • 2 ounces bittersweet chocolate , chopped fine

  • 1/4 cup heavy cream 

  • 1 tablespoon confectioners' sugar 

Chocolate Cupcakes

  • 3 ounces bittersweet chocolate , chopped fine

  • 1/3 cup (1 ounce) Dutch-processed cocoa 

  • 3/4 cup hot coffee 

  • 3/4 cup (4 1/8 ounces) bread flour 

  • 3/4 cup (5 1/4 ounces) granulated sugar 

  • 1/2 teaspoon table salt 

  • 1/2 teaspoon baking soda 

  • 6 tablespoons vegetable oil 

  • 2 large eggs 

  • 2 teaspoons white vinegar 

  • 1 teaspoon vanilla extract 

314D6A4D-BA9F-4A3B-B179-EBBC4CDA2B02.jpeg

Directions

IMG_6998.jpeg

FOR GANACHE FILLING: Place chocolate, cream, and confectioners’ sugar in medium microwave-safe bowl. Heat in microwave on high power until mixture is warm to touch, 20 to 30 seconds. Whisk until smooth; transfer bowl to refrigerator and let stand until just chilled, no longer than 30 minutes. (Do not chill for longer than 30 minutes. The ganache gets too hard and sinks to the bottom of the cupcake during baking. Still just as delicious, but quite messy, and not as easy to eat. I found 20-25 minutes to work well.)

FOR CUPCAKES: Adjust oven rack to middle position and heat oven to 350 degrees. Line standard-size muffin pan (cups have ½-cup capacity) with baking-cup liners. Place chocolate and cocoa in medium bowl. Pour hot coffee over mixture and whisk until smooth. Set in refrigerator to cool completely, about 20 minutes. Whisk flour, sugar, salt, and baking soda together in medium bowl; set aside.

Whisk oil, eggs, vinegar, and vanilla into cooled chocolate-cocoa mixture until smooth. Add flour mixture and whisk until smooth.

Divide batter evenly among muffin pan cups. Place one slightly rounded teaspoon ganache filling on top of each cupcake. Bake until cupcakes are set and just firm to touch, 17 to 19 minutes. Cool cupcakes in muffin pan on wire rack until cool enough to handle, about 10 minutes. Carefully lift each cupcake from muffin pan and set on wire rack. Cool to room temperature before frosting, about 1 hour. 

TO FROST: Mound 2 to 3 tablespoons frosting on center of each cupcake. Using small icing spatula or butter knife, spread frosting to edge of cupcake, leaving slight mound in center.

Mocha Frosting
From Cook's Country 
Makes about 4 cups
This recipe makes enough frosting for two 9-inch layers, a 13 by 9-inch sheet cake, one Bundt cake (made in a 12-cup Bundt pan) or 24 cupcakes. The frosting can be made up to 2 days ahead and refrigerated in an airtight container. Before using the frosting, let it stand at room temperature until softened, about 2 hours, then whip with an electric mixer briefly to re-fluff.

Ingredients

  • 24 tablespoons unsalted butter (3 sticks), cut into pieces and softened 

  • 3 tablespoons heavy cream 

  • 1 teaspoon vanilla extract 

  • 1/4 teaspoon salt 

  • 3 cups confectioners' sugar 

  • 3 tablespoons cocoa 

  • 1 1/2 tablespoons instant espresso 

Directions
CREAM BUTTER In an electric mixer fitted with whisk attachment, beat butter, cream, vanilla, and salt on medium-high speed until combined. 

WHIP FROSTING Reduce mixer speed to medium-low. With motor running, slowly add confectioners' sugar, cocoa, and instant espresso and mix until smooth, 1 to 2 minutes. Increase speed to medium-high and beat frosting until light and fluffy, about 5 minutes.

———————————————————————————————————————————————————————————————

Red Velvet Cupcakes
From Sally’s Baking Addiction
Ingredients

  • 2 large eggs, room temperature and separated

  • 1 and 1/3 cups (160g) all-purpose flour (alternatively you can use 1 and 2/3 cups [192g] cake flour and omit the cornstarch below)

  • 1/4 cup (32g) cornstarch

  • 1/2 teaspoon baking soda

  • 4 teaspoons (6g) natural unsweetened cocoa powder

  • 1/4 teaspoon salt

  • 1/4 cup (60g) unsalted butter, softened to room temperature

  • 1 cup (200g) granulated sugar

  • 1/2 cup (105 grams) canola or vegetable oil

  • 2 teaspoons pure vanilla extract

  • 1/2 teaspoon distilled white vinegar

  • 1 ounce red gel food coloring (I used Wilton brand)

  • 1/2 cup (120ml) buttermilk, room temperature

  • Cream cheese frosting for topping (See below)

Directions
Preheat oven to 350°F. Line a one to two muffin pans with cupcake liners (the recipe makes about 14 cupcakes). With a handheld or stand mixer fitted with a whisk attachment, beat 2 egg whites on high speed in a medium bowl until soft peaks form, about 2-3 minutes. Set aside.

Sift the flour and cornstarch together to make sure it is evenly combined. Whisk this, along with baking soda, cocoa powder, and salt together in a medium bowl. Set aside.

Using a handheld or stand mixer fitted with a paddle attachment, beat the butter on high speed until smooth and creamy – about 1 minute. Add the sugar and beat on high speed for 2 minutes until creamed together fairly well. Scrape down the sides and up the bottom of the bowl with a rubber spatula as needed. Add the oil and beat on high for 2 minutes. Add 2 egg yolks and the vanilla. Beat on medium-high speed until combined. Scrape down the sides and up the bottom of the bowl with a rubber spatula as needed. Beat in the vinegar and the food coloring– until you reach your desired color.

With the mixer on low speed, add the dry ingredients in three additions alternating with the buttermilk, beginning and ending with the dry ingredients, and mixing each addition just until incorporated. Do not overmix. Fold whipped egg whites into cupcake batter with a rubber spatula or wooden spoon. The batter will be silky and slightly thick.

Spoon batter into cupcake liners filling 1/2 – 2/3 of the way full. Bake for 18-20 minutes or until the tops of the cupcakes spring back when gently touched and a toothpick inserted in the center comes out clean. Don’t overbake. Allow to cool in the pan for 5 minutes, then transfer to a rack to cool completely.

Cream Cheese Frosting
From Sugar Spun Run
Ingredients

  • 1/2 cup (1 stick) unsalted butter softened

  • 8 oz cream cheese softened

    1 teaspoon vanilla extract

  • 1/4 teaspoon salt

  • 4 cups (500 grams) powdered sugar

Directions
Combine butter and cream cheese in the bowl of a stand mixer (or you may use an electric mixer) and beat until creamy, well-combined, and lump-free. Add vanilla extract and salt and stir well to combine. With mixer on low, gradually add powdered sugar until completely combined. Use to frost completely cooled cake or cupcakes.

*Note: I made a double batch of frosting and it was enough to frost my 30 cupcakes with a small container leftover. I’d probably made a 1.5 batch if I was frosting 2 dozen cupcakes, and the full batch would then be plenty for a dozen cupcakes.

Vanilla Cake with Swiss Meringue Buttercream

8D1B3FD9-DC7D-4352-AD9A-AF5237D90649 2.jpg
7AC8CB7A-36A8-415B-8469-7AA5B694765F.jpg
17C95D03-867D-40E5-8C9F-CFE32F33A9EF.jpg

A family friend reached out to me a few weeks ago and asked if I would be willing and able to make a cake for her parent’s surprise anniversary party. I love sharing my love of cake with others so I was excited to help. She wanted a simple vanilla cake, which is my favorite as well, and then I had free range to decorate it however I wanted. She was decorating with eucalyptus and gold and white pumpkins so I used that as my inspiration to create this beautiful cake.

F05BE420-4527-4506-91E6-C1C319573F35.jpg

Since I had just made a vanilla cake a few weeks prior (for my own birthday) that turned out great, I used the same recipe, replacing the 1/3 cup lemon juice + 2/3 cup milk with 1 cup of (homemade) buttermilk. I made the full batch of Swiss meringue buttercream and it was the perfect amount to frost this cake without worrying about running out of frosting. I had a little frosting leftover (maybe around a cup).

Vanilla Butter Cake
Adapted from Liv for Cake
Ingredients

Vanilla Cake:

  • 3 cups all-purpose flour

  • 1 Tbsp baking powder

  • 3/4 tsp salt

  • 1 cup unsalted butter room temperature

  • 2 cups granulated sugar

  • 4 large eggs room temperature

  • 2 tsp vanilla

  • 1 cup buttermilk at room temperature

Elderflower Swiss Meringue Buttercream:

  • 6 large egg whites

  • 2 cups granulated sugar

  • 3 cups unsalted butter room temperature

Directions
For the Cake: Preheat oven to 350F. Grease and flour three 8" cake rounds and line with parchment.

In a medium bowl, whisk flour, baking powder, and salt until well combined. Set aside.

Using a stand mixer fitted with a paddle attachment, cream butter until smooth. Add sugar and beat on med-high until pale and fluffy (approximately 3mins). Reduce speed and add eggs one at a time fully incorporating after each addition. Add vanilla. Alternate adding flour mixture with buttermilk, beginning and ending with flour (3 additions of flour and 2 of buttermilk). Fully incorporating after each addition. Spread batter evenly between the prepared pans and smooth the tops.

Bake for approximately 28-30 mins or until a toothpick inserted into the center comes out mostly clean. Place cakes on wire rack to cool for 10mins then turn out onto wire rack to cool completely

For the Swiss Meringue Buttercream: Place egg whites and sugar into the bowl of a stand mixer, whisk until combined. Place bowl over a pot with 1-2" of simmering water and whisk constantly until the mixture is hot and no longer grainy to the touch or reads 160F on a candy thermometer (approx. 3mins) Place bowl on your stand mixer and whisk on med-high until the meringue is stiff and cooled (the bowl is no longer warm to the touch (approx. 10mins).

Switch to paddle attachment. Slowly add cubed butter and mix until smooth.

Lemon Elderflower Cake

IMG_4903.jpg

For my birthday earlier this month I kept with tradition and made a simple layer cake decorated with local, in-season flowers. As in years past, I went with dahlias. They are one of my favorite flowers, and they are perfectly in season on my birthday which is a win-win!

I saw this cake a while ago and thought it was so beautiful, and the flavor combination sounded amazing so I decided to go for it. It’s a lemon butter cake, layered with rich and tart lemon curd and smothered in creamy Swiss meringue buttercream.

IMG_9527.jpg

Changes I made: I decreased the frosting amount slightly because in the original recipe she stated that you wouldn’t need all of the frosting for the cake. I cut it down by 1/3 and found that I had just enough to frost the cake, although there were a few spots that you could see the cake through the thin layer of frosting. If I made it again I would make the full amount of frosting. Also, if for some reason you didn’t want to use the lemon curd between the layers you would most certainly need the full recipe for the frosting.

I also didn’t use the lemon curd recipe that was printed with the cake. Since the buttercream recipe called for egg whites, I was left with 4 egg yolks (since I decreased the amount of frosting) so I searched for a lemon curd recipe that called for 4 egg yolks which was easy enough to find. That way I didn’t have to waste anything. It worked out great - 4 whites for the frosting, 4 yolks for the lemon curd!

IMG_4916.jpg

Overall I thought this was a lovely cake. The cake itself was moist and fragrant. It baked up very well. The lemon curd was really nice, but I did find that it was perhaps a bit too strong for my taste. Not that it was bad in any way, but I would probably want a little more of a subtle lemon flavor in this cake if I would make again. I would keep the lemon zest in the cake, but perhaps just put frosting between the layers instead of curd. Or perhaps mix a little buttercream with lemon curd? Not sure how that would turn out, but I think it would be tasty.

IMG_2541.jpg

Also, I was not able to find elderflower cordial so I ended up using elderflower liqueur in the frosting which in the end didn’t really shine through. I couldn’t really taste it, partly because of how tart and strong the lemon flavor from the lemon curd was. In the end still an awesome cake, and a great birthday choice, just a few alterations if making again!

——————————————————————————————

IMG_6820.jpg

Lemon Elderflower Cake
From Liv for Cake
Ingredients

IMG_2803.jpg

Lemon Cake:

IMG_9973.jpg
  • 3 cups all-purpose flour

  • 1 Tbsp baking powder

  • 3/4 tsp salt

  • 1 cup unsalted butter room temperature

  • 1 Tbsp lemon zest from one large lemon

  • 2 cups granulated sugar

  • 4 large eggs room temperature

  • 2 tsp vanilla

  • 2/3 cup milk room temperature

  • 1/3 cup lemon juice fresh squeezed, from one medium lemon

Elderflower Swiss Meringue Buttercream:

  • 6 large egg whites

  • 2 cups granulated sugar

  • 3 cups unsalted butter room temperature

  • 2-4 Tbsp elderflower cordial to taste

Lemon Curd

  • See recipe below

Directions
For the Lemon Cake:Preheat oven to 350F. Grease and flour three 8" cake rounds and line with parchment.

In a medium bowl, whisk flour, baking powder, and salt until well combined. Set aside.

Using a stand mixer fitted with a paddle attachment, cream butter and lemon zest until smooth. Add sugar and beat on med-high until pale and fluffy (approximately 3mins). Reduce speed and add eggs one at a time fully incorporating after each addition. Add vanilla. Alternate adding flour mixture with milk & lemon juice, beginning and ending with flour (3 additions of flour and 2 of milk & lemon juice). Fully incorporating after each addition. Spread batter evenly between the prepared pans and smooth the tops.

Bake for approximately 35mins (mine was done at 30, so start checking before 35 minutes to make sure you don’t overbake) or until a toothpick inserted into the center comes out mostly clean. Place cakes on wire rack to cool for 10mins then turn out onto wire rack to cool completely

For the Elderflower Swiss Meringue Buttercream: Place egg whites and sugar into the bowl of a stand mixer, whisk until combined. Place bowl over a pot with 1-2" of simmering water and whisk constantly until the mixture is hot and no longer grainy to the touch or reads 160F on a candy thermometer (approx. 3mins) Place bowl on your stand mixer and whisk on med-high until the meringue is stiff and cooled (the bowl is no longer warm to the touch (approx. 5-10mins)).

Switch to paddle attachment. Slowly add cubed butter and mix until smooth. Add 2-4 Tbsp elderflower cordial (to taste) one Tbsp at a time whip until smooth.

Assembly:
Place one layer of cake on a cake stand or serving plate. Poke holes into the cake using a bamboo skewer. Brush with elderflower cordial. Spread a thin layer of buttercream on top of the layer and pipe a border around the outside to hold the lemon curd in. Fill with approx 3/4 cup of lemon curd. Repeat with next layer. Place final layer on top and do a thin crumb coat on the cake. Chill for 20mins.

Frost the top and sides of the cake with remaining frosting in a rustic manner. I started by spreading a generous amount of buttercream on the top and letting it overhang on the sides. Then I used a flat spatula to add buttercream to the sides of the cake and to smooth the which created a top lip with the overlapping buttercream. Top with fresh flowers if desired.

Lemon Curd
From Sally’s Baking Addiction
Ingredients

  • 4 large egg yolks

  • 2/3 cup (134g) granulated sugar

  • 1 Tablespoon lemon zest (about 1 lemon)

  • 1/3 cup (80ml) fresh lemon juice (about 3 lemons)

  • 1/8 teaspoon salt

  • 6 Tablespoons (86g) unsalted butter, softened to room temperature

Directions
Fill the bottom pot of your double boiler with 1-2 inches of water. Place on high heat. Once the water begins to boil, reduce to low heat to keep the water at a simmer.

Place egg yolks, granulated sugar, lemon zest, lemon juice, and salt into the top pot of your double boiler. Using a silicone whisk, whisk until completely blended, then continue to whisk as the curd cooks. Constant whisking prevents the egg yolks from curdling. Whisk and cook until the mixture becomes thick, resembling the texture of hollandaise sauce, about 10 minutes. If curd isn’t thickening, turn up the heat and constantly whisk.

Remove pan from heat. Cut the butter into 6 separate pieces, then stir into the curd. The butter will melt from the heat of the curd. Pour curd into a jar or bowl and place a piece of plastic wrap directly on top so it is touching the top of the curd. (This prevents a skin from forming on top.) The curd will continue to thicken as it cools. Once cool, the plastic wrap can be removed.

Refrigerate the curd for up to about 10 days.

Four Ingredient Apple Cake

IMG_4965.jpg

This cake recently popped up on my instagram feed and I was intrigued. Only 4 ingredients? And no fat? I had quite a few apples in the fridge, and although they all had good flavor, there were a few that were a little softer than I like to eat out of hand - perfect for baking with! (These were Zester apples, they really had fantastic apple flavor, like really good apple cider, they were just not as crisp as I would have hoped.)

IMG_0926.jpg

So I grabbed my 4 ingredients and whipped together this simple cake. It was super easy, and I thought the end result was quite beautiful in a rustic way. They only small changes I made were to add a little bit of spice (cinnamon mainly, a touch of allspice and cardamom as well) and to grate the apple instead of cutting into chunks. I don’t typically like chunks of apple in my baked goods, I don’t like biting into a semi-soft apple piece, I prefer the apple to melt into the bread and impart flavor and moisture without altering the texture of the bread.

The grated apple seemed to work great. I had no issues at all, it baked up great, had great flavor and texture. Since there is no fat in this recipe it does have more of a springy texture, and ended up being just a little “sticky” on the outside, a little reminiscent of angle food cake which makes sense. The flavor is definitely sweet because there is not fat to balance it out, but not in a bad way. It is a little “eggy” as well for the same reason. I did not find the flavor to be extremely apple-y either even with 4 grated apples either.

IMG_4962.jpg

I definitely recommend pairing the cake with some kind of fat; lightly whipped cream, plain yogurt, or vanilla ice cream. Whipped cream or yogurt are really nice because the contrast between the sweet cake and the not sweet topping is perfect. But sweet ice cream is certainly not a problem either!

Overall, a fun recipe to try for the fall, especially with extra apples hanging around. I would definitely make again for the right occasion.

——————————————————————————————

Easy Apple Cake
From Food52
Ingredients

  • Unsalted butter, at room temperature, or oil for greasing the pan

  • 3 large eggs, at room temperature

  • 1 cup (213 grams) light brown sugar

  • 1/4 teaspoon kosher salt

  • 3 Granny Smith apples (about 198 grams or 7 ounces each) - I used 4 zester apples, 600 grams total prior to grating which equalled 475 grams of grated apple

  • 1 cup plus 2 tablespoons (134 grams) white whole-wheat flour

Directions
Heat the oven to 350°F. Butter the bottom (but not the sides) of an 8-inch springform pan.

Combine the eggs, light brown sugar, and salt in the bowl of a stand mixer fitted with the whisk attachment. Start on low, then raise the speed to medium-high, and beat for about 8 minutes, until the mixture is a pale tan in color and super fluffy.

While that’s going, peel the apples, then cut them into ½-inch pieces (they don’t have to be perfect cubes but they should all be a similar size). This should yield about 4 cups of apple pieces. Or grate the apples on a box grater. No need to peel.

When the egg-sugar mixture is done mixing, remove the bowl from the stand mixture and add the flour. Use a flexible spatula to gently fold in the flour until it’s almost incorporated. Add the apples and fold those in, too. Scrape the batter into the prepared pan.

Bake for about 1 hour and 15 minutes, or until the top is browned and a cake tester comes out completely clean. I checked my cake after 1 hour and it was completely done. So watch your cake closely, and check early. Cool in the pan for about 30 minutes, then run a knife around the edge to loosen the cake, and unhinge the outside.

Serve the cake in big wedges, warm or at room temperature, with confectioners’ sugar dusted on top, and crème fraîche (or whipped cream or Greek yogurt) plopped alongside. This is best the day it’s made.

Pumpkin Bundt Cake

I have fallen off the posting train! But I’m trying to get back on board. It’s been a busy and fun fall, which means I have neglected this little hobby of mine. But this cake was too good not to share! I had a fun Oktober fest at a new friends house. It was outdoors on the perfect chilly, but lovely October night. They had grilled up two whole lambs, and brewed some homemade beer, and then invited a bunch of people over to share.

I decided to try out a new cake recipe. It’s pumpkin season and this cake did not disappoint. It has a mix of butter and oil for flavor and moisture with the perfect amount of fall spices. It baked up beautifully and came out of the pan easily. I topped with a simple yogurt glaze which had just enough tang to perfectly compliment the rich and sweet cake. Happy Fall!

IMG_3306.jpg

The original recipe had a cream cheese glaze. I didn’t have any cream cheese so I ended up making something up on my own. I didn’t measure anything so I can’t tell you exactly, but I used melted butter, milk, powdered sugar and plain Greek yogurt. I turned out great, but if you’re looking for exact measurements, follow the link to the original recipe and try hers out, I’m sure it’s great!

 
IMG_3303.jpg
IMG_3301.jpg
IMG_3300.jpg
IMG_3297.jpg
 

Pumpkin Bundt Cake
From Style Sweet CA
Ingredients

  • 3 cups all-purpose flour

  • 2 teaspoons baking powder

  • 1 teaspoon baking soda

  • 1 teaspoon salt

  • 2 teaspoons cinnamon

  • 1 teaspoon cardamom

  • 1 teaspoon ginger

  • ¼ teaspoon clove

  • pinch black pepper

  • ¾ cup Land O Lakes® European Style Unsalted Butter, softened

  • 1 cup brown sugar

  • 1 cup white sugar

  • ¼ cup flavorless oil, like grapeseed or canola

  • 3 large eggs

  • 2 teaspoons pure vanilla extract

  • 1/3 cup buttermilk

  • 14 ounces pumpkin puree

Directions
Pre-heat oven to 350°F. Generously brush the inside of a Bundt pan with very soft butter, sprinkle with flour, and tap out the excess. Set aside.

Sift together the flour, baking powder, baking soda, salt, and spices. Set aside.

In the bowl of an electric mixer, beat the butter on medium-low speed with the paddle attachment until smooth. Add in both sugars and mix on medium until light and fluffy, 3 to 5 minutes. Add the oil and vanilla. Mix until combined.

With the mixer on low, add in the eggs, one at a time. Stop the mixer and scrape down the sides and bottom of the bowl.

With the mixer on low, add in half of the flour mixture and mix until just combined. Add in the buttermilk and mix until combined. Add in the remaining half of the flour mixture and mix until just incorporated and few streaks of flour remain visible. Add in the pumpkin puree and mix until smooth. The batter will be thick.

Spoon the cake batter into the prepared pan. Tap the bottom of the filled pan on a hard work surface to release any air bubbles. Bake for 45 to 55 minutes, or until a long wooden skewer or thin paring knife inserted into the center of the cake comes out clean. Cool on a wire rack for about 15 minutes. Gently loosen the edges of the cake with a flexible rubber spatula. Place a wire rack or cutting board on top of the cake. Holding on to the edges of the pan and rack, carefully invert everything. Remove the cake pan and continue to completely cool the cake before adding the glaze.