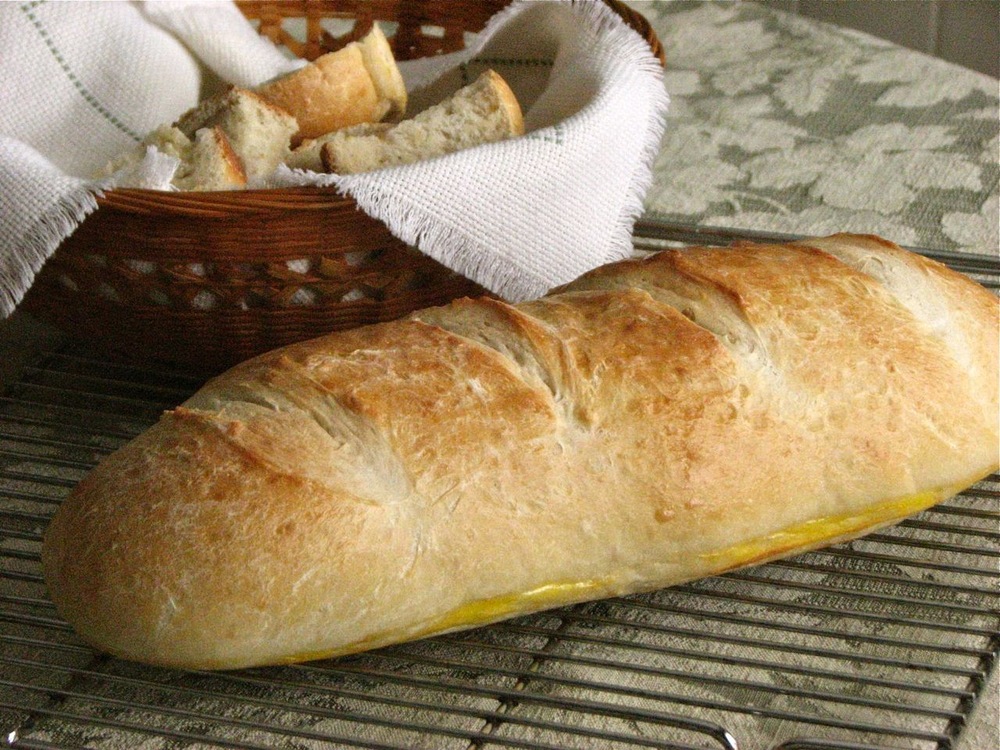
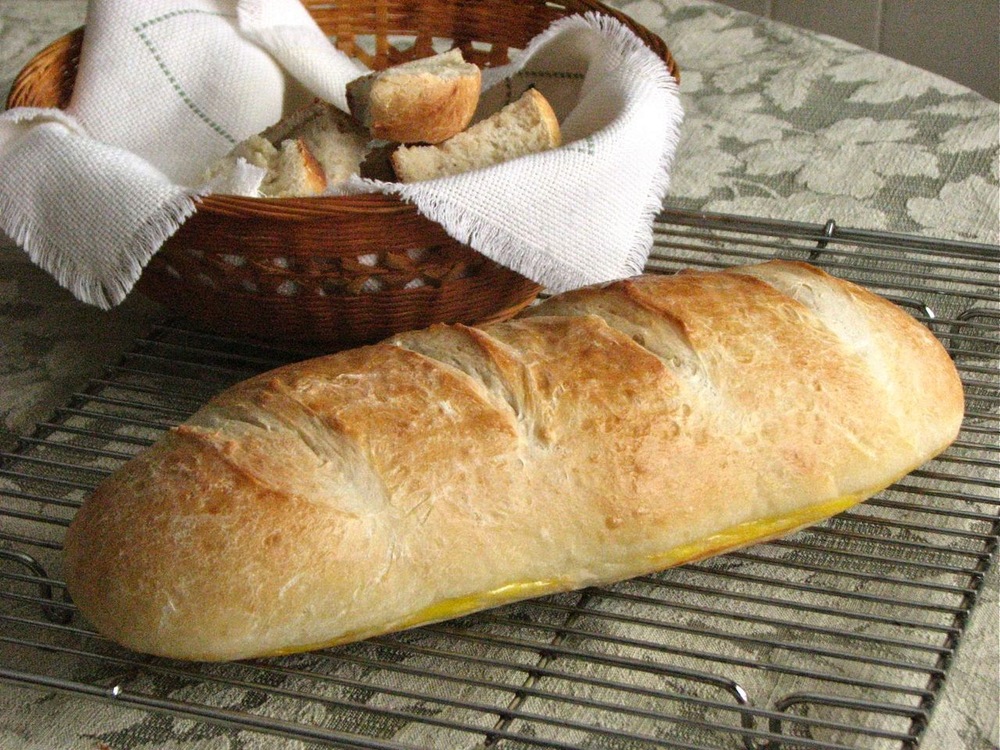
Soft Sandwich Sourdough
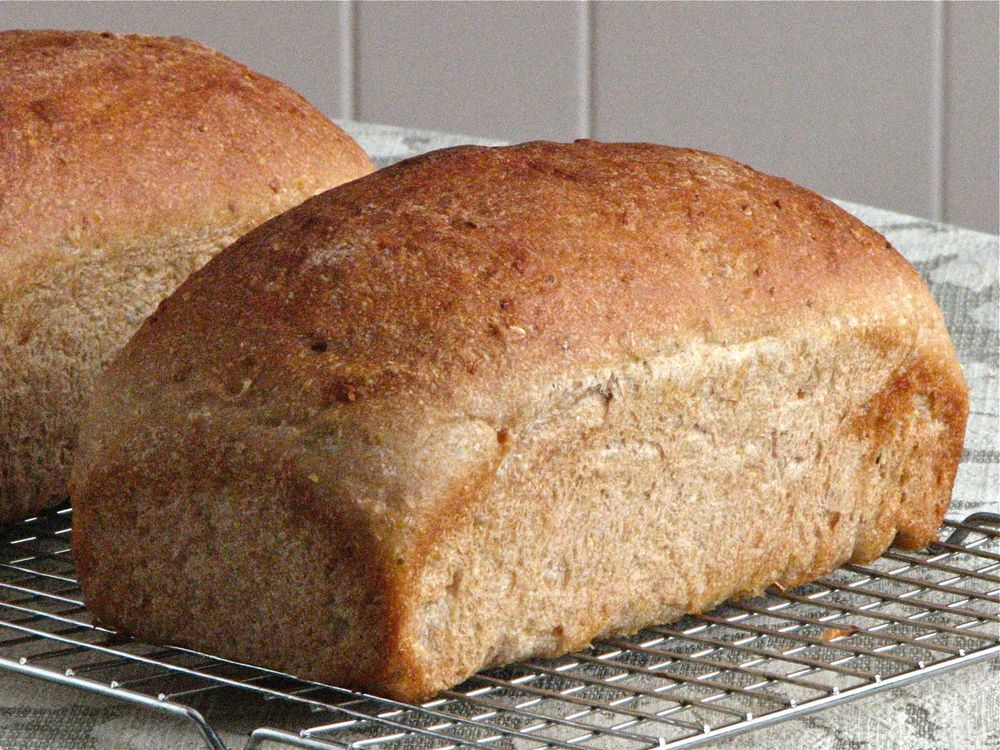
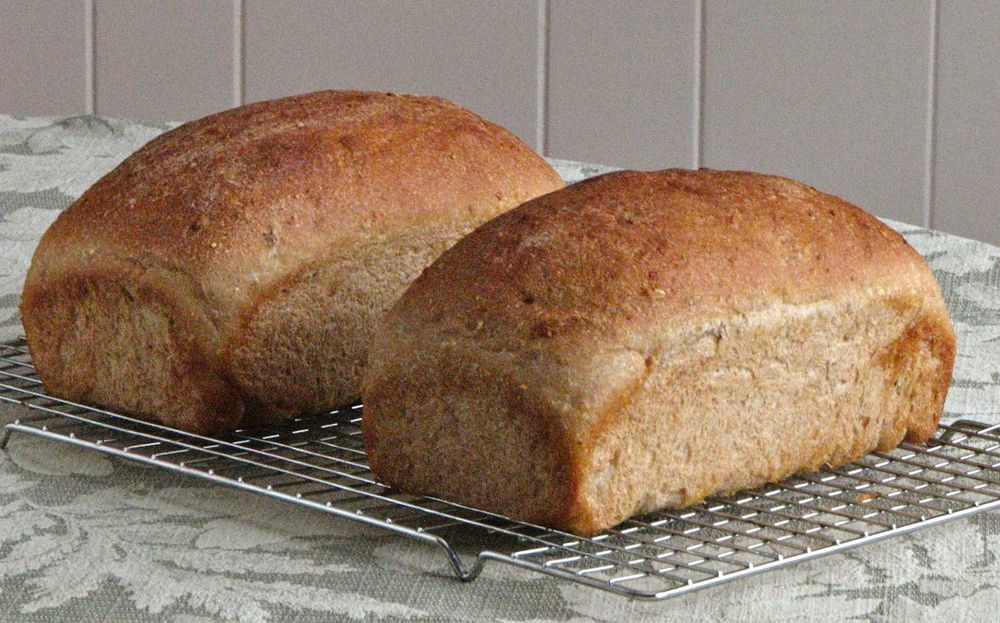
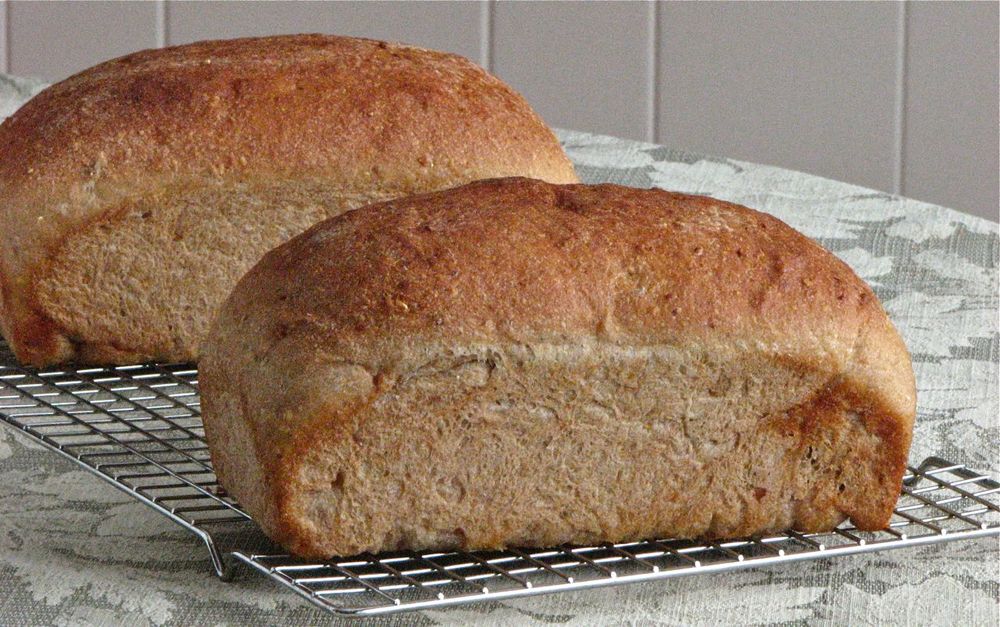
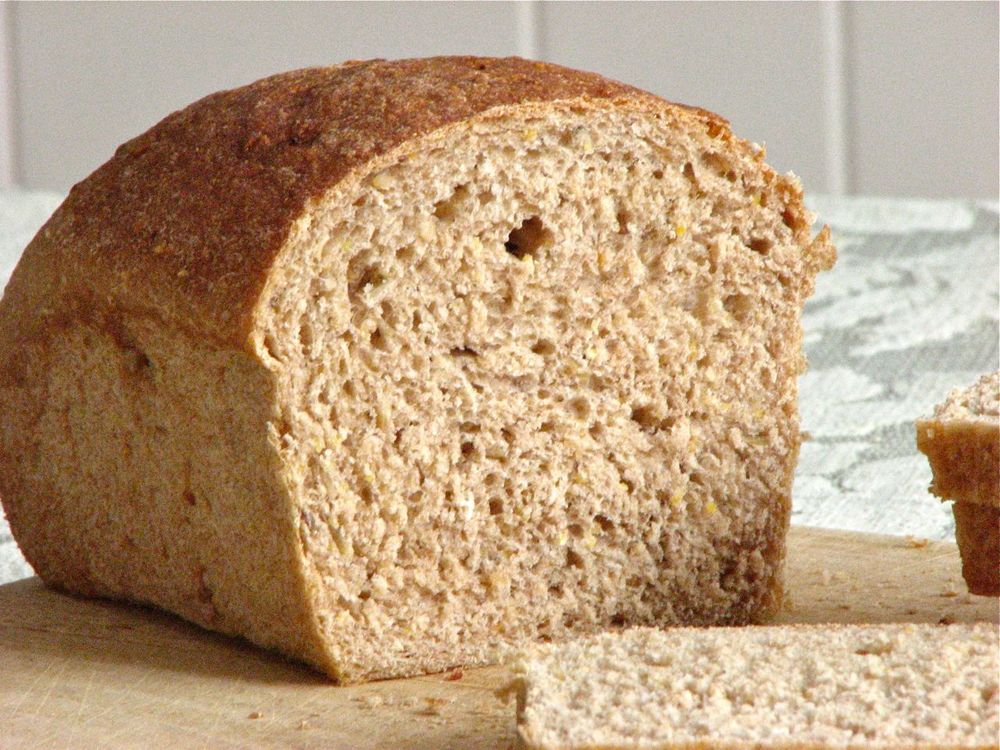
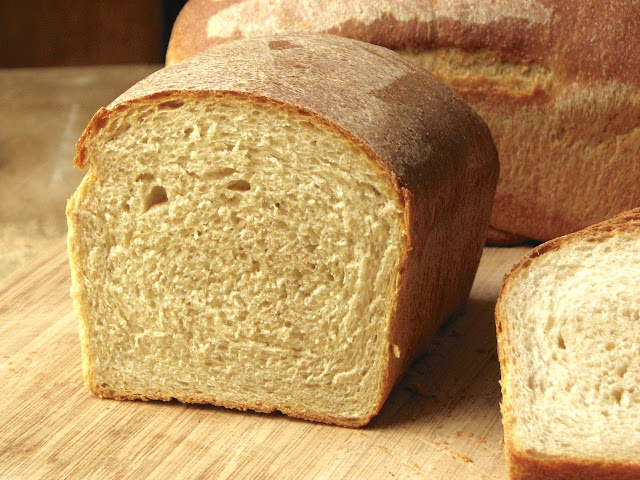
I decided to try out a new sourdough sandwich loaf recently, just for something new. I don't like getting stuck in a rut, so I did some browsing of recipes I had pinned as well as exploring the internet for anything new that I might want to try. I finally settled on this soft sandwich sourdough. It has enough butter and sugar to make it a little special without being overly rich and heavy, a good compromise. This was the first time I've made a truly sourdough bread, one without any added commercial yeast. I wasn't sure how it would turn out, I was hoping my starter was healthy and vigorous enough to provide the rise needed to make a nice and light loaf. No need to worry! There recipe turned out two beautiful loaves, absolutely perfect for whatever sandwich you are craving. Not overly sour tasting, but soft and full of flavor. A definite keeper!

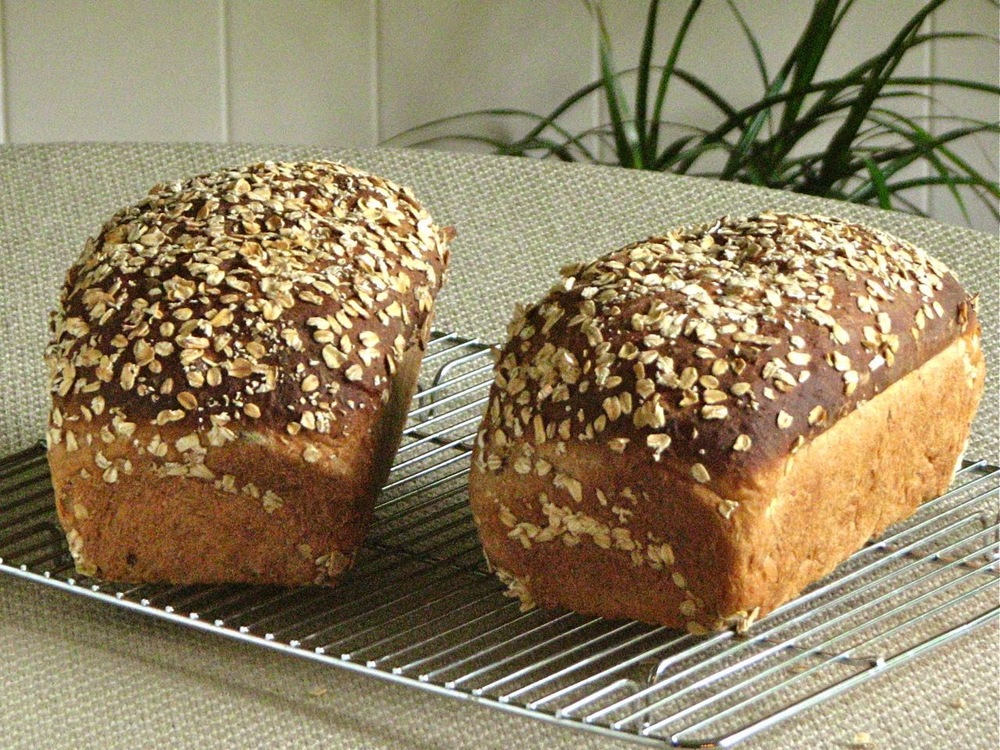
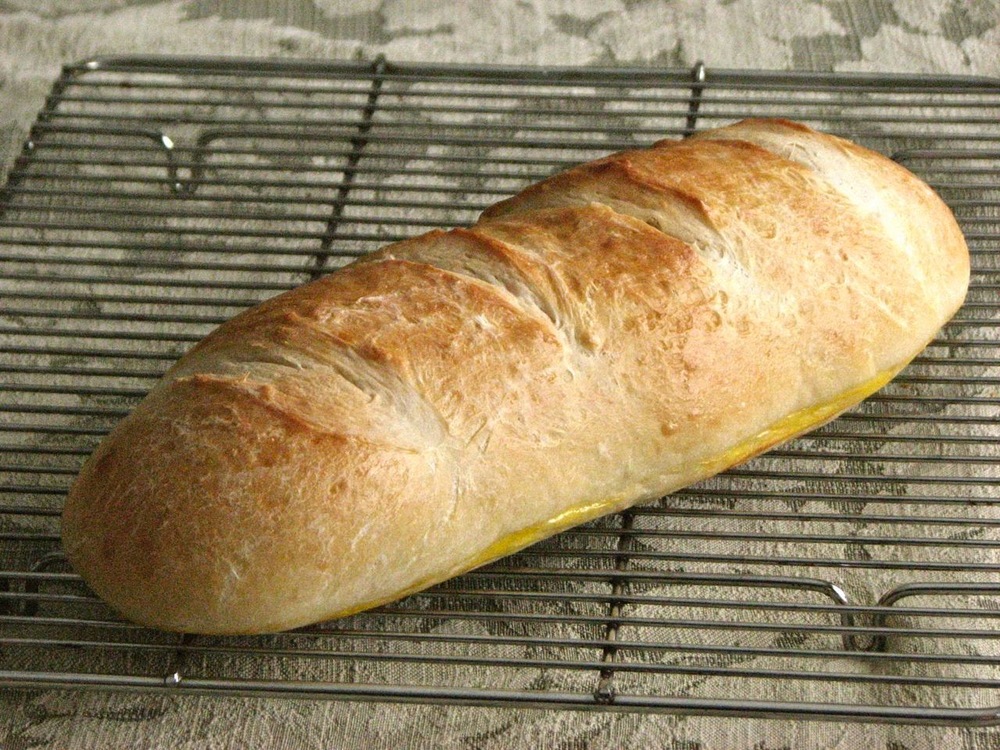
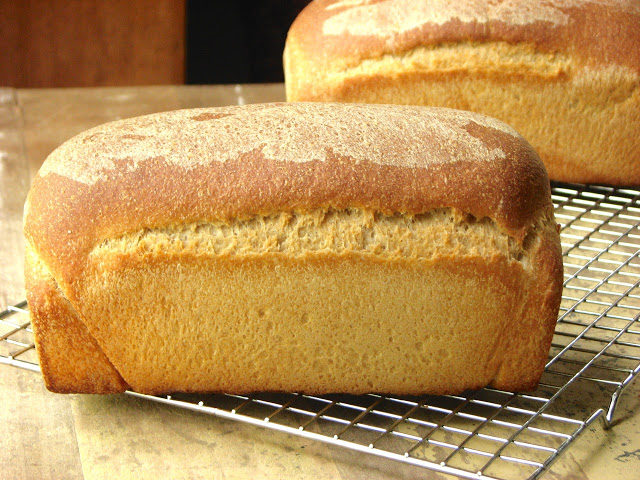
Without the addition of any commercial yeast, this recipe definitely took longer to rise than most "normal" bread recipes. But that is okay with me. It just needed a little more time and it rose beautifully. The final loaves are extra tall, but they were just the right size for me to make a very nice sandwich on.
One other unique part of this recipe is that it calls for you to bake it about halfway until the crust is completely set, and then you remove the loaves from the bread pans and continue the baking process directly on a baking stone to finish. I've never done this before but it seemed to work quite well, helping the crust brown evenly all over.
Soft Sandwich Sourdough
Adapted From Wild Yeast
Ingredients
- 622 g flour (I used about 1/2 all purpose, 1/2 whole wheat)
- 200 g water
- 16.2 g salt
- 65 g unsalted butter at room temperature
- 31 g honey
- 120 g milk, scalded and cooled
- 411 g mature 100%-hydration sourdough starter
Directions
In the bowl of a stand mixer fitted with a dough hook, combine all of the ingredients except about 10% of the water. Mix in low speed until the ingredients are incorporated, adjusting the water as needed to achieve a medium dough consistency (you may need additional water). Continue mixing to in medium speed to a medium-high level of gluten development.
Transfer the dough to a lightly oiled container. Cover and ferment for 3 hours, with folds* after the first 1 and 2 hours.
Turn the dough into a lightly floured counter. Divide it in half. Preshape each piece into a cylinder and let rest, covered, for about 25 minutes. Generously butter two 8.5 x 4.5-inch loaf pans. Shape the dough tightly into blunt batards and place them, seam-side-down, into the prepared pans. Proof, covered, for 3 hours, or until the top of the dough has risen to about 1.5 inches above the edge of the pan.
Meanwhile, preheat the oven, with baking stone, to 425F. You will also need steam* during the initial phase of baking, so prepare for this now.
Once the loaves are in the oven, reduce the temperature to 400F. Bake for 15 minutes with steam, and another 10 minutes without steam. Then remove the loaves from the pans, place them directly on the stone, and bake for another 20 minutes or so, until the crust is a deep golden brown. Cool completely on a wire rack before cutting.
*For more information about folding and steaming check out the original recipe on Wild Yeast
Nutrition: Approximate calorie count, 1/12 of a loaf is 143 calories