Dutch Apple Pie

When I was younger I didn’t really appreciate pie. I was, and always will be, a cake girl, but I have grown to love and appreciate a good pie as well. For Thanksgiving this year I felt like making a pie, and settled on Dutch apple because I love crumb topping, and I love apples. I settled on a recipe that originally came from America’s Test Kitchen, but I found it on The Splendid Table website. I figured I couldn’t go wrong!

IMG_5391.jpeg

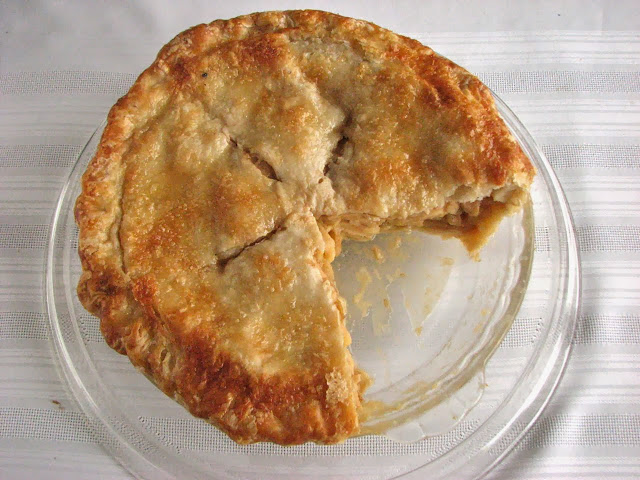
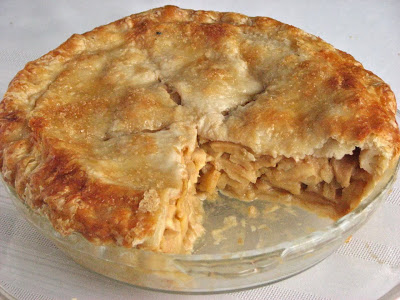
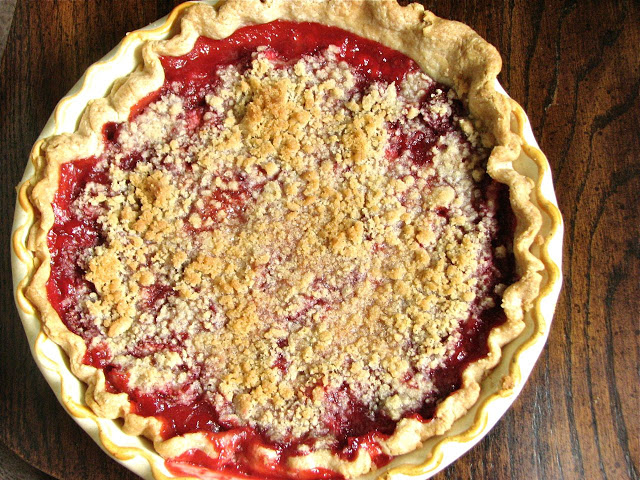
I was right! This pie turned out so so well. I didn’t end up using the crust as stated in the original recipe (posted below) because I had a crust I had made a few times recently that turned out so well I wanted to stick to what I knew worked. The recipes are actually quite similar, but mine uses yogurt while this one calls for sour cream.

IMG_5407.jpeg

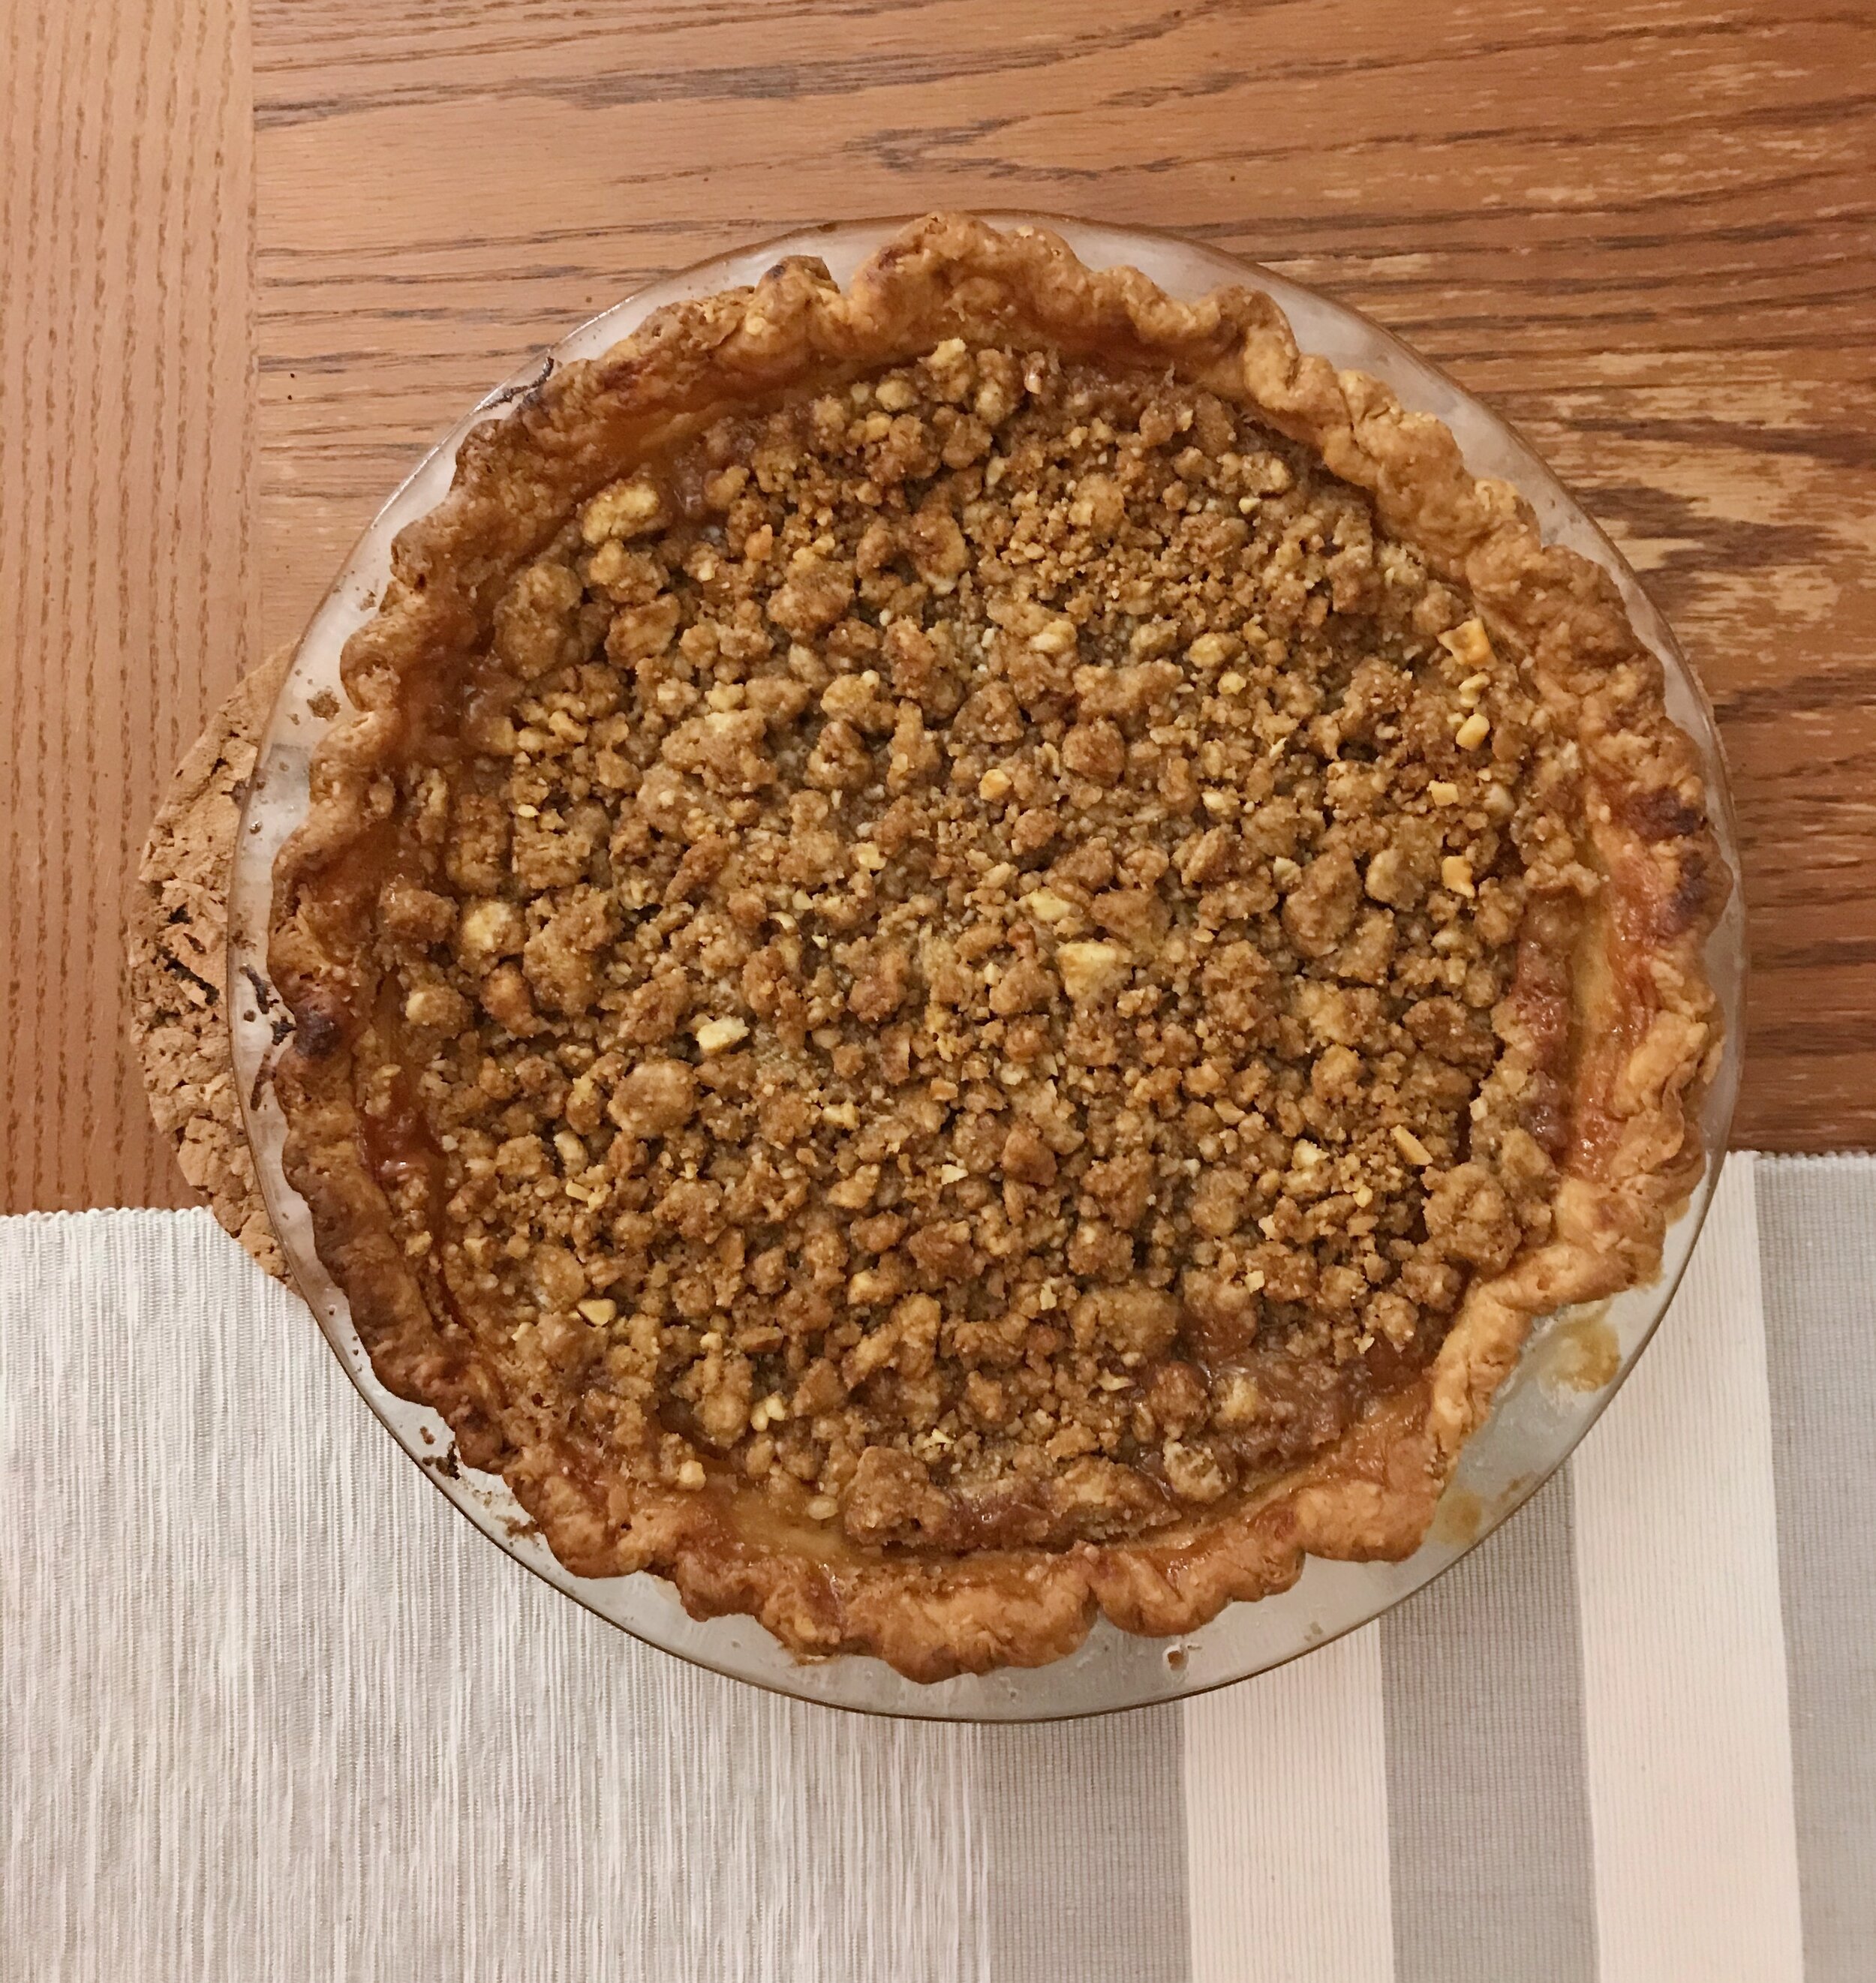
For the crumb topping, I actually increased the amount because in my opinion you can never have too much streusel! I upped it to 8 tablespoons of butter and then increased everything else by 1.33x. I did not think it was too much! I would do this again for sure!

——————————————————————————————

Dutch Apple Pie
From The Splendid Table
Ingredients

Crust [I did not use this crust recipe, see below]

  • 1/4 cup ice water

  • 4 teaspoons sour cream

  • 1 1/4 cups (6 1/4 ounces) all-purpose flour

  • 1 1/2 teaspoons granulated sugar

  • 1/2 teaspoon salt

  • 8 tablespoons unsalted butter, cut into 1/4-inch pieces and frozen for 15 minutes

Filling

IMG_5399.jpeg
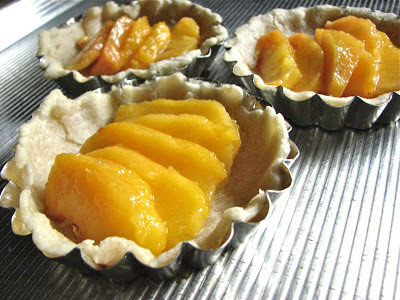
  • 2 1/2 pounds apples, peeled, cored, halved, and sliced 1/4 inch thick

  • 1/2 cup melted vanilla ice cream

  • 1/2 cup raisins (optional)

  • 1/2 cup (3 1/2 ounces) granulated sugar

  • 1 tablespoon lemon juice

  • 1 teaspoon vanilla extract

  • 1 teaspoon ground cinnamon

  • 1/2 teaspoon salt

Topping

  • 1 cup (5 ounces) all-purpose flour

  • 1/2 cup packed (3 1/2 ounces) light brown sugar

  • 6 tablespoons unsalted butter, melted

  • 1/2 teaspoon salt

Directions
We prefer Golden Delicious or Gala apples here, but Fuji, Braeburn, or Granny Smith varieties also work well. You may substitute 1/2 cup of heavy cream for the melted ice cream, if desired. This pie is best when baked a day ahead of time and allowed to rest overnight. Serve with vanilla ice cream.

FOR THE CRUST: Combine water and sour cream in bowl. Process flour, sugar, and salt in food processor until combined, about 5 seconds. Scatter butter over top and pulse until butter is size of large peas, about 10 pulses. Add sour cream mixture and pulse until dough forms clumps and no dry flour remains, about 12 pulses, scraping down sides of bowl as needed.

Turn dough onto sheet of plastic wrap and form into 4-inch disk. Wrap tightly in plastic and refrigerate for 1 hour. (Wrapped dough can be refrigerated for up to 2 days or frozen for up to 1 month. If frozen, let dough thaw completely on counter before rolling.)

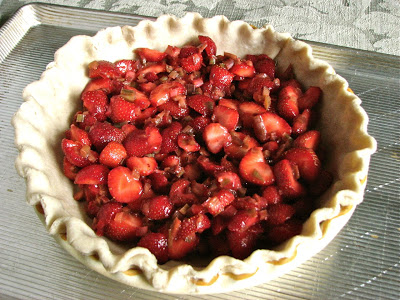
FOR THE FILLING: Toss all ingredients in large bowl until apples are evenly coated. Let sit at room temperature for at least 1 hour or up to 2 hours.

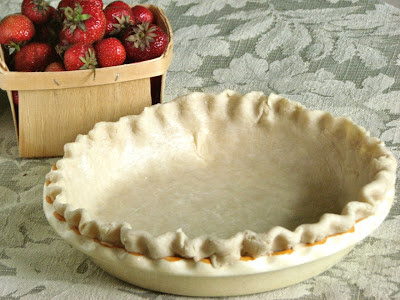
Adjust oven rack to lower-middle position and heat oven to 350 degrees. Let chilled dough sit on counter to soften slightly, about 10 minutes, before rolling. Roll dough into 12-inch circle on lightly floured counter. Loosely roll dough around rolling pin and gently unroll it onto 9-inch pie plate, letting excess dough hang over edge. Ease dough into plate by gently lifting edge of dough with your hand while pressing into plate bottom with your other hand.

Trim overhang to 1/2 inch beyond lip of plate. Tuck overhang under itself; folded edge should be flush with edge of plate. Crimp dough evenly around edge of plate using your fingers. Wrap dough-lined plate loosely in plastic and refrigerate until dough is firm, at least 30 minutes.

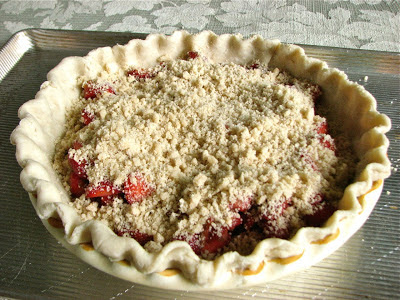
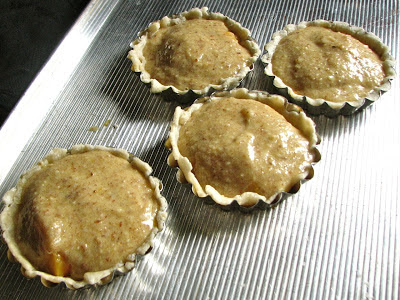
FOR THE TOPPING: Stir all ingredients in bowl until no dry spots remain and mixture forms clumps. Refrigerate until ready to use.

Place dough-lined plate on parchment paper–lined rimmed baking sheet. Working with 1 large handful at a time, distribute apple mixture in plate, pressing into even layer and filling in gaps before adding more. Take care not to mound apple mixture in center of plate. Pour any remaining liquid from bowl into pie. Break topping (it will harden in refrigerator) into pea-size crumbs and distribute evenly over apple mixture. Pat topping lightly to adhere.

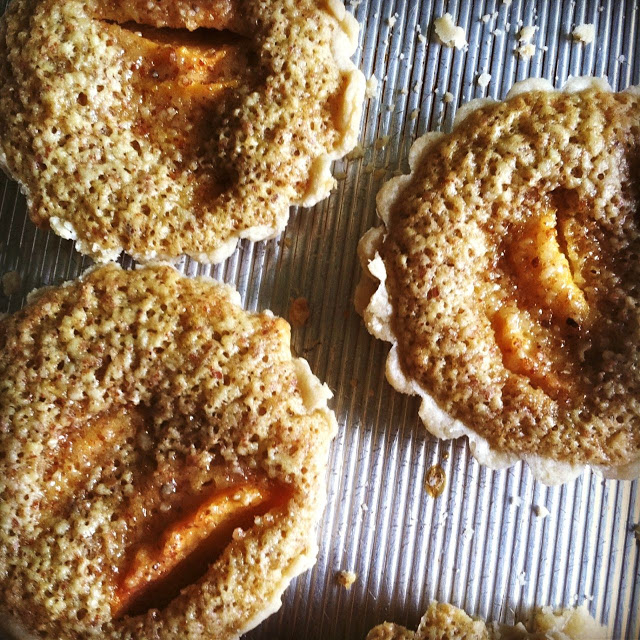
Bake pie on sheet until top is golden brown and paring knife inserted in center meets no resistance, about 1 hour 10 minutes, rotating sheet halfway through baking. Let pie cool on wire rack for at least 4 hours or preferably overnight. Serve.

———————————————————————————————————————————————————————————————

Alternative Crust [This is the crust I used in the pie pictured above]
Yogurt Pie Crust
Ingredients

  • 1 1/4 cup unbleached white flour chilled in the freezer for 15 minutes (I used spelt and it worked beautifully)

  • 1/4 tsp. salt

  • 8 tbsp. (1/2 cup) cold unsalted butter

  • 1/4 cup full-fat yoghurt (if liquidy, drain it first so it is thick and creamy)

  • 2 tsp. fresh lemon juice

  • 1/4 cup ice water

Directions
First, make sure your flour and butter are chilled. In a medium mixing bowl, mix the flour and salt together, then cut the butter into the flour with a pastry blender, a food processor, or two knifes, until the butter is evenly distributed with the largest chunks about the size of peas (these chunks of butter are what will give your crust its delightful flakiness). In a small bowl, mix together the ice cold water, cold yoghurt, and 2 teaspoons of lemon juice. Pour this mixture into the flour. With a wooden spoon, gently mix together, just until you can get it into a ball. It doesn't have to be perfectly mixed, you want to avoid overworking the dough. Flatten the ball into a disc and wrap in plastic or parchment paper and chill in the fridge for at least 1 hour before using.

Yogurt Galette Dough

18B9ADF0-6DB3-4BE5-AD5B-A49E05270EF4.jpg

Sometimes a recipe hits at the exact right time. This galette/tart/pie dough was one of those recipes. I was having a group from church over for dinner and wasn’t sure what to make. I wanted something light and summery that I could easily make ahead so it was all ready when the guests arrived. I was debating several options when Lara showed me a video for this beautiful tart dough. I instantly knew this was what we were going to do.

IMG_4656.jpg

We decided to highlight heirloom tomatoes and zucchini in the two different tarts. Both of them had the veggies assembled over a layer of ricotta mixed with grated parmesan. The tomato tart had a layer of pesto spread on the dough under the ricotta, while the zucchini version had a layer of nduja under the ricotta. Both were fantastic.

The dough was a real winner. It came together so easily. After chilling it rolled out beautifully without any trouble at all. It was a dream. A dough to keep close by for any tart or pie in the future.

——————————————————————————————

Cherry Tomato Galette
Kitchen Vignettes for PBS Food
Ingredients

For the Pastry:

  • 1 1/4 cup unbleached white flour chilled in the freezer for 15 minutes (I used spelt and it worked beautifully)

  • 1/4 tsp. salt

  • 8 tbsp. (1/2 cup) cold unsalted butter

  • 1/4 cup full-fat yoghurt (if liquidy, drain it first so it is thick and creamy)

  • 2 tsp. fresh lemon juice

  • 1/4 cup ice water

For the Filling:

  • 1/2 cup ricotta cheese

  • 1/2 cup grated parmesan

  • About 1 pound of cherry tomatoes, halved

  • 1 tbsp. olive oil

  • Freshly minced basil for garnish (4 or 5 basil leaves)

  • Salt and pepper, to taste

For the Glaze:

  • 1 egg yolk

  • 1 tsp. water

Directions
First, make sure your flour and butter are chilled. In a medium mixing bowl, mix the flour and salt together, then cut the butter into the flour with a pastry blender, a food processor, or two knifes, until the butter is evenly distributed with the largest chunks about the size of peas (these chunks of butter are what will give your crust its delightful flakiness). In a small bowl, mix together the ice cold water, cold yoghurt, and 2 teaspoons of lemon juice. Pour this mixture into the flour. With a wooden spoon, gently mix together, just until you can get it into a ball. It doesn't have to be perfectly mixed, you want to avoid overworking the dough. Flatten the ball into a disc and wrap in plastic or parchment paper and chill in the fridge for at least 1 hour.

On a floured surface, using a floured rolling pin, roll the chilled dough into a large round about 12 to 14 inches wide and between 1/8 to 1/4 inch thick. Place the rolled-out dough on a piece of parchment paper on a large baking sheet. (You may find it easier to handle the dough if you roll it out directly onto the floured piece of parchment paper).

In a small bowl, mix the ricotta and grated parmesan together. Crumble and spread this mixture onto your dough, leaving a 2-inch border all around. Place your halved tomatoes, cut-side up, tightly together to fill the circle, leaving the 2-inch border intact. Fold the border edges of the dough inwards so that the tomatoes are encased by dough around the edges but exposed in the center. Brush the edges with the egg yolk glaze. Season with salt and pepper if you wish and drizzle the olive oil on top of the tomatoes.

Bake in a 375 F oven for about 45 minutes or until crust is golden.

Remove from the oven, let it cool for a few minutes before sprinkling shredded basil on top. Slice and serve.

Italian Jam Crostata

88E9EE9C-2B6C-4D54-B444-51554C8EB54F.jpg

After getting back from Italy I had a list of Italian things I had to try making at home. One of the things on the list was a crostata. We had them at pretty much every single breakfast while in Italy. A crostata is basically a jam filled tart. The dough is kind of a mix between a pie crust and a cookie crust in my opinion. Fill it with whatever jam you have around, add a few decorative touches to the top and voila! A simple and delicious breakfast treat, afternoon snack, dessert… whatever you wish!

1D0CDDAA-EF25-4FA7-B5C2-03B596114F35.jpg

A few weeks after coming back from Italy my cousin asked if I would make something Italiain for an “Around the World” themed bridal shower. I knew exactly what to make! A Crostata! An excuse to check one thing off the “to-bake” list. I used some of my mom’s home made strawberry jam which was delicious! Overall it turned out very very well. Definitely something I will make again!

——————————————————————————————

Italian Jam Filled Crostata
From An Italian in My Kitchen
Ingredients

  • 1 3/4 cups all purpose flour (236 grams)

  • 1/2 cup granulated sugar (100 grams)

  • 1 teaspoon baking powder

  • 1 egg

  • 1 egg yolk

  • 1/2 cup + 2 tablespoons butter room temperature (125 grams)

  • 3/4 -1 cup jam, for the filling (Any type of jam can be used, but I find raspberry, strawberry, blueberry, apricot, peach or a wild fruit mixture work the best.)

Directions
Pre-heat oven to 350F (180C), grease and flour an 8 or 9 inch- (20 - 22 cm) pie dish.

In a large bowl ,gently whisk together flour, sugar and baking powder, create a well in the middle and add slightly beaten egg and yolk and softened butter cut into pieces.

Mix together, at this point turn mixture onto a slightly floured surface and work the mixture to form a soft dough (if dough is very dry then add an extra tablespoon of soft butter).

Wrap in plastic and refrigerate for 30 minutes. Remove from fridge and knead the dough a couple of times to soften it up again on a lightly floured surface. Roll out to 1/8" thickness.

Transfer to prepared pie plate, I used a tart pan. Trim the dish of any extra dough. Prick the dough with the tongs of a fork, then fill the pastry shell with the jam**. With the extra dough make strips to create a lattice finish. Brush top lightly with milk and bake in pre heated oven at 350° (180°) for 25-30 minutes or until golden. Let cool then slice, enjoy!

Strawberry Rhubarb Bakewell Tart

Happy Memorial Day a week late! For pretty much my entire life, this holiday has included the local Memorial Day parade which is nothing amazing, but it's tradition and I enjoy it. A lot of local businesses, schools, churches, organizations make up this event which is basically a huge ad. But I love it! And they throw candy!! :) After the parade, my family and I have been getting together with a group of good family friends for brunch which typically includes homemade waffles and whatever else people want to bring. This is usually a good time to try out a new recipe, see how it goes over with a crowd. This year I decided to go seasonal and picked a rhubarb recipe; a strawberry rhubarb Bakewell tart. A Bakewell tart is an English pastry made up of a shortcrust pastry shell with jam and frangipane. This one used strawberry jam and then topped everything with fresh rhubarb, the best combination!

I had such a fun time making this tart. I loved layering the beautiful pink rhubarb in a herringbone pattern on top of the delicious frangipane. There are quite a few different components to this dish. None of them are especially difficult, but it does take some time to put together. I found that the amount of frangipane that this recipe made was too much from my tart pan. When making this again, I would probably cut back to 3/4 of the frangipane recipe, or even 2/3, as my frangipane overflowed all over the place. Good thing I had a baking sheet underneath the tart pan! You can see the explosion in the pictures below! It still turned out well after a little bit of clean up, no problem, just a little messy!

IMG_0716.jpg
IMG_2356.jpg
IMG_2360.jpg
IMG_2363.jpg
IMG_2357.jpg
IMG_2362.jpg
IMG_2364.jpg
IMG_2371.jpg

The saddest part of this whole Memorial Day party post is the fact that I didn't even make it to any of the festivities. I drove to my parents house in the morning to watch the parade, but as soon as I got there I was contacted by the hospital. I was on call on Memorial Day and had to turn right around and go to the hospital where I spent the next 5 hours. Sigh. I missed the parade and brunch. My sister brought my tart to lunch so everyone else could enjoy, but I did not get to join in the party. I was super bummed. But such is life. At least I got to have a fun time putting it all together!

IMG_2380.jpg

Strawberry Rhubarb Bakewell Tart
Adapted from Broma Bakery
Ingredients
For the Tart Shell (pate sucree)

  • 6 tablespoons butter, room temperature
  • 1/4 cup granulated sugar
  • 3 egg yolks, room temperature
  • 1 1/2 cups all purpose flour

For the rhubarb

  • 500 grams rhubarb, cut into short lengths (bias cut if using “herringbone” pattern on top)
  • 1 cup granulated sugar
  • 1 small orange, zested and 2 tablespoons juice
  • 8 ounces Strawberry preserves

For the frangipane

  • 12 tablespoons butter, softened
  • 3/4 cup granulated sugar
  • 1 cup (100 grams) ground almonds
  • 2 large eggs
  • 1 teaspoon almond extract
  • 1 teaspoon baking powder
  • 1/2 teaspoon salt
  • 6 tablespoons all purpose flour

Directions
For the pate sucree: With paddle attachment cream the butter and sugar together in a bowl until fluffy then beat in the egg yolks, one at a time, until fully incorporated into the mixture. Mix in the flour until it comes together as a ball of dough being careful not to overmix and then, by hand finish incorporating flour remaining at bottom of bowl.|

Form into a dis and wrap the pastry then chill for 30 minutes, but up to 1 day.

When ready to bake: Roll out, between cling wrap and fit into standard sized tart shell. Prick the dough (and rechill if it has warmed up too much) and then using baking beads or rice, blind bake at 350°F until the dough is golden brown (about 20 min).

Toss the rhubarb with sugar, orange juice, and orange zest. Let sit in fridge (up to overnight).
Spread strawberry jam over bottom of par cooked shell.

For the Frangipane: Beat together the sugar, butter, almonds, eggs, almond extract, baking powder, salt and flour until creamy. Spoon the mixture over the strawberry-rhubarb purée.

Arrange the rhubarb on top of the frangipane. If using the herringbone method, place rhubarb accordingly. Bake for 50-55 minutes, or until golden and risen. Cool in the tin until warm. 

Greek Yogurt Tart with Sunflower Seed Crust

Well, June is here and after a chilly start to the week, it finally feels like it has actually arrived here in Michigan. June is a wonderful month, but for all it's greatness I think my favorite thing about June may be strawberries!! We wait so long for such a short season, but I try to enjoy every minute of it. This Greek yogurt tart is the perfect way to showcase this fruit in all of its splendor. I actually made this tart a few weeks back for a Memorial Day brunch I attended, but now that local strawberries are just beginning to arrive at the Farmer's market it's the perfect opportunity to give this recipe a try. Of course, as the summer goes on and other fruits come into season this tart can be adapted to pretty much whatever fruit you have on hand in a given moment. 

I was looking for something fresh, light and delicious to make for my brunch and my mind kept focusing on some kind of fresh tart. I didn't want it to have a traditional crust, but wanted something a little different. While browsing recipes I came across a savory sunflower seed crust over at Natural Girl Modern World and was intrigued. I decided to try adapting it a bit to work for me in a sweet application. With a few tweaks it came out great! More like a giant cookie crust as opposed to a traditional tart crust, exactly what I was looking for. It was perfect topped with some yogurt and fruit, kind of twist on the more traditional fruit and yogurt parfait - delicious. 

For the filling of this tart I wanted to go very simple. I took my homemade yogurt and strained it for several days until very thick and incredibly creamy. Store-bought yogurt would work just fine too, just make sure to buy plain yogurt to strain, not the flavored stuff, you can add sugar and flavorings yourself.  To the very thick yogurt I gently added a little honey, a little brown sugar, and some lemon zest. Not a lot of sugar, but just enough to add a touch of sweetness. Just taste and adjust until the flavors are to your liking. I spooned this sweetened yogurt into the crust and topped with the sliced berries. Done! Fresh and light, exactly what I was hoping for. 


Sunflower Seed Tart Crust
Adapted from Natural Girl Modern World
Ingredients

  • 1 cup (80 grams) oats 
  • 1/2 cup (60 grams) flour
  • 3/4 cup (105 grams) sunflower seeds 
  • 3/4 tsp salt
  • 4 1/2 tablespoons (63 grams) butter, chilled
  • 3  tablespoons (63 grams) honey 
  • 1/2 teaspoon cinnamon
  • 1/8 teaspoon cardamom

Directions
In a food processor, blend oats until the texture of coarse sand. Add sunflower seeds and salt and blend until the seeds are also a crumb-like texture. This should only take 30 seconds to 1 minute. Over-blend and you'll start to make nut butter. Add the flour and pulse a few times to combine. Add the chilled butter and pulse a couple of times, until starting to come together. Add the honey and continue to pulse until a ball of dough forms. It will be sticky. Wrap dough in plastic wrap and place into the back of your freezer for about 15 minutes, or refrigerate for a couple of hours or overnight. 

While the dough chills, preheat oven to 350 degrees. 

Remove dough from freezer and press it into prepared greased 9 inch tart pan with a removable bottom. Aim for an even distribution of dough throughout the pan, pressing the dough together firmly to create a solid base. Using a fork, prick the bottom of the crust thoroughly to allow air to escape when baking. Bake for 20-25 minutes. Keep an eye on it towards the end of baking to ensure the edges don't over-brown. Set aside to cool before filling. 

Classic Apple Pie

I haven't always been a big pie fan. In fact, it's only been in the last year that I've really changed my tune and started to really like pies, a lot! (Don't worry cake, you will forever be my first love.) I was never a big fan of soft, warm fruit, and while it is still not on my top 10, when it's encased in a flaky and buttery crust, generously sprinkled with sugar, and baked until golden perfection it's difficult for me not to like. Since I've jumped on the pie band wagon I decided it was time that my Thanksgiving dinner included an apple pie, it just seemed right. No doubts here; this pie was tall and handsome, but more importantly the taste was spot on, the perfect blend of sweet and buttery, tender apples and flaky crust. A wonderful start to my holiday season.

First ever double crusted pie! I was a little nervous, but knew it would work. It baked up beautifully with no worries. I did cover it with foil about halfway through baking because I do not at all like over-baked crusts. I like a light golden brown, not dark and hard. The perfect ending for my delicious Thanksgiving meal.

Classic Apple Pie
Crust adapted from Martha Stewart
Pie Adapted from Williams Sonoma
Ingredients
Crust

  • 2 1/2 cups all-purpose flour
  • 1 teaspoon salt
  • 1 tablespoon sugar
  • 2 sticks (1 cup) unsalted butter, very cold
  • 1/4 to 1/2 cup ice water

Pie

  • 5 pounds apples, or about 14 apples (I used Northern Spy)
  • 1/2 cup brown sugar
  • 1/4 cup white sugar
  • 1/2 teaspoon ground cinnamon
  • 1/4 teaspoon salt
  • 1/4 teaspoon freshly grated nutmeg
  • 4 teaspoons cornstarch
  • 1 tablespoon fresh lemon juice

Directions
For the crust: using a cheese grater, grate the butter into a bowl and place in the freezer for a few minutes to freeze. In a large bowl mix together flour, salt and sugar. Add the frozen butter and quickly mix together. Add in the ice water a little bit at a time just until the dough comes together in a ball. Add as little water as needed, it's okay if the dough is a little shaggy. Split the dough into two pieces and shape into a disc. Wrap each disc in plastic wrap and place in fridge for at least 2 hours.

On a lightly floured work surface, roll out half of the dough into a 12-inch round about 1/8 inch thick. Transfer the dough to a 9-inch deep-dish pie dish and gently press the dough into the bottom and sides of the dish. Trim the edges and refrigerate for 30 minutes.

Roll out the remaining dough disk into a 12-inch round about 1/8 inch thick.  Refrigerate for 30 minutes.

Meanwhile, make the filling: In a large Dutch oven, stir together the apples, brown sugar, granulated sugar, cinnamon, salt, nutmeg and cornstarch. Set over medium heat, cover and cook, stirring occasionally, until the apples are just tender but not mushy, about 20 minutes. Uncover and cook until the liquid has thickened and become glossy, 5 to 7 minutes more. Remove from the heat, stir in the lemon juice and let cool to room temperature, about 30 minutes.

Position a rack in the lower third of an oven, place a baking sheet on the rack and preheat the oven to 400°F.

Transfer the apple filling to the pie shell, and gently invert the top over the pie. Trim the edges flush with the rim of the dish and press the top and bottom crusts together to seal. Brush the entire top crust with egg wash and sprinkle with the granulated sugar. Cut a couple of slits in the dough to allow steam to escape.

Place the pie dish on the preheated baking sheet. Bake at 400 degrees for 20 minutes, then reduce the temperature to 350 degrees and continue baking until the crust is crisp and golden brown, about 40 minutes more, covering the edges with aluminum foil if they become too dark. Transfer the pie to a wire rack and let cool for at least 1 1/2 hours before serving.

Strawberry Rhubarb Pie

Strawberry season is basically over, this is always a sad realization to me since strawberries are my favorite fruit. I love buying a couple quarts at the farmers market and then stuffing my face full of sweet, juicy berries because we all know that freshly picked strawberries last about a day before they start going bad. To me this means I am required to eat as many as possible because I can't let any of these early summer jewels go to waste. This is a task I attack with pleasure.

This year I definitely did my share helping out the local strawberry farmers. This sometime required me to become creative with the baskets and baskets lining my counter. I had a wonderful time figuring out what to do with all of my strawberries, what a fantastic problem! When my neighbor called and told me she had rhubarb galore and I needed to come take some off of her hands I jumped at the opportunity. I had never made a strawberry rhubarb pie, but that was all about to change. Strawberry and rhubarb are my favorite combination. The juicy sweetness of the strawberries combined with the puckering tartness of the rhubarb is a match made in heaven. I'm already looking forward to next year!

While I've been making more pies and tarts recently, I still would definitely call myself an amateur. I'm getting better, but I still have things I need to work on. Regardless, this pie turned out absolutely delicious, even if it lacks a little in the looks department. I like to think of it as rustic. In the end it really doesn't matter what the pie looks like, the most important thing is what it tastes like, and this one did not disappoint.

Note: This is a rough estimate of my strawberry rhubarb pie recipe. It was delicious, but it could definitely have used more filling, both strawberries and rhubarb. Feel free to play around with the quantities, increasing the filling until you are satisfied with it.

For the topping: this time around I didn't melt the butter, but for future use I probably would. I think you get bigger chunks of streusel then. Also, if you are a big streusel fan (like me) you'll want to increase the amount of streusel. Try doubling it perhaps!

Strawberry Rhubarb Pie

Ingredients

Pie

  • 1/2 recipe Pate Brisee (or your favorite pie dough)
  • 1 3/4 cup chopped rhubarb
  • 4 cups sliced strawberries
  • 1/4 cup granulated sugar
  • 1/4 cup brown sugar
  • 1/4 cup cornstarch
  • 1/4 teaspoon vanilla
  • 2 tablespoons Yukon Jack Liquor (or whatever you happen to have in your cupboard, this was what was in mine!)

Topping

  • 3 tablespoons room temperature butter
  • 1/4 cup brown sugar
  • 2 tablespoons granulated sugar
  • 1/2 cup flour
  • pinch salt

Directions

Preheat oven to 375 degrees. Make the filling: Mix together rhubarb, strawberries, granulated sugar, brown sugar, cornstarch, vanilla, and liquor. Set aside.

Make the crust: Roll out pate brisee to a 1/8-inch thickness on a lightly floured surface. Fit dough into a 9-inch pie plate. Place in refrigerator or freezer for 15-30 minutes, until well chilled. 

Drain excess juice from the rhubarb/berry mixture. Pour filling into chilled pie crust. Bake pie for 45-55 minutes, until crust is well browned. Remove from oven and cool. Enjoy with vanilla ice cream or lightly whipped cream. 

Almond Peach Tartlets

After making my Tomato Tart last week I had a good chunk of tart dough leftover. Not wanting to waste any of this buttery goodness I pressed the pieces I had left into a few mini tart pans and threw them in the freezer. This week I had a few peaches sitting on the counter just crying out to be used. What to do? Then, what do you know, the King Arthur Flour Baker's Companion magazine showed up in the mail with a recipe for an almond tart. Out of all of this inspiration these peach tartlets appeared. It was the perfect solution to a very wonderful problem!

I took the recipe for the almond tarts and added some delicious peaches. I love the combination of almond and peach so I knew this was going to be good. I spread the peaches on the chilled crust and then topped with the filling. It worked out quite well, but when I try it again I would try to remember to save a few peach slices to lay on top of the filling too. This would make the finished product look even better I think. But they were still delicious as they were. This is a great versatile tart that I can think will be the perfect starting point for many other delicious tarts this summer!

Almond Peach Tartlets

Adapted From 

King Arthur Flour

Ingredients

Filling

  • 1/4 cup (4 tablespoons) soft butter
  • 1/4 teaspoon salt
  • 1 cup sugar
  • 2 tablespoons Flour
  • 1 teaspoon almond extract
  • 1 teaspoon vanilla extract
  • 3 large eggs
  • 1 1/4 cups almond flour or finely ground sliced or slivered almonds
  • 3-4 peaches, cut into slices

Glaze

  • 1 cup glazing sugar or confectioners' sugar
  • 2 tablespoons milk

Directions

You'll need to start with 6 mini tart pans filled with your favorite tart/pie dough. I used some leftover  Pate brisee, but whatever you like will work. (Here's the easy press in press in crust that King Arthur Flour suggests)

To make the filling: Beat together the butter, salt, sugar, flour, and extracts. Beat in the eggs, then add the almond flour, stirring just to combine.

Lay sliced peaches onto the well chilled crust. Spread the filling over the peaches.

Bake the tarts for 18 to 24 minutes, until their tops are lightly browned. Remove from the oven, and cool in the pans.

To make the glaze: Stir together the sugar and milk until smooth.

Spread the glaze over the cooled tarts. Top with some whipped cream or a scoop of ice cream if desired.

Yield: 6 mini tarts.